Table of Contents
Advertisement
Quick Links
Model No. WEBE26780
Serial No.
Write the serial number in the space
above for reference.
Serial Number Decal
QUESTIONS?
As a manufacturer, we are com-
mitted to providing complete
customer satisfaction. If you have
questions, or find that there are
missing or damaged parts, we
will guarantee you complete sat-
isfaction through direct assis-
tance from our factory.
TO AVOID UNNECESSARY
DELAYS, PLEASE CALL DIRECT
TO OUR TOLL-FREE CUSTOMER
HOT LINE. The trained techni-
cians on our customer hot line
will provide immediate assis-
tance, free of charge to you.
CUSTOMER HOT LINE:
1-800-999-3756
Mon.–Fri., 6 a.m.–6 p.m. MST
CAUTION
USER'S MANUAL
Read all precautions and instruc-
tions in this manual before using
this equipment. Save this manual
for future reference.
PATENT PENDING
Advertisement
Table of Contents

Related Manuals for Weider WEBE26780


Summary of Contents for Weider WEBE26780
- Page 1 Model No. WEBE26780 Serial No. Write the serial number in the space above for reference. Serial Number Decal QUESTIONS? As a manufacturer, we are com- mitted to providing complete customer satisfaction. If you have questions, or find that there are...
-
Page 2: Table Of Contents
Table of Contents Warning Decal Placement ..............2 Important Precautions . -
Page 3: Important Precautions
Important Precautions WARNING: To reduce the risk of serious injury, read the following important precautions before using the weight bench. 1. Read all instructions in this manual before 11. Keep hands and feet away from moving parts. using the weight bench. 12. -
Page 4: Before You Begin
Whether your goal is a shapely figure, dramatic mus- before calling. The model number is WEBE26780. The cle size and strength or a healthier cardiovascular sys- serial number can be found on a decal attached to the... -
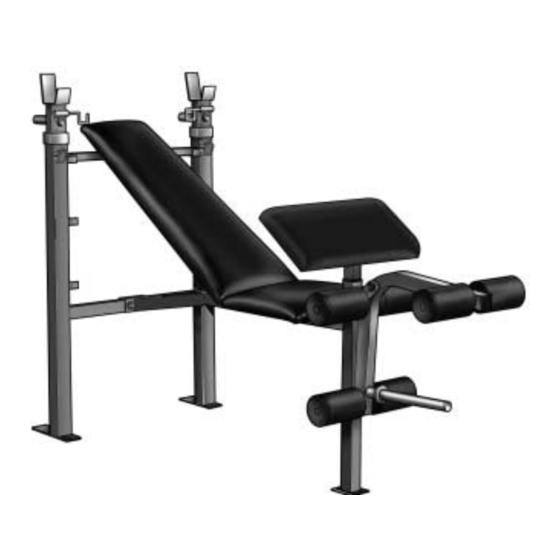
Page 5: Part Identification Chart
Part Identification Chart - Model No. WEBE26780 R0898A M10 x 130mm Bolt (9) —1 M10 x 70mm Bolt (26)—5 11mm x 10.5mm Spacer (38)–2 M8 x 60mm Bolt (37)—2 M8 Washer (20)—18 M8 x 55mm Bolt (27)—2 M8 Nylon Locknut (33)—7 M8 x 51mm Bolt (39)—1... -
Page 6: Assembly
Assembly Before beginning assembly, carefully read the • For help identifying the small parts, use the PART following information and instructions: IDENTIFICATION CHART on page 5. • As you assemble the weight bench, make sure all Make Things Easier for Yourself! parts are oriented as shown in the drawings. - Page 7 3. Attach the Frame (2) to the Crossbar (3) with two M8 x 55mm Bolts (27) and two M8 Nylon Locknuts (33). Tighten the Nylon Locknuts (23 and 33) and the Screws (23) used in steps 1–3 now. 4. Attach a Dip Handle (24) to one of the Weight Rests (19) with an M8 x 60mm Bolt (37), an 11mm x 10.5mm Spacer (38), two M8 Washers (20) and an M8 Nylon Locknut (33).
- Page 8 7. Lubricate the M10 x 70mm Bolt (26). Attach the Leg Lever (4) to the bracket (C) on the Front Leg (8) with the Bolt, two M10 Washers (22) and an M10 Nylon Locknut (21). Do not tighten the Nylon Locknut; the Leg Lever must be easy to turn.
-
Page 9: Adjusting The Weight Bench
11. Press a 1” Square Inner Cap (13) into each end of the seat support brackets on the Frame (2). Attach the Seat (11) to the seat support brackets on the Frame (2) with four M8 x 40mm Bolts (25) and four M8 Washers (20). - Page 10 ADJUSTING THE WEIGHT RESTS/DIP HANDLES To adjust the Weight Rests (19), remove the Large Threaded Knobs (32) from the Uprights (1, 16). Move the Weight Rests to the desired height. Replace the Large Threaded Knobs. WARNING: The Weight Rests must be set to the same height.
-
Page 11: Exercise Guidelines
USING THE BARBELL HOOKS To change weights while your barbell (not included) is on the Weight Rests (19), secure the barbell with the Barbell Hooks (28, 30). To do this, flip the Barbell Hooks over the barbell. This will reduce the possibility of the barbell tipping while you are changing weights. - Page 12 the most. To give balance and variety to your work- • Rest three minutes after each set for a muscle build- outs, vary the exercises from session to session. ing workout • Rest one minute after each set for a toning workout Schedule your workouts for the time of day when your •...
- Page 13 EXERCISE WEIGHT SETS REPS MONDAY Date: AEROBIC EXERCISE TUESDAY Date: EXERCISE WEIGHT SETS REPS WEDNESDAY Date: THURSDAY AEROBIC EXERCISE Date: EXERCISE WEIGHT SETS REPS FRIDAY Date: Make photocopies of this page for scheduling and recording your workouts.
-
Page 14: Part List
Part List - Model No. WEBE26780 R0898A Key No. Qty. Description Key No. Qty. Description Left Upright M8 x 16mm Screw Frame Dip Handle Crossbar M8 x 40mm Screw Leg Lever M10 x 70mm Bolt Backrest Tube M8 x 55mm Bolt... -
Page 15: Exploded Drawing
Exploded Drawing - Model No. WEBE26780 R0898A 22 26... -
Page 16: Ordering Replacement Parts
This warranty gives you specific legal rights. You may also have other rights which vary from state to state. ICON HEALTH & FITNESS, INC., 1500 S. 1000 W., LOGAN, UT 84321-9813 WEIDER is a registered trademark of ICON Health & Fitness, Inc. Part No. 148522 H02279-C R0898A...
Need help?
Do you have a question about the WEBE26780 and is the answer not in the manual?
Questions and answers