Table of Contents
Advertisement
Quick Links
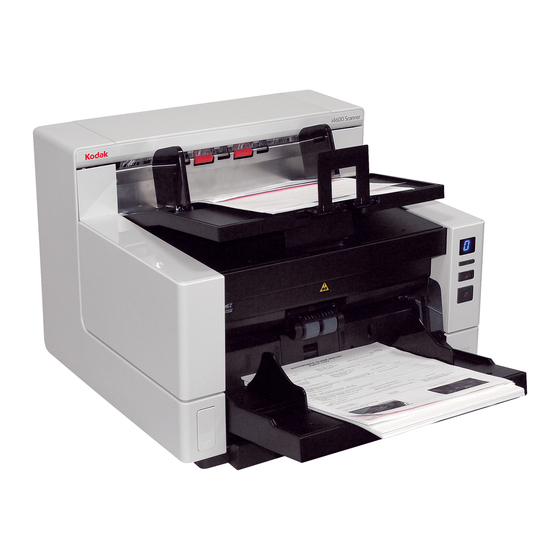
i4000 Series Scanners
User's Guide
User's Guide on Installation CD
Guides de l'utilisateur sur le CD d'installation
Benutzerhandbücher auf der Installations-CD
Guida dell'utente sul CD di installazione
Guías de usuario incluidas en el CD de instalación
Guias do usuário no CD de instalação
Gebruikershandleidingen op installatie-cd
Kurulum CD'sindeki Kullanım Kılavuzları
Uživatelská pøíruèka na instalaèním disku CD
A-61651
6J7319
Advertisement
Chapters
Table of Contents

Subscribe to Our Youtube Channel
Related Manuals for Kodak i4200


Summary of Contents for Kodak i4200
- Page 1 i4000 Series Scanners User’s Guide User’s Guide on Installation CD Guides de l'utilisateur sur le CD d'installation Benutzerhandbücher auf der Installations-CD Guida dell’utente sul CD di installazione Guías de usuario incluidas en el CD de instalación Guias do usuário no CD de instalação Gebruikershandleidingen op installatie-cd Kurulum CD'sindeki Kullanım Kılavuzları...
-
Page 2: User Precautions
• When relocating the scanner, it is recommended that two people lift the scanner and use safe lifting techniques. • Do not install the scanner in a location subject to dust, humidity or steam. This may cause electrical shock or a fire. Only use the scanner indoors in a dry location. -
Page 3: Environmental Information
Kodak locally for more information. • The product packaging is recyclable. • Kodak i4000 Series Scanners are Energy Star compliant and shipped from the factory with the default time set to 15 minutes. European Union This symbol indicates that when the last user wishes to discard this product, it must be sent to appropriate facilities for recovery and recycling. -
Page 4: Table Of Contents
OVERVIEW INSTALLATION SCANNING DOCUMENT PRINTING MAINTENANCE TROUBLESHOOTING APPENDICIES... -
Page 5: Overview
What’s in the box... 1-2 Scanner components ... 1-3 The Kodak i4000 Series Scanners include the following models: information and procedures for using and maintaining the Kodak i4000 Series Scanner. The information in this guide is for use with both models unless otherwise noted. -
Page 6: Accessories
Kodak Feeder Kit for Ultra-Lightweight Paper — allows you to feed lightweight paper from a paper weight range of 25 g/m (7 to 20 lbs). The Kodak Feeder Kit for Ultra-Lightweight Paper includes a feed module and separation roller that are specially designed to feed light-weight paper through the scanner transport. -
Page 7: Scanner Components
Other display patterns are also used to indicate scanner status or operator action. See Chapter 6 for more information. Scanner cover release latch — pull the lever forward to open the scanner cover. Scroll button — allows you to select or scroll through predefined functions or applications for scanning. - Page 8 The red LED on this button indicates a possible error condition has been detected (i.e., document jam). Power button — press to turn the scanner on or press and hold for one second to turn the scanner off.
- Page 9 Printer access view A-61651 December 2009 Even if you do not have the Kodak Enhanced Printer Accessory, you will still need to access this area of the scanner. The feed module release knob is located in this area. Printer cable — this cable connects directly to the printer carrier to allow communication to the Enhanced Printer.
-
Page 10: Inside View
Inside view When you pull the scanner cover release latch forward the following internal components are visible. Separation module — provides smooth document feeding and separation of various sizes, thicknesses and textures of documents. Imaging guides — keep imaging guides clean to obtain optimum image quality. - Page 11 USB ports — connects the scanner to the PC and allows the connection of other peripheral devices. Power port — connects the power cord to the scanner.
-
Page 12: Installing The Scanner
• When positioning the scanner, be sure to provide adequate clearance at the back of the scanner if you will be using the rear document exit. For more information on the rear document exit, see the section entitled, “Adjusting... -
Page 13: Installing The Kodak Driver Software
Installing the Kodak Driver Software - Windows operating systems Do not install the USB cable before installing the Kodak Driver Software. 1. Insert the Kodak i4000 Series Scanners Installation CD in the CD-ROM drive. The installation program starts automatically. 2. Select Install Scanner Software. -
Page 14: Attaching The Output Tray
Connecting the power cord and USB cable A-61651 December 2009 When you unpack the Kodak i4000 Series Scanner, the output tray is packed in a separate box. • Locate the output tray slots on the scanner, align the output tray with the slots and set the output tray in place. -
Page 15: Turning On The Scanner
• Press the Power button. When you turn on the scanner, the input elevator will open if it is not already opened and the green indicator on the Start/Resume button will flash as the scanner goes through a series of self tests. - Page 16 Getting your documents ready to scan ... 3-6 Selecting your scanning application ... 3-7 Kodak i4000 Series Scanners were designed to be easy to use and get you scanning quickly. All you need to do to start scanning to PDF is place your documents in the input elevator, press the Scroll button to display “2”...
-
Page 17: Adjusting/Input Elevator
You can adjust the side guides and input elevator height to accommodate your scanning needs. When the scanner is not is use, the input elevator can be folded up against the scanner. NOTE: The input elevator must be in the lowest position before closing it. -
Page 18: Adjusting The Input Elevator
- Documents lengths more than 43.2 cm (17 inches) — if you are scanning documents longer than 43.2 cm (17 inches), the scanner driver must be set to accommodate these long documents. Be sure to verify that... -
Page 19: Installing The Document Extender
• Insert the ends of the document extender into the holes on the input elevator or the output tray and lower the extender into position. The Kodak i4000 Series Scanners are designed with improved stacking performance which allows most users to scan documents without the assistance of the output tray side guides and document stop. - Page 20 A-61651 December 2009 • Adjusting the side guides — open and adjust the side guides on the output tray to match the position of the side guides on the input elevator. The side guides can also be folded flat against the output tray. •...
-
Page 21: Getting Your Documents Ready To Scan
• Be sure to toggle the rear document exit switch back into it’s original position when finished. • Be sure that you have adequate clearance behind the scanner to feed the document(s) through when using this option. • When scanning several documents through the rear document exit, the documents will be outputted in the reverse scanning order. -
Page 22: Selecting Your Scanning Application
PDFs or integrate your information into a common location - such as Microsoft SharePoint. Kodak Capture Pro Software is also available for use with the Kodak i4000 Series Scanners. Go to www.Kodak.com/go/capturepro for more information. -
Page 23: Document Printing
Changing print positions ... 4-8 Installing/Replacing the ink blotter strips... 4-9 Problem solving ... 4-10 This chapter provides information for using the optional Kodak Enhanced Printer. In order to use the printing option you must have purchased and installed the Enhanced Printer Accessory. -
Page 24: Printer Specifications
Printer specifications More information about the following specifications can be found in the TWAIN Datasource or ISIS Driver Scanning Setup Guide. Characteristic Description Maximum lines Maximum characters 40 (including spaces) Print locations (horizontal) 8 front manually set Print locations (vertical) Set by the scanning application Print orientation 0 and 90 degrees... -
Page 25: Installing/Replacing The Ink Cartridge
Installing/Replacing the ink cartridge A-61651 December 2009 You must install the ink cartridge before using the printer. Refer to the section entitled, “Supplies and consumables” in Chapter 5 for ordering information. After initial installation, replace the ink cartridge when: • printed characters appear light or uneven •... - Page 26 3. If you are installing the ink cartridge for the first time, push the connector on the printer cable firmly into the printer carrier. NOTE: If you are replacing an ink cartridge, the printer cable will already be installed and you just need to remove the printer carrier from it’s position and remove the empty ink cartridge.
-
Page 27: Running A Print Test
7. Close the printer access cover and reinstall the output tray. 8. Run a print test (see the next section). You can only run a print test by using the Kodak Scan Validation Tool. 1. Place a blank sheet of paper in the input elevator. - Page 28 5. Click the Setup icon. The Scan Validation Tool main window will be displayed. 6. Select the Default Setting Shortcut and click Settings. 7. On the General tab, click the Device button. A-61651 December 2009...
- Page 29 A-61651 December 2009 8. On the Device - General tab, click the Diagnostics button. The General- Diagnostics window will be displayed. 9. Check the Printer check box and click Done. 10. Scan the blank sheet of paper that is in the input elevator. 11.
-
Page 30: Changing Print Positions
Changing print positions The horizontal print position must be changed manually. 1. Remove the output tray. 2. Open the printer access cover. NOTES: • The horizontal print positions are visible by a small detent on the printer rail. • Printing automatically stops approximately 1.27 cm (½-inch) from the trailing edge of the document, even if the information has not been completely printed. -
Page 31: Installing/Replacing The Ink Blotter Strips
“Supplies and Consumables” in Chapter 5. 1. Pull the scanner cover release latch forward to release and lift the scanner cover. 2. Locate the two blotter strip channels. These channels are where the blotter strips will be installed or replaced. -
Page 32: Problem Solving
• Clean the print head (see “Printing problems when starting up due to dry print head” below.) Remove the ink cartridge from the scanner and using a damp cloth or swab, dab (do not wipe) the ink jets on the ink cartridge, replace the ink cartridge and try again. - Page 33 Refer to the “Cleaning frequency chart” on the next page for cleaning guidelines. However, you will need to determine what works best for you. Years of Kodak’s production scanning experience proves that properly cleaning and maintaining your scanner will result in scanning more paper in less time with less issues.
-
Page 34: Cleaning Frequency Chart
1. Power down the scanner. 2. Remove any documents from the input elevator, transport and output tray. 3. Pull the scanner cover release latch forward. The scanner cover will open partially. Raise the cover up to fully open the cover for access to the internal components. -
Page 35: Cleaning Procedures
Staticide Wipes contain isopropanol which can cause eye irritation and dry skin. Wash your hands with soap and water after performing maintenance procedures. Refer to the Material Data Safety Sheet (MSDS) for more information. The MSDS is available on the Kodak web site at www.kodak.com/go/MSDS. NOTE: To access the MSDS, you will need to provide the catalog number of the supply. -
Page 36: Vacuuming The Output Tray And Input Elevator
Vacuuming the output tray and input elevator Cleaning the rollers 1. Power down the scanner. 2. Remove the output tray. 3. Thoroughly vacuum the output tray area and the input elevator area. Cleaning the rollers includes all of the rollers in the transport area, the separation roller tires and the feed module tires. -
Page 37: Cleaning The Separation Roller Tires
Cleaning the separation roller tires A-61651 December 2009 4. Pull the separation pad holder forward and remove the separation roller. NOTE: The separation roller cover is spring-loaded. Hold the separation roller cover back until you remove the separation roller, then gently lower the roller cover back in place. -
Page 38: Cleaning The Feed Module Tires
Cleaning the feed module tires Cleaning the Flippable White background strips 8. Clean the feed module tires by manually rotating and wiping the feed module tires with a roller cleaning pad. For best results wipe parallel to the ribs in order to remove any residue between the ribs. You do not need to remove the feed module to clean the tires. -
Page 39: Cleaning The Imaging Guides - Basic Cleaning
— basic cleaning A-61651 December 2009 12. Wipe the upper and lower imaging guides with a Staticide wipe. 13. Wipe the upper and lower imaging guides again with an almost-dry Staticide wipe to remove any streaks. 14. Close the scanner cover. -
Page 40: Cleaning The Imaging Guides - Thorough Cleaning
Upper imaging guide 1. Open the scanner cover. 2. Turn the screw to the left on each end of the upper imaging guide and remove it from its position. Set the imaging guide aside. - Page 41 9. Clean both the top and bottom of the lower imaging guide thoroughly with a Staticide wipe. 10. Wipe the imaging guide again with an almost-dry Staticide wipe to remove any streaks. 11. Reinstall the lower imaging guide. 12. Close the scanner cover. 13. When finished with all cleaning procedures, turn on the scanner.
-
Page 42: Running A Transport Cleaning Sheet
When finished running the transport cleaning sheet: 1. Open the scanner cover. 2. Wipe the exposed side of the upper and lower imaging guides with a lint- free cloth. 3. Close the scanner cover and scan a test image to ensure image quality. A-61651 December 2009... -
Page 43: Replacement Procedures
Replacement procedures Replacing the feed module or feed module tires A-61651 December 2009 This section provides procedures for replacing the following parts. Use the list below as a guideline for frequency of replacement. • Feed module tires and separation roller tires — tire life will vary depending upon paper types, environment and cleanliness. - Page 44 5-12 3. Turn the feed module release knob and release the feed module. 4. If you are just replacing the feed module, go to Step 11. If you are replacing the tires, proceed with Step 5. 5. With one hand, press the locking tabs (one on each side) while holding the lower housing with the other hand.
- Page 45 (3) and turn the green feed module release knob (4) to re- engage the feed module. Verify that the feed module is securely in place and moves freely after you install it. 12. Close the scanner cover and the printer access cover. 13. Reinstall the output tray. 5-13...
-
Page 46: Replacing The Separation Roller Or Separation Roller Tires
Step 5. 3. Insert the new separation roller. Be sure to line up the slots on the separation roller with the holders. 4. Release the separation roller cover back in place and close the scanner cover. A-61651 December 2009... -
Page 47: Replacing The Pre-Separation Pad
7. Reinstall the separation roller. Be sure to line up the slots on the separation roller with the holders. 8. Lower the separation roller holder back in place. 9. Close the scanner cover. Change the pre-separation pad when the frequency of multi-fed documents increases. -
Page 48: Replacing The Imaging Guides
NOTE: Handle the imaging guides carefully so as to not put fingerprints on the guides. 1. Open the scanner cover. 2. Loosen the screws on each end of the lower imaging guide and remove it from its position. -
Page 49: Supplies And Consumables
Kodak Feeder Kit for Ultralightweight Paper Enhanced Printer Accessory NOTE: Items and catalog numbers are subject to change. For the most up to date list of supplies and consumables go to: www.kodak.com/go/ scannersupplies. *These parts must be ordered from Parts Services. -
Page 50: Troubleshooting
The scanner will not scan/ feed documents Image quality is poor or has decreased Make sure that the scanner and imaging guides are clean. Refer to A-61651 December 2009 Problem solving ... 6-1 Indicator lights and error codes... 6-3 Upgrading software ... - Page 51 Tools>Computer Management to display the Computer Management window. Select Device Manager and select your PC. The Kodak i4200 or i4600 Scanner should be displayed under Imaging Devices. Click Action>Scan for hardware changes. • Make sure that the transport area is clean.
-
Page 52: Indicator Lights/Error Codes
However, the host computer may require several seconds to detect the scanner. Falling bar — when the scanner is waiting for an operator action, a blue bar will step down in succession from top to bottom in the function window. -
Page 53: Contacting Service
• Turn power off and then on again If problem persists, call Service. Kodak frequently updates drivers and firmware to correct issues and add new features. If you are having error codes (Ex), you should upgrade to the latest driver before contacting Service. Go to: www.Kodak.com/go/disupport, access i4000 Software and Drivers and download the most recent upgrade. -
Page 54: Appendix A Specifications
Appendix A Specifications Scanner Type/Speed • i4200 Scanner: duplex color scanner with an automatic document feeder, 100 pages per minute (landscape) at 200 dpi; black and white. • i4600 Scanner: duplex color scanner with an automatic document feeder, 120 pages per minute (landscape) at 200 dpi; black and white. - Page 55 System requirements Following is the recommended system configuration to run Kodak i4000 Series Scanners. • PC: Intel Core 2 duo, 2 GHz per core • USB port 2.0 high speed • 2 GB RAM • Supported operating systems: - Microsoft Windows XP (Home and Professional); SP2 and higher - Microsoft Windows XP Professional x64 Edition;...
-
Page 56: Limited Warranty For Kodak Scanners
Kodak or through Kodak’s authorized distribution channels: Kodak warrants that a Kodak Scanner, from the time of sale through the Limited Warranty period applicable to the Product, will be free of defects in materials or workmanship and will conform to the performance specifications applicable for the particular Kodak Scanner. -
Page 57: How To Obtain Limited Warranty Service
(800) 822-1414. Kodak also provides a variety of service programs that may be purchased to assist with the use and care of the Kodak Scanner. Kodak is committed to providing its customers with quality, performance, reliability and service under the Limited Warranty. -
Page 58: Depot Service
Kodak Scanners must obtain a Return Material Authorization number (“RMA”) by calling (800) 822-1414, and within ten (10) business days from the date of issuance of the RMA must return the Kodak Scanner to the address designated in the RMA at the end user’s own expense and risk. - Page 59 Website: www.Kodak.com/go/docimaging For U.S. Service, Repair and Technical Assistance by Telephone: Telephone technical support is available Monday-Friday between the hours of 5 a.m. to 5 p.m. excluding Kodak holidays. Phone: (800) 822-1414 For Technical Documentation and FAQ’s available 24 hours a day: Website: www.Kodak.com/go/docimaging...
Need help?
Do you have a question about the i4200 and is the answer not in the manual?
Questions and answers