Kodak i1210 User Manual
I1200/i1300 series scanners
Hide thumbs
Also See for i1210:
- Quick tips (2 pages) ,
- Installation manual (1 page) ,
- User manual (134 pages)
Table of Contents
Advertisement
Advertisement
Table of Contents

Related Manuals for Kodak i1210


Summary of Contents for Kodak i1210
-
Page 2: Table Of Contents
Turning the scanner on and off ....... . . 17... - Page 3 Selecting Device settings ........45 The main Kodak Scanner window ....... 46 The Image Settings window .
- Page 4 Vacuuming the scanner ........
-
Page 5: Introduction
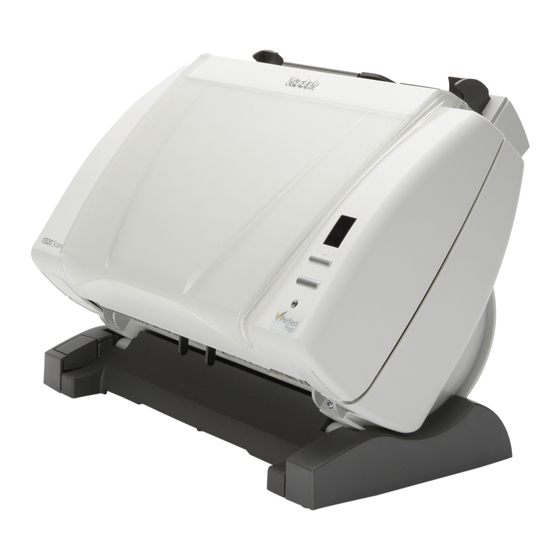
The i1200/i1300 Scanners also can support the optional Kodak A4 Flatbed Accessory. The following models are available: Kodak i1210 Scanner — a simplex scanner which provides scanning at up to 30 pages per minute in color, grayscale or black and white at 200 dpi. -
Page 6: Scanner Features
• An optional A4 tethered flatbed accessory provides added scanning capability for exception documents and easily connects and disconnects to the scanner • Choose color, black and white, grayscale, simultaneous black and white and grayscale, or simultaneous black and white and color •... -
Page 7: Safety Information
• Remove all loose objects from the area that could be drawn into the machine. • Follow the recommended Kodak cleaning procedures. Do not use air, liquid or gas spray cleaners. These cleaners only displace the dust, dirt or debris to another location within the scanner, which could cause the scanner to malfunction. -
Page 8: European Union
This symbol indicates that when the last user wishes to discard this product, it must be sent to appropriate facilities for recovery and recycling. Please contact your local Kodak representative or refer to www.kodak.com/go/recycle for additional information on the collection and recovery programs available for this product. -
Page 9: Emc Statements
EMC statements United States Korea Japan A-61560 January 2007 This equipment has been tested and found to comply with the limits for a Class B digital device pursuant to Part 15 of the FCC rules. These limits are designed to provide reasonable protection against harmful interference in a residential installation. -
Page 10: Getting Started
2 Getting Started What’s in the box Before you begin open the box and check the contents: • Kodak i1210 or i1220 Scanner or Kodak i1310 or i1320 Scanner • Output tray • Output tray extender and exit deflector • USB 2.0 cable •... -
Page 11: System Requirements
2. Connect the power cord to the scanner. 3. Connect the USB cable between your scanner and PC. 4. Attach the output tray. 5. Turn on scanner power and finalize the Kodak Driver Software installation. 6. Verify your scanner installation (see Chapter 3). - Page 12 3. The Kodak i1200/i1300 Series Scanner Installation window will be displayed. NOTE: This window may or may not be displayed depending upon what was previously installed on your computer. 4. Click Yes. The Welcome window will be displayed. 5. Click Next.
- Page 13 A-61560 January 2007 The Software License Agreement window will be displayed. 6. After reading the agreement, click I Agree to continue. The installation will start. 7. When the installation is complete, the Installation Completed window will be displayed. 8. Click Finish.
-
Page 14: Connecting The Power Cord To The Scanner
Connecting the power cord to the scanner Use only the power supply that was provided with the Kodak i1200/ i1300 Series Scanner. Do not substitute another power supply model or another manufacturer’s power supply. After the drivers have been installed, connect the power supply and power cord to the scanner. -
Page 15: Connecting The Usb Cable
Attaching the output tray A-61560 January 2007 IMPORTANT: If you have not installed the Kodak Driver Software, do that now before proceeding. The USB cable supplied with your scanner has two different ends. 1. Attach the B end of the USB cable to the scanner USB port, located on the back of the scanner. -
Page 16: Turning On The Scanner And Finalizing Kodak Driver Software
Kodak Software Drivers have been properly installed, the installation will be complete when the scanner is turned on. 1. Use the power switch on the back of the scanner to turn the scanner on (I). When you turn on the scanner, the scanner goes through an initialization process. -
Page 17: Installing Application Software
The Found New Hardware window will be displayed. 3. Click Finish. The Kodak Scan Validation Tool is available on the CDs packed with your scanner. Refer the section entitled, “Verifying your scanner installation” in Chapter 3 for installation instructions and use. -
Page 18: Scanner Components
Tilt release button — press this button to tilt the scanner body into a different position. Output tray — collects the scanned documents. The output tray can be extended when scanning documents longer than 8.5 x 11 inches (A4). - Page 19 Scanner cover release lever — opens the scanner to allow access to the paper path for cleaning or clearing a document jam. Feed module, Separation module and Rollers — provides smooth document feeding and separation of various sizes, thicknesses and textures of documents.
-
Page 20: Locking The Scanner
(as shown below) at an office supply store. 1. Insert the lock into the back of the scanner and turn the key to lock the scanner in place. 2. Use the looped end of the cable to secure the cable and scanner to a stationary place. -
Page 21: Using The Scanner
The Kodak i1200 and i1300 Series Scanners are equipped with a tilt feature which allows the scanner to be used in two positions. Depending upon your scanning needs, you can tilt the scanner body and position the input and output trays. -
Page 22: Tilting The Scanner Body
Tilting the scanner body 65-degree angle In addition to tilting the scanner body, the input and output trays can be adjusted to provide even more scanning flexibility. See the following sections for information on adjusting the input and output trays. -
Page 23: Adjusting The Output Tray
The output tray and the output tray extender can be used in several positions. Different positions perform for different needs. If the way you use your scanner is not described in this section, experiment with different positions to determine the one that best fits your needs. - Page 24 - Turn the output tray right-side up and slide it under the scanner until it locks into place. • The output tray extender is best used when the scanner is in the 25 degree position (see below). This setup is ideal for scanning large batches of mixed document sets.
-
Page 25: Adjusting The Input Tray
You can scan documents with the input tray open or closed. Feed documents with the input tray open if you are scanning a batch of documents. You can tilt the scanner body to a more upright position to save working space. -
Page 26: Adjusting The Side Guides
The side guides can be moved in or out to accommodate document size. Adjust the side guides slightly wider than the documents you are scanning. Before you start scanning, make sure the scanner is on and ready for operation, which is indicated by the green indicator light being on and constant. -
Page 27: Document Preparation
A-61560 January 2007 • A batch of documents to be fed into the scanner must be arranged so the leading edges of all documents are aligned and centered in the input tray; this allows the feeder to introduce documents into the scanner one at a time. -
Page 28: Verifying Your Scanner Installation
1. Select Start>Programs>Kodak>Document Imaging>Scan Validation Tool. The Scan Validation Tool dialog box will be displayed. 2. Select TWAIN for the Driver Types and Kodak Scanner i12XX/ i13XX as the Driver. The Scan Validation Tool dialog box will be displayed. 3. Click the Setup icon. - Page 29 A-61560 January 2007 The main Kodak Scanner window will be displayed. NOTE: When you access the main Kodak Scanner window, refer to Chapter 4, Image Processing for more information on how to get started using the TWAIN datasource or ISIS 4.
-
Page 30: Viewing Test Images
Some scanning applications are available on the CDs packed with your scanner. Scanning applications will use either the ISIS driver or TWAIN datasource which are provided with your scanner as part of the Kodak Scanner Driver Software installation. The TWAIN datasource or ISIS driver links the scanner to your scanning application. -
Page 31: Smart Touch Functionality
NOTE: If the Scanner icon indicates that the scanner is not ready, turn the scanner off, and then on again. • Click on the Scanner icon on the system tray to display the smart touch function listing. This list displays the currently configured functions. -
Page 32: Configuration Dialog Box
The software will restart automatically the next time Windows start ups or if you scan documents using the Start button on the scanner. The software can be started manually by selecting Start>Programs>Kodak>Document Imaging>i1310,i1320 (or i1210, i1220)>Smart touch. -
Page 33: Scan To Settings
Scan To settings A-61560 January 2007 Destination — allows you to select one of the following options: • File: creates an electronic file from the scanned documents and saves it in the location specified in the Folder path. • Application: creates an electronic file from the scanned documents and launches the application program for the saved file. - Page 34 • JPEG/TIFF - Single page: if you are scanning documents with multiple pages or sides, each page or side is saved as a separate JPEG or TIFF file. • TIFF - Multi-page: combines all the scanned images into a single TIFF file.
-
Page 35: Scan As Settings
A-61560 January 2007 Settings Shortcut — displays the name of a group of scanner settings currently defined for use by the Kodak Scanner. This named group of scanner settings is called a shortcut and is described in more detail in Chapter 4. -
Page 36: Configuring Function Numbers
Configuring function numbers 1. Click the smart touch icon on the system tray to display the smart touch function listing and select Configure. The Configuration dialog box will be displayed. 2. Select the Task shortcut you want to configure from the Task Shortcut drop-down list. - Page 37 7. If desired, add a file name prefix by entering the text in the File name prefix field. 8. If desired, select a different scanner Settings Shortcut based on the type of document you are scanning by selecting the Settings button on the Kodak Scanner window.
-
Page 38: Smart Touch Edit Window
Smart touch Edit window The smart touch Edit window allows you to view the scanned images before sending them to the final destination. As documents are scanned, the images will be displayed in the Edit window. From this window you can perform common editing tasks such as, rotating and deleting blank pages, etc. - Page 39 A-61560 January 2007 These icons are available on the Edit window. To use a tool, click on the icon and apply it to the desired image. Start — allows you to scan additional documents and append them to the current images. Stop —...
-
Page 40: Using Function Numbers
Using function numbers When you have assigned the function numbers, they can be easily launched by using the Start button on the scanner or from the smart touch function listing. Launching from the scanner: 1. Use the arrow button to scroll through the function numbers and select the desired function. -
Page 41: Scanning Your Documents
A-61560 January 2007 Standard paper size documents should feed easily through the scanner. • If you have a Kodak i1210 or i1310 Scanner or are scanning one- sided documents only, place the documents you want to scan into the input tray of the scanner. The documents should be placed with the side you want to scan facing the input tray. -
Page 42: Automatic Feeding
To scan a batch of documents, follow the guidelines for size, type, quantity, etc., in the “Document preparation” section. IMPORTANT: Staples and paper clips in documents may damage the scanner. Remove all staples and paper clips before scanning. 1. Align the leading edges of the stacked documents. -
Page 43: Image Processing
(i.e., Kodak Capture Software). 1. Select Start>Programs>Kodak>Document Imaging>Scan Validation Tool. 2. Select TWAIN (or ISIS) for the Driver Type and the Kodak Scanner i12XX/i13XX Scanner as the Driver. The Scan Validation Tool dialog box will be displayed. -
Page 44: Scan Validation Tool Dialog Box
The Scan Validation Tool (SVT) is a diagnostic application provided by Kodak. The SVT user interface allows access to all the features of the scanner and is a good way to verify that the scanner is working properly. The Scan Validation Tool allows you to verify scanner functionality using both the TWAIN datasource and the ISIS driver. -
Page 45: Using The Twain Datasource
For the purpose of this manual, all displayed windows assume the features available on the Kodak i1220 or i1320 Scanner (duplex scanner). If you have a Kodak i1210 or i1310 Scanner (simplex scanner) all options are limited to one-sided scanning only. -
Page 46: How Do I Begin
The procedures that follow describe how to configure a customized Setting Shortcut. Complete descriptions of the features and options on the main Kodak Scanner window and tabs are found in the section entitled, “The main Kodak Scanner window”. NOTE: Setting Shortcuts can sometimes be overridden by your scanning application. -
Page 47: Selecting Image Settings
NOTE: When scanning one side of a document or if you are using an i1210 or i1310 Scanner, be sure to place the side of the document to be scanned facing the input tray. 4. If you want to see what your selected image processing options will look like and make on-screen changes, click Preview to review and adjust the image. - Page 48 Steps 3 - 5 to until you get the desired results. 6. If you made any changes to a predefined default Setting Shortcut, click Save As on the main Kodak Scanner window. The Save As dialog box will be displayed.
-
Page 49: Selecting Device Settings
6. On each tab, select the appropriate options or action you want the scanner to perform. 7. When finished: • Click Home to return to the main Kodak Scanner window and click Save to save your selections to your custom Setting Shortcut, or •... -
Page 50: The Main Kodak Scanner Window
The main Kodak Scanner window The main Kodak Scanner window is the home window of the scanner’s user interface. You can scan by simply selecting a Setting Shortcut and then selecting OK/Scan. Setting Shortcuts — provides a listing of the Setting Shortcuts currently set up. - Page 51 • Be sure to place your documents face down in the input tray. • The Two Sided and One Sided - Back options are only available for duplex scanner models. Save — saves any changes made to the current Setting Shortcut.
- Page 52 NOTE: If this button is OK, any unsaved changes will remain in effect for the current scan session. Cancel — closes the main Kodak Scanner window without saving any changes. Information Icons About: displays the scanners’ version and copyright information.
-
Page 53: The Image Settings Window
NOTES: • The Side option is only available when advanced settings have been selected on the Advanced tab. • The Both and Back options are only available for duplex scanner models. Advanced Image Setup: displays the Advanced tab. -
Page 54: Preview Area
OK/Scan — when selected, you will be prompted to save any unsaved changes. NOTE: If this button is OK, any unsaved changes will remain in effect for the current scan session. Cancel — closes the main Kodak Scanner window without saving any changes. A-61560 January 2007... -
Page 55: General Tab
General tab A-61560 January 2007 The General tab contains the commonly used image options. In most cases, you will not have to change options on other tabs. Scan as — allows you to select the electronic image format. • Color (24-bit): produces a color version of your document. •... - Page 56 Compression — allows you to reduce your electronic image size. • Type: the scanner will produce a color version of your document. - (none): no compression, which may produce a large image size. - Group-4: uses a CCITT standard to compress a black and white image, often used in conjunction with TIFF files.
-
Page 57: Size Tab
(regardless of size). If a document is fed crooked, it will not be straightened. • Manually Detect: the scanner will return an image based on the area you specify with the Outline options. It is suggested that you only use this option for scan jobs that contain same-size documents. - Page 58 • Origin (x, y): - if you select Document: Manually Select, (x) is the distance from the left edge of the scanner’s paper path and (y) is the distance from the first portion of the document detected by the scanner.
- Page 59 • (none) • Automatic — the scanner will analyze each document to determine how it was fed and will rotate the image to the proper orientation. • 90, 180, 270 degrees — the amount of rotation that will be performed.
-
Page 60: Adjustments Tab: Black And White
General tab. The following options are based on a Scan as selection of Black and White. Conversion quality — these settings effect how the scanner analyzes a grayscale version of the document which is used to produce the black and white electronic image. - Page 61 A-61560 January 2007 Threshold — aids in controlling the level at which a pixel is considered black or white. Decreasing this setting will make the image appear lighter, and can be used to subdue background noise. Increasing this setting will make the image appear darker, and can be used to help pick up light information.
-
Page 62: Adjustments Tab: Color Or Grayscale
Adjustments tab: color or grayscale The options available on the Adjustments tab depend on the Scan as selection on the General tab. The following options are based on a Scan As selection of Color or Grayscale. Brightness — changes the amount of white in the color or grayscale image. - Page 63 A-61560 January 2007 • Apply to: - Predominant - smooths the predominant background color to white. - Neutral - smooths only the neutral color to white, and also smooths up to two additional background colors. - All - smooths the neutral color and up to two additional background colors to white.
-
Page 64: Enhancements Tab
Enhancements tab The options on the Enhancements tab depend on the Scan as selection on the General tab. Image Edge Fill — fills the edges of the final electronic image by covering the area with the specified color. • Color: allows you to select the color to fill the edges with. - (none) - White - Black... - Page 65 A-61560 January 2007 Blank Image Detection — allows you to configure the scanner to not include blank images. • On: turns Blank Image Detection on and makes the rest of the Blank Image Detection options available. • Delete if file size is less than: allows you to select the minimum image size that the scanner will consider to be non-blank.
-
Page 66: Advanced Image Setup
- Back depending on what side(s) you want to configure. NOTE: The Two Sided and One Sided - Back options are only available for duplex scanner models. Different settings per side — by default, the settings you select apply to both sides of the image. - Page 67 NOTE: The Different settings per side option is only available for duplex scanner models. Images per side — indicates how many images the scanner will create for a side, based on you imaging selections. • One: indicates you want the scanner to create one image.
- Page 68 Example 3. When available, use the up and down arrows to select the order the images will be delivered by the scanner to the scanning application. Toolbar buttons: Add: adds an image type to the bottom of the configuration list.
-
Page 69: Content Settings Tab
Content Settings tab A-61560 January 2007 The options on the Content Settings tab can be used for either one- or two-sided jobs. Side — determines which side the Sensitivity settings are applied to. This option is only available if Different settings per side is checked on the Advanced tab. - Page 70 Custom to manually adjust Color Amount and/or Color Threshold. Custom also allows access to the Learn mode which provides a method for the scanner to analyze documents and recommend settings. Color amount — the amount of color that needs to be present in a document before it will be saved as either color/grayscale.
-
Page 71: Creating Color/Grayscale Or Black And White Images Based On The Content Of Your Documents - Example 1
1. Select a Setting Shortcut from the main Kodak Scanner window that closely describes your desired output. 2. Select Settings to display the Image Settings window. - Page 72 NOTE: Make any other adjustments to the black and white image settings on the rest of the tabs on the Image Settings window. 11. When finished, select Home to return to the main Kodak Scanner window and then select Save to save your selections to the shortcut.
-
Page 73: Creating Multiple Images For Each Side Of A Document - Example 2
1. Select a Setting Shortcut from the main Kodak Scanner window that closely describes your desired output. 2. Select Settings to display the Image Settings window. - Page 74 NOTE: Make any other adjustments to the black and white image settings on the rest of the tabs on the Image Settings window. 11. When finished, select Home to return to the main Kodak Scanner window and then select Save to save your selections to the shortcut.
-
Page 75: Creating Different Settings For Each Side Of A Document - Example 3
1. If you are not already on the Advanced tab: • Select a Setting Shortcut from the main Kodak Scanner window that closely describes your desired output. • Select Settings to display the Image Settings window. - Page 76 NOTE: Make any other adjustments to the back side settings on the rest of the tabs on the Image Settings window. 10. When finished, select Home to return to the main Kodak Scanner window and then select Save to save your selections to the shortcut.
-
Page 77: Creating A New Setting Shortcut
Creating a new Setting Shortcut A-61560 January 2007 1. From the main Kodak Scanner window, select a Setting Shortcut from the list. It is recommended that you select a shortcut that most closely describes the desired image output. 2. Determine if you want to capture an electronic image of the front of your document, back of your document or both sides of your document and make the selection from the Input document is field. - Page 78 8. Review each tab and select the appropriate options or actions you want the scanner to perform. 9. Select Home to return to the main Kodak Scanner window. 10. Select Save As to display the Save As window. 11. Enter a new shortcut name that is meaningful to you and select Save.
-
Page 79: Changing Image Settings
Changing Image Settings A-61560 January 2007 1. Select a Setting Shortcut from the main Kodak Scanner window that closely describes your desired output. 2. Select an Input document is option from the main Kodak Scanner window. 3. Select Settings to display the Image Settings window. -
Page 80: The Device Settings Window
NOTE: If this button is OK, any unsaved changes will remain in effect for the current scan session. Cancel — closes the main Kodak Scanner window without saving any changes. Information Icons About: displays the scanners’ version and copyright information. -
Page 81: Device - General Tab
• Flatbed: scanner will scan from the flatbed. Power Saver — allows you to set the amount of time the scanner has to be inactive before going into power saver mode. You can turn this option off or set a time from 5 to 240 minutes. -
Page 82: Device - Multifeed Tab
Length Detection — allows you to select the maximum length of the documents in your job set. If the scanner detects a document of that length or longer, it will determine that a multifeed has occurred. You can turn this option off or set a length up to 34.5 inches. - Page 83 A-61560 January 2007 Action When Detected — select what action you want the scanner to take when a multifeed is detected. With all options, the condition will be logged in the scanner. • Stop Scanning: scanning will stop and control will return to the scanning application (i.e., ends the job).
-
Page 84: Changing Device Settings
Changing Device settings 1. Select a Setting Shortcut from the main Kodak Scanner window that closely describes your desired output. 2. Select Settings to display the Image Settings window. 3. Select Device to display the Device Settings window. 4. Before making any adjustments, browse through the tabs on the Device Settings window to get familiar with options that are available. -
Page 85: The Diagnostics Window
Done — returns you to the Device Settings window. The General tab allows you to perform a scanner test and displays the scanner time. Tests • Scanner — similar to, but more extensive than, a power-on self test. -
Page 86: Diagnostics - Debug Tab
Click the drop-down box to select from Off (the default), On or Custom. It is suggested that you do not use the Custom setting unless directed to do so by Kodak support personnel. -
Page 87: Diagnostics - Logs Tab
By default, only the General and Operator logs are displayed. Toolbar buttons Save As — saves all the logs for viewing by Kodak support personnel. When selected, you will be prompted for the location to save the logs along with the option of including any debug images. -
Page 88: Using The Isis Driver
For the purpose of this manual, all displayed windows assume the features available on the Kodak i1220/i1320 Scanners. If you have a Kodak i1210 or i1310 Scanner, all options are limited to one-sided scanning only. See the section entitled, “Starting the Scan Validation Tool” earlier in this chapter to access the main ISIS Driver window. -
Page 89: Main Tab
Options include: Front Image #1, Front Image #2, Back Image #1 and Back Image #2. The Kodak Scanner drivers allow you to control the camera settings independently. Some settings apply only to black and white images, others apply to color/grayscale images. By selecting the appropriate camera and image mode, you can control the scanner’s output. - Page 90 • iThresholding: allows the scanner to dynamically evaluate each document to determine the optimal threshold value to produce the highest quality image. This allows scanning of mixed document sets with varying quality (i.e., faint text, shaded backgrounds, color...
- Page 91 A-61560 January 2007 • Adaptive Thresholding (ATP): separates the foreground information in an image (i.e., text, graphics, lines, etc.) from the background information (i.e., white or non-white paper background). When using Adaptive Thresholding, Brightness and Contrast can be adjusted. Brightness — changes the amount of white in the color and grayscale image.
-
Page 92: Layout Tab
Page Orientation — allows you to select the way you place your documents in the scanner, Top first, Bottom first, Left first or Right first. When using the Kodak i1200/i1300 Scanners, select Top first. Image Orientation • Automatic: if you select Automatic, the Page Orientation options are not available. -
Page 93: Image Processing Tab
Image Processing tab A-61560 January 2007 The Image Processing tab displays the Image Mode and Mode information that was previously described. Refer to the section entitled “The main ISIS Driver tab” earlier in this chapter for descriptions. Document Type • Text: when the documents you want to scan contain mostly text. •... - Page 94 Options • Deskew automatically straightens a document within ±0.3 degrees of the leading edge of the document. Deskew can detect up to a 45-degree skew and correct up to a 24-degree angle at 200 dpi or a 10-degree skew angle at 300 dpi. This option is not available when Fixed to Transport or Relative to Document is selected.
-
Page 95: Scanner Tab
You can specify a time delay setting from 1 to 300 seconds. Energy Star — allows you to set the amount of time the scanner will remain inactive before the scanner goes into an idle state. Choices are: 0 to 60 minutes. - Page 96 Open dialog box. From the Open dialog box, select the desired .wav file and click OK. Calibrate — the Kodak i1200/i1300 Scanners automatically calibrate. This option is available if a Kodak representative directs you to calibrate the scanner using this option. A-61560 January 2007...
-
Page 97: Auto Color Detect Tab
Auto Color Detect tab A-61560 January 2007 The Auto Color Detect tab provides the following options. Color Content • Low: documents require only a small amount of color to be saved as color or grayscale images. Used for capturing documents that are primarily black text with small logos, or contain small amounts of highlighted text or small colorful photos. - Page 98 • Custom: makes the Color Amount and/or Color Threshold options available. NOTE: When setting Auto Color Detect values, it is suggested that you start with the Medium option and scan a typical job set. If too many documents were returned as color/grayscale vs. black and white, then change to the High option and re-run the job.
-
Page 99: Adjustments Tab
Adjustments tab A-61560 January 2007 The Adjustments tab provides the following options. Color Adjustment Red — changes the amount of red in the color image. Green — changes the amount of green in the color image. Blue — changes the amount of blue in the color image. •... - Page 100 • Apply to: - Predominant - smooths the predominant background color to white. - Neutral - smooths only the neutral color to white, and also smooths up to two additional background colors. - All - smooths the neutral color and up to two additional background colors to white.
-
Page 101: Dropout Tab
(i.e., remove the form’s lines and boxes). For black and white images, these settings effect the grayscale version of the document which the scanner analyzes to produce that electronic image. Enable Dropout Color the i1200/i1300 Series Scanners can drop... -
Page 102: Log Tab
The Log tab provides a listing of any errors that have been encountered. You can either save this information to a file by clicking the Save icon, or print the displayed information. Displays information about your scanner and driver. A-61560 January 2007... -
Page 103: Scan Area Dialog Box
The Scan Area dialog box is only available when Fixed to Transport or Relative to Document is selected on the Scanner Settings dialog box. Page Size the default paper size is set when a scanner is first selected. You can choose a different paper size using the drop-down... - Page 104 1/8-inch increments. This option is not available in Pixels mode. • X: the distance from the left end of the scanner to the left-edge of the scanning area. • Y: the position from the top end of the document to the top end of the scanning area.
-
Page 105: Maintenance
Do not use cleaners on hot surfaces. Allow surfaces to cool to ambient temperature before use. Kodak Scanners use replaceable tires that can feed a wide range of document types, sizes and thicknesses. Tire life and performance will vary based on the customer’s document set, the frequency of cleaning and transport and tires, and following the recommended schedule for changing tires. -
Page 106: Opening The Scanner Cover
• Press the scanner cover release lever and pull the scanner cover down. • When you finish cleaning the scanner or replacing a part, close the scanner cover. NOTE: The scanner cover cannot be opened when the input tray is in the closed position or when the output tray has the output tray extender attached to it. -
Page 107: Cleaning Or Replacing The Separation Module
Cleaning or replacing the separation module A-61560 January 2007 The separation module should be removed from the scanner for best cleaning results. NOTE: When removing or cleaning the separation module, it may be easier to access the separation module if you remove the input tray. - Page 108 4. Insert the separation module by aligning the pins and placing it into position. A-61560 January 2007...
-
Page 109: Replacing The Separation Module Tires
Replacing the separation module tires A-61560 January 2007 1. Push the separation module release lever down and lift the separation module up and out of position. 2. Holding onto the separation module, rotate the release lever back so you can access the separation roller. NOTE: Use caution as the separation module is spring-loaded and will snap back if you do not hold it in place. -
Page 110: Replacing The Pre-Separation Pad
6. Replace the separation roller in the separation roller housing. Be sure the separation roller snaps into place. 7. Reinstall the separation module. 1. Remove the separation module from the scanner by following the steps described previously in “Replacing the separation module and tires”... - Page 111 7. Align the side tabs of a new pre-separation pad with the slots on the separation module. 8. Push the pre-separation pad firmly in the slots until the pre- separation pad flap rests lightly against the separation module tires. 9. Reinstall the separation module. 10. Close the scanner cover.
-
Page 112: Cleaning Or Replacing The Feed Module
Cleaning or replacing the feed module Degradation of feeder performance, multiple feeds, stoppages, etc. indicate a need to change the feed module. Certain paper types such as carbonless paper or newsprint, or failure to clean regularly, and/or use of non-recommended cleaning solvents (do not clean with alcohol) can shorten the feed module life. - Page 113 A-61560 January 2007 2. Rotate the feed module upward and push it to the left to lift it out of position. 3. Manually rotate and wipe the feed module tires with a roller cleaning pad. 4. Inspect the feed module. If the feed module tires show signs of wear or damage, replace the tires or the feed module.
-
Page 114: Replacing The Tires On The Feed Module
Replacing the tires on the feed module 6. Insert the feed module by aligning the pins and pushing it toward the left to fit it into position. Be sure the gears are aligned and it snaps into place. 7. Reinstall the feed module cover by aligning the tabs in the slots and pushing the feed module cover down until it snaps into place. -
Page 115: Vacuuming The Scanner
Before cleaning the imaging area, it is suggested that you vacuum the inside of the scanner to remove any dust and debris. 1. Remove dust and debris from this area by using a Staticide wipe. Be careful not to scratch the imaging area when cleaning. -
Page 116: Supplies And Consumables
CAT No. 892 7717 • Kodak A4 Flatbed Accessory — the Kodak A4 Flatbed adds scanning capability for exception documents to your Kodak i1200/ i1300 Series Scanner. CAT No. 867 7288 •... -
Page 117: Troubleshooting
When an error is indicated, the indicator light will blink the same number of times as the number displayed in the function window. Therefore, if the scanner cover is open, the number “6” will be displayed in the function window and the indicator will flash red and blink six times. -
Page 118: Clearing A Document Jam
Clearing a document If your scanner stops scanning due to a document jam, follow the procedures below. IMPORTANT: Only use the tilt feature when the scanner cover is closed. 1. Open the scanner cover. 2. Remove any jammed documents from inside the scanner. -
Page 119: Problem Solving
• the scanner and tires are clean. • the feed module is installed properly and securely in place. • If you are scanning one-sided documents or are using a Kodak i1210 or i1310 Scanner, be sure the side you want to scan is facing the input tray (not facing you). -
Page 120: Appendix A Specifications
Specifications Scanner Type/Speed Kodak i1210 Scanner — a simplex scanner which provides scanning at up to 30 pages per minute in color, grayscale or black and white at 200 dpi. Kodak i1220 Scanner — a duplex scanner which provides scanning at up to 30 pages per minute in color, grayscale or black and white at 200 dpi. -
Page 121: Appendix Btwain Image Processing Terminology
• Pictures or Photographs A-61560 January 2007 If you have used previous scanners from Kodak, you will notice that the user interface has been updated. Many of the image processing features you are familiar with may have been renamed or moved. The table below will help you find the feature’s new name and/or location.. - Page 122 Feature: Cropping Location: Paper tab Options: • Automatic with Automatic Deskew • Automatic without Automatic Deskew • Document: Automatically Detect • Aggressive • Fixed to Transport without Overscan • Fixed to Transport with Overscan • Relative to Document Feature: Polarity Location: Imaging tab Options: •...
-
Page 123: Appendix C Warranty - Us And Canada Only
Kodak Scanners (excluding spare parts and consumables) distributed by Kodak or through Kodak’s authorized distribution channels: Kodak warrants that a Kodak Scanner, from the time of sale through the Limited Warranty period applicable to the Product, will be free of defects in materials or workmanship and will conform to the performance specifications applicable for the particular Kodak Scanner. -
Page 124: Warranty Exclusions
God or transportation, including (a) by a failure to properly package and ship the Scanner back to Kodak for warranty service in accordance with Kodak’s then current Packaging... -
Page 125: Installation Warning And Disclaimer
This will assist the Response Center in determining if the problem is the Kodak Scanner or another component and if the problem can be resolved over the phone. If the Response Center... -
Page 126: Packaging And Shipping Guidelines
Limited Warranty must obtain a Return Material Authorization number (“RMA”) by calling (800) 822-1414 and within ten (10) business days from the date of issuance of the RMA must return the Kodak Scanner to the address designated in the RMA at the end user’s own expense and risk, in compliance with Kodak’s current Packaging and... -
Page 127: On-Site Service
(800) 822-1414. To avoid service delays, Kodak urges end users to complete and return the enclosed Limited Warranty Registration Card at the first opportunity. If you cannot locate the Limited Warranty Registration card, you may register online at www.Kodak.com/go/warranty or by phone at (800) -
Page 128: Depot Service
Kodak’s receipt of the signed agreement. The malfunctioning product must be received by Kodak within ten (10) days of the end user’s receipt of the replacement product or the end user’s credit card will be charged the list price of the replacement product. -
Page 129: Important Restrictions
Alaska and Hawaii for products purchased from authorized distributors of Kodak. The Kodak Scanner will be ineligible for any service under warranty if the product falls under any of Kodak’s then-current Warranty Exclusions, including a purchaser’s failure to return defective products to Kodak in compliance with Kodak’s then...
Need help?
Do you have a question about the i1210 and is the answer not in the manual?
Questions and answers