Advertisement
Quick Links
5695341COM
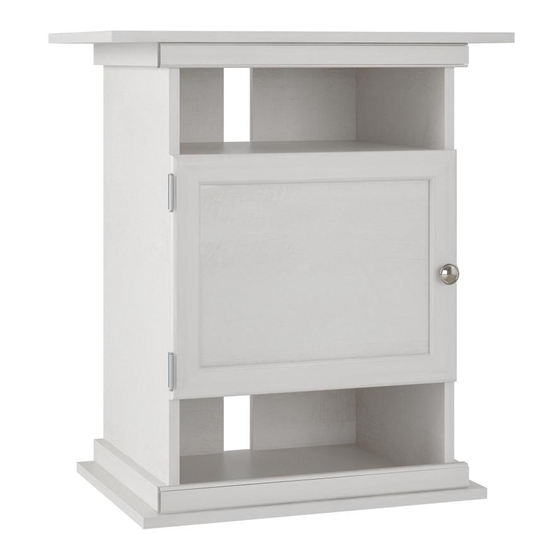
Aquarium Stand
Date of Purchase ___ / ___ / ___
Lot Number:
THIS INSTRUCTION BOOKLET CONTAINS IMPORTANT SAFETY INFORMATION. PLEASE READ AND KEEP FOR FUTURE REFERENCE.
Do Not Return This Product!
Contact our customer service team for help first.
Call: 1-800-489-3351 (toll free)
Monday-Friday 9am - 5pm CST
Visit: www.ameriwoodhome.com
WARNING
- Unit can tip over causing severe injury or death.
- Anchor unit to stud in wall (if instructed to).
- Do Not allow children to climb on unit.
- Put heavy items on lower shelves or drawers.
Easy
Assembly Difficulty Meter
Follow Ameriwood Home
You
Tube
B345695341COM0
Tough
Advertisement

Related Manuals for Ameriwood HOME 5695341COM


Summary of Contents for Ameriwood HOME 5695341COM
- Page 1 Visit: www.ameriwoodhome.com Easy Tough Assembly Difficulty Meter WARNING Follow Ameriwood Home - Unit can tip over causing severe injury or death. - Anchor unit to stud in wall (if instructed to). - Do Not allow children to climb on unit. Tube...
-
Page 2: Helpful Hints
Contact Us! Do NOT return this product! Contact our friendly customer service team first for help. Assembly Tips Call us! 1-800-489-3351 Monday-Friday 9am - 5pm CST Tube Visit ameriwoodhome.com to view the limited warranty valid in the U.S. and Canada. Helpful Hints PEOPLE NEEDED FOR ASSEMBLY: 1-2 ESTIMATED ASSEMBLY TIME: 1 HOUR... -
Page 3: Before You Start
Before You Start Read through each step carefully and follow the proper order Separate and count all your parts and hardware Give yourself enough room for the assembly process Have the following tools: Flat Head Screwdriver, #2 Phillips Head Screwdriver and Hammer Caution: If using a power drill or power screwdriver for screwing, please be aware to slow down and stop when screw is tight. -
Page 4: Board Identification
Board Identification Not actual size Small Shelf Large Shelf Fixed Shelf End Panel 35695341020 35695341030 35695341010 35695341040 Assembled Door Front Molding Back 35695341080 Side Molding 35695341050 35695341060 35695341070 ameriwoodhome.com Tube... - Page 5 Board Identification Not actual size Parts List ITEM PART NUMBER DESCRIPTION 35695341010 END PANEL 35695341020 SMALL SHELF 35695341030 LARGE SHELF 35695341040 FIXED SHELF 35695341050 BACK 35695341060 FRONT MOLDING 35695341070 SIDE MOLDING 35695341080 ASSEMBLED DOOR ameriwoodhome.com Tube...
-
Page 6: Part List
Part List Actual Size (x12) (x24) (x24) (x8) (x6) #A22620 #A21660 #A12920 #A22610 #A53840 cam lock cam bolt wood dowel 1-1/8" pan head angle bracket (x12) (x8) (x1) (x1) #A12210 #A11080 #A17400 #A52555 1/2" pan head 7/16" flat head 8-32 x 7/8" bolt knob (x1) (x2) - Page 7 STEP 1 Quick Assembly (x8) (x4) (x8) #A22610 #A21660 #A22620 Proper orientation of CAM LOCK Important: When using a power drill or power screwdriver for screwing, please be aware to slow down and stop when screw is tight. Failure to do so may result in stripping the screw.
- Page 8 STEP 2 Quick Assembly (x8) #A12920 Proper orientation of CAM LOCK Be sure the molding edges are flush with the end panel edges. Notice: You will have 2 end panels (A). You attach 2 side moldings (G) to each end panel (A). Make sure edges are flush with each other.
- Page 9 STEP 3 Quick Assembly (x16) (x8) #A22620 #A21660 Proper orientation of CAM LOCK Note: You will have 2 fixed shelves (D) and 2 backs (E). ameriwoodhome.com Tube...
- Page 10 STEP 4 (x16) Be sure to use the holes shown. #A22610 Finished Edge Finished Edge ameriwoodhome.com Tube...
- Page 11 STEP 5 (x6) (x6) #A53840 #A12210 Notice: You will have 2 front moldings (F). You will attach hardware to both front moldings (F). Make sure edge of molding is flush with the angle bracket surface. End View ameriwoodhome.com Tube...
- Page 12 STEP 6 (x6) #A12210 Attach a front molding (F) to both the small shelf (B) and large shelf (C) as shown. Do not fully tighten this screw. Finished Edge Finished Edge ameriwoodhome.com Tube...
- Page 13 STEP 7 Cam locks in fixed shelves (D) will face each other. Finished Edge Finished Edge ameriwoodhome.com Tube...
- Page 14 STEP 8 Finished Edge Finished Edge ameriwoodhome.com Tube...
- Page 15 STEP 9 You may need to adjust the front molding (F) while positioning the end panels (A) onto the large shelf (C). After end panels (A) are attached to the large shelf (C), make sure the front molding (F) is against the end panel front edges and tighten the three screws attaching the angle brackets to the large shelf (C).
- Page 16 STEP 10 Note: The finished edges of the backs (E) will face each other. Finished Edge * raw edges are shaded ameriwoodhome.com Tube...
- Page 17 STEP 11 You may need to adjust the front molding (F) during the attachment of the small shelf (B). After small shelf (B) is attached, tighten the screws attaching the angle brackets to the small shelf (B). ameriwoodhome.com Tube...
- Page 18 STEP 12 (x4) (x1) (x1) (x2) #A11080 #A17400 #A52555 #A60000 ameriwoodhome.com Tube...
- Page 19 STEP 13 Your model can be positioned with either shelf, small (B) or large (C) as it's top. Depending on the size of your aquarium, position your aquarium stand with the top that best suits your aquarium tank. Do not allow your aquarium tank to overhang the top that it sits on. ameriwoodhome.com Tube...
- Page 20 STEP 14 (x4) #A11080 (x1) #A31000 Determine what side you want the door to hinge from. The door can be attached to either side. Using four screws, mount the door (H) as shown. Using two screws, attach the magnetic catch to the opposite side from the hinges.
-
Page 21: Maximum Loads
Maximum Loads This unit has been designed to support the maximum loads shown. Exceeding these load limits could cause sagging, instability, product collapse, and/or serious injury. Note: The aquarium MUST NOT overhang the top of the aquarium stand. Maximum aquarium size for small shelf (B): Maximum aquarium size for large shelf (C): 10 gallons 20 gallons... - Page 22 Visit your local retailer's website, rate your purchased product and leave us some feedback! We would like to extend a big "Thank You" to all of our customers for taking the time to assemble this Ameriwood Home product, and to give us your valuable feedback. ameriwoodhome.com Tube...
- Page 23 Español Cubierta Delantera Este libro de instrucciones contiene información IMPORTANTE de seguridad. Por favor lea y manténgalo para referencia en el futuro. No Regrese este producto! Comuniquese con nuestro amistoso equipo de servicio al cliente para obtener ayuda. Llamenos al: 1-800-489-3351 (Gratis) Lunes - Viernes 9am - 5pm CST Visitar: www.ameriwoodhome.com PRECAUCION Este mueble puede volcarse y causar graves heridas y/o muerte.
- Page 24 Español Página 7 Importante: Cuando se utiliza un taladro eléctrico o corriente desarmador para atornillar, tenga en cuenta a despacio y se detendrá cuando el tornillo está apretado. No hacerlo puede resultar en despojar el tornillo. Página 8 Asegúrese de que los bordes de moldeo están al ras con los bordes de los paneles extremos. Asegúrese de que los bordes queden al ras del wih entre sí.
- Page 25 Visite el sitio web de su tienda local, califique su comprado y denos sus comentarios! Nos gustaría enviar un gran "Agradecimiento" a todos nuestros clientes por tomarse el tiempo de ensamblar este producto de Ameriwood Home, y por darnos sus valiosos comentarios. Gracias ameriwoodhome.com...
- Page 26 Français Couverture Avant CE LIVRET D'INSTRUCTION CONTIENT DES INFORMATIONS IMPORTANTES SUR LA SÉCURITÉ. VEUILLEZ LIRE ET GARDER POUR UNE RÉFÉRENCE FUTURE Ne retournez pas ce produit! Contactez notre équipe de service à la clientèle amicale d'abord pour obtenir de l'aide. Appelez-nous: 1-800-489-3351 (sans frais) du Lundi au Vendredi de 9h à...
- Page 27 Français Page 8 Assurez-vous que les bords de moulage sont alignés sur les bords de panneau d'extrémité. Assurez-vous que les bords sont à fleur de l'autre. Avis: Vous aurez 2 panneaux d'extrémité (A). Vous attachez 2 moulures latérales (G) à chaque panneau d'extrémité...
- Page 28 Visitez le site Web de votre détaillant local, évaluez votre produit acheté et laissez-nous quelques commentaires ! Nous tenons à offrir un grand "Merci" à tous nos clients pour avoir pris le temps d'assembler ce produit "Ameriwood Home", et de nous donner vos commentaires précieux. Merci ameriwoodhome.com...
Need help?
Do you have a question about the 5695341COM and is the answer not in the manual?
Questions and answers