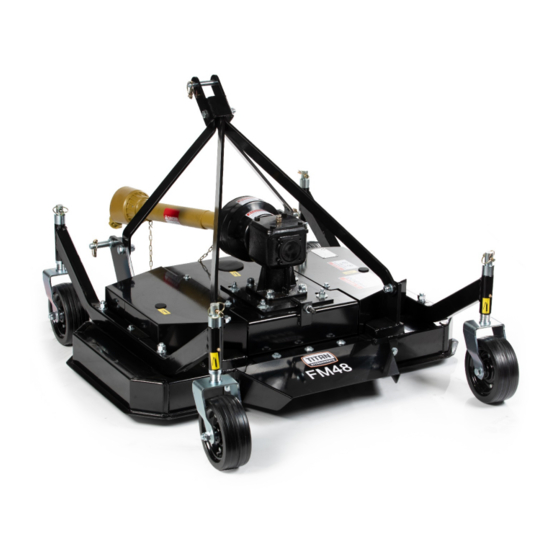
Summary of Contents for Titan Attachments FM48
- Page 1 OWNER’S MANUAL MPN(s): FM48, FM60, FM72 SKU(s): 191578, 191579, 191580 UPC(s): 840009219900, 840009219917, 840009219924...
- Page 2 IMPORTANT READ THESE INSTRUCTIONS BEFORE INSTALLING AND USING THIS IMPLEMENT...
-
Page 3: Safety Instructions
FM48/FM60/FM72 Finish Mower Instructions SAFETY INSTRUCTIONS Do not attempt to operate the mower until you have read the operator’s manual and all the safety signs on the mower. NOTE: The words Danger, Warning or Caution on the safety signs indicate a hazard or unsafe practice, which could result in injury or death if proper precautions are not taken. -
Page 4: Connecting To Tractor
Replace safety sign immediately if it become damaged, torn, or illegible. OPERATING INSTRUCTIONS The Finish Mower is designed to be used on a tractor with a standard category 1 three-point hitch. Using excessive power will shorten the life of the drive train components. CONNECTING TO TRACTOR Park the mower and tractor on a level dry area free of debris and foreign objects. -
Page 5: Field Operation
FIELD OPERATION 1. The mower works best on dry grass. Slower cutting speed and occasional cleaning may be required on damp or wet grass. 2. The PTO must run at the full 540 rpm for a good cut. Slower speeds or double cutting could be required for very high grass. - Page 6 Finishing Mower Series Packing List and Installation Instructions NOTE: Please check the mower and accessory packages carefully after receiving and read this instruction before installation.
- Page 7 1 Packing Description 1.1 Remove and check Remove any loose parts or packaging from the crate. Check goods without damage and omission. FIGURE 1: Your New Mower as It Is Shipped to You FIGURE 2: The Mower and Accessory In The Crate...
- Page 8 1.2 Packing List The detailed packing list as the following table 1. DESCRIPTION Package Form Wheel Bracket assy. Bubble Film Mower Deck Body None Discharge Guide and Fittings Bubble Film Short Pivot Bar and Fittings Bubble Film Long Pivot Bar and Fittings Bubble Film Wheel Frame and Fittings Bubble Film...
- Page 9 The detailed description of discharge guide and fittings FIGURE 4: Discharge Guide and Fittings DESCRIPTION Discharge Guide Plate Large Plain Washer 10 Locknut M10 Bolt M10x25 Plain Washer 10 LABLE 3: Discharge guide and Fittings List The detailed description of short pivot bar and fittings FIGURE 5: Short Pivot Bar and Fittings DESCRIPTION Short Pivot Bar...
- Page 10 The detailed description of long pivot bar and fittings FIGURE 6: Long Pivot Bar and Fittings DESCRIPTION Long Pivot Bar Locknut M16 Plain Washer 16 Bolt M16x50 LABLE 5: Long Pivot Bar and Fittings List The detailed description of Wheel Frame and fittings FIGURE 7: Wheel Frame and Fittings...
- Page 11 DESCRIPTION Bolt M16x95 Plain Washer 16 Wheel Frame Spring Washer 16 Nut M16 Large Plain Washer 8 Spring Washer 8 Bolt M8x16 LABLE 6: Wheel Frame and Fittings List The detailed description of Upper Lift Bracket and fittings FIGURE 8: Upper Lift Bracket and Fittings DESCRIPTION Upper Lift Bracket Hitch pin-Upper...
- Page 12 2 Installation Wizard The installation wizard will guide you to finish the final assembly of your new mower easily. 2.1 Tool Required • 1/2” Ratchet Wrench with 13mm,16mm,24mm sleeves 17-19, 22-24 • Spanner Side cutter or Industrial Scissors • Safety Goggles and Gloves •...
- Page 13 FIGURE 9: Installing Long, Short Pivot Bar, Upper Lift Bracket and Fittings Step2: Installing Wheel Frame and Fittings Remove the packaging of wheel frame and fittings. Assemble 2pcs of wheel frames on the mower deck body. Parts: 4pcs of Bolts M16x95, 8pcs of plain washers 16, 4pcs of spring washers 16, 4pcs of nuts M16, 2pcs of bolt M8x16, 2pcs of plain washers 8 and 2pcs of large plain washers 8.
- Page 14 FIGURE 10: Installing Wheel Frame and Fittings Step3: Installing wheel bracket assembly and Fittings Remove the packaging of wheel bracket assembly and fittings. Assemble wheel bracket assemblies on wheel frame as well as spacers. Through the combination of spacers with different height to get the mowing height you need. Parts: 4pcs of wheel bracket assemblies.
- Page 15 Make sure all wheel height adjustments are same, otherwise it will lead to uneven mowing. FIGURE 11: Installing wheel Bracket and Fittings Step4: Installing discharge guide and Fittings Remove the packaging of discharge guide and fittings. Assemble discharge guide on mower deck body using included fittings. Parts: 4pcs of bolts M10x25, 3pcs of plain washers 10, 7pcs of large plain washer 10 and 5pcs of locknuts M10.
- Page 16 PARTS DIAGRAM / EXPLODED VIEW...
- Page 21 This concludes the Finish Mower Owner’s Manual. If applicable to your product, make sure to tighten all nut-and-bolt combinations before use. Enjoy! TITAN LIMITED WARRANTY: TERMS, EXCLUSIONS AND LIMITATION OF REMEDIES This product comes with a one (1) year limited warranty that can be found at palletforks.com/warranty.html.


Need help?
Do you have a question about the FM48 and is the answer not in the manual?
Questions and answers