Table of Contents
Advertisement
Quick Links
Advertisement
Table of Contents

Related Manuals for Thames & Kosmos WindBots 6-IN-1 WIND-POWERED MACHINE KIT


Summary of Contents for Thames & Kosmos WindBots 6-IN-1 WIND-POWERED MACHINE KIT
- Page 1 EXPERIMENT MANUAL Feel the Wind! No motor or batteries required! Franckh-Kosmos Verlags-GmbH & Co. KG, Pfizerstr. 5-7, 70184 Stuttgart, Germany | +49 (0) 711 2191-0 | www.kosmos.de Thames & Kosmos, 89 Ship St., Providence, RI, 02903, USA | 1-800-587-2872 | www.thamesandkosmos.com...
-
Page 2: Kit Contents
Good to know! u wissen! KIT CONTENTS If you are missing any parts, please contact Thames & Kosmos customer service What’s inside your experiment kit: (see back cover). Round Shaft Sponge Sponge 4 pcs 1 pc Fan Blade Oil Bag P12 Foam Pad Please oil ONLY the 180°... -
Page 3: Table Of Contents
WindBots CONTENTS Additional information Inside front cover Kit Contents ........can be found in the Table of Contents ............check it out sections on Safety Information ............21 and 52. pages Important Information ..........ASSEMBLY STARTS ON PAGE 4 Introducing the WindBots ........Assembly Tips ............ -
Page 4: Safety Information
SAFETY INFORMATION WARNING Not suitable for children under 3 years. Choking hazard — small parts may be swallowed or inhaled. WARNING. This kit contains functional sharp edges or points. Do not injure yourself! Keep the packaging and instructions as they contain important information. -
Page 5: Important Information
WindBots IMPORTANT INFORMATION Dear Parents and Supervising Adults, Children want to explore, understand, and create new things. They want to try things and do it by themselves. They want to gain knowledge! They can do all of this with Thames & Kosmos experiment kits. With every single experiment, they grow smarter and more knowledgeable. -
Page 6: Assembly Starts
INTRODUCING THE WINDBOTS Surf Bot This buoyant machine lets me explore the sea. The wind drives a fin that lets me swim like a fish. hello! My name is luca and I live in storm City. There Quadruped is always a stiff breeze blowing here. - Page 7 Introducing the WindBots Walker Bot Drill Dozer This two-footed robot uses wind energy The wind powers the drill and drives the to walk. The more headwind blows dozer forward at the same time. It’s a big against me, the more progress I make. help on the construction site.
- Page 8 ASSEMBLY USEFUL TIPS THE MODULES Before you start building the models, you will assemble the wind machine with hand crank and the various modules. These modules make it easier for you to build the models later, and they are useful when you want to convert one model into another because the modules do not have to be disassembled.
-
Page 9: Assembly Tips
Assembly Tips HOW TO USE PART D28 LOOSENING D27 (UPPER PART): LOOSENING D27 (BOTTOM PART): Press PUSH LOOSENING P13: PULL PULL Pull PULL LOOSENING D27: Pull PULL PULL PULL... - Page 10 Yay! Let’s start building! Before you start building the models, you will build various modules. These modules make it easier for you to build the models later, and they are very useful when you want to convert one model into another, as the modules will not have to be taken apart again.
-
Page 11: Assembling The Wind Machine
Assembling the Wind Machine — Rubriktitel Blindtext ASSEMBLING THE WIND MACHINE Remove all burrs before assembling. (round axle) (round axle) Actual size Actual size Actual size (White) (White) Actual size (White) (White) D28 (Tool) D28 (Tool) Press or lightly tap with the handle of the PUSH PUSH screwdriver. - Page 12 ASSEMBLING THE WIND MACHINE = Apply oil When you see this symbol, oil the parts as shown. Do not put oil on other parts. Tissue Paper Place a cup on top of a piece of tissue paper. Pour the contents of the oil packet into the cup.
- Page 13 Assembling the Wind Machine — Rubriktitel Blindtext Done! Wind Machine Turn the handle clockwise to create wind. To avoid injuries, never allow the fan blades to come into contact with people or objects when turning the crank! Please note that holding the fan blades Hold the blades of the fan while cranking the handle can cause with your fingers while...
-
Page 14: Assembling The Modules
ASSEMBLING THE MODULES GEAR MODULE A Do not cut off this part. Side view Done! TEST GEAR MODULE A Gear module A After the test, use D28 to loosen P13, as shown on page 7. - Page 15 Assembling the Modules — Rubriktitel Blindtext GEAR MODULE B Remove all burrs before assembling. (White) A9x2 Actual size (White) A9x2 Actual size (Tool) (Tool) PUSH Press PUSH Top view (White) (White) Actual size Actual size...
- Page 16 ASSEMBLING THE MODULES Actual size (White) Top view (White) (White) (Tool) (Tool) (Tool) Actual size Press PUSH PUSH PUSH (White) (White) (White) Actual size...
- Page 17 Assembling the Modules — Rubriktitel Blindtext Done! TEST GEAR MODULE B Gear module B After the test, use D28 to loosen P13, as shown on page 7.
- Page 18 ASSEMBLING THE MODULES Remove all burrs GEAR MODULE C before assembling. (Orange) (Orange) Actual (White) size (White) Actual size (White) (White) (Tool) (Tool) PUSH Press PUSH (Tool) (Tool) Press PUSH PUSH Remove A9 and save it for the next step. (Orange) (Orange) (White)
- Page 19 Assembling the Modules — Rubriktitel Blindtext Top view (White) (White) Actual size (White) PUSH PUSH PUSH Press 90° 90° 90° (White) (White) (White) Actual size...
- Page 20 ASSEMBLING THE MODULES Done! TEST GEAR MODULE C Gear module C After the test, use D28 to loosen P13, as shown on page 7.
- Page 21 Assembling the Modules — Rubriktitel Blindtext GEAR MODULE D Remove all burrs before assembling. Burr Burr Burr Burr Burr 90° 90° 90° 90° 90° Burr Burr Burr Burr Burr Remove all burrs before assembling. Burr Burr Burr Burr Burr Burr Burr Burr Burr...
- Page 22 ASSEMBLING THE MODULES PILOT MODULE Pilot module Done! COCKPIT MODULE Cockpit module Done! WHEELS P15– P15– P15– P15– P15– P15 Foam sticker sheet P15– P15 Foam sticker sheet P15– P15 Foam sticker sheet P15– P15 Foam sticker sheet FOOT MODULE P15 Foam sticker sheet P15 Foam sticker sheet P15 Foam sticker sheet...
-
Page 23: Check It Out: Locomotion With Wind Power
Check It Out CHECK IT OUT Locomotion with Wind Power Humans have been using the wind for a very long time to move boats across the water. The first known sail boats traveled on rivers or near the coast more than 7,000 years ago. - Page 24 Wow! Moving with the wind! Now you can start building your models. The assembly steps are shown for one model after another. Be sure to read the helpful tips on pages 6 and 7 before you start.
-
Page 25: Assembling The Surf Bot
Assembling the Surf Bot ASSEMBLING THE SURF BOT Gear Pilot module A module Actual size D27 x3 D27 x3 D27 x3 D27 x3... - Page 26 ASSEMBLING THE SURF BOT Gear module A Pilot module...
- Page 27 Assembling the Surf Bot Done! HOW TO OPERATE: Put the Surf Bot in water. Wind machine Warning. Only to be used in water in which the child is within its depth and under adult supervision.
-
Page 28: Assembling The Walker Bot
ASSEMBLING THE WALKER BOT Gear Pilot Foot module module B module Actual Actual Actual size size size A24 x4 A24 x4 A24 x4 B7 x2 B7 x2 B7 x2 Actual size D27 x8 D27 x8 D27 x8 Gear module B Actual size... - Page 29 Assembling the Walker Bot Actual Actual size size...
- Page 30 ASSEMBLING THE WALKER BOT Foot module Foot module Pilot module HOW TO OPERATE: Wind machine Done!
-
Page 31: Assembling The Drill Dozer
Assembling the Drill Dozer ASSEMBLING THE DRILL DOZER Gear Pilot Wheel module C module Actual size A16x2 B20 x2 A16x2 B20 x2 A16x2 B20 x2 Actual size D27 x2 D27 x2 D27 x2 Gear module C 90° 90° 90°... - Page 32 ASSEMBLING THE DRILL DOZER Wheel...
- Page 33 Assembling the Drill Dozer P15 Foam sticker sheet P15 Foam sticker sheet P15 Foam sticker sheet P15 Foam sticker sheet P15– P15– P15– P15– P15– P15– P15– P15–...
- Page 34 ASSEMBLING THE DRILL DOZER 90° 90° 90° 90° 90° Pilot module Done! HOW TO OPERATE: Wind Machine...
-
Page 35: Assembling The Quadruped
Assembling the Quadruped ASSEMBLING THE QUADRUPED Gear Pilot Cockpit module C module module B9 x2 B12 x2 B9 x2 B12 x2 B9 x2 B12 x2 D14 x2 D14 x2 D14 x2 Gear module C... - Page 36 ASSEMBLING THE QUADRUPED Pilot module Cockpit module...
- Page 37 Assembling the Quadruped P12 Foam Pad P12 Foam Pad P12 Foam Pad P12 Foam Pad P12 Foam Pad P12 Foam Pad 180° 180° 180° 180° 180° 180° P12 Foam Pad P12 Foam Pad P12 Foam Pad P12 Foam Pad P12 Foam Pad P12 Foam Pad 180°...
- Page 38 ASSEMBLING THE QUADRUPED Done! HOW TO OPERATE: Wind machine...
-
Page 39: Assembling The Flying Machine
Assembling the Flying Machine ASSEMBLING THE FLYING MACHINE Gear Gear Pilot module module A module B Foot module Actual Actual A10 x2 A13 x2 B6 x2 size size A10 x2 A13 x2 B6 x2 Actual Actual B14x2 B16 x2 size size B14x2 B16 x2... - Page 40 ASSEMBLING THE FLYING MACHINE P15 Foam sticker sheet P15 Foam sticker sheet P15 Foam sticker sheet P15– P15– P15– Gear module A...
- Page 41 Assembling the Flying Machine Front view Press Press Side view Gear module B...
- Page 42 ASSEMBLING THE FLYING MACHINE...
- Page 43 Assembling the Flying Machine Actual Actual size size Left wing module...
- Page 44 ASSEMBLING THE FLYING MACHINE Actual Actual size size Right wing module...
- Page 45 Assembling the Flying Machine Right wing module Left wing module 180° 180° 180° Pilot module...
- Page 46 ASSEMBLING THE FLYING MACHINE Pick up the flying machine from the base, not the top. Done! HOW TO OPERATE: Wind machine...
-
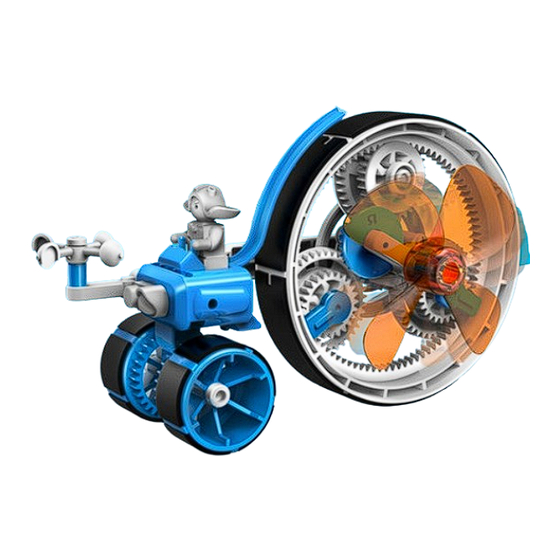
Page 47: Assembling The Big Wheel Tricycle
Assembling the Big Wheel Tricycle ASSEMBLING THE BIG WHEEL TRICYLE Gear Pilot Cockpit module D module module Wheel Actual A12 x2 size A12 x2 B20 x2 B20 x2 C13 x2 C13 x2 Cockpit module... - Page 48 ASSEMBLING THE BIG WHEEL TRICYCLE 180° 180° 180° 180° Wheel Wheel...
- Page 49 Assembling the Big Wheel Tricycle Remove all burrs Remove all before assembling. burrs before assembling. Burr Burr Burr Burr Burr Burr Burr Burr Burr Burr Burr Burr...
- Page 50 ASSEMBLING THE BIG WHEEL TRICYCLE Remove all burrs before assembling. burr burr burr burr P15 Foam sticker sheet P15 Foam sticker sheet P15– P15– P15– P15–...
- Page 51 Assembling the Big Wheel Tricycle...
- Page 52 ASSEMBLING THE BIG WHEEL TRICYCLE Front View Gear module D...
- Page 53 Assembling the Big Wheel Tricycle Pilot module Done! HOW TO OPERATE: Wind machine...
-
Page 54: Check It Out: Harnessing Nature's Power
CHECK IT OUT Learning From Nature Humans aren’t the only ones who have been using the wind for transportation — plants and animals have used wind power to get around for millions of years. Think of birds that can glide through the air for hours on end, barely flapping their wings to stay in flight. - Page 55 Check It Out Modern wind turbines use generators to produce electricity. The blades of the wind turbine are set in motion by the wind and drive the generator. This principle has been used in windmills for centuries. The only difference is that the windmills do not drive electric generators, but rather millstones, which turn grain into flour.
- Page 56 2nd Edition © 2022 Franckh-Kosmos Verlags-GmbH & Co. KG, Pfizerstrasse 5 – 7, 70184 Stuttgart, Germany This work, including all its parts, is copyright protected. Any use outside the specific limits of the copyright law is prohibited and punishable by law without the consent of the publisher. This applies specifically to reproductions, translations, microfilming, and storage and processing in electronic systems and networks.
Need help?
Do you have a question about the WindBots 6-IN-1 WIND-POWERED MACHINE KIT and is the answer not in the manual?
Questions and answers