Table of Contents
Advertisement
Quick Links
Advertisement
Table of Contents

Summary of Contents for DALBO DINCO CLASSIC 300
- Page 1 DINCO CLASSIC 300/380/470 Serial no: 3400-xxxx...
- Page 3 Congratulations on your new DINCO CLASSIC cultivator. For safety reasons and for optimal use of the machine, please read the following instructions carefully before putting the machine into operation. © Copyright 1995. All rights reserved DALBO Items which are important as regards safety are preceded by a ...
-
Page 5: Table Of Contents
DINCO CLASSIC Table of Contents TABLE OF CONTENTS ..............................5 EMPLOYMENT ................................6 DINCO CLASSIC ............................6 DVANTAGES OF USING SAFETY ..................................7 CONNECTING AND DISCONNECTING ..........................8 ....................................8 ONNECTING ..................................... 8 ISCONNECTING ............................8 ANDLING WITHOUT THREE POINT HITCHES ADJUSTMENT................................. -
Page 6: Employment
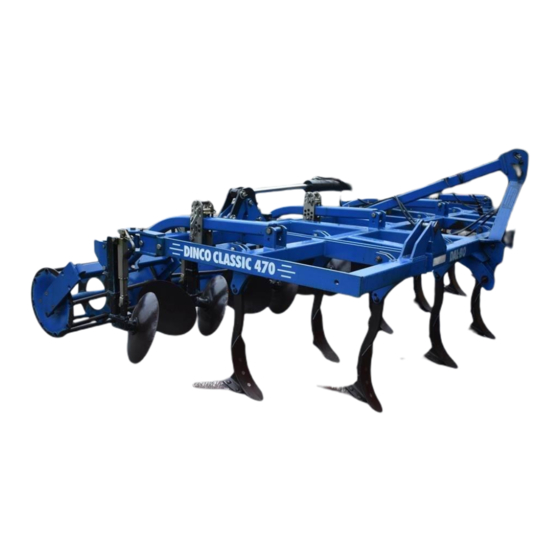
Employment DINCO CLASSIC is a light cultivator, which has been designed to work down stubble and crop residues. Owing to the large ground clearance and the distance between the tines great amounts of crop residues can be worked down. DINCO CLASSIC has been designed to obtain complete cutting by which the growth of both crop and weeds is stopped. -
Page 7: Safety
DINCO CLASSIC is only to be used in ordinary fieldwork. DINCO CLASSIC should not be used in deforestation or the breaking up of old roads, paving stones or the like. If in doubt, please contact your DINCO CLASSIC Classic-agent or DALBO. ... -
Page 8: Connecting And Disconnecting
Connecting and disconnecting DINCO CLASSIC is constructed according to the DS/ISO 730-1 category II and III. If the lift construction on the tractor is not designed for this, please contact your DALBO agent. Connecting First mount the lift arm with the lift pins. Then mount the toplink. Adjust the toplink so that the frame is in a horizontal position. -
Page 9: Adjustment
DINCO CLASSIC Adjustment DINCO CLASSIC has been adjusted from the manufacturer. A fine adjustment is, however, always necessary before putting the machine into use. Several possible adjustments make your DINCO CLASSIC more versatile thus making the optimal utilisation of the machine possible. Adjustment of depth Cultivation depth is controlled by the rear roller in the form of a cage roller or a t-ring rear roller. -
Page 10: The Angle Of The Tine
The correct adjustment of the discs leaves the field level with no visible traces of the harrow tines. Fine adjustment of the discs is done with the spindle (A) and not until actually in the field. Discs must be adjusted to work the topsoil, so that a suitable quantity of earth is thrown back after the harrow tine. -
Page 11: Driving And Operating
DINCO CLASSIC Driving and operating The right operation is important to obtain the optimal utilisation of your DINCO CLASSIC Classic. This applies to fieldwork as well as security. Each day before work is started check that no nuts or bolts are loose and that all splits pins are intact. -
Page 12: Speed
On the models for the German market side discs for levelling the outside of the outermost tine are standard equipment whereas models for other markets are equipped with covering discs on the outermost tines. Side discs are therefore considered extras on markets other than the German (see ”Accessories, Side discs”). Speed To obtain optimal tillage a working speed of 6-7 mph (10-12 kph) is recommended. -
Page 13: Maintenance
DINCO CLASSIC Maintenance Proper maintenance lengthens the life span of the DINCO CLASSIC and thus secures optimal utilisation of the implement. For that reason grease nipples have been placed where the most wear happens. All nuts and bolts should be tightened up after the first day. Pins and bolts should be checked to avoid damage. -
Page 14: Other Things
Other things Avoid spilling oil on the ground. Should it happen anyway, gather it together and deliver it for destruction. When parked under damp conditions for a longer period piston rods should be lubricated in oil or fat to avoid corrosion. Cleaning and checking When the season is over, the machine should be cleaned for dirt and moist attracting material. -
Page 15: Accessories
DINCO CLASSIC Accessories Various forms of accessories for DINCO CLASSIC exist, e.g. crumblers and side discs. Other accessories are lights and seeddrills. Crumbler The crumbler is mounted behind the rear roller and gives an extra working of the field. The crumbler is designed as a roller with a smaller diameter than the rear roller, which means a faster rotation and thereby a more effective crushing of clods. -
Page 16: Driving And Adjusting
3. Bolt the rotation stand to the bearing of the rear roller (D, fig. 8). 4. Mount the flange bearings loosely on the crumbler shaft 5. Roll the crumbler in between the bearings (B, fig. 8). 6. Bolt the flange bearings to the bearing. 7. -
Page 17: Replacement And Repair
DINCO CLASSIC Replacement and repair All repairs and maintenance in connection with DINCO CLASSIC should be done while DINCO CLASSIC stands properly on the ground and thus rests securely on the ground. It is very dangerous to stay under DINCO CLASSIC when it is lifted without being properly supported. -
Page 18: Replacing Bearings
Replacing bearings When DINCO CLASSIC is lowered the rear roller is supported so that the arms (A) rests on the lower pin (B). 1. Remove the bolts in each side of the flange bearings (C). 2. The cage roller/t-ring roller can be rolled away. 3. -
Page 19: Replacing Scrapers
DINCO CLASSIC Replacing scrapers 1. Screw the adjustment bolts (A, fig. 8) all the way in. 2. Remove the bolts, which fasten the rotation, stand (C, fig. 8) and splitpin and washer can be removed. 3. Mount the old rotation stand on the new scraper and mount in reverse order. Replacing rear roller When replacing the cage roller or t-rings follow the same procedure as when replacing bearings. -
Page 20: Scrapping
Scrapping Support DINCO CLASSIC on strong trestles so that the tines are free of the ground. Make sure that there is no danger of falling or getting trapped under the implement. A crane or the like should be used to dismantle the parts from the frame. ... -
Page 21: Spare Parts
DINCO CLASSIC Spare parts Page 21...
Need help?
Do you have a question about the DINCO CLASSIC 300 and is the answer not in the manual?
Questions and answers