Table of Contents
Advertisement
Quick Links
This manual contains test procedures and test information obtained by an ASE Certified Master Technician with
known good test equipment on real vehicles, your tests may vary due to your equipment or technician procedures.
No warranty can be made from the ideas presented due to personal testing procedures, nor does the author or
anyone connected with him assume responsibilities or liabilities. The use of this manual is conditional on the
acceptance of this disclaimer. If the terms of this disclaimer are not acceptable, please return this manual.
Content authored for Automotive Video Inc. by Heritage Technical LLC, Cochranville, PA. Copyrighted © in 2010 by
Heritage Technical LLC. No portion of this manual may be copied, altered, or reproduced without written permission
of the author.
OVERVIEW . . . . . . . . . . . . . . . . . . . . . . . . . . . . . . . . . . . . . . . . . . . . . . . .2
COMMON CONNECTORS AND COMPONENTS . . . . . . . . . . . . . . . . . .4
GETTING STARTED . . . . . . . . . . . . . . . . . . . . . . . . . . . . . . . . . . . . . . . . .4
SETTING UP THE TECH 2 . . . . . . . . . . . . . . . . . . . . . . . . . . . . . . . . . . . .5
Power Up And Display . . . . . . . . . . . . . . . . . . . . . . . . . . . . . . . . . . . .5
HOW TO FIND THE ONLINE MANUALS . . . . . . . . . . . . . . . . . . . . . . . . .6
UPDATING THE SOFTWARE VERSION . . . . . . . . . . . . . . . . . . . . . . . . .7
Tech 2 Update Procedures . . . . . . . . . . . . . . . . . . . . . . . . . . . . . . . .8
NATIONAL AUTOMOTIVE SERVICE TASK FORCE (NASTF) . . . . . . . .11
REGISTERING AN ACCOUNT WITH TIS2WEB . . . . . . . . . . . . . . . . . . .13
TIS2WEB OVERVIEW . . . . . . . . . . . . . . . . . . . . . . . . . . . . . . . . . . . . . . .15
SETTING UP TECH 2 VIEW (T2 VIEW) . . . . . . . . . . . . . . . . . . . . . . . . .16
MAIN MENU NAVIGATION . . . . . . . . . . . . . . . . . . . . . . . . . . . . . . . . . .17
POWERTRAIN NAVIGATION MENU . . . . . . . . . . . . . . . . . . . . . . . . . . .18
Building A Vehicle In The Tech 2 . . . . . . . . . . . . . . . . . . . . . . . . . . .18
1. Select the year of the vehicle . . . . . . . . . . . . . . . . . . . . . . . . .20
2. Select the vehicle type . . . . . . . . . . . . . . . . . . . . . . . . . . . . . . .21
3. Select the vehicle make . . . . . . . . . . . . . . . . . . . . . . . . . . . . . .21
4. Select the product line . . . . . . . . . . . . . . . . . . . . . . . . . . . . . . .22
5. Select the engine type . . . . . . . . . . . . . . . . . . . . . . . . . . . . . . .22
POWERTRAIN NAVIGATION MENU REVIEW . . . . . . . . . . . . . . . . . . . .23
Diagnostic Menu . . . . . . . . . . . . . . . . . . . . . . . . . . . . . . . . . . . . . . . .23
Diagnostic trouble codes (DTCs) . . . . . . . . . . . . . . . . . . . . . . . . .24
Data display . . . . . . . . . . . . . . . . . . . . . . . . . . . . . . . . . . . . . . . . . .26
Special functions . . . . . . . . . . . . . . . . . . . . . . . . . . . . . . . . . . . . . .27
Using the CANDi module . . . . . . . . . . . . . . . . . . . . . . . . . . . . . . . .29
CLEARING DIAGNOSTIC TROUBLE CODES (DTCS) . . . . . . . . . . . . . .31
VEHICLE CONTROL SYSTEMS . . . . . . . . . . . . . . . . . . . . . . . . . . . . . . .32
BCM Data . . . . . . . . . . . . . . . . . . . . . . . . . . . . . . . . . . . . . . . . . . . . . .32
QUICK SNAPSHOT . . . . . . . . . . . . . . . . . . . . . . . . . . . . . . . . . . . . . . . . .34
Recording Data . . . . . . . . . . . . . . . . . . . . . . . . . . . . . . . . . . . . . . . . .34
POWERTRAIN NAVIGATION . . . . . . . . . . . . . . . . . . . . . . . . . . . . . . . . .35
Power Steering Control Module . . . . . . . . . . . . . . . . . . . . . . . . . . . .35
Data Display . . . . . . . . . . . . . . . . . . . . . . . . . . . . . . . . . . . . . . . . . . . .36
Disclaimer of Warranties:
Automotive Video, Inc.
6280 Arc Way
Ft. Myers, FL 33966
1-800-71-TRAIN (1800-718-7246)
fax: 1-239-561-9111
www.auto-video.com
TABLE OF CONTENTS
TECH 2 VIEW . . . . . . . . . . . . . . . . . . . . . . . . . . . . . . . . . . . . . . . . . . . . .38
Special Functions . . . . . . . . . . . . . . . . . . . . . . . . . . . . . . . . . . . . . . .38
Module ID Information . . . . . . . . . . . . . . . . . . . . . . . . . . . . . . . . . . .38
SPECIAL FUNCTIONS . . . . . . . . . . . . . . . . . . . . . . . . . . . . . . . . . . . . . .39
Body Control Module . . . . . . . . . . . . . . . . . . . . . . . . . . . . . . . . . . . . .39
Instrument Panel Cluster . . . . . . . . . . . . . . . . . . . . . . . . . . . . . . . . .41
Lighting Systems . . . . . . . . . . . . . . . . . . . . . . . . . . . . . . . . . . . . . . . .42
EVAP Systems . . . . . . . . . . . . . . . . . . . . . . . . . . . . . . . . . . . . . . . . . .43
BASIC COMPONENT TESTS . . . . . . . . . . . . . . . . . . . . . . . . . . . . . . . . .44
Diagnostic Trouble Codes (DTCs) . . . . . . . . . . . . . . . . . . . . . . . . . . .44
REPROGRAMMING . . . . . . . . . . . . . . . . . . . . . . . . . . . . . . . . . . . . . . . .45
Getting Prepared . . . . . . . . . . . . . . . . . . . . . . . . . . . . . . . . . . . . . . . .45
Vehicle Setup . . . . . . . . . . . . . . . . . . . . . . . . . . . . . . . . . . . . . . . . . . .45
Performing The Reprogram . . . . . . . . . . . . . . . . . . . . . . . . . . . . . . .47
Reprogramming Calibration Information . . . . . . . . . . . . . . . . . . . .50
TECH 2 VIEW . . . . . . . . . . . . . . . . . . . . . . . . . . . . . . . . . . . . . . . . . . . . .52
Oil Life Monitor Reset . . . . . . . . . . . . . . . . . . . . . . . . . . . . . . . . . . . .52
EVAP SERVICE BAY TESTING . . . . . . . . . . . . . . . . . . . . . . . . . . . . . . . .54
Setting Up . . . . . . . . . . . . . . . . . . . . . . . . . . . . . . . . . . . . . . . . . . . . . .54
CHECKING FOR LEAKS . . . . . . . . . . . . . . . . . . . . . . . . . . . . . . . . . . . . .55
EVAP Testing Using A Smoke Machine And The Tech 2 . . . . . . . .55
GM MDI INTERFACE . . . . . . . . . . . . . . . . . . . . . . . . . . . . . . . . . . . . . . .56
Overview . . . . . . . . . . . . . . . . . . . . . . . . . . . . . . . . . . . . . . . . . . . . . . .56
Online Information . . . . . . . . . . . . . . . . . . . . . . . . . . . . . . . . . . . . . .58
What Is Included In The Kit . . . . . . . . . . . . . . . . . . . . . . . . . . . . . . .59
GM MDI VS THE MASTERTECH VCI . . . . . . . . . . . . . . . . . . . . . . . . . . .60
What Is The Difference . . . . . . . . . . . . . . . . . . . . . . . . . . . . . . . . . . .60
GM MDI SOFTWARE . . . . . . . . . . . . . . . . . . . . . . . . . . . . . . . . . . . . . . .60
Setting Up The GDS Software And GM MDI Manager . . . . . . . . .60
GDS SOFTWARE . . . . . . . . . . . . . . . . . . . . . . . . . . . . . . . . . . . . . . . . . .61
Basic Navigation . . . . . . . . . . . . . . . . . . . . . . . . . . . . . . . . . . . . . . . .61
Data Display . . . . . . . . . . . . . . . . . . . . . . . . . . . . . . . . . . . . . . . . . . .66
Vehicle & Module Diagnosis . . . . . . . . . . . . . . . . . . . . . . . . . . . . . .67
REVIEW . . . . . . . . . . . . . . . . . . . . . . . . . . . . . . . . . . . . . . . . . . . . . . . . . .68
MDI Tool And GDS Software . . . . . . . . . . . . . . . . . . . . . . . . . . . . . .68
1-800-71-TRAIN (1-800-718-7246) OR www.auto-video.com
BOSCH TECH 2
Presented by Bob Pattengale
1
Advertisement
Table of Contents

Related Manuals for Bosch TECH 2


Summary of Contents for Bosch TECH 2
-
Page 1: Table Of Contents
SETTING UP THE TECH 2 ........5... -
Page 2: Overview
Tech 1. The Tech 1 began in 1994 and was in use until late 1995. In 1996 GM moved to the Tech 2. The Tech 2 began in 1992 and continues to service the current vehicles of today. - Page 3 • Saab 9-4X As we cover these tools during the presentation, our primary focus will be on the Tech 2 with an introduction to the MDI. Later we will discuss the use of an inexpensive device that can be used for GM reprogramming.
-
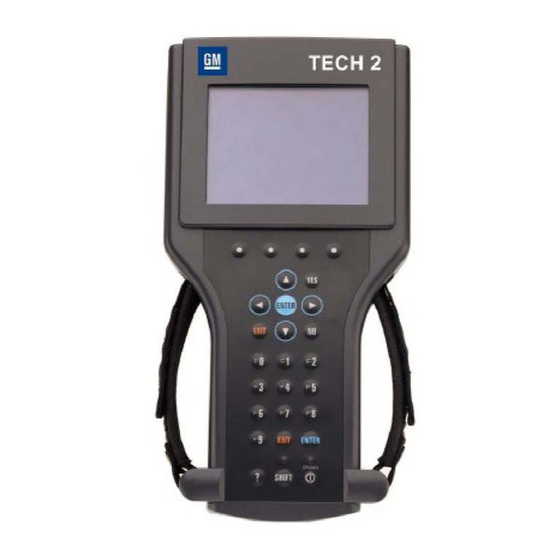
Page 4: Common Connectors And Components
GETTING STARTED The Tech 2 is ready to go right out of the box. There is a 32 MB data card inside of the tool that has software already pre-loaded onto it. It may not be the most current software available, but it will be ready to start working on vehicles. -
Page 5: Setting Up The Tech 2
SETTING UP THE TECH 2 Power Up And Display The [PWR] key is used to turn the Tech 2 on or off. The status indicator light above this key is illuminated green when the Tech 2 is operational. The [SHIFT] key is used with the up and down arrow keys to change screen brightness and contrast. -
Page 6: How To Find The Online Manuals
HOW TO FIND THE ONLINE MANUALS You may have noticed that when you purchased your Tech 2 that a manual was not included. This is because they want you to have the latest version of the manual. The manuals for the Tech 2 can be found online at: http://www.boschdiagnostics.com/support/documentation/Pages/DiagnosticsDocumentation.a... -
Page 7: Updating The Software Version
Presented by Bob Pattengale UPDATING THE SOFTWARE VERSION A common question that technicians ask when starting to use the Tech 2 is: “How often or when should I update the tool?”. When you power up the Tech 2 the first screen that shows up on the display indicates what software version is loaded on the tool. -
Page 8: Tech 2 Update Procedures
Tech 2 Update Procedures The Software Download function of TIS 2000 allows updating of the Tech 2 with the latest service information. The Software Download function transfer (downloads) updates scan tool software from the terminal to the scan tool. There are two download modes: Standard and Custom. - Page 9 BOSCH TECH 2 Presented by Bob Pattengale UPDATING THE SOFTWARE VERSION Tech 2 Update Procedures Fig. 3 5. At the Select Diagnostic Tool for Download screen, highlight and verify your selection Fig 3. • Standard installs the newest software onto the scan tool.
- Page 10 Tech 2 Update Procedures Fig. 4 7. The terminal displays a Confirm Software Change screen, Fig. 4, showing what the Tech 2 currently contains and what it will contain after the download. Select Next to continue. This software download can take a fair amount of time depending on the speed of your internet connection.
-
Page 11: National Automotive Service Task Force (Nastf)
BOSCH TECH 2 Presented by Bob Pattengale NATIONAL AUTOMOTIVE SERVICE TASK FORCE (NASTF) The National Automotive Service Task Force is a not-for-profit, no-dues task force established to facilitate the identification and correction of gaps in the availability and accessibility of automotive service information, service training, diagnostic tools and equipment, and communications for the benefit of automotive service professionals. - Page 12 Go to www.gmtechinfo.com or call the ACDelco eBusiness Helpdesk 1-800-825-5886 prompt #3 TIS 2 Web ACDelco technical support can be reached at 1-888-212-8959. Where can I find information on the use of TIS 2 Web, Service Information and Tech 2®? http://service.gm.com/userguides/index.pdf...
-
Page 13: Registering An Account With Tis2Web
BOSCH TECH 2 Presented by Bob Pattengale REGISTERING AN ACCOUNT WITH TIS2WEB To register for a TIS2 Web account, go to: www.acdelcotds.com/acdelco/action/home and click on “Not A Registered User”. Fill out the form completely making sure you have filled out all of the fields indicated by the red “*”... - Page 14 Once you have created your account you will need to make a selection as to what you want to subscribe to. If you own a Tech 2 and you want to keep the software current, you are going to want to choose the TIS2 Web option. This option includes Tech 2 diagnostic software updates, Tech 2 View, Tech 2 Snap Shot, and Service programming software.
-
Page 15: Tis2Web Overview
Currently, all that needs to be done is to use the Pass Lock System and match the keys up to the modules. 5. Snapshot (Snap): This is where you will be extracting information from the Tech 2 that you have saved. -
Page 16: Setting Up Tech2 View (T2 View)
Most of you will be using the Tech 2 in a stand alone mode. For demonstration purposes, we will show you how to set the Tech 2 up to be viewed on a larger screen. To do this we need to connect the Tech 2 to the PC as described earlier in this presentation, and we also need to log into the Tech2 View (T2 View) option at the TIS2Web website. -
Page 17: Main Menu Navigation
MAIN MENU NAVIGATION Pictured above is a screen shot of the main navigation menu of the Tech 2 as it is viewed on a PC using Tech2 View. Below is a brief overview of each option available. Later in the presentation we will cover each option in more detail. -
Page 18: Powertrain Navigation Menu
Presented by Bob Pattengale POWERTRAIN NAVIGATION MENU REVIEW Building A Vehicle In The Tech 2 You will be able to build most vehicles without a problem. However, sometimes you need a little help. Use a GM VIN Card as illustrated below for help with unfamiliar vehicles. You can find these VIN cards at http://service.gm.com/dealerworld/vincards/... - Page 19 BOSCH TECH 2 Presented by Bob Pattengale POWERTRAIN NAVIGATION MENU REVIEW Building A Vehicle In The Tech 2 1-800-71-TRAIN (1-800-718-7246) OR www.auto-video.com...
-
Page 20: Select The Year Of The Vehicle
BOSCH TECH 2 Presented by Bob Pattengale 1. Select The Year Of The Vehicle For demonstration purposes we will show you how to build a 2007 Chevrolet Equinox LT AWD VIN: 2CNDL73F6760XXXXX. 1-800-71-TRAIN (1-800-718-7246) OR www.auto-video.com... -
Page 21: Select The Vehicle Type
BOSCH TECH 2 Presented by Bob Pattengale POWERTRAIN NAVIGATION MENU REVIEW Building A Vehicle In The Tech 2 2. Select The Vehicle Type 3. Select The Vehicle Make 1-800-71-TRAIN (1-800-718-7246) OR www.auto-video.com... -
Page 22: Select The Product Line
BOSCH TECH 2 Presented by Bob Pattengale POWERTRAIN NAVIGATION MENU REVIEW Building A Vehicle In The Tech 2 4. Select The Product Line 5. Select The Engine Type 1-800-71-TRAIN (1-800-718-7246) OR www.auto-video.com... -
Page 23: Powertrain Navigation Menu Review
BOSCH TECH 2 Presented by Bob Pattengale POWERTRAIN NAVIGATION MENU REVIEW Diagnostics Menu For our demonstration purposes, we have chosen a 2005 Pontiac G6. In the screen capture to the right you can see that we are going to choose F4: Engine function from the Diagnostics menu. -
Page 24: Diagnostic Trouble Codes (Dtcs)
BOSCH TECH 2 Presented by Bob Pattengale POWERTRAIN NAVIGATION MENU REVIEW Diagnostics Menu When we enter the Engine Controls option, you can see that in the screen capture above we have several different options to choose from. Below is a brief description of some of them. Later in the presentation will will cover some of these functions in more depth. - Page 25 BOSCH TECH 2 Presented by Bob Pattengale POWERTRAIN NAVIGATION MENU REVIEW Diagnostics Menu Pictured right is a screen capture showing that we have entered the Not Ran Since Code Cleared option and you can see that the stop lamp switch circuit has failed to run.
-
Page 26: Data Display
BOSCH TECH 2 Presented by Bob Pattengale POWERTRAIN NAVIGATION MENU REVIEW Diagnostics Menu Data Display The Data Display function is where we can look at the individual parameter identifications (PIDs) such as EGR, EVAP, Fuel Trim, HO2S, Ignition, Misfire, TAC, and Output Driver Data. -
Page 27: Special Functions
BOSCH TECH 2 Presented by Bob Pattengale POWERTRAIN NAVIGATION MENU REVIEW Diagnostics Menu Below the Engine Data function in the Data Display menu is the EGR Data function. This function allows you to see all of the data available with information relating to the EGR and its performance. - Page 28 BOSCH TECH 2 Presented by Bob Pattengale SETTING UP DIAGNOSTICS VEHICLE CONTROL SYSTEMS Diagnostics Menu Data Display The Data Display function is where we can look at the individual parameter identifications (PIDs) such as EGR, EVAP, Fuel Trim, HO2S, Ignition, Misfire, TAC, and Output Driver Data.
-
Page 29: Using The Candi Module
BOSCH TECH 2 Presented by Bob Pattengale POWERTRAIN NAVIGATION MENU REVIEW Diagnostics Menu Using The CANDi Module 1-800-71-TRAIN (1-800-718-7246) OR www.auto-video.com... - Page 30 Diagnostics Menu Using The CANDi Module After connecting the CANDi module to the vehicle and the Tech 2, we ran the DTC Information test. Note in the screen capture to the right, that the first and second ECUs have a “No Communication”...
-
Page 31: Clearing Diagnostic Trouble Codes (Dtcs)
BOSCH TECH 2 Presented by Bob Pattengale CLEARING DIAGNOSTIC TROUBLE CODES (DTCS) Depending on what diagnostic process you follow, it may be necessary to clear the DTCs and test the system again. Again, don’t forget to record the DTCs on your diagnostic worksheet. -
Page 32: Vehicle Control Systems
BOSCH TECH 2 Presented by Bob Pattengale VEHICLE CONTROL SYSTEMS BCM Data While still in the Vehicle Control Systems menu we have chosen the Data Display Option. At the top of the list you can see the BCM Data option. - Page 33 Off position and has actually removed the key. Notice that the Tech 2 did not turn off. It is still on and is still reporting all of the PIDs that it did when the ignition switch was on.
-
Page 34: Quick Snapshot
BOSCH TECH 2 Presented by Bob Pattengale QUICk sNAPshOT Recording Data Another option available in the BCM data mode is the Quick snapshot option at the bottom right hand portion of the screen capture. Quick Snapshot Option There will be instances where having the scan tool in your hand while you test something will not be convenient. -
Page 35: Powertrain Navigation
POWeRTRAIN NAvIgATION Power steering Control Module In the previous example we looked at diagnosing an ignition switch using the Tech 2. Now lets take a quick look at diagnosing the electronic stability Control (esC) system. All vehicles, 2011 and newer, must be equipped with the esC system. -
Page 36: Data Display
In this portion of the presentation we are going to take a closer look at the Data Display function of the Tech 2. you will be spending a lot of time working with this function, and what you need to know are some of the unique features that are part of the Tech 2. - Page 37 BOSCH TECH 2 Presented by Bob Pattengale POWeRTRAIN NAvIgATION Data Display We have used the select Items function to select the three PIDs that we want to view. As you can see in the screen capture, that the three APP sensor PIDs that we have selected are at the top of the screen.
-
Page 38: Tech 2 View
BOSCH TECH 2 Presented by Bob Pattengale TeCh 2 vIeW special Functions The special Functions option in the gM world means that you will be turning something on and off to test an individual component. later in the presentation we will cover this... -
Page 39: Special Functions
FUNCTIONs Body Control Module One of the key power features of the Tech 2 is its ability to have bi-directional control over the available actuators within the vehicle. This means that you will have the ability to turn things On or Off using the Tech 2. - Page 40 BOSCH TECH 2 Presented by Bob Pattengale sPeCIAl FUNCTIONs Body Control Module In the Body Control Module function we have the ability to lock and unlock the doors of the vehicle. For our demonstration we have chosen the first option on the list F0: Door lock.
-
Page 41: Instrument Panel Cluster
To do this we need to enter the “Instrument Panel” option of the body and accessories function menu on the Tech 2. After we have followed the prompts on the screen, the Instrument Panel Cluster function appears with the options Display Test, segment Check, and Dimming Intensity. -
Page 42: Lighting Systems
BOSCH TECH 2 Presented by Bob Pattengale sPeCIAl FUNCTIONs lighting systems With regards to the lighting systems, a common customer complaint may be that the turn signal is not working or maybe the dome light is not working. For our demonstration we will focus on the interior lamps of the vehicle. -
Page 43: Evap Systems
FUNCTIONs evAP systems When testing the evAP systems of vehicles using the Tech 2 there are three things we can do. We can test the evAP Purge solenoid, evAP vent solenoid, and the evAP Purge/seal. For this demonstration we have entered the evAP vent solenoid test function. -
Page 44: Basic Component Tests
BOSCH TECH 2 Presented by Bob Pattengale BAsIC COMPONeNT TesT Diagnostic Trouble Codes (DTCs) As a good technician, you always want to scan for DTCs after any type of major engine repair. This will either verify the repair and tell you if there may be other issues still outstanding that need to be addressed. -
Page 45: Reprogramming
1 of setting a vehicle Up for a Reflash is to test the battery and the integrity of the electrical system. For our purposes, we will be using a Bosch BAT 151 starting/Charging Analyzer. 1-800-71-TRAIN (1-800-718-7246) OR www.auto-video.com... - Page 46 BOSCH TECH 2 Presented by Bob Pattengale RePROgRAMMINg vehicle setUp step 2 of setting a vehicle Up for a Reflash is to connect a clean power supply to the electrical system. We are going to use the Midtronics PsC-550 to supply 13.4 volts of clean power to the...
-
Page 47: Performing The Reprogram
Once we have properly prepared the vehicle we can begin the reprogramming process. For our purposes we will be using the gM MDI. The Tech 2 will work for reflashing as well as most J2534 tools, but gM recommends using the MDI. - Page 48 BOSCH TECH 2 Presented by Bob Pattengale RePROgRAMMINg Performing The Reprogram The next step in the reprogramming process is to select the vehicle from the menu that we will be reprogramming. For our purposes we will be working on a 2005 Pontiac g6.
- Page 49 BOSCH TECH 2 Presented by Bob Pattengale RePROgRAMMINg Performing The Reprogram At this point, the program is going to ask us to select the controller that we want to reprogram from a list of supported controllers. For our purposes we are going to choose to reprogram the PCM/vCM and we will be programming it normally instead of using vCI.
-
Page 50: Reprogramming Calibration Information
BOSCH TECH 2 Presented by Bob Pattengale RePROgRAMMINg Performing The Reprogram After the reprogramming is complete, you will be prompted to do some controller specific procedures. you need to follow any procedures listed before moving on to the next step. - Page 51 BOSCH TECH 2 Presented by Bob Pattengale RePROgRAMMINg Reprogramming Calibration Information Next you will need to click on the “Reprogramming Calibration Information” option to continue. Once you enter this option, you will be prompted to enter the vIN of the vehicle that you are working on.
-
Page 52: Tech 2 View
PCM of our subject vehicle. At this point you need to consult the calibration information of the vehicle that you are working using the Tech 2. If there are newer calibrations available for the vehicle that you are working on you need to update them. - Page 53 Oil life Reset To perform this procedure you need to enter the Module setup functions from the main vehicle menu on the Tech 2. Once you have navigated to the Module setup functions, select the Powertrain Control Module to continue.
-
Page 54: Evap Service Bay Testing
To do this we need to enter the engine option from the Diagnostics menu on the Tech 2. Once in the engine option, we need to click on... -
Page 55: Checking For Leaks
CheCkINg FOR leAks evAP Test Using A smoke Machine And The Tech 2 Based on the evAP service bay test we have determined that there is a leak somewhere in the evAP system of our subject vehicle. -
Page 56: Gm Mdi Interface
Tech 1. The Tech 1 began in 1994 and was in use until late 1995. In 1996 gM moved to to the Tech 2. The Tech 2 began in 1992 and continues to service the current vehicles of today. - Page 57 • saab 9-4X As we cover these tools during the presentation, our primary focus will be on the Tech 2 with an introduction to the MDI. later we will discuss the use of an inexpensive device that can be used for gM reprogramming.
-
Page 58: Online Information
BOSCH TECH 2 Presented by Bob Pattengale gM MDI INTeRFACe Online Information To find the latest information regarding the MDI, all you need to do is go to https://www.acdelcotds.com/acdelco/action/techinfo. Once you have navigated to the site, just click on the “Reprogramming” option to continue. -
Page 59: What Is Included In The Kit
BOSCH TECH 2 Presented by Bob Pattengale gM MDI INTeRFACe Online Information select the MDI from the list of diagnostic tools displayed in the left sidebar menu on the screen. All of the current information on the MDI will appear in the browser. From here you can click on, and navigate all of the options that are currently available for the MDI. -
Page 60: Gm Mdi Vs The Mastertech Vci
BOSCH TECH 2 Presented by Bob Pattengale gM MDI vs The MAsTeRTeCh vCI What Is The Difference One common question that is asked is “What is the difference between the gM MDI and the Bosch Mastertech vCI”. The gM MDI was designed to be the factory scan tool for all gM vehicles. gM is not concerned about working on other makes of vehicles such as Ford, honda or Toyota. -
Page 61: Gds Software
BOSCH TECH 2 Presented by Bob Pattengale gDs sOFTWARe Basic Navigation When you launch the gDs software it immediately goes to the gDs website and looks for updates to the MDI and the gDs software. keep in mind that you need to have Internet access for this to happen. - Page 62 BOSCH TECH 2 Presented by Bob Pattengale gDs sOFTWARe Basic Navigation Once you have entered all of the needed vehicle criteria and clicked the Next Action tab, you will have the options of vehicle Diagnosis and Module Diagnosis. When you click on the vehicle Diagnosis option you will be prompted to select the appropriate engine and RPO option.
- Page 63 BOSCH TECH 2 Presented by Bob Pattengale gDs sOFTWARe Basic Navigation you can see in the screen capture that a new option has appeared. The vehicle DTC Information option is what you want to select to scan the entire vehicle for DTCs stored in the memories of all of the modules that the vehicle is equipped with.
- Page 64 BOSCH TECH 2 Presented by Bob Pattengale gDs sOFTWARe Basic Navigation After answering all of the prompted questions and selecting the next action, the software scans each of the vehicles control modules and reports back if the modules do or do not have DTCs stored in memory.
- Page 65 The Module Diagnosis function gives you the ability to diagnose each module individually. very similar to the Tech 2, you can see the DTCs of the individual modules as well as the ID information, data display, control functions, and the configure/reset functions.
-
Page 66: Data Display
Pictured above is a screen capture of the Data Display function. you can see that it displays all of the available PIDs just like the Tech 2. Also like the Tech 2 you have the ability to choose only certain PIDs for viewing as well as recording and saving snaphots. -
Page 67: Vehicle & Module Diagnosis
BOSCH TECH 2 Presented by Bob Pattengale gDs sOFTWARe vehicle & Module Diagnosis Taking a closer look at the vehicle Diagnosis section, you can see in the screen capture above that we have scanned all of the modules that are equipped on our subject vehicle which is a 2011 Chevrolet Camaro. -
Page 68: Review
MDI Tool And gDs software One of the important things to remember about both the Tech 2 and the MDI is that the MDI is very similar in design to the Tech 2. The navigation software of the Tech 2 is very similar to the navigation of the gDs software.
Need help?
Do you have a question about the TECH 2 and is the answer not in the manual?
Questions and answers