Table of Contents
Advertisement
Quick Links
Advertisement
Table of Contents

Related Manuals for ICE COBOTICS SoftBank Robotics Whiz

Summary of Contents for ICE COBOTICS SoftBank Robotics Whiz
- Page 1 Quick Start Guide Guía Rápida de Whiz...
- Page 2 Live support is available from 8am - 5pm EST, Monday - Friday excluding US bank holidays. También puede contactar al soporte técnico de ICE Cobotics llamando al 1-833-423-7626, o enviando un correo electrónico a: clientcare@icecobotics.com. El soporte técnicoestá disponible de 8am a 5pm EST, de lunes a viernes excepto festivos.
-
Page 3: Table Of Contents
Table of Contents Tabla de Contenidos Machine Overview Vista General de la Máquina Battery Batería Notification Pager Bíper de Notificaciones Machine Setup Configuración de la Máquina Teaching Mode 10-13 Modo Enseñanza Autonomous Mode Modo Autónomo Maintenance and 14-16 Troubleshooting Mantenimiento y Solución de Problemas... -
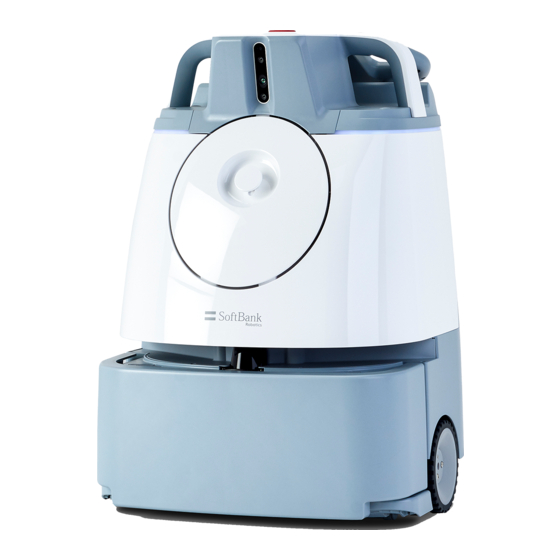
Page 4: Machine Overview
Machine Overview Vista General de la Máquina Sensors 2D/3D Camera Lift Handles Sensores Cámara 2d / 3d Manijas para Levantar Dustbin Depósito de Polvo Pager Compartment Compartimiento para el Bíper LIDAR Sensor Sensor LIDAR Wheel Bumper Rueda Parachoques Steering Handle Manija de Dirección Main Power Switch... - Page 5 Emergency Stop Button Botón de Parada de Emergencia Vacuum Power Touch display Button Pantalla Táctil Botón de Encendido de la Aspiradora Max Power Mode Button Autonomous mode Botón de Modo de start/stop button Potencia Máxima Botón de inicio/ parada de limpieza autónoma Cliff Sensors (Red circles)
-
Page 6: Battery
Battery Batería Ensure Whiz is charged prior to use. • Whiz has a three hour battery life under normal use conditions. • It takes approximately four hours to charge the Battery. Asegúrese de que Whiz esté cargado antes de usar. Whiz tiene una duración de batería de tres horas en condiciones normales •... -
Page 7: Bíper De Notificaciones
Remove / Replace the Battery Remover / Reemplazar la Batería Open the Battery Compartment. Abra el Compartimento de la Batería. Press the Battery lock with your thumb, being careful not to pinch your fingers. Presione el seguro de la batería con el pulgar, teniendo cuidado de no pellizcarse los dedos. - Page 8 Power the Notification Pager Encendido del Bíper Use the supplied pin to press the power button on the side of the Notification Pager. Use el pin suministrado para presionar el botón de encendido en el costado del Bíper. Charge the Notification Pager Carga del Bíper Place the Notification Pager in the provided cradle (USB AC Adapter not included) to...
-
Page 9: Machine Setup
Machine Setup Configuración de la Máquina Confirm the following components are properly installed and that the Emergency Stop button is released. (Twist to the right to release.) Make sure to turn on the secondary battery and remove Cliff sensor lens cover. Asegúrese que los siguientes componentes estén instalados correctamente y que se haya liberado el Botón de Parada de Emergencia. -
Page 10: Teaching Mode
5.Teaching Mode Configuración de la Máquina Whiz performs optimally when used in open areas and hallways that are free of: obstructions, loose debris, and changes in gradation steeper than 5%. The recommended cleaning area per route is 5000 ft or less (approximately 30 minutes of teaching.) Whiz se desempeña de manera óptima en áreas abiertas y pasillos libres de obstrucciones, escombros sueltos y cambios de pendiente superiores al 5%. - Page 11 Turn the machine on using the green On/Off switch. Encienda a Whiz usando el interruptor verde de Encendido/Apagado. Check to see that the Robot Operation Center (ROC) is connected to ensure data is collected and stored. Verifique que el Robot Operation Center (ROC) esté...
- Page 12 Map a Route Trazar una Ruta Press the Vacuum Power On button to activate suction. Presione el Botón de Encendido de la Aspiradora para activar la succión. If you would like to activate Power Mode while teaching the route, press the Power Mode button. Whiz will remember this adjustment when running the route in the future.
-
Page 13: Autonomous Mode
Scan the HLC to begin saving the route. (This may take a few minutes.) Escanee el HLC para comenzar a guardar la ruta. (Esto puede tomar algunos minutos.) Autonomous Mode Modo Autónomo Once Whiz has been taught a route, it will run the same route autonomously, pulling map information from the HLC. -
Page 14: Maintenance And Troubleshooting
Always turn off and charge the Battery and Notification Pager after use. Store Whiz in a dry room that does not interfere with fire doors or evacuation routes and hang wall chart near vacuum. Siempre apague y cargue la Batería y el Bíper de Notificaciones después de su uso. Almacene a Whiz en una habitación seca que no interfiera con puertas escape o rutas de evacuación y colgar póster cerca de la máquina. - Page 15 Clean the Sensors Limpieza de los Sensores If the Cliff Sensors are dirty, wipe them with the attached Microfiber Cloth. Use the Microfiber Cloth to gently wipe the LIDAR Sensors and camera, being careful not to scratch the surface of the machine.
- Page 16 If there are issues charging the Battery, remove it from the Charging Port and contact Customer Support. Si hay problemas para cargar la batería, retirarla del puerto de carga comunicarse con Atención al Cliente. ICE Cobotics Support 1-833-423-7626 Phone clientcare@icecobotics.com...
Need help?
Do you have a question about the SoftBank Robotics Whiz and is the answer not in the manual?
Questions and answers