Table of Contents
Advertisement
Quick Links
Advertisement
Table of Contents

Subscribe to Our Youtube Channel
Related Manuals for HydroQuip BALBOA CS6000B Series


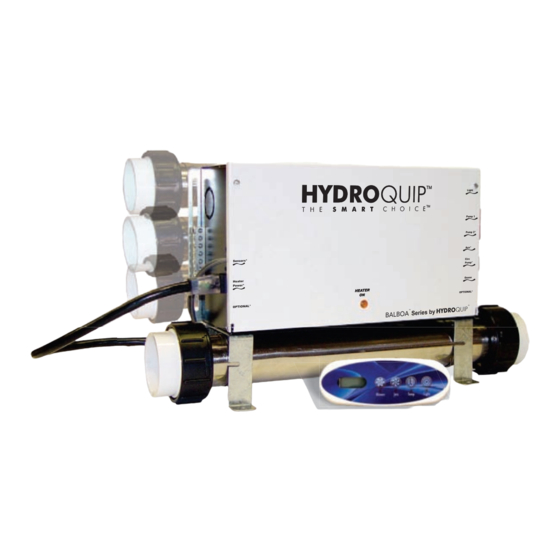
Summary of Contents for HydroQuip BALBOA CS6000B Series
- Page 1 CS6000B SERIES Operation Manual Duplex Models Series by BALBOA...
- Page 2 Introduction This manual covers electrical and installation details on the following product series. Some photos and instructions may not apply to the product you have purchased. -U Series "Fixed" Heater configuration: This series is designed to fit the most common heater position. Depending upon the actual control being replaced, you may still need to modify the plumbing to achieve proper alignment.
-
Page 3: Table Of Contents
Contents Important Safety Instructions......3-4 Electrical Installation...........5-7 GFCI Wiring Detail..........8 Heater Installation..........9 Versi-Heat / Optional Heaters......10 Universal Sensor Fitting Kit........10 Power Connection..........11 Sensor Connections..........12 Cord Connections..........13 Circuit Board Configurations......14-19 System Start-Up..........19-20 Heater Start-Up Sequence........20 Filtration Programming.........21 Modes /Behaviors..........21 Spa Side Control Operation.........22 Optional Equipment..........23 Operational Considerations........24 Spa Side Messages........25-26... -
Page 4: Important Safety Instructions
IMPORTANT SAFETY INSTRUCTIONS DANGER To reduce the risk of injury, do not permit children to use this product unless they are closely supervised at all times. WARNING - RISK OF CHILD DROWNING. Extreme caution must be exercised to prevent unauthorized access by children. To avoid accidents, ensure that children cannot use a spa or hot tub unless they are supervised at all times. - Page 5 Persons using medication should consult a physician before using a spa or hot tub since some medication may affect heart rate, blood pressure, and circulation. For Cord and Plug Connected Units Must be connected to a grounded, grounding type receptacle only. NEVER connect the spa to an extension cord.
-
Page 6: Electrical Installation
Electrical Installation A licensed electrician must accomplish the electrical installation in accordance with the National Electric Code(NEC) Article 680, and any local codes in effect at the time of installation. Refer to the System Data Label for equipment voltage and maximum amperage draws. - Page 7 Electrical Installation ELECTRICAL CONNECTIONS If your system was configured to include a 120VAC power cord, ensure that the proper receptacle has been installed (a dedicated circuit is required). DO NOT under any circumstances modify a 20 Amp plug to fit into a 15 Amp receptacle or use an extension cord.
- Page 8 Electrical Installation ELECTRICAL CONNECTIONS OPTION 2 GFCI Installed in Main Service Panel 20-60AMP HARDWIRED MAIN BREAKER PANEL INLINE SPA DISCONNECT PORTABLE SPA LINE 1 LINE 2 REFER TO GFCI WIRING DETAIL ON PAGE 8 Option 2 shows the power from GFCI breaker installed into main service panel to a service disconnect within line-of-site of the spa.
-
Page 9: Gfci Wiring Detail
GFCI Wiring Detail It is important that the GFCI circuit breaker is installed correctly. Often this component has been improperly installed causing the breaker to instantly trip when the system is turned on. Below is an illustration of a typical GFCI breaker installation. -
Page 10: Heater Installation
Heater Installation The "U" Series Fixed Heater and "US" Series Slide Heater systems will arrive from the factory with the heater mounted in the bottom location as pictured in Step 1. The "US" Series Slide Heater can be installed and used in this configuration or you can move the Slide Heater to the back of the control as shown below to align easily with your particular plumbing arrangement. -
Page 11: Versi-Heat / Optional Heaters
Versi-Heat / Optional Heaters Versi-Heat series heaters are supplied with a 60” cord which allows for versatile installations and locations. BE SURE HEATER IS INSTALLED HORIZONTALLY. The Heater can be installed on either the pressure or vacuum side of the pump. IMPORTANT - Heater pump must provide a minimum flow of 23 GPM through the heater. -
Page 12: Power Connection
Power Connection IMPORTANT: Always refer to the product data label (located on top of the control box) for specific electrical information. Use copper conductors only as required by the NEC. Ÿ Secure wires as defined by the NEC and in compliance with any local Ÿ... -
Page 13: Sensor Connections
Sensor Connections The control system contains the temperature sensors inside the heater tube. If your spa has a pre-existing temperature sensor, do not connect it to the control system. It may be required to leave the old temperature sensor installed in the wall of the spa to prevent leaking. -
Page 14: Cord Connections
Cord Connections Spaside connects to J1 IR Receiver Module or AUX panel connects to J2 2-SPEED PUMP CORD CONFIGURATION The following wiring configuration is for two-speed pump circuits. Black = Low Speed Red = High Speed System Pump White = Common Green = Ground SINGLE SPEED PUMP / ACCESSORY CORD CONFIGURATION The following wiring configuration is for single-speed pump circuits, circulation... -
Page 15: Circuit Board Configurations
Circuit Board Configurations J17/26 EXT. Figure 1 All Device outputs are preset for 120V outputs (as seen above in figure 1). If 240V output is required, please utilize the chart below to configure the appropriate outputs for 240V. For example, to convert pump 1 to 240V, move the red coded wire to J32 (as shown in Figure 2). - Page 16 Circuit Board Configurations IMPORTANT: Power off spa when making any dip switch changes. Dip Switch Chart for CS610*B ( * = 0,7,8,9 ) A1 Test Mode (normally OFF) A2 “ON” position: Button layout will be: Pump 1, Light, Temp Down, Temp Up * “OFF”...
- Page 17 Circuit Board Configurations IMPORTANT: Power off spa when making any dip switch changes. Dip Switch Chart for CS620*B ( * = 0,7,8,9 ) A1 Test Mode (normally OFF) A2 “ON” position: Standard mode only “OFF” position: Std/Ecn/Sleep mode changes allowed A3 “ON”...
- Page 18 Circuit Board Configurations IMPORTANT: Power off spa when making any dip switch changes. Dip Switch Chart for CS622*B ( * = 0,7,8,9 ) A1 Test Mode (normally OFF) A 2+A10 Control amp draw requirements (See Table 1) A3 “ON” position: use Mini Panel “OFF”...
- Page 19 Circuit Board Configurations IMPORTANT: Power off spa when making any dip switch changes. Dip Switch Chart for CS623*B ( * = 0,7,8,9 ) A1 Test Mode (normally OFF) A2 “ON” position: Standard mode only “OFF” position: Std/Ecn/Sleep mode changes allowed A3 “ON”...
-
Page 20: System Start-Up
Circuit Board Configurations ECO200 Series Panel Dipswitch A3 must be in the on / up position for the ECO200 series spaside to operate correctly. ECO401 Series Panel Prior to connecting the optional ECO401 series spaside. Move dipswitch A3 to the off / down position. -
Page 21: Heater Start-Up Sequence
Heater Start-Up Sequence The HydroQuip heater goes through a testing phase every time it starts up to assure that there is adequate water flow. 1) Prior to heating, the pump will run for at least 2 minutes and verify that sensors are within specifications. -
Page 22: Filtration Programming
Filtration Programming The first preset filter cycle begins 6 minutes after the spa is powered up. The second preset filter cycle begins 12 hours later. Filter duration is programmable for 2, 4, 6, or 8 hours or for continuous filtration (indicated by fc ). To program, press “Temp,” then “Jets 1.” Press “Temp”... -
Page 23: Spaside Control Operation
Spaside Control Operation For Spasides with one temperature button. Press the “Temp” button once to display the set temperature. To change the set temperature, press the pad a second time before the LCD stops flashing. Each press of the “Temp” button will continue to either raise or lower the set temperature. -
Page 24: Optional Equipment
Optional Equipment IR Receiver Dolphin Remote Part Number 34-0216C Part Number 34-0215 Spa Light Your control may contain a high intensity, low voltage light to enhance night time use. This illustration shows how and where to find the bulb for replacement. It also shows the mounted spa light with a replacement (colored) lens. -
Page 25: Operational Considerations
Operation Considerations The following describes situations you may encounter and situations to be aware of. Warm Weather Conditions Since your spa will normally be expected to maintain warm to hot water ready for use, a great deal of attention has been directed to the energy conservation detail of insulation to keep electrical cost down. -
Page 26: Spa Side Messages
Spa Side Messages Action Required Message Meaning No Message on display. The control panel will be disabled until power Power has been cut off to the returns. spa. Temperature unknown. After the pump has been running for 2 minutes, the current water temperature will be displayed. -
Page 27: Troubleshooting
Spa Side Messages Action Required Message Meaning “Ice” - Potential freeze condition No action required. All equipment will detected. automatically activate regardless of spa status. The equipment stays on 4 minutes after the sensors detect that the spa temperature has risen to 45°F/7.2°C or higher. - Page 28 Therapy Jet Not Operational Water Shut-Off Valves are Closed - Open Shut-Off valves. Dirty Filter - Clean or replace filter. Jets Not Properly Adjusted - Adjust Jets properly. Diverter Valve Not Properly Adjusted - Adjust diverter valve properly. Thermal Overload Tripping - Check for restricted flow of water. Water Leaks Spa Overfilled - Adjust water level.
-
Page 29: Testing Sensors
Testing the Sensor Set IMPORTANT: For the following set of instruction, the power must be off when plugging in or unplugging sensors. 1) Check sensor wires for cracks or damage that may indicate the presence of a rodent. 2) Inspect connections of both sensors on the circuit board. The plugs must be clean. 3) If the spaside has the error message of SA or Sb, this is an indication of a faulty sensor or possibly a faulty circuit board. -
Page 30: System Data Label
Warranty Information To all original purchasers, HydroQuip, warrants this product to be free from defects in material and workmanship for a period of 1 year from the date of manufacture. Hydro-Quip will, at it’s discretion, repair or replace any part which has been found to be defective. - Page 31 Notes Use this section to jot down any information you may need at a later date. Date of Manufacture: Dealer: Contact: Phone: Address: City: State: Zip: Notes:...
- Page 32 85-0069 Rev.01 10/22...
Need help?
Do you have a question about the BALBOA CS6000B Series and is the answer not in the manual?
Questions and answers
I have aux button on topside control no blower button but have blower. When I push aux button no power to blower connector. How does control know to send power to blower?
The HydroQuip BALBOA CS6000B Series control sends power to the blower when the "Blower" button is pressed. An automatic timer turns the blower off after 30 minutes of operation. Additionally, the heater pump will run whenever the blower is activated.
This answer is automatically generated