Classe Audio CA-5100 Owner's Manual
Classe audio power amplifier owner's manual ca-5100
Hide thumbs
Also See for CA-5100:
- Owner's manual (30 pages) ,
- Owner's manual (48 pages) ,
- Owner's manual (24 pages)
Table of Contents
Advertisement
Available languages
Available languages
Quick Links
Owner's Manual
CA-5100
Power Amplifier
Manuel d'utilisation
CA-5100
Amplificateur de Puissance
Bedienungsanleitung
CA-5100
Endstufe
Manuale di Istruzioni
CA-5100
Amplificatore finale di potenza
Manual de Instrucciones
CA-5100
Etapa de Potencia
Manual de Instruções
CA-5100
Amplificador de potência
Gebruiksaanwijzing
CA-5100
Vijf Kanaals Eindversterker
Инструкция пользователя
Classe CA-5100
Усилитель мощности
Advertisement
Chapters
Table of Contents

Related Manuals for Classe Audio CA-5100


Summary of Contents for Classe Audio CA-5100
- Page 1 CA-5100 Amplificateur de Puissance Bedienungsanleitung CA-5100 Endstufe Manuale di Istruzioni CA-5100 Amplificatore finale di potenza Manual de Instrucciones CA-5100 Etapa de Potencia Manual de Instruções CA-5100 Amplificador de potência Gebruiksaanwijzing CA-5100 Vijf Kanaals Eindversterker Инструкция пользователя Classe CA-5100 Усилитель мощности...
- Page 2 WARNING:TO REDUCETHE RISK OF FIRE OR ELECTRIC SHOCK, DO NOT EXPOSE THIS APPLIANCE TO RAIN OR MOISTURE. CAUTION: TO REDUCE THE RISK OF ELECTRICAL SHOCK, DO NOT REMOVE COVER. NO USER-SERVICEABLE PARTS INSIDE. REFER SERVICING TO QUALIFIED PERSONNEL. The lightning flash with arrowhead symbol, within an equilateral triangle, is intended to alert the user to the presence of uninsulated dangerous voltage within the product’s enclosure that may be of sufficient magnitude to constitute a risk of electric shock to persons.
-
Page 3: Important Safety Instructions
Important Safety Instructions Caution: Please read and observe all warnings and instructions in this owner’s manual and all those marked on the unit. Retain this owner’s manual for future reference. 1. Do not attempt to service this product yourself. Do not open the cover for any reason. There are no user-serviceable parts inside. -
Page 4: Table Of Contents
Contents Welcome to the Classé family...5 Unpacking and Placement...6 Special Design Features ...9 Front Panel...11 Rear Panel ...13 Initial Setup ...18 Care and Maintenance...20 Troubleshooting...21 Specifications ...23 Dimensions ...178 a word about installation... 5 unpacking your amplifier ... 6 placement ... 6 ventilation ... -
Page 5: Welcome To The Classé Family
You will find the warranty registration card at the end of the separate warranty policy booklet, enclosed. a word about installation Every effort has been made to make the Classé CA-5100 simple and straightforward to install and use. Still, we have no way to evaluate many other variables such as the size and shape of your room, its acoustics, and the associated equipment you have chosen to use with your amplifier. -
Page 6: Unpacking And Placement
The vents on both the bottom and the top of the CA-5100 must be kept free from any obstruction which would reduce the flow of air through the unit. Avoid placement on soft surfaces that would restrict airflow (such as plush carpeting). -
Page 7: Custom Installations
It will take only a minute or so. Please complete the card now, before you forget. operating voltage The CA-5100 power amplifier is set at the factory (internally) for 100V, 120V, 230V, or 240V AC mains operation, as appropriate for the country in which it is to be sold (230V only in European Union countries, in compliance with CE regulations). -
Page 8: Warm Up/Break-In Period
The CA-5100 includes protection circuitry that will prevent the amplifier from operating at dangerously high or low voltages. • At startup: the AC mains voltage must be within a range of • Over-voltage during operation: if the AC mains voltage surges •... -
Page 9: Special Design Features
Special Design Features highly refined All Classé analog amplification stages are based on circuits that have been circuit design extensively optimized over many years of continuous development. By starting with excellent circuit designs and working with them over the years, we are able to discover the many small refinements that add up to superlative performance, in a variety of applications. -
Page 10: Extraordinary Longevity
extraordinary longevity Another benefit of having worked with highly refined circuit designs so extensively over many years is that we have vast experience in what works well over the long term. By using only the highest quality parts to begin with, and then using them in an informed way as a result of both accelerated aging experiments and actual long- term experience, we are able to design and manufacture products which we are confident will stand the test of time. -
Page 11: Front Panel
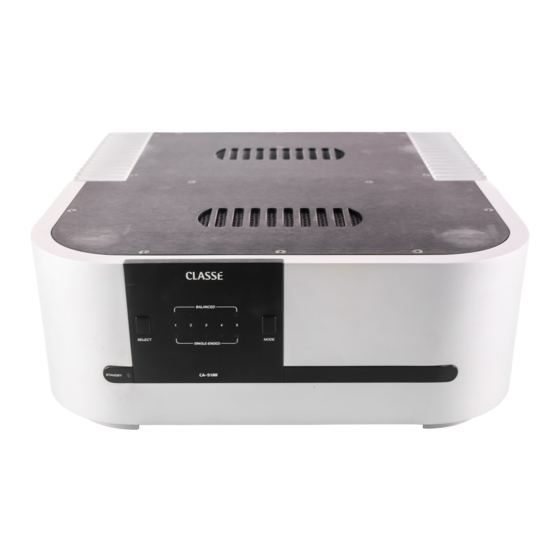
BALANCED SELECT MODE SINGLE-ENDED ������� Front Panel Standby button & LED indicator The front panel Standby button will toggle the amplifier between operate, its fully operational state, and a standby mode that leaves the amplifier off, yet ready to respond to system commands via any of the supported control options (e.g. - Page 12 Caution! Select button The Select button is used (along with the Mode button) when configuring the amplifier for either balanced or single-ended operation. It is also used when configuring the turn-on delay or amplifier number for an amplifier connected to a Classé preamplifier by the DC Trigger or CAN Bus control systems.
-
Page 13: Rear Panel
Rear Panel The following descriptions are intended as a quick reference, should you have any questions about your new product. Please see the next section (entitled Initial Setup) for specific advice on incorporating your new amplifier into your system. Balanced (XLR) Input Balanced audio interconnections were originally developed in the professional audio world, for preserving the delicate nuances of extremely small microphone-level signals. - Page 14 The pin assignments of these XLR input connectors are: Pin 1: Signal ground Pin 2: Signal + (non-inverting) Pin 3: Signal – (inverting) Connector ground lug: chassis ground These pin assignments are consistent with the standard adopted by the Audio Engineering Society (AES14-1992). If you are using your Classé...
- Page 15 Classé CAN Bus Control Ports These RJ-45 connectors are reserved for future control and communication applications using Classé Audio’s implementation of the Controller Area Network (CAN) Bus specification. IR Input and Output Your Classé amplifier includes two support the IR remote controls that are ubiquitous today. IR commands exist for toggling the amplifier between operate and standby, as well as discrete command codes for either operate or standby.
-
Page 16: Rs-232 Control Port
For more information, please contact your dealer and ask about home automation systems. AC Mains Input An IEC standard power cord is used with the CA-5100. Plug the cord into the IEC receptacle on the rear panel, and the other end into a suitable wall outlet. - Page 17 Danger! Potentially dangerous voltages and current capabilities exist within your power amplifier, even when disconnected from AC mains. Do not attempt to open any portion of the amplifier’s cabinet. There are no user-serviceable parts inside your power amplifier. All service of this product must be referred to a qualified Classé...
-
Page 18: Initial Setup
Initial Setup Your new Classé amplifier is quite simple to set up and enjoy. Please follow the steps outlined below in order to safely set up and use your new amplifier. Important: configuring balanced/ single-ended operation The AC mains connection should be the last connection you make on your new power amplifier. -
Page 19: Configuring Amplifier Turn-On Delay/Amp No
configuring amplifier In a system that contains multiple Classé amplifiers, you may set the turn-on delay/amp no. number of seconds of turn-on delay for each amplifier, allowing each to turn on in the order you have specified, rather than all at once. (Having several powerful amplifiers all turning on at the same time can sometimes stress the AC mains in your home, potentially leading to nuisance tripping of circuit breakers). -
Page 20: Care And Maintenance
Care and Maintenance To remove dust from the cabinet of your amplifier, use a feather duster or a lint- free soft cloth. To remove dirt and fingerprints, we recommend isopropyl alcohol and a soft cloth. Dampen the cloth with alcohol first and then lightly clean the surface of the amplifier with the cloth. -
Page 21: Troubleshooting
Troubleshooting In general, you should refer any service problems to your Classé dealer. Before contacting your dealer, however, please check to see if the problem is listed here. No sound, and no Channel LED is lit. • The amplifier is not plugged into the AC mains, or the AC mains are down (circuit breaker, fuse). - Page 22 The AC mains fuse is blown. There is a specific troubleshooting procedure for a blown AC mains fuse, since this rare occurrence sometimes indicates a significant problem. Please follow the following steps, in order: a. Disconnect your amplifier from the AC mains, as well as from its input connections and speaker connections, and remove the fuse cover on the rear of the unit.
-
Page 23: Specifications
Specifications Classé Audio reserves the right to make improvements without notice. ■ Power output (all channels driven) ■ Frequency response ■ Phase ■ Signal-to-noise ratio ■ Channel separation ■ Noise floor (FFT) ■ Distortion (THD + noise) (unweighted, 0.8Vrms/1kHz input, 10Hz – 500kHz) ■... - Page 24 ATTENTION : POUR RÉDUIRE LES RISQUES D’INCENDIE ET D’ÉLECTROCUTION, NE JAMAIS EXPOSER CET APPAREIL À LA PLUIE OU L’HUMIDITÉ. ATTENTION : POUR RÉDUIRE LES RISQUES D’ÉLECTROCUTION, NE JAMAIS ÔTER LE CAPOT DE L’APPAREIL. AUCUNE PIÈCE ACCESSIBLE PAR L’UTILISATEUR À L’INTÉRIEUR. CONSULTER UN TECHNICIEN AGRÉÉ EN CAS DE PROBLÈME. Le symbole de l’éclair terminé...
- Page 25 Importantes instructions concernant la sécurité Attention : Veuillez lire et observer toutes les instructions et recommandations de ce manuel d’utilisation, ainsi que celles inscrites sur l’appareil lui-même. Conservez soigneusement ce manuel d’utilisation. 1. Ne tentez pas de réparer vous-même cet appareil. N’ôtez pas son capot, pour quelque raison que ce soit.
- Page 26 Sommaire Bienvenue dans la famille Classé ...27 Face avant...33 Face arrière...35 Réglage initial...40 Entretien ...42 Problèmes de fonctionnement ...43 Spécifications ...45 Dimensions ...178 un mot concernant l’installation... 27 déballage de votre amplificateur de puissance ... 28 installation ... 28 aération... 28 installations personnalisées ...
-
Page 27: Bienvenue Dans La Famille Classé
Tous les efforts de notre part ont été faits pour rendre l’installation et l’utilisation l’installation de votre Classé CA-5100 simple et évidente. Cependant, nous n’avons aucun moyen d’évaluer certains paramètres, comme la taille et la forme de votre pièce d’écoute, son acoustique, et les maillons que vous avez choisi d’associer à... -
Page 28: Déballage De Votre Amplificateur De Puissance
Notez qu’une longueur suffisante doit être prévue pour tous les câbles de liaison et le câble d’alimentation secteur, derrière le CA-5100. Nous vous suggérons de laisser un espace d’au moins 20 centimètres derrière l’amplificateur de puissance pour permettre leur passage sans... -
Page 29: Installations Personnalisées
Cela ne vous prendra qu’une minute. Faites-le maintenant, avant d’oublier... tension d’alimentation Le CA-5100 est réglé en usine pour fonctionner sur une tension d’alimentation secteur de 100 V, 120 V, 230 V ou 240 V AC, suivant le pays pour lequel il est vendu (uniquement 230 V dans les pays de l’Union européenne, selon les normes... -
Page 30: Période De Rodage
Le CA-5100 possède un circuit de protection contre les variations importantes de tension, à la hausse comme à la baisse. • Au démarrage : la tension d’alimentation doit se trouver dans • Surtension pendant le fonctionnement : si la tension •... -
Page 31: Caractéristiques Particulières
Caractéristiques particulières conception sophistiquée Tous les étages d’amplification analogiques des appareils Classé sont basés sur des circuits des circuits sans cesse améliorés, depuis des années, grâce à un développement continu. En démarrant avec des schémas excellents ayant fait leurs preuves depuis de nombreuses années, nous avons découvert au fil du temps plusieurs petites améliorations qui ont fini par permettre d’atteindre des performances exceptionnelles, dans une variété... -
Page 32: Longévité Extraordinaire
longévité extraordinaire Un autre avantage de travailler depuis des années sur les mêmes schémas de base éprouvés réside dans la connaissance que nous avons maintenant de la façon dont ils se comportent sur le long terme. En n’utilisant que des composants de la plus haute qualité possible, mais en les utilisant à... -
Page 33: Face Avant
BALANCED SELECT MODE SINGLE-ENDED ������� Face avant Touche de mise en veille Standby et indicateur LED La touche de mise en veille Standby de la face avant permet de faire basculer l’amplificateur de puissance entre son état de fonctionnement normal (dit « operate ») et son état de mise en veille (dit « standby ») qui l’éteint tout en le laissant capable de répondre aux commandes du système via n’importe laquelle des options de commande (entrée infrarouge IR, commutation courant continu Trigger, prise CAN Bus ou prise RS-232). - Page 34 Attention ! C’est aussi une excellente habitude que de débrancher tous les maillons électroniques sensibles pendant un orage, car un éclair tombant près de votre domicile peut se traduire par une violente surtension dans votre ligne secteur, celle-ci étant capable d’endommager les appareils les mieux protégés et les mieux conçus.
-
Page 35: Face Arrière
Face arrière La description qui suit est conçue comme référence générale pour la prise en main de votre nouvel amplificateur. Veuillez vous reporter au chapitre suivant (intitulé « Réglage initial ») pour toutes les questions plus complètes, et notamment pour l’intégration parfaite de votre nouvel amplificateur dans votre installation. - Page 36 Si vous utilisez un préamplificateur d’une autre marque, reportez-vous à son manuel d’utilisation pour vérifier le bon câblage de ses propres prises, par rapport à celles du CA-5100. Si ces câblages ne sont pas identiques, des câbles spécifiques adaptés devront être fabriqués, ce dont votre revendeur agréé...
- Page 37 Prises de commande Classé CAN Bus Ces prises type RJ-45 sont prévues pour de futures applications de commande et de télécommunication, utilisant les spécifications du système de réseau de commande développé par Classé « Controller Area Network », ou CAN. Entrée et sortie infrarouge (IR) Votre amplificateur de puissance Classé...
- Page 38 Résolution des problèmes. Ne jamais ouvrir votre amplificateur. Il n’y a à l’intérieur du CA-5100 aucune pièce susceptible d’être remplacée par l’utilisateur. et Crestron™.
- Page 39 Danger ! Des tensions et courants électriques potentiellement dangereux subsistent à l’intérieur de l’amplificateur de puissance, même lorsque celui-ci est débranché de son alimentation secteur. N’essayez jamais d’ouvrir tout ou partie de son coffret. Il n’y a à l’intérieur aucune pièce susceptible d’être modifiée par l’utilisateur.
-
Page 40: Réglage Initial
Réglage initial Votre nouvel amplificateur de puissance est d’une utilisation très simple et immédiate. Veuillez simplement suivre, dans l’ordre, les quelques étapes détaillées ci-dessous afin de l’utiliser pleinement et en toute sécurité. Important : configuration du fonctionnement symétrique/asymétrique Le branchement sur la prise d’alimentation secteur doit toujours être le dernier branchement effectué... -
Page 41: Configuration Du Délai De Mise Sous Tension/N° De L'amplificateur
Pressez de nouveau sur la touche Select pour configurer le canal suivant, et répétez cette procédure pour tous les canaux jusqu’à ce que l’amplificateur soit exactement configuré comme vous le souhaitez. Pour terminer la procédure, appuyez puis relâchez la touche Select jusqu’à ce que toutes les diodes Channel LED, pour tous les canaux, soient éteintes. -
Page 42: Entretien
Entretien Attention ! Effectuez les branchements des enceintes acoustiques. Effectuez les branchements entre les sorties des enceintes sur l’amplificateur et vos enceintes acoustiques, en n’utilisant que du câble spécial de très haute qualité. Branchez les prises noires (-) de l’amplificateur sur les prises noires (-) de chaque enceinte acoustique, et les prises rouges (+) sur les prises rouges (+) des enceintes. -
Page 43: Problèmes De Fonctionnement
Problèmes de fonctionnement En règle générale, en cas de problème, contactez immédiatement votre revendeur agréé Classé. Mais, avant de contacter celui-ci, vérifiez que votre problème ne soit pas répertorié ci-dessous. Il n’y a pas de son et aucune diode des canaux Channel LED n’est allumée. - Page 44 Le fusible secteur principal AC Mains est fondu. Il y a une procédure spécifique pour la résolution de ce problème, car la survenance – très rare – de cette fusion du fusible indique généralement un autre problème. Veuillez donc suivre, dans l’ordre, la procédure suivante : a.
-
Page 45: Spécifications
Spécifications Classé Audio se réserve le droit d’apporter des améliorations sans préavis. ■ Puissance de sortie (tous les canaux en service) ■ Réponse en fréquence ■ Phase ■ Rapport signal-sur-bruit ■ Séparation des canaux ■ Bruit résiduel (FFT) ■ Distorsion (DHT + bruit) (non pondéré, 0.8 Vrms/1 kHz en entrée, 10 Hz –... - Page 46 WARNUNG: UM DIE GEFAHR VON FEUER ODER EINES ELEKTRISCHEN SCHLAGS ZU REDUZIEREN, DAS GERÄT NIEMALS REGEN ODER FEUCHTIGKEIT AUSSETZEN. UM DIE GEFAHR EINES ELEKTRISCHEN SCHLAGS ZU REDUZIEREN, NICHT DIE GEHÄUSEABDECKUNG ENTFERNEN. IM INNERN BEFINDEN SICH KEINE VOM BEDIENER ZU WARTENDEN TEILE. ZIEHEN SIE NUR QUALIFIZIERTES PERSONAL ZU RATE. Das Blitzsymbol mit Pfeil in einem gleichseitigen Dreieck macht den Benutzer auf das Vorhandensein gefährlicher Spannung im Gehäuse aufmerksam.
-
Page 47: Wichtige Sicherheitshinweise
Wichtige Sicherheitshinweise Achtung: Bitte lesen Sie sich alle Warn- und sonstigen Hinweise in dieser Bedienungsanleitung und auf dem Gerät genau durch und befolgen Sie diese. Bewahren Sie die Bedienungsanleitung so auf, dass sie jederzeit zugänglich ist. Versuchen Sie nicht, dieses Gerät selber zu reparieren. Öffnen Sie auf keinen Fall das Gehäuse. Im Gehäuse befinden sich keine vom Bediener zu wartenden Teile. - Page 48 Inhaltsverzeichnis Willkommen in der Classé-Familie ...49 Auspacken und Aufstellen des Gerätes...50 Besondere Merkmale Ihrer Endstufe...53 Frontansicht ...55 Rückansicht ...57 Setup ...62 Pflege & Wartung...64 Störungssuche und -beseitigung...65 Technische Daten ...67 Abmessungen ...178 Ein Wort zur Installation ... 49 Auspacken Ihrer Endstufe ... 50 Aufstellen des Gerätes ...
-
Page 49: Willkommen In Der Classé-Familie
Booklets. Ein Wort zur Installation Es sind viele Anstrengungen unternommen worden, um eine einfache Installation und Bedienung der CA-5100 von Classé zu gewährleisten. Andererseits wissen wir nichts über andere Variablen wie die Größe des Raumes, seine Akustik und das mit der Endstufe verbundene Equipment. All diese Faktoren haben letztendlich einen Einfluss auf die Klangqualität Ihres Systems. -
Page 50: Auspacken Und Aufstellen Des Gerätes
Auspacken und Aufstellen des Gerätes Auspacken Ihrer Endstufe Packen Sie Ihre Endstufe den beigefügten Hinweisen entsprechend aus. Nehmen Sie das gesamte Zubehör aus dem Karton. Seien Sie beim Anheben der Endstufe vorsichtig, da sie sehr schwer ist. Wichtig! Aufstellen des Gerätes Sie haben zwei Möglichkeiten beim Aufstellen Ihrer Endstufe: Sie können das Gerät in die Nähe der Lautsprecher stellen, dann benötigen Sie längere Verbindungskabel zum Vorverstärker. -
Page 51: Custom Installation
Es kostet Sie nur weinige Minuten. Bitte füllen Sie die Karte jetzt aus, bevor Sie es vergessen. Betriebsspannung Die Endstufe CA-5100 wird ab Werk (im Gehäuse), abhängig vom Land, in dem sie verkauft wird, auf eine Betriebsspannung von 100 V, 120 V, 230 V bzw. -
Page 52: Warmlauf-/Einlaufphase
Die CA-5100 besitzt eine Schutzschaltung, die die Endstufe vor extrem hohen bzw. niedrigen Spannungen bewahrt. • Beim Einschalten: Die Netzspannung muss beim Einschalten in • Überspannung während des Betriebs: Steigt die Netzspannung • Unterspannung während des Betriebs: Sinkt die Netzspannung Warmlauf-/Einlaufphase Ihre neue Classé-Endstufe liefert von Anfang an eine erstklassige Klangqualität. -
Page 53: Besondere Merkmale Ihrer Endstufe
Besondere Merkmale Ihrer Endstufe Ausgeklügelter Alle analogen Classé-Verstärkerstufen basieren auf Schaltungen, die im Laufe Schaltungsaufbau vieler Jahre stetig immer weiter optimiert worden sind. So waren, ausgehend von einem bereits hervorragenden Schaltungsaufbau und jahrelanger Erfahrung, viele kleine Verfeinerungen möglich, die letztendlich zu hervorragenden Leistungsparametern geführt haben. -
Page 54: Extrem Hohe Lebensdauer
Extrem hohe Lebensdauer Ein weiterer Vorteil der langjährigen Arbeit mit ausgeklügelten und weiterentwickelten Schaltungslayouts besteht darin, dass wir genau wissen, was langfristig gut funktioniert. Zunächst einmal verwenden wir nur hochwertigste Teile und setzen diese einerseits Belastungstests aus und nutzen andererseits unsere langjährige Erfahrung. -
Page 55: Frontansicht
BALANCED SELECT MODE SINGLE-ENDED ������� Frontansicht Standby-Taste & LED-Anzeige Mit der Standby-Taste an der Gerätefront schalten Sie die Endstufe vom Betriebs- in den Standby-Modus und umgekehrt. Im Standby-Betrieb ist die Endstufe ausgeschaltet, sie reagiert jedoch auf Systembefehle jeder beliebigen der unterstützen Steuerfunktionen (z.B. IR-Eingang, Trigger, CAN-Bus oder RS-232). - Page 56 Achtung! Select-Taste Die Select-Taste wird (zusammen mit der Mode-Taste) zur Konfiguration der Endstufenkanäle (Auswahl zwischen symmetrisch oder unsymmetrisch) verwendet. Sie wird auch zur Konfiguration der Verzögerungszeit beim Einschalten bzw. der Nummer der Endstufe genutzt, wenn diese über den CAN-Bus oder über den Trigger-Anschluss mit einer Classé-Vorstufe verbunden ist.
-
Page 57: Rückansicht
Rückansicht Im Folgenden erhalten Sie eine kurze Beschreibung, falls Sie Fragen zu Ihrem neuen Gerät haben. Im nächsten Kapitel dieser Bedienungsanleitung (siehe Setup) erhalten Sie detaillierte Hinweise darüber, wie Sie Ihre neue Endstufe in das System integrieren können. Symmetrischer (XLR-) Eingang Symmetrische Audioverbindungen wurden ursprünglich für die professionelle Audiowelt entwickelt, um die feinsten Nuancen der extrem kleinen Mikrofonpegel-Signale zu reproduzieren. - Page 58 Die Pins sind folgendermaßen belegt: Pin 1: Signal Masse Pin 2: Positives Signal (non-inverted) Pin 3: Negatives Signal (inverted) Steckergehäuse kontaktiert mit Gerätegehäuse-Masse Diese Pin-Belegungen entsprechen den Standards der Audio Engineering Society (AES14-1992). Wird Ihre Classé-Endstufe an einen Classé-Vorverstärker angeschlossen, ist nichts zu beachten.
- Page 59 Classé-Ports für den CAN-Bus Diese RJ-45-Anschlüsse stehen für künftige Steuer- und Kommunikations- anwendungen bei Nutzung der Classé Audio-Implementierung der CAN(Controller Area Network)-Spezifizierung zur Verfügung. IR-Ein- und -Ausgang Ihre Classé-Endstufe verfügt über zwei 3,5-mm-Minibuchsen, um die heute überall genutzten IR-Fernbedienungen zu unterstützen. Die IR- Befehle schalten die Endstufe vom Betriebs- in den Standby-Modus und umgekehrt.
- Page 60 ® Weitere Informationen zu Home Automation Systemen erhalten Sie bei Ihrem Fachhändler. Netzeingang Für die CA-5100 wird ein Standard-IEC-Netzkabel verwendet. Verbinden Sie das Kabel mit dem Netzeingang an Ihrer Endstufe und anschließend mit einer Netzsteckdose. Netzsicherung Ihre Classé-Endstufe besitzt an der Geräterückseite eine Netzsicherung.
- Page 61 Vorsicht! Auch bei gezogenem Netzstecker existieren im Endstufengehäuse lebensgefährlich hohe Spannungen und Ströme. Versuchen Sie auf keinen Fall, das Gehäuse zu öffnen. Im Gehäuse befinden sich keine vom Bediener zu wartenden Teile. Die Wartung dieses Gerätes ist ausschließlich von einem qualifizierten Classé-Fachhändler oder -Distributor durchzuführen.
-
Page 62: Setup
Setup Das Setup Ihrer neuen Classé-Endstufe ist einfach durchzuführen, so dass Sie schnell die erstklassige Klangqualität Ihrer Endstufe genießen können. Befolgen Sie die unten genannten Schritte, um ein ordnungsgemäßes Setup zu gewährleisten und Ihre neue Endstufe in Betrieb nehmen zu können. Wichtig: Konfigurieren der Kanäle (symmetrisch oder... -
Page 63: Konfigurieren Der Verzögerungszeit Beim Einschalten/Der Nummer Der Endstufe
Stellen Sie sicher, dass Sie die Endstufe für den Typ Eingangsanschluss konfigurieren, den Sie für jeden Kanal verwenden werden. Sie können jede beliebige Kombination an unsymmetrischen und symmetrischen Eingangsanschlüssen nutzen, die für Ihr System erforderlich ist. Konfigurieren der Verfügt ein System über mehrere Classé-Endstufen, so können Sie die Verzögerungszeit beim Anzahl der Sekunden für die Einschaltverzögerung für jede Endstufe Einschalten/der Nummer... -
Page 64: Pflege & Wartung
Pflege & Wartung Um Staub vom Gehäuse der Endstufe zu entfernen, verwenden Sie einen Staubwedel oder ein fusselfreies, weiches Tuch. Zum Entfernen von Schmutz und Fingerabdrücken empfehlen wir Isopropylalkohol und ein weiches Tuch. Tränken Sie das Tuch zunächst mit dem Alkohol und reinigen Sie die Oberfläche der Endstufe dann vorsichtig mit dem Tuch. -
Page 65: Störungssuche Und -Beseitigung
Störungssuche und -beseitigung Im Allgemeinen sollten Sie sich bei Service-Problemen an Ihren Classé-Händler wenden. Bevor Sie dies tun, gehen Sie bitte die folgende Liste durch, ob das entsprechende Problem hierin angesprochen wird. Kein Ton, es leuchtet keine Kanal-LED. • Die Endstufe ist nicht an die Stromversorgung angeschlossen, oder die Stromversorgung ist unterbrochen (Schutzschalter, Sicherung). - Page 66 Die Netzsicherung ist durchgebrannt. Wenn Sie nach der Ursache für das Durchbrennen der Netzsicherung suchen, folgen Sie bitte den angegebenen Schritten in der aufgeführten Reihenfolge, da dieser selten auftretende Fehler manchmal auf ein schwerwiegendes Problem hinweist: a. Ziehen Sie den Netzstecker. Lösen Sie darüber hinaus alle Eingangs- und Lautsprecherverbindungen.
-
Page 67: Technische Daten
Technische Daten ■ Dauerausgangsleistung (alle Kanäle aktiv) ■ Frequenzgang ■ Phase ■ Geräuschspannungsabstand ■ Kanaltrennung ■ Grundrauschen (FFT) ■ Gesamtklirrfaktor + Rauschen (0,8 V RMS/1 kHz Eingang, 10 Hz – 500 kHz) ■ Spannungsverstärkung ■ Empfindlichkeit ■ Eingangsimpedanz ■ Leistungsaufnahme (IEC60065 Para. 2.3.10) Bei Nennleistung Im Leerlauf ■... - Page 68 ATTENZIONE: Per ridurre il rischio di incendio e di scossa elettrica non esponete l’apparecchio all’umidità o alla pioggia. AVVERTENZA: PER RIDURRE IL RISCHIO DI SCOSSA ELETTRICA, NON TOGLIETE IL COPERCHIO. NON CONTIENE PARTI UTILI PER L’UTENTE. PER L’ASSISTENZA FATE RIFERIMENTO A PERSONALE QUALIFICATO. Il fulmine inserito in un triangolo vi avverte della presenza di materiale non isolato, sotto tensione, ad elevato voltaggio all’interno del prodotto che può...
-
Page 69: Importanti Informazioni Di Sicurezza
Importanti informazioni di Sicurezza ATTENZIONE: Leggete attentamente tutte le istruzioni ed osservate le dovute precauzioni, quando trovate indicazioni di pericolo o avvertenze, sia sul manuale che sul prodotto. Conservate questo manuale per ogni riferimento futuro alle istruzioni di sicurezza. Non provate a riparare questo prodotto da soli. Non aprite il coperchio per nessuna ragione. L’apparecchio non contiene parti utili per l’utente. - Page 70 Indice Benvenuti nella famiglia Classè ...71 Sballaggio e posizionamento ...72 Caratteristiche speciali...75 Pannello frontale...77 Pannello posteriore ...79 Impostazioni iniziali ...84 Cura e manutenzione ...86 Risoluzione dei problemi...87 Caratteristiche tecniche ...89 Dimensioni...178 informazioni sull’installazione ... 71 Sballaggio del vostro amplificatore... 72 Posizionamento...
-
Page 71: Benvenuti Nella Famiglia Classè
Pur essendo un apparecchio di alta qualità e dalle notevoli prestazioni, ci siamo sull’installazione impegnati per rendere il collegamento e l’utilizzo del Classè CA-5100 il più semplice possibile. Le prestazioni del vostro sistema non dipendono solo dall’amplificatore finale, ma da diversi altre fattori, come ad esempio: la grandezza e la forma della stanza in cui è... -
Page 72: Sballaggio E Posizionamento
Assicuratevi di lasciare almeno 15 cm circa di spazio libero da ogni lato per permettere la dissipazione del calore con la normale circolazione dell’aria. Le aperture di ventilazione sulla parte superiore ed inferiore del CA-5100 devono essere lasciate libere da qualsiasi impedimento possa ridurre il flusso d’aria attraverso l’unità. -
Page 73: Installazioni Particolari
Se la tensione di alimentazione AC indicata sul vostro amplificatore non è corretta, contattate il vostro rivenditore o il distributore Classè del vostro paese. Il CA-5100 può essere collegato ad una normale presa di alimentazione AC da 15 Ampere. Se dovessero esserci altri componenti collegati sulla stessa presa, tenete conto del loro assorbimento di corrente. -
Page 74: Periodo Di Rodaggio
Il CA-5100 è dotato di circuiti di protezione atti a prevenire il pericoloso funzionamento dell’amplificatore in condizioni di alimentazione con una tensione troppo alta o troppo bassa. • All’accensione: All’accensione dell’unità, la tensione AC di rete • Aumenti di tensione durante il funzionamento: Se la tensione •... -
Page 75: Caratteristiche Speciali
Caratteristiche speciali Design raffinato dei circuiti Tutti gli stadi di amplificazione analogica di Classè derivano da circuiti che hanno ormai raggiunto lo stato dell’arte, dopo anni di continuo sviluppo. Partendo da un eccellente design circuitale, implementato anno dopo anno da migliorie derivate dall’esperienza, siamo in grado di scoprire ulteriori piccole rifiniture nelle diverse applicazioni, che ci permettono di raggiungere prestazioni superlative. -
Page 76: Straordinaria Longevità
Straordinaria longevità Un altro beneficio derivato dalla continua ricerca del migliore design circuitale negli anni è la garanzia della durata nel tempo dei nostri prodotti. Utilizziamo solo componenti della più alta qualità disponibili sul mercato, scelti anche in base alla loro durata nel tempo, verificata dalla nostra esperienza personale e mediante test di invecchiamento dei componenti;... -
Page 77: Pannello Frontale
BALANCED SELECT MODE SINGLE-ENDED ������� Pannello frontale Tasto Standby e LED indicatore Premendo il tasto Standby del pannello frontale commuterete lo stato dell’amplificatore da pienamente operativo alla modalità standby, in cui l’amplificatore è disattivato ma comunque attivabile da un qualsiasi comando del sistema di controllo esterno ( per esempio, dall’ingresso IR, un segnale Trigger DC, via CAN Bus, o dalla interfaccia RS-232). - Page 78 Attenzione! Tasto Select Il tasto Select viene utilizzato (congiuntamente con il tasto Mode) durante la configurazione dei canali dell’amplificatore per il funzionamento con ingressi bilanciati o RCA. E’ anche usato durante la configurazione della sequenza di accensione di una serie di amplificatori Classè collegati ad un preamplificatore Classè...
-
Page 79: Pannello Posteriore
Pannello posteriore Le seguenti informazioni sono rapida descrizione delle funzioni e delle caratteristiche del prodotto. Andate alla sezione seguente (Impostazioni iniziali) per maggiori dettagli sull’installazione del vostro nuovo amplificatore nel vostro sistema. Ingresso bilanciato (XLR) Le connessioni bilanciate audio sono state sviluppate originariamente per il settore audio professionale, per preservare i dettagli più... - Page 80 La piedinatura di questi connettori di ingresso XLR è: Pin 1: Massa Pin 2: Positivo + (non invertito) Pin 3: Negativo - (invertito) Corpo del connettore: Massa dello chassis Questo tipo di piedinatura corrisponde agli standards adottati dalla Audio engineering society (AES14-1992). Se utilizzate il vostro amplificatore Classè...
- Page 81 Porta di collegamento del sistema di controllo Classè CAN Bus Questo connettore RJ-45 è riservato a futuri sistemi di controllo e comunicazione che utilizzano le specifiche Classè Audio del Controller Area Network (CAN) Bus. Uscita ed ingresso IR Il vostro amplificatore Classè è dotato di due connettori mono mini-jack da 1/8 di pollice per il collegamento a sistemi di controllo a raggi infrarossi (IR) disponibili oggi sul mercato, che permettono il controllo dell’operazione di accensione/modalità...
- Page 82 Per maggiori dettagli sui sistemi di controllo, contattate il vostro rivenditore di fiducia. Ingresso alimentazione AC Il CA-5100 utilizza un cavo di alimentazione IEC standard. Inserite il cavo nella presa IEC dell’amplificatore, e quindi in una presa di corrente di rete adeguata.
- Page 83 Pericolo! Anche se l’amplificatore è scollegato dalla presa di alimentazione, potrebbero essere comunque presenti residui di tensioni e correnti pericolose. Non cercate di aprire il vostro amplificatore, non contiene parti utili. Per l’assistenza fate riferimento al vostro rivenditore o all’assistenza tecnica autorizzata Classè.
-
Page 84: Impostazioni Iniziali
Impostazioni iniziali Il vostro nuovo amplificatore Classè è molto semplice da configurare e da utilizzare. Seguite accuratamente le seguenti indicazioni per impostare ed utilizzare il vostro nuovo amplificatore. Importante: Configurazioni operative modo bilanciato/single-ended Il collegamento del cavo di alimentazione AC del vostro nuovo amplificatore dovrebbe essere collegato per ultimo. -
Page 85: Configurazione Della Sequenza Di Attivazione Degli Amplificatori
Configurazione della In un sistema in cui vengono impiegati più amplificatori Classè, potere sequenza di attivazione specificare il numero di secondi di ritardo nell’accensione di ogni degli amplificatori amplificatore, facendoli accendere nell’ordine che avete specificato, o tutti insieme. (L’accensione simultanea di più amplificatori potrebbe mettere a dura prova l’impianto elettrico di casa vostra, e potenzialmente fare scattare gli interruttori magnetotermici del contatore.) Questo numero fungerà... -
Page 86: Cura E Manutenzione
Cura e manutenzione Per rimuovere la polvere dal cabinet del vostro amplificatore, utilizzate uno spolverino o un panno morbido. Per rimuovere sporco e ditate potete usare un panno morbido con alcool: inumidite prima il panno con l’alcool e poi passatelo delicatamente sulla superficie dell’amplificatore. -
Page 87: Risoluzione Dei Problemi
Risoluzione dei problemi Normalmente, per ogni problema è meglio fare riferimento al proprio rivenditore Classè. Prima di contattarlo, comunque, controllate questa sezione per verificare se il problema che riscontrate è compreso in questa lista. Nessun suono, ed i LED dei canali sono spenti. •... - Page 88 Il fusibile principale è bruciato. Esiste una procedura specifica di risoluzione dei problemi, nel caso in cui il fusibile principale sia bruciato; anche se raro, questo tipo di inconveniente a volte indica un problema abbastanza grave. Seguite le seguenti indicazioni come indicato: a.
-
Page 89: Caratteristiche Tecniche
Caratteristiche tecniche Classè Audio si riserva il diritto di apportare modifiche senza preavviso. ■ Potenza di uscita (tutti i canali in funzione) ■ Risposta in frequenza ■ Fase ■ Rapporto Segnale/Rumore ■ Separazione tra i canali ■ FFT tutti i picchi al di sotto di -95dBV (10Hz-80kHz) ■... - Page 90 ADVERTENCIA: PARA REDUCIR EL RIESGO DE INCENDIO O DESCARGA ELÉCTRICA, NO EXPONGA ESTE APARATO A LA LLUVIA O LA HUMEDAD. PRECAUCION: PARA REDUCIR EL RIESGO DE QUE SE PRODUZCA UNA DESCARGA ELÉCTRICA, NO QUITE LA CUBIERTA. EN EL INTERIOR DEL APARATO NO HAY COMPONENTES QUE PUEDAN SER MANIPULADOS POR EL USUARIO.
-
Page 91: Instrucciones De Seguridad Importantes
Instrucciones de Seguridad Importantes Precaución: le rogamos que lea y observe todas las advertencias e instrucciones que figuran en este manual de instrucciones, así como las marcadas en el aparato. Guarde este manual de instrucciones por si tuviera que necesitarlo en el futuro. No intente reparar este aparato usted mismo. - Page 92 Contenido Bienvenido a la familia Classé ...93 Desembalaje y Ubicación...94 Detalles de Diseño Relevantes...97 Panel Frontal...99 Panel Posterior ...101 Puesta a Punto Inicial ...106 Cuidado y Mantenimiento ...108 Problemas y Posibles Soluciones ...109 Características Técnicas ...111 Dimensiones...178 unas palabras acerca de la instalación... 93 desembalaje de su amplificador ...
-
Page 93: Bienvenido A La Familia Classé
Se ha hecho todo lo posible para hacer que tanto la instalación como el uso de la de la instalación Classé CA-5100 sean excepcionalmente simples y rápidos. Aún así, no tenemos ningún modo de evaluar muchas otras variables, como por ejemplo el tamaño y la forma de su sala de escucha, la acústica de esta última... -
Page 94: Desembalaje Y Ubicación
8 centímetros en sus dos lados para garantizar una ventilación adecuada del mismo. Las ranuras situadas en las partes superior e inferior de la CA-5100 deben mantenerse libres de cualquier obstrucción potencialmente capaz de reducir la libre circulación del flujo de aire a través del aparato. -
Page 95: Instalaciones Personalizadas
En este manual se incluyen (ver Dimensiones) dibujos para facilitar la inserción de la CA-5100 en instalaciones especiales o en recintos -para el caso de que fueran necesarios- hechos a medida. Asimismo, se dispone opcionalmente de un kit diseñado a medida para el montaje en rack de este producto. Para más información, contacte con su detallista Classé. -
Page 96: Período De Calentamiento/Rodaje
La CA-5100 incluye circuitos de protección que evitarán que el amplificador trabaje con tensiones de alimentación peligrosamente altas o bajas. • En el momento del arranque: La tensión de alimentación alterna • Sobretensión durante el funcionamiento: Si se producen • Descenso del valor de la tensión de red durante el período de... -
Page 97: Detalles De Diseño Relevantes
Detalles de Diseño Relevantes diseño circuital Todas las etapas analógicas de amplificación utilizadas por Classé están basadas extremadamente refinado en circuitos que han sido optimizados de manera intensiva a través de muchos años de desarrollo continuado. Partiendo de diseños circuitales exclusivos y trabajando con ellos a lo largo de los años somos capaces de descubrir esos múltiples pequeños refinamientos que se suman para proporcionar unas prestaciones superlativas en un amplio abanico de aplicaciones. -
Page 98: Longevidad Extraordinaria
longevidad extraordinaria Otra ventaja derivada del empleo, durante tantos años y de modo intensivo, de diseños circuitales altamente refinados es que tenemos una vasta experiencia sobre lo que funciona bien a largo plazo. Al utilizar únicamente los mejores componentes disponibles como punto de partida y a continuación emplearlos de la manera correcta como consecuencia de experimentos de envejecimiento acelerados y experiencia real a largo plazo, somos capaces de diseñar y construir productos que con toda seguridad... -
Page 99: Panel Frontal
BALANCED SELECT MODE SINGLE-ENDED ������� Panel Frontal Botón e indicador luminoso correspondiente a la Posición de Espera (“Standby”) El botón Standby del panel frontal hará que el amplificador conmute entre su modo de funcionamiento plenamente operativo y un modo “de espera” que “desconecta”... - Page 100 ¡Precaución! Asimismo, es una buena costumbre que desconecte físicamente sus valiosos componentes audiovisuales durante las tormentas con fuerte aparato eléctrico, ya que un relámpago que caiga en cualquier lugar cerca de su casa puede provocar una tremenda descarga eléctrica que puede dañar cualquier aparato que contenga componentes electrónicos independientemente de lo bien diseñado y protegido que esté.
-
Page 101: Panel Posterior
Panel Posterior Las descripciones que siguen pretenden ser una referencia rápida para el caso de que se le planteen dudas sobre el producto que acaba de adquirir. En el caso de que necesite una orientación específica relacionada con la incorporación de su nuevo amplificador a su equipo, le rogamos que consulte la siguiente sección (titulada Puesta a Punto Inicial). - Page 102 Patilla 1: Masa de la señal Patilla 2: Señal + (no invertida) Patilla 3: Señal - (invertida) Carcasa del conector: Masa del conjunto Estas asignaciones concuerdan con los estándares adoptados por la Audio Engineering Society (AES). Si usted está utilizando su amplificador Classé con un preamplificador de la misma marca, habrá...
- Page 103 Puertos para el Bus de Control Classé CAN Estos conectores RJ-45 están reservados para futuras aplicaciones de control y comunicaciones basadas en la aplicación del Bus “Controller Area Network (CAN)” desarrollada por Classé. Entrada y Salida de Rayos Infrarrojos (IR) Su amplificador Classé...
- Page 104 Entrada de Corriente Alterna En la CA-5100 se utiliza un cable de alimentación IEC estándar. Insértelo en el receptáculo IEC de alta corriente del panel posterior y a continuación conéctelo a una toma de corriente eléctrica adecuada.
- Page 105 ¡Peligro! En el interior de su amplificador hay, incluso cuando el aparato está desconectado de la red eléctrica, tensiones y corrientes eléctricas potencialmente peligrosas. No intente abrir ninguna parte de la carcasa del amplificador. En el interior de su etapa de potencia no hay partes que puedan ser manipuladas por el usuario.
-
Page 106: Puesta A Punto Inicial
Su nuevo amplificador Classé no debería presentar ningún problema a la hora de ponerlo a punto y disfrutar con su sonido. Le rogamos que siga los pasos que se indican a continuación con el fin de configurar y utilizar sin problemas la CA-5100. Importante: configuración del... -
Page 107: Configuración De La Secuencia De Arranque/Número De Amplificadores
configuración de la secuencia de arranque/ número de amplificadores Pulse de nuevo el botón Select para seleccionar el siguiente canal y repita el proceso hasta que el amplificador esté configurado en función de sus deseos. Para finalizar, continúe pulsando el botón Select hasta que todos los indicadores luminosos de canal se apaguen. -
Page 108: Cuidado Y Mantenimiento
Cuidado y Mantenimiento Para quitar el polvo del recinto de su amplificador, utilice un plumero o una gamuza suave sin gasa. Para quitar la suciedad o las huellas dactilares, le recomendamos que use alcohol isopropílico y una gamuza suave. Impregne en primer lugar la gamuza con alcohol y a continuación limpie suavemente con ella la superficie del amplificador. -
Page 109: Problemas Y Posibles Soluciones
Problemas y Posibles Soluciones Por regla general, contacte con su detallista Classé para cualquier problema relacionado con el mantenimiento de su producto. No obstante, antes de hacerlo le recomendamos que compruebe si el problema detectado coincide con alguno de los que se enumeran a continuación. No hay sonido y los indicadores luminosos de canal están apagados. - Page 110 El fusible de protección principal está fundido. Hay un procedimiento específico para la comprobación y sustitución de un fusible principal fundido, ya que es muy raro que tal situación indique la presencia de un problema significativo. Realice los pasos que siguen: a.
-
Page 111: Características Técnicas
Características Técnicas ■ Potencia de salida nominal (todos los canales excitados) ■ Respuesta en frecuencia ■ Linealidad de la fase ■ Relación señal/ruido (referida a la salida máxima entre 10 y 80.000 Hz) ■ Separación entre canales ■ Nivel de ruido de fondo (FFT) todos los picos situados por debajo de 95 dBV ■... - Page 112 AVISO: PARA REDUZIR O RISCO DE CHOQUE ELÉCTRICO, NÃO EXPONHA ESTE EQUIPAMENTO À CHUVA OU HUMIDADE. CUIDADO: PARA REDUZIR O RISCO DE CHOQUE ELÉCTRICO, NÃO RETIRE A TAMPA (OU A PARTE POSTERIOR). NÃO EXISTEM NO INTERIOR PEÇAS SUBSTITUÍVEIS PELO UTILIZADOR. ENTREGUE TODA A ASSISTÊNCIA A PESSOAL QUALIFICADO. Este símbolo destina-se a alertar para a presença de “tensões perigosas”...
-
Page 113: Instruções De Segurança Importantes
Instruções de Segurança Importantes Cuidado: Por favor, leia e respeite todos os avisos e instruções deste manual e todos os colocados no equipamento. Mantenha este manual para futuras consultas. Não tente efectuar reparações no equipamento. Não abra a tampa por qualquer razão. Não existem no interior peças substituíveis pelo utilizador. - Page 114 Índice Bem-vindo à família Classé...115 Desembalagem e Colocação ...116 Características de Design Especiais...119 Painel frontal ...121 Painel Traseiro...123 Setup Inicial...128 Cuidados e Manutenção ...130 Guia para resolução de problemas ...131 Especificações ...133 Dimensões ...178 Uma palavra acerca da instalação ... 115 Desembalar o seu amplificador ...
-
Page 115: Bem-Vindo À Família Classé
Por favor, reserve alguns minutos para preencher o cartão de garantia, e coloque-o no correio. Uma palavra acerca da Todos os esforços foram efectuados para tornar o Classé CA-5100 simples e fácil instalação de instalar e utilizar. No entanto, não temos processo de avaliar muitas outras variáveis como a dimensão e forma da sua sala, a sua acústica e o equipamento associado que... -
Page 116: Desembalagem E Colocação
8 cm de cada lado para permitir a dissipação de calor através da circulação do ar. As aberturas de ventilação no topo e na base do CA-5100 devem ser mantidas livres de qualquer obstrução a qual reduzirá a circulação do ar através da unidade. -
Page 117: Instalações Específicas
Apenas levará um minuto. Por favor preencha o cartão agora, antes que se esqueça. Voltagem de operação O amplificador de potência CA-5100 vem definido de fábrica (internamente) para uma operação eléctrica de 100V, 120V, 230V, ou 240V AC, conforme apropriado para o país em que é vendido (230V apenas em países da União Europeia, de acordo com o destipulado pelos regulamentos da CEE). -
Page 118: Aquecimento/Período De Queima
O circuito de protecção do CA-5100 evita que o amplificador opere a voltagens perigosamente altas ou baixas. • No arranque: a voltagem de corrente AC deverá estar dentro • Sobre-voltagem durante a operação: se os picos de voltagem • Sub-voltagem durante a operação: se as quebras de voltagem aquecimento/período... -
Page 119: Características De Design Especiais
Características de Design Especiais Desenho de circuito Todos os estágios analógicos de amplificação da Classé são baseados em altamente refinado circuitos que têm sido optimizados ao longo de muitos anos de contínuos desenvolvimentos. Ao começar com excelentes desenhos de circuitos e ao trabalhar com os mesmos ao longo dos anos, somos capazes de descobrir os muitos pequenos refinamentos que adicionam à... -
Page 120: Extraordinária Longevidade
Extraordinária longevidade Um outro benefício de ter trabalhado de forma intensiva com desenhos de circuitos altamente refinados ao longo de tantos anos é que temos uma vasta experiência do que trabalha no longo prazo. Para começar, ao utilizar componentes da maior qualidade, e ao utiliza-los com conhecimento do seu funcionamento como resultado das experiências de envelhecimento acelerado e actual experiência de longo termo, somos capazes de desenhar e fabricar produtos na qual temos confiança que irão resistir ao teste do... -
Page 121: Painel Frontal
BALANCED SELECT MODE SINGLE-ENDED ������� Painel frontal Tecla de Standby & LED indicador A tecla de Standby do painel frontal alterará o estado do amplificador entre o modo de operação, o seu estado de funcionamento total e o modo de standby que deixa o amplificador desligado, no entanto preparado para responder a comandos do sistema via qualquer uma das opções de controlo suportadas (por exemplo: entrada IR, disparador DC, CAN Bus, ou RS- 232). - Page 122 Atenção! Tecla Select A tecla de Select é utilizada (em combinação com a tecla Mode) quando se configura o amplificador para operação balanceada ou single-ended. É igualmente usada quando se configura o atraso de ligação ou o numero do amplificador ligado a um pré-amplificador Classé pelo Disparador (Trigger) DC ou sistema de controlo CAN Bus.
-
Page 123: Painel Traseiro
Painel Traseiro As descrições seguintes pretendem ser uma referência rápida, caso tenha algumas questões acerca do seu novo produto. Por favor veja a secção seguinte (Intitulada Setup Inicial) para concelhos específicos na incorporação o novo amplificador no seu sistema. Entrada Balanceada (XLR) As Interligações audio Balanceadas foram originalmente desenvolvidas no mundo do audio profissional, de molde a preservar as delicadas nuances dos sinais extremamente pequenos de nível de microfone. - Page 124 As configurações dos pinos das fichas de entrada XLR são: Pino 1: Sinal de terra Pino 2: Sinal + (não-invertido) Pino 3: Sinal – (invertido) Patilha da ficha: massa do chassis Estas configurações de pinos estão de acordo com o standard adoptado pelo Audio Engineering Society (AES14-1992).
- Page 125 Portas de controlo Classé CAN Bus Estas ligações RJ-45 estão reservadas para aplicações de controlo e comunicação futura usando a implementação Controller Area Network (CAN) Bus com especificação audio da Classé. Entrada e Saída de IR O seu amplificador Classé inclui duas mini jacks-mono de 3,5mm de molde a suportar os controlos remotos de Infravermelhos tão usuais nos dias de hoje.
- Page 126 Para mais informação, por favor contacte o seu revendedor e questione sobre sistemas de automação. Entrada de corrente AC Um cabo de corrente IEC standard é utilizado com o CA-5100. Ligue o cabo ao receptáculo IEC no painel traseiro e a outra ponta à tomada de parede.
- Page 127 Perigo! Existem voltagens e correntes potencialmente perigosas dentro do seu amplificador de potência, mesmo quando desligado da corrente eléctrica. Não tente abrir nenhuma parte da caixa do amplificador. Não existem partes reparáveis pelo utilizador dentro do seu amplificador. Toda a assistência deste produto deve ser dirigida a um distribuidor ou revendedor qualificado Classé.
-
Page 128: Setup Inicial
Setup Inicial O seu novo amplificador Classé é bastante simples de configurar e apreciar. Por favor siga os passos sublinhados em baixo de molde a configurar e utilizar com segurança o seu novo amplificador. Importante: configurando a operação single-ended/ balanceada A ligação de corrente AC deverá... -
Page 129: Configurando O Atraso De Ligação Do Amplificador/E Número
configurando o atraso Num sistema que contenha múltiplos amplificadores Classé, pode definir o de ligação do número de segundos de atraso de ligação para cada amplificador, amplificador/e número. permitindo a ligação de cada um pela ordem que especificou, em vez de todos ao mesmo tempo. -
Page 130: Cuidados E Manutenção
Cuidados e Manutenção Para retirar o pó da caixa do seu amplificador, use um espanador ou um pano suave. Para remover sujidade e dedadas, recomendamos álcool isopropilico e um pano suave. Empregne o pano primeiro com o álcool e depois limpe levemente a superfície com o pano. -
Page 131: Guia Para Resolução De Problemas
Guia para resolução de problemas Geralmente, deverá dirigir os problemas de assistência para o seu revendedor Classé. No entanto, antes de o contactar verifique se o problema está na lista seguinte. Não existe som e nenhum LED está aceso. • O amplificador não está ligado à corrente, ou a corrente está cortada (fusível do disjuntor). - Page 132 O fusível de corrente AC está queimado. Existe um simples procedimento para a resolução do problema de um fusível de corrente AC queimado, uma vez que esta rara ocorrência por vezes indica um problema grave. Por favor siga os seguintes passos, por ordem: a.
-
Page 133: Especificações
Especificações A Classé Audio reserva-se o direito de fazer melhoramentos sem aviso prévio. ■ Potência de saída (todos os canais) ■ Resposta de frequência ■ Fase ■ Relação sinal ruído ■ Separação de canais ■ Patamar de ruído (FFT) ■ Distorção (THD + ruído) (calibrado, 0.8Vrms/1kHz de entrada, 10Hz –... - Page 134 WAARSCHUWING: OM HET RISICO VAN BRAND OF ELEKTRISCHE SCHOKKEN TE VOORKOMEN, ADVISEREN WIJ U HET APPARAAT NIET BLOOT TE STELLEN AAN REGEN OF ANDERE VOCHTIGE EN NATTE OMSTANDIGHEDEN. PAS OP: OM HET RISICO VAN ELEKTRISCHE SCHOKKEN TE VOORKOMEN, LAAT DE KAP A.U.B. DICHT. IN HET APPARAAT BEVINDEN ZICH GEEN ONDERDELEN DIE GEACHT WORDEN DOOR DE GEBRUIKER ONDERHOUDEN TE WORDEN.
-
Page 135: Belangrijke Veiligheidsinstructies
Belangrijke Veiligheids Instructies Opgelet: Lees en bekijk alle waarschuwingen en instructies vermeld in deze handleiding en op het apparaat goed en bewaar deze gebruiksaanwijzing voor je kan niet weten. Probeer het apparaat nooit zelf te repareren. Laat de kap a.u.b. dicht. In het apparaat bevinden zich geen onderdelen die geacht worden door de gebruiker onderhouden te worden. - Page 136 Inhoud Welkom bij de Classé familie ...137 Uitpakken en Neerzetten ...138 Speciale Ontwerp Kenmerken ...141 De Voorkant ...143 De achterkant ...145 Het installeren ...150 Verzorging en Onderhoud ...152 Problemen oplossen ...153 Technische gegevens ...155 Afmetingen ...178 toelichting op het Installeren ... 137 het uitpakken van de versterker ...
-
Page 137: Welkom Bij De Classé Familie
U vindt het garantiebewijs achterin het apart bijgeleverde boekje dat handelt over de garantievoorwaarden. toelichting op het Installeren We hebben alles in het werk gesteld om de CA-5100 zo eenvoudig mogelijk te kunnen installeren en te laten functioneren. De vele andere variabelen, zoals de vorm en afmetingen van uw kamer, zijn akoestische eigenschappen en de bijkomende apparatuur, hebben wij niet in de hand. -
Page 138: Uitpakken En Neerzetten
Zorg, voor een goede ventilatie: zo’n 15cm. vrije ruimte boven en ongeveer 3cm. aan de zijkanten van de versterker. De ventilatoren boven- en onderin de CA-5100 moeten vrijelijk hun werk kunnen doen, zorg ervoor dat niets hun taak in de weg staat. Vermijd plaatsing op zachte oppervlakken (zoals kleedjes), die de luchtstroom kunnen belemmeren. -
Page 139: Het Installeren
Het kost u slechts een minuutje van uw tijd. Invullen en op de post doen, voordat u het vergeet. het werkvoltage De CA-5100 is op de fabriek ingesteld op één van de lichtnetvoltages: 100V, 120V, 230V of 240V wisselspanning, al naar gelang het land waar deze versterker moet worden verkocht. -
Page 140: De Opwarm En "Inbreek"Periode
De CA-5100 is uitgerust met een beveiligingscircuit om te voorkomen dat hij moet werken op een gevaarlijk veel te hoog of veel te laag voltage. • Bij het aanzetten: Het aangeboden voltage bij het aanzetten van • Een oplopend voltage gedurende het gebruik: Als het •... -
Page 141: Speciale Ontwerp Kenmerken
Speciale Ontwerp Kenmerken hoogst verfijnde Alle analoge versterkingstrappen van Classé zijn gebaseerd op circuits die door technische ontwerpen vele jaren continue ontwikkeling tot in de puntjes zijn geperfectioneerd. Door al te beginnen met uitstekend ontworpen circuits en daar nog jaren aan te werken, weten wij ondertussen wat hele kleine verfijningen kunnen bijdragen aan al buitengewoon presterende apparaten in een grote variëteit van toepassingen. -
Page 142: Buitengewone Duurzaamheid
buitengewone Nog een voordeel van het over vele jaren op grote schaal werken aan de duurzaamheid ontwikkeling van hoogst verfijnde schakelingen is, dat we een enorme ervaring hebben op het gebied van wat wel en niet werkt op de lange termijn. Door, om te beginnen, alleen maar te werken met de beste onderdelen en ze dan, door de opgedane kennis van versnelde verouderingsexperimenten en onze lange termijn expertise, op de juiste wijze in te zetten, zijn we in staat een product te... -
Page 143: De Voorkant
Doet u dat niet eerder dan dat u de CA-5100 eerst uit (standby) heeft gezet. Omdat bliksem in de buurt van uw huis een enorme energiepuls kan geven... - Page 144 Opgelet! De keuzetoets (SELECT) Deze keuzetoets (Select) (samen met de modustoets [Mode]) wordt gebruikt om de versterker te configureren voor gebalanceerd of niet gebalanceerd gebruik. Hij wordt ook gebruikt om de vertragingstijd cq rangordenummer voor het in bedrijf stellen, bij het gebruik van meerdere Classé...
-
Page 145: De Achterkant
De achterkant De volgende beschrijvingen zijn bedoeld als een snel overzicht, zou u enige vragen hebben over uw nieuwe versterker. Lees voor het inpassen van uw nieuwe versterker in het totale systeem het hoofdstuk “Het aansluiten”. De gebalanceerde (XLR) ingang Om het delicate, miniem kleine microfoonsignaal voor invloeden van buitenaf te vrijwaren werd voor de professionele wereld de gebalanceerde verbinding ontwikkeld. - Page 146 “Het aansluiten” iets verderop. De luidsprekeruitgangen Wij hebben ieder kanaal van de CA-5100 voorzien van een paar vijfweg topkwaliteits klemschroefaansluitingen. Alhoewel op de klemschroefaansluitingen van uw Classé versterker de...
- Page 147 De Classé “CAN Bus” bedieningspoort Deze RJ-45 aansluiting is gereserveerd voor toekomstige bedienings en communicatie toepassingen. De infrarood in- en uitgang Uw Classé eindversterker is ook uitgerust met twee 3.5mm. mono mini- jackpluggen voor gebruik met een infrarood afstandsbedieningssysteem. De “IR” commando’s zijn voor het aan/uitzetten van de versterker, maar zijn ook vaak verborgen commandocodes voor hetzelfde.
- Page 148 De lichtnetaansluiting De bekende Euro netkabel wordt voor de CA-5100 gebruikt om hem te kunnen activeren. Doe de contrasteker in de lichtnetaansluiting en de andere steker in een geschikte wandcontactdoos.
- Page 149 Gevaarlijk! Potentieel gevaarlijke spannings- en stroompunten bevinden zich in uw versterker zelfs wanneer hij uit staat en van het lichtnet ontkoppeld is. Doe dus ook geen pogingen de versterker te openen. Nogmaals: in het apparaat bevinden zich geen onderdelen die geacht worden door de gebruiker onderhouden te worden.
-
Page 150: Het Installeren
Het installeren Uw nieuwe versterker is vrij makkelijke te installeren en dus snel van te genieten. Volg de onderstaande stappen om uw nieuwe versterker op een veilige manier te installeren. Belangrijk! het configureren van de kanalen De verbinding met het lichtnet is de laatste verbinding die u moet maken. -
Page 151: Het Configureren Van Het Op Volgorde Aanzetten Van Versterkers
Het aansluiten op de voorversterker Wanneer de versterker uit staat en/of niet op het lichtnet is aangesloten kunt u uw CA-5100 op de gekozen aansluitwijze (in stap 3: gebalanceerd of ongebalanceerd) met uw voorversterker verbinden. Gebruik daar wel topkwaliteits kabels voor. -
Page 152: Verzorging En Onderhoud
Verzorging en Onderhoud Gebruik een pluisvrije stofdoek om de CA-5100 af te stoffen. Om vuil en vingerafdrukken te verwijderen adviseren wij spiritus en een stofdoek te gebruiken. Maak de stofdoek eerst vochtig met spiritus en wrijf dan lichtjes het oppervlak van de versterker schoon. Gebruik zo weinig mogelijk vloeistof, dat kan alleen maar in de versterker terecht komen. -
Page 153: Problemen Oplossen
Problemen oplossen Normaal gesproken moet u, als er zich problemen voordoen met uw versterker, zich wenden tot uw Classé leverancier. Voordat u dat echter doet is het wellicht verstandig om de onderstaande lijst met problemen eerst even door te nemen en, als dat het geval is, de voorgestelde oplossingen te proberen. - Page 154 De hoofdzekering heeft het begeven We hebben een speciale probleemprocedure ontwikkeld voor het geval de hoofdzekering ter ziele gaat, want dat komt niet zo vaak voor en duidt meestal op een serieus probleem. Volg in volgorde de onderstaande stappen: a. Als u vermoedt dat de hoofdzekering opgeblazen is, haal dan de versterker van het lichtnet, verwijder alle andere verbindingen (voorversterker, luidsprekers) en haal de zekeringhouder er uit.
-
Page 155: Technische Gegevens
Technische gegevens Op het moment van drukken van deze gebruiksaanwijzing waren alle specificaties accuraat. Classé houdt zich echter het recht voorbehouden om niet aangekondigd veranderingen aan te brengen. ■ Uitgangsvermogen ■ Frequentiebereik ■ Faseverschuiving ■ Signaal/ruisverhouding ■ Kanaalscheiding ■ Ruisvloer (FFT) ■... - Page 156 ПРЕДОСТЕРЕЖЕНИЕ:ДЛЯСНИЖЕНИЯОПАСНОСТИВОЗГОРАНИЯИЛИ ПОРАЖЕНИЯ ЭЛЕКТРИЧЕСКИМ ТОКОМ НЕ ПОДВЕРГАЙТЕ ДАННЫЙ АППАРАТ ВОЗДЕЙСТВИЮ ДОЖДЯ ИЛИ ВЛАГИ. ВНИМАНИЕ: ДЛЯ СНИЖЕНИЯ ОПАСНОСТИ ПОРАЖЕНИЯ ЭЛЕКТРИЧЕСКИМ ТОКОМ НЕ СНИМАЙТЕ КРЫШКУ (ИЛИ ЗАДНЮЮ ПАНЕЛЬ). ВНУТРИ НЕТ ЭЛЕМЕНТОВ, КОТОРЫЕ НЕОБХОДИМЫ ПОЛЬЗОВАТЕЛЮ. ДОВЕРЯЙТЕ ПРОВЕДЕНИЕ ТЕХНИЧЕСКОГО ОБСЛУЖИВАНИЯ ТОЛЬКО КВАЛИФИЦИРОВАННОМУ ПЕРСОНАЛУ. Изображение молнии в равностороннем треугольнике предупреждает пользователя о наличии...
- Page 157 Важная информация по безопасности Внимание: Прочтите и соблюдайте все предупреждения и инструкции, приведенные в данном Руководстве и на корпусе аппарата. Сохраните данное Руководство для использования в дальнейшем. Не пытайтесь обслуживать этот аппарат самостоятельно. Ни в коем случае не открывайте корпус, так как...
- Page 158 Содержание Добро пожаловать в семью Classé... 159 Распаковка и размещение... 160 Характерные технические особенности ... 163 Передняя панель... 165 Задняя панель ... 167 Первоначальная настройка... 172 Уход и обслуживание... 174 Диагностика и устранение неполадок ... 175 Технические характеристики ... 177 примечание...
-
Page 159: Добро Пожаловать В Семью Classé
По вопросам гарантийного обслуживания обращайтесь к региональному дилеру Classé. примечание к установке Мы изо всех сил старались сделать процедуры установки и эксплуатации CA-5100 как можно проще. Однако, невозможно предугадать такие факторы, как размер и форма вашей комнаты, ее акустические особенности, а также параметры... -
Page 160: Распаковка И Размещение
распаковка усилителя Аккуратно распакуйте ваш усилитель согласно прилагаемым инструкциям и извлеките все принадлежности из коробки. Внимание! размещение CA-5100 лучше всего разместить в стойке, причем лучше всего в самом нижнем ее уровне, подальше от источников, предусилителей и других чувствительных компонентов. Расположению внизу делает рэковую стойку... -
Page 161: Заказная Инсталляция
панели аппарата, совпадают с параметрами электросети в вашем регионе. Попытка включить усилитель в сеть с иным напряжением может привести к его повреждению. Предостережение: CA-5100 может питаться от обычной 15-амперной сетевой проводки. Если к этой проводке подключены другие электроприборы, необходимо учитывать суммарную потребляемую ими мощность. Конфигурация напряжения питания вашего... -
Page 162: Прогрев И Приработка
CA-5100 оборудован схемой защиты, отслеживающей ситуации опасно высокого или низкого напряжения в сети. прогрев и приработка Ваш усилитель Classé обеспечивает паспортные характеристики с первого включения. Однако, по мере достижения нормальной рабочей температуры и “приработки”, его звучание должно еще более улучшиться. -
Page 163: Характерные Технические Особенности
Характерные технические особенности отработанные схемные Все аналоговые каскады усиления Classé выполнены на базе схемных решения решений, оптимизированных в процессе многолетней непрерывной работы. Начав с отличных схемных конфигураций, в течение многих лет мы ввели массу небольших усовершенствований, обеспечивших превосходные характеристики в различных областях применения. Изменяя напряжение в... -
Page 164: Исключительная Долговечность
исключительная Еще одним преимуществом многолетних доработок является знание того, долговечность как та или иная деталь ведет себя в течение длительного времени. Используя комплектующие самого высокого качества в оптимальных для них режимах (выявленных в результате опытов по ускоренному старению и реальной длительной эксплуатации изделий), мы можем разрабатывать и изготавливать... -
Page 165: Передняя Панель
BALANCED SELECT MODE SINGLE-ENDED ������� Передняя панель Кнопка Standby и LED индикатор режима готовности Кнопка Standby на передней панели переключает усилитель между рабочим состоянием и состоянием готовности, в котором усилитель выключен, но готов к приему команд любой поддерживаемой системы управления (например, с ИК-входа, с триггерного входа постоянного... - Page 166 Внимание! Кнопка Select Кнопка Select используется (вместе с кнопкой Mode) при конфигурировании усилителя для работы в балансном или же обычном режиме. Она также используется для настройки задержки по времени включения или для присвоения номера усилителю, соединенному с предусилителем Classé с помощью 12 В триггера или же...
-
Page 167: Задняя Панель
Задняя панель Это описание предназначено для быстрого знакомства с продуктом, если у вас возникли вопросы. Смотрите следующий Раздел (Начальная установка) по вопросам включения вашего усилителя в систему. Балансный вход (разъем XLR) Балансные аудио соединения первоначально были разработаны для профессиональной аудио аппаратуры с целью сохранения всех нюансов... - Page 168 Цоколевка разъемов XLR следующая: Штырек 1: Земля сигнала Штырек 2: Сигнал + (неинвертированный) Штырек 3: Сигнал – (инвертированный) Земляной контакт разъема: Шасси Данная распайка соответствует стандарту Общества аудио инженеров (AES14-1992). Если вы используете усилитель мощности с предусилителем к Classé, то все в порядке - достаточно использовать стандартные балансные соединительные...
- Page 169 (Controller Area Network) в версии Classé. Вход IR IN и выход IR OUT CA-5100 оборудован двумя мини-гнездами (1/8 дюйма) для приема команд ИК ДУ в виде электрических сигналов (IR IN) и возможной передачи этих команд на другие компоненты (IR OUT). Существуют...
- Page 170 Дополнительную информацию о системах домашней автоматики можно получить у вашего дилера. Розетка для шнура питания В комплект поставки CA-5100 входит шнур питания стандарта IEC. Вставьте разъем с одного конца шнура в розетку IEC, а вилку с другого конца – в розетку электросети с соответствующим...
- Page 171 Опасность! Даже после отсоединения усилителя от электросети, внутри его корпуса имеется потенциально опасное напряжение. Не пытайтесь полностью или частично открыть корпус усилителя. Внутри его нет элементов, которые обслуживаются пользователем. Доверяйте проведение технического обслуживания этого аппарата только квалифицированному авторизованному дилеру или дистрибьютору Classé.
-
Page 172: Первоначальная Настройка
Первоначальная настройка Ваш новый усилитель Classé легко настроить и можно наслаждаться его звучанием. Для его безопасной установки и использования следуйте указаниям, приведенным ниже. Внимание! Конфигурирование балансного/ однополярного режимов работы Последнее, что нужно сделать – это включить вилку усилителя в сетевую розетку. Всегда полезно включать усилитель... -
Page 173: Конфигурирование Задержки По Времени Включения Усилителя
Конфигурирование задержки по В системе, содержащей множество усилителей Classé, вы можете времени включения усилителя задать время в секундах, на которое будет задержано включение каждого усилителя, позволяя устанавливать их очередность. (Одновременное включение всех усилителей мощности может перегрузить сеть в вашем доме, и даже привести к срабатыванию автоматов-предохранителей). Это... -
Page 174: Уход И Обслуживание
Уход и обслуживание очистка корпуса Для смахивания пыли с корпуса усилителя пользуйтесь метелкой из перьев или мягкой тканью без ворса. Грязь и отпечатки пальцев можно удалить изопропиловым спиртом. Смочите им мягкую ткань и аккуратно протрите поверхность корпуса. Не смачивайте ткань слишком сильно, чтобы капли спирта... -
Page 175: Диагностика И Устранение Неполадок
Диагностика и устранение неполадок По вопросам диагностики и ремонта обращайтесь к дилеру Classé. Однако, сначала попробуйте устранить проблему самостоятельно, пользуясь приведенными ниже советами. Звука нет и ни один из индикаторов Channel LED не светится. • Усилитель не подсоединен к розетке электросети, или же в сети... - Page 176 Усилитель продолжает отключаться • Убедитесь, что усилитель имеет достаточную вентиляцию, и что температура в комнате не превышает 40 градусов С. • Проделайте процедуры устранения неисправностей, приведенные выше (если усилитель выходит в режим защиты). Перегорел сетевой предохранитель Это маловероятное событие сигнализирует о серьезной проблеме и для...
-
Page 177: Технические Характеристики
Технические характеристики Classé оставляет за собой право производить усовершенствования без уведомления. ■ Выходная мощность (при работе всех каналов) ■ Частотная характеристика ■ Фазовый сдвиг ■ Отношение сигнал/шум ■ Разделение каналов ■ Порог шума (FFT) ■ Искажения (THD + шум) (невзвешенные, вход 0,8 В rms/1 кГц, 10 Гц–500 кГц) ■... -
Page 178: Dimensions
������ ����� Dimensions • Abmessungen Dimensioni • Dimensiones Dimensões • Afmetingen Габариты ����� SELECT ����� ����� ����� ����� ���� ������ ����� ������ ����� ����� ���� BALANCED MODE SINGLE-ENDED CA-5100... - Page 180 Classé Audio 5070 François Cusson Lachine, Quebec Canada H8T 1B3 +1 (514) 636-6384 +1 (514) 636-1428 (fax) http://www.classeaudio.com email: cservice@classeaudio.com Copyright © 2006 Classé Audio Inc. Printed in Canada. v1.4 012706...
Need help?
Do you have a question about the CA-5100 and is the answer not in the manual?
Questions and answers