Table of Contents
Advertisement
Quick Links
Advertisement
Table of Contents

Subscribe to Our Youtube Channel
Related Manuals for Datalogic MATRIX 400


Summary of Contents for Datalogic MATRIX 400
- Page 1 MATRIX 400™ Code Quality Verifier Solution Manual...
- Page 2 ALL RIGHTS RESERVED Datalogic reserves the right to make modifications and improvements without prior notification. Datalogic shall not be liable for technical or editorial errors or omissions contained herein, nor for incidental or consequential damages resulting from the use of this material.
-
Page 3: Table Of Contents
CONTENTS REFERENCES ......................v Conventions........................v Reference Documentation .................... v Service and Support ..................... v Patents.......................... v COMPLIANCE......................vi EMC Compliance......................vi Power Supply....................... vi LED Class........................vi CE Compliance......................vi FCC Compliance ......................vi GENERAL VIEW ......................vii RAPID CONFIGURATION ................... 1 Step 1 –... - Page 4 Configuration ......................59 5.4.1 ISO/IEC 15415 Verification Setup ................59 5.4.2 ISO/IEC 15416 Verification Setup ................60 5.4.3 AS9132A Verification Setup ..................61 5.4.4 AIM DPM Verification Setup ..................62 5.4.5 Digital Outputs Activation.................... 63 5.4.6 Code Filtering ......................65 5.4.7 Output Message Format .....................
-
Page 5: References
Matrix 400™ reader. REFERENCE DOCUMENTATION For further details refer to: the VisiSet™ Help On Line, Matrix 400™ Reference Manual, Matrix Series Reading Methods, Matrix 400™ Host Mode Programming, Matrix 400™ SW Parameter Guide, LT-410 Coaxial Lighting System, LT-510 Mini Dome Lighting System, LT- 511 Dome Lighting System and LT-630 Four Bar Lighting System provided as supplementary documentation on VisiSet™... -
Page 6: Compliance
FCC COMPLIANCE Modifications or changes to this equipment without the expressed written approval of Datalogic could void the authority to use the equipment. This device complies with PART 15 of the FCC Rules. Operation is subject to the following two conditions: (1) This device may not cause harmful interference, and (2) this device must accept any interference received, including interference which may cause undesired operation. -
Page 7: General View
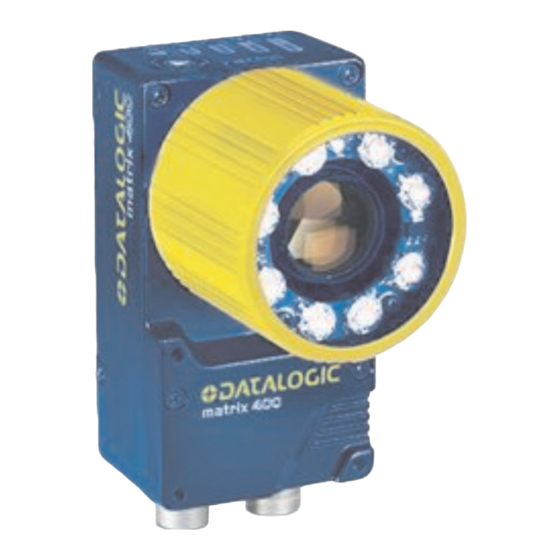
GENERAL VIEW Matrix 400™ Figure A HMI X-PRESS™ Interface Device Class Label "POWER ON" LED Mounting Holes (12) Power - Serial Interfaces - I/O Connector Lens Cover Lens Ethernet Connector (separate accessory) (Ethernet Models Only) Internal Illuminator Ethernet Connection LED... -
Page 9: Rapid Configuration
1 RAPID CONFIGURATION STEP 1 – CHECK REQUIRED HARDWARE ISO/IEC 15415 AND ISO/IEC 15416 VERIFICATION To install the Matrix 400™ reader in an ISO/IEC 15415 or ISO/IEC 15416 symbol verifier configuration, you need the hardware indicated in Figure 1. LTC-630... - Page 10 MATRIX 400™ CODE QUALITY VERIFIER SOLUTION AS9132A AND AIM DPM VERIFICATION: To install the Matrix 400™ reader in an AS9132A or AIM DPM symbol verifier configuration, you need the hardware indicated in Figure 2. PG 6000 CAB-MS01 Host Matrix 400™...
- Page 11 Four Bar Lighting System 93A401018 LTC-630 Four Bar Lighting System Controller 93ACC1790 BK-4990 Generic LT Bracket Matrix 400 93ACC1805 BK-4410 Coaxial LT Bracket Matrix 400 93ACC1804 (*) The suggested external lighting systems provide a complete solution for DPM parts verification based on AS9132 and AIM DPM recommendations.
-
Page 12: Step 2 - Connect The System
MATRIX 400™ CODE QUALITY VERIFIER SOLUTION STEP 2 – CONNECT THE SYSTEM To install the Matrix 400™ reader in a symbol verifier system configuration, you need the hardware indicated in Figure 3 or Figure 4. In this layout the data is transmitted to the Host on the main serial interface. - Page 13 Main Interface Code Surface Figure 4 – Matrix 400™ in ISO/IEC 15415 and ISO/IEC 15416 Verifier Layout 1. Connect the Matrix 400™ to the CBX connection box. 2. Connect the selected LT-XXX lighting system to the CBX connection box according to the wiring table below.
- Page 14 SGND SGND SGND (*) Do not leave floating, refer to Matrix 400™ Reference Manual for connection details. Do not connect GND, SGND and REF to different (external) ground references. GND, SGND and REF are internally connected through filtering circuitry which can be permanently damaged if subjected to CAUTION voltage drops over 0.8 Vdc.
-
Page 15: Step 3 - Mount And Position The System
RAPID CONFIGURATION STEP 3 – MOUNT AND POSITION THE SYSTEM 1. To mount the Matrix 400™, use the mounting brackets to obtain the most suitable position for the reader. Two of the most common mounting configurations are shown in the figures below. Other mounting solutions are provided in the Matrix 400™ Reference Manual. - Page 16 Use 4 of the M4 screws in the bag marked "Screws for Bracket-Bracket- Reader assembling". 6. Remove the Lens Cover and loosen the Locking Knobs as described in the Matrix 400™ Reference Manual. Swing the bracket D 90° returning to the reading position.
- Page 17 5. Swing the bracket D 90° and mount the reader C onto it through the mounting holes on the bracket. Use 4 of the M4 screws. 6. Remove the Lens Cover and loosen the Locking Knobs as described in the Matrix 400™ Reference Manual. Swing the bracket D 90° returning to the reading position.
- Page 18 MATRIX 400™ CODE QUALITY VERIFIER SOLUTION 9. After Focusing, tighten the Focus and Diaphragm Locking Knobs. 10. Swing the bracket D 90° as previously shown to replace the Lens Cover. Swing the bracket D 90° returning to the reading position and fix the reader assembly (C+D) to the illuminator assembly (A+B) with the remaining 2 M4 screws.
-
Page 19: Step 4 - Installing Visiset™ Configuration Program
RAPID CONFIGURATION STEP 4 – INSTALLING VISISET™ CONFIGURATION PROGRAM ™ VisiSet is a Datalogic reader configuration tool providing several important advantages: • Autolearning Wizard for new users; • Symbol Verification tool; • Defined configuration directly stored in the reader; •... -
Page 20: Step 5 - Focus The Reader And Calibrate Image Density
MATRIX 400™ CODE QUALITY VERIFIER SOLUTION STEP 5 – FOCUS THE READER AND CALIBRATE IMAGE DENSITY The Autolearning Wizard option is advised for rapid configuration or for new users. It allows reader focusing and calibration in a few easy steps. - Page 21 RAPID CONFIGURATION 4. Press the "Positioning" button. The reader continuously acquires images and gives visual feedback in the view image window. Select the largest code from the chart that completely fits into the view image window. Move the reader (or code) to center it. The code must be aligned across the X-axis reference line at the center of the FOV.
- Page 22 Autolearning Wizard" and tighten the Locking Knobs. In order to function correctly to the fullest extent of its symbol verification and decoding capabilities, Matrix 400™ must acquire information regarding image density or PPI (pixels per inch).
-
Page 23: Step 6 - Setting Verification Parameters
RAPID CONFIGURATION STEP 6 – SETTING VERIFICATION PARAMETERS Before to calibrate and validate your verifier system, you need to set the parameters for ISO/IEC 15415, AS9132A, AIM DPM or ISO/IEC 15416 verification process. 1. Select the “Symbol Verification” button from the Main menu. 2. - Page 24 MATRIX 400™ CODE QUALITY VERIFIER SOLUTION 5. Select the “Options” button from the Symbol Verification window. The Symbol Verification Options window allows to set the default verification report and image formats, the default saving path and other options automatically activated after verification process.
-
Page 25: Step 7 - Calibrate Verifier System
RAPID CONFIGURATION STEP 7 – CALIBRATE VERIFIER SYSTEM The Verifier Setup option allows system configuration and calibration in a few easy steps. 1. Select the “Symbol Verification” button from the Main menu. 2. Select the “Verifier Setup” button from the Symbol Verification window. ISO/IEC 15415 AND ISO/IEC 15416 VERIFICATION 3. - Page 26 MATRIX 400™ CODE QUALITY VERIFIER SOLUTION 4. Press the “Positioning” button. The reader continuously acquires images and gives visual feedback in the view image window. Move the code to the center of the field of view. The code must be aligned across the X-axis reference line at the center of the FOV. See figure above.
- Page 27 RAPID CONFIGURATION 6. Use the spin boxes in the Reflectance Calibration Options section to set the Minimum and Maximum Reflectance (%) values provided in the ISO/IEC Calibration Chart. 7. Press the “Reflectance Calibration” button. The reader flashes several time and auto calibrates the best Exposure and Gain parameters.
- Page 28 MATRIX 400™ CODE QUALITY VERIFIER SOLUTION 4. Press the "Positioning" button. The reader continuously acquires images and gives visual feedback in the view image window. Move the code to the center of the field of view. The code must be aligned across the X-axis reference line at the center of the FOV. See figure above.
-
Page 29: Step 8 - Validate Verifier System
RAPID CONFIGURATION STEP 8 – VALIDATE VERIFIER SYSTEM Once the verifier system is calibrated, the Verifier Setup option can be used to evaluate its measurement stability in a few easy steps. 1. Select the “Symbol Verification” button from the Main menu. 2. - Page 30 MATRIX 400™ CODE QUALITY VERIFIER SOLUTION 4. Press the "Positioning" button. The reader continuously acquires images and gives visual feedback in the view image window. Move the code to the center of the field of view. The code must be aligned across the X-axis reference line at the center of the FOV. See figure above.
- Page 31 RAPID CONFIGURATION Repeat steps 3 and 4 rotating clockwise the symbol of approximately 72°, 144°, 216° and 288° in order to achieve a full 360° rotation. After each rotation press the “Next Validation Cycle” button. The reader performs the specified number of image acquisitions and gives visual feedback in the System Validation Report section.
-
Page 32: Step 9 - Verify Symbol
MATRIX 400™ CODE QUALITY VERIFIER SOLUTION STEP 9 – VERIFY SYMBOL When the system is configured and calibrated, you can move again to the Symbol Verification window and perform the selected verification procedure. 1. Select the “Symbol Verification” button from the Main menu. - Page 33 RAPID CONFIGURATION Press the “Positioning” button again to stop positioning. 9. Press the “Capture Image” button. The reader flashes once to acquire the image and gives visual feedback in the view image window. If necessary, press the “View Image” button to visualize the full resolution image in a separated window. 10.
-
Page 34: Step 10 - Save Verification Report
MATRIX 400™ CODE QUALITY VERIFIER SOLUTION STEP 10 – SAVE VERIFICATION REPORT The Symbol Verification window allows to generate and save a report containing your verification results. 1. Press the “Save Report” button. The reader generates and save the verification report as a HTML, RTF, TXT or CSV file according to the settings configured in the Symbol Verification Options window (see Step 6). - Page 35 RAPID CONFIGURATION Code data and symbology Non-graded parameters (Pixels per Element, Print Growth, ..) Code quality analysis results grades (Cell Contrast, Axial Non Uniformity, Unused Error Correction, ..) Acquired code image Reference Data (Reader firmware version and serial number, VisiSet™ configuration tool version, Device Model, Operator Name, Company Name, ..)
-
Page 36: Symbol Verification Overview
2 SYMBOL VERIFICATION OVERVIEW 2.1 INTRODUCTION Matrix 400™ can be used to evaluate printed or marked symbols according to the ISO/IEC 15415, ISO/IEC 15416, AS9132 and AIM DPM standards. The purpose of verification is to guarantee reliability of 2D and 1D codes according to the criteria summarized in the above mentioned symbol verification standards. -
Page 37: Iso/Iec 15415 2D Standard
SYMBOL VERIFICATION OVERVIEW 2.2 ISO/IEC 15415 2D STANDARD The ISO-IEC 15415 Standard specifies the methodologies for the measurement of specific attributes of two-dimensional bar code symbols, and methods for evaluating and grading these measurements and deriving an overall assessment of symbol quality. Two-dimensional symbol quality assessment shall be based on measurement and grading of parameters of the reference Grey-scale image, the binarized image derived from it, and the application of the reference decode algorithm to these. - Page 38 MATRIX 400™ CODE QUALITY VERIFIER SOLUTION Axial Non-Uniformity (ANU) Measures and grades the squareness of all modules in the direction of each of the symbol’s major axes (X-axis and Y-axis) by applying the decode algorithm to the binarized image. Decode This parameter tests, on a Pass/Fail basis, whether the symbol has all its features sufficiently correct.
- Page 39 SYMBOL VERIFICATION OVERVIEW Modulation (MOD) Modulation is a measure of the uniformity of reflectance of the dark and light modules respectively. Some printing/background factors may reduce the apparent margin between the reflectance of a module and the Global Threshold. Print Growth Print Growth refers to the deviation (larger or smaller) of actual element size from intended element size due to printing problems.
- Page 40 MATRIX 400™ CODE QUALITY VERIFIER SOLUTION Unused Error Correction (UEC) This parameter tests and grade the extent to which regional or spot damage in the symbol has eroded the information redundancy margin that error correction provides. 100% Unused Error Correction Capacity is the ideal condition.
-
Page 41: As9132 2D Standard
SYMBOL VERIFICATION OVERVIEW 2.3 AS9132 2D STANDARD This SAE Aerospace Standard (AS) defines uniform Quality and Technical requirements relative to direct parts marking performed in using Data Matrix symbology. The marking processes covered by this standard are as follows: Dot Peening, Ink Jet, Laser Etching and Electro-Chemical Etching. - Page 42 MATRIX 400™ CODE QUALITY VERIFIER SOLUTION Dot Ovality Evaluate the ovality of each dot by measuring the difference between its height (D) and width (d) expressed as percentage differences from the nominal circle values. It is calculated only for circular module shape.
-
Page 43: Aim Dpm Quality Guideline
SYMBOL VERIFICATION OVERVIEW 2.4 AIM DPM QUALITY GUIDELINE The AIM DPM Quality Guideline is applicable to the symbol quality assessment of direct parts marking performed in using two-dimensional bar code symbols. It defines modifi cations to the measurement and grading of several symbol quality parameters. The marking processes covered by this guideline are as follows: Dot Peening, Ink Jet, Laser Etching and Electro-Chemical Etching. - Page 44 MATRIX 400™ CODE QUALITY VERIFIER SOLUTION Axial Non-Uniformity (ANU) Measures and grades the squareness of all modules in the direction of each of the symbol’s major axes (X-axis and Y-axis) by applying the decode algorithm to the binarized image. Cell Contrast (CC) Measures and grades the difference between the means of brightest and darkest values of the symbol (instead of determining differences between the brightest and darkest values).
- Page 45 SYMBOL VERIFICATION OVERVIEW Grid Non-Uniformity (GNU) qualifies the module placement by comparing to a nominal evenly spaced grid. Minimum Reflectance (MR) The image brightness is adjusted on a reference part, after which this calibrated value is compared with the reflectance of that part. MR is the ratio of the parts reflectance to the calibrated reflectance Print Growth Measures the the deviation of actual elements dimension from the...
-
Page 46: Iso/Iec 15416 1D Standard
MATRIX 400™ CODE QUALITY VERIFIER SOLUTION 2.5 ISO/IEC 15416 1D STANDARD The ISO-IEC 15416 Standard specifies the methodologies for the measurement of specific attributes of linear bar code symbols, and methods for evaluating and grading these measurements and deriving an overall assessment of symbol quality. - Page 47 SYMBOL VERIFICATION OVERVIEW Decode The symbology reference decode algorithm shall be used to decode the symbol using the element edges determined on the Scan Reflectance profile. This algorithm may be found in the symbology specification. Decodability The decodability of a bar code symbol is a measure of the accuracy of its production in relation to the appropriate reference decode algorithm.
- Page 48 MATRIX 400™ CODE QUALITY VERIFIER SOLUTION Defects are irregularities found within elements and quiet zones, and are measured in terms of element reflectance non-uniformity. Element reflectance non-uniformity within an individual element or quiet zone is the difference between the reflectance of the highest peak and the reflectance of the lowest valley.
- Page 49 SYMBOL VERIFICATION OVERVIEW ISO/IEC ISO/IEC AIM DPM AS9132A 16022-18004 15415 Angle Of Distortion Axial Non Uniformity Cell Contrast Cell Modulation Decode Dot Center Offset Dot Ovality Dot Size / Cell Fill Fixed Pattern Damage Grid Non Uniformity Minimum Reflectance Modulation Print Growth Non Graded Non Graded...
-
Page 50: Reading Features
MATRIX 400™ CODE QUALITY VERIFIER SOLUTION 3 READING FEATURES 3.1 OPTICAL ACCESSORY SELECTION Referring to Figure 12 and the formula below, use the data in the following table to calculate the FOV for your application. Min Focus Distance Viewing Angle... -
Page 51: Horizontal Fov Vs. Reading Distance Diagrams
READING FEATURES Example: The FOV for a Matrix 400 600-0x0 base using the 16 mm lens at a focus distance of 200 mm is: = 2 [(200 mm + 35 mm) tan (24°/2)] = 100 mm = 2 [(200 mm + 35 mm) tan (18°/2)] = 74 mm 3.2 HORIZONTAL FOV VS. -
Page 52: Linear) Codes
MATRIX 400™ CODE QUALITY VERIFIER SOLUTION 3.2.2 1D (Linear) Codes 1D Codes – Matrix 400 400-0x0 (SXGA) 16 mm 0.38 mm 0.35 mm 0.33 mm 0.30 mm 0.27 mm Code Resolution Conversion 0.27 mm (11 mils) 0.30 mm (12 mils) 0.33 mm (13 mils) -
Page 53: Bi-Dimensional) Codes
READING FEATURES 3.2.3 2D (Bi-dimensional) Codes 2D Codes – Matrix 400 400-0x0 (SXGA) 16 mm 0.38 mm 0.35 mm 0.33 mm 0.30 mm 0.27 mm Code Resolution Conversion 0.27 mm (11 mils) 0.30 mm (12 mils) 0.33 mm (13 mils) 0.35 mm (14 mils) -
Page 54: External Lighting Systems
MATRIX 400™ CODE QUALITY VERIFIER SOLUTION 4 EXTERNAL LIGHTING SYSTEMS 4.1 INTRODUCTION A series of accessory illuminators are available which cover a variety of applications. The LT-100 Cone Lighting System provides a circular symmetrical light source designed for the following applications: •... - Page 55 SOFTWARE CONFIGURATION The LT-210 Mini Spot Lighting System provides a high intensity light source designed for the following applications: • with uneven, noisy and scratched surfaces • where dot peening or laser etching codes are directly marked onto metal surfaces or PCBs and need to be highlighted.
- Page 56 MATRIX 400™ CODE QUALITY VERIFIER SOLUTION The LT-316 60° Dark Field Ring Lighting System is designed for reading codes produced by Dot Peening (especially by a 120° stylus) or Laser Etching on flat, reflective parts. Figure 18 - LT-316 60° Dark Field Ring Lighting System...
- Page 57 SOFTWARE CONFIGURATION The LT-511 Dome Lighting System is a diffuse dome light designed for reading printed label or Direct Marking codes on parts with a curved surface. Figure 21 - LT-511 Dome Lighting System The LT-630 Four Bar Lighting System is designed for Code verification applications according to ISO/IEC 15415 or ISO/IEC 15416 specifications.
-
Page 58: How To Select The Right External Lighting System
MATRIX 400™ CODE QUALITY VERIFIER SOLUTION 4.2 HOW TO SELECT THE RIGHT EXTERNAL LIGHTING SYSTEM... -
Page 59: Software Configuration
SOFTWARE CONFIGURATION 5 SOFTWARE CONFIGURATION Software configuration of your Matrix 400™ for code quality verification applications can be accomplished by using the VisiSet™ Autolearning Wizard and Symbol Verification tools for easy setup. These procedures are described in chapter 1. For all other applications use VisiSet™ through the reader serial ports (or Ethernet port for Matrix 400™... -
Page 60: Startup
After completing the mechanical and electrical connections to Matrix 400™, you can begin software configuration as follows: 1. Power on the Matrix 400™ reader. Wait for the reader startup. The system bootstrap requires a few seconds to be completed. The reader automatically enters Run Mode. -
Page 61: Visiset™ Options
SOFTWARE CONFIGURATION 5.3.1 VisiSet™ Options The Options item from the VisiSet™ menu (see Figure 23) presents a window allowing you to configure: • the logging function (Log) • VisiSet™ window properties (Environment) • VisiSet™ communication channel (Communication) Figure 24 - Options - Log Figure 25 - Options - Environment... - Page 62 You can easily find it by just clicking on the Look for devices on network button, and then selecting and saving the desired device as soon as it appears. Only Datalogic devices are visualized in the list. Any unknown device refer to older version products. The IP Port number has a fixed value.
-
Page 63: Edit Reader Parameters
Management (right click) Figure 28 - Editing Parameters When all the configuration parameters are set correctly, save them to the Matrix 400™ reader by pressing the Send button. See Figure 28. For successive configuration of other readers or for backup/archive copies, it is possible to save the configuration onto your PC by selecting the Save Configuration File option from the File menu. - Page 64 MATRIX 400™ CODE QUALITY VERIFIER SOLUTION Parameters to verify/modify: Operating Mode Sets the parameters which customize the reader operating mode starting from three main modes: One Shot: acquires a single image based on the selected value for the Acquisition Trigger and Acquisition Trigger Delay.
-
Page 65: Send Configuration Options
SOFTWARE CONFIGURATION 5.3.3 Send Configuration Options The device parameters are divided into two main classes, Configuration and Environmental which are effected differently by the Send Configuration and Send Default Configuration commands. Configuration Parameters regard parameters that are specific to the device. These parameters are influenced by the Send Configuration and Send Default Configuration commands, that is they are overwritten by these commands. - Page 66 MATRIX 400™ CODE QUALITY VERIFIER SOLUTION For device replacement it is necessary to send the previously saved configuration (both Configuration and Environmental parameters) to the new device. To do this select "Send Configuration with Options" from the Device Menu and check the Environmental Parameters checkbox: Figure 30 –...
-
Page 67: Configuration
SOFTWARE CONFIGURATION 5.4 CONFIGURATION Once connected to Matrix 400™ as described in paragraph 5.3, you can modify the configuration parameters for off line or on line symbol verification applications. 5.4.1 ISO/IEC 15415 Verification Setup Allows to configure lighting and camera settings to comply with ISO/IEC 15415 optical requirements for 2D symbol verification. -
Page 68: Iso/Iec 15416 Verification Setup
MATRIX 400™ CODE QUALITY VERIFIER SOLUTION 5.4.2 ISO/IEC 15416 Verification Setup Allows to configure lighting and camera settings to comply with ISO/IEC 15416 optical requirements for 1D symbol verification. ISO-IEC 15415-15416 SETUP Aperture Mode Allows configuration of the Aperture parameter according to the ISO-IEC 15415 and ISO-IEC 15416 international standards. -
Page 69: As9132A Verification Setup
SOFTWARE CONFIGURATION 5.4.3 AS9132A Verification Setup Allows to configure camera settings to comply with AS9132A requirements for 2D symbol verification. AS9132A Status Enables/disables symbol verification according to the AS9132A standard for direct part mark DataMatrix ECC200 symbology. Module Shape Allows specifying the module shape of the code to be verified (circular or square). This option affects the symbol verification results according to the AS9132A standard. -
Page 70: Aim Dpm Verification Setup
MATRIX 400™ CODE QUALITY VERIFIER SOLUTION 5.4.4 AIM DPM Verification Setup Allows to configure lighting and camera settings to comply with AIM DPM Quality Guideline optical requirements for 2D symbol verification. AIM DPM SETUP Aperture Mode Allows configuration of the Aperture parameter according to the AIM DPM quality guideline. -
Page 71: Digital Outputs Activation
SOFTWARE CONFIGURATION 5.4.5 Digital Outputs Activation Matrix 400™ digital outputs can be used to indicate if one or more grades of the decoded symbol fall become lower than the selected threshold grade. DIGITAL I/O - OUTPUT 1,2 Activation Events Defines the event(s) which will activate the output. Among the available activating event selections, several Standard Code Quality Parameters are listed. - Page 72 MATRIX 400™ CODE QUALITY VERIFIER SOLUTION The valid Activation Events for this standard are: • ISO-IEC Symbol Contrast • ISO-IEC Modulation • ISO-IEC Min Edge Contrast • ISO-IEC Decodability • ISO-IEC / AIM DPM Minimum Reflectance • ISO-IEC Defects •...
-
Page 73: Code Filtering
SOFTWARE CONFIGURATION 5.4.6 Code Filtering Matrix 400™ digital outputs allows ordering read codes and filtering them according to their symbology, length, position and quality grades. DATA COLLECTION - CODE FILTER SETTING Code Quality Index The Code Quality Index allows selecting from a list of Standard code quality parameters, which the codes read must meet or exceed in order to be accepted in the collection. - Page 74 MATRIX 400™ CODE QUALITY VERIFIER SOLUTION • ISO-IEC Modulation • ISO-IEC Min Edge Contrast • ISO-IEC Decodability • ISO-IEC / AIM DPM Minimum Reflectance • ISO-IEC Defects • ISO-IEC / AIM DPM Decode AIM DPM Threshold This parameter is available when the AIM DPM Status parameter is enabled.
-
Page 75: Output Message Format
SOFTWARE CONFIGURATION 5.4.7 Output Message Format Matrix 400™ allows to include in the output data string information about the code quality parameters calculated according to the available symbol verification Standards. DATA COLLECTION – DATA FORMAT Data Packet Format Allows the definition of the output data string format. It is possible to type any printable or non-printable character and to select special symbols to have a customized data format output. - Page 76 MATRIX 400™ CODE QUALITY VERIFIER SOLUTION You can also include information about the code quality parameters calculated according to the following Standards: • ISO/IEC 16022 (grade and numeric values) • ISO/IEC 18004 (grade and numeric values) • ISO/IEC 15415 (grade and numeric values) •...
- Page 77 SOFTWARE CONFIGURATION Example: to have a Data Packet composed of Code Data followed by the ISO/IEC 15415 code quality parameters (grade only) in parenthesis, separated by a comma and a space, the Data Packet Format string must be the following: Data Packet Format = %2 (%C, %E, %I, %K, %a, %m, %Q, %n) The transmitted code quality parameters have the following format: •...
- Page 78 MATRIX 400™ CODE QUALITY VERIFIER SOLUTION When ISO/IEC 15416 Status parameter is enabled, the following code quality parameters can be included in the Data Packet Format string: • %C ISO-IEC / AIM DPM Overall (Grade) • %D ISO-IEC / AIM DPM Overall (Value) •...
- Page 79 SOFTWARE CONFIGURATION • AS9132 Angle Of Distortion (grade) • AS9132 Angle Of Distortion (value) • AS9132 Quiet Zone (grade) • AS9132 Quiet Zone (value) • AS9132 Symbol Contrast (grade) • AS9132 Symbol Contrast (value) Some AS9132A code quality parameters are calculated according to the configured Module Shape and Marking Method parameters value.
-
Page 80: Technical Features
MATRIX 400™ CODE QUALITY VERIFIER SOLUTION 6 TECHNICAL FEATURES ELECTRICAL FEATURES Power Supply Voltage 10 to 30 Vdc Power Consumption 0.8 to 0.27 A, 8 W max.; 0.5 to 0.17 A, 5 W typical Communication Interfaces Main - RS232 2400 to 115200 bit/s... - Page 81 (this symbology requires an • Intelligent Mail + PLANET activation procedure – contact (including Addon 2 and Addon 5) • Intelligent Mail + PLANET + your local Datalogic • GS1 DataBar (RSS) Family POSTNET Automation distributor for • Composite Symbologies •...
-
Page 82: Glossary
GLOSSARY (Association for Automatic Identification and Mobility): AIM Global is the international trade association representing automatic identification and mobility technology solution providers. AIM DPM Quality Guideline Standard applicable to the symbol quality assessment of direct part marking (DPM) performed in using two-dimensional bar code symbols. It defines modifications to the measurement and grading of several symbol quality parameters. - Page 83 Depth of Field The difference between the minimum and the maximum distance of the object in the field of view that appears to be in focus. Diffused Illumination Distributed soft lighting from a wide variety of angles used to eliminate shadows and direct reflection effects from highly reflective surfaces.
- Page 84 LED (Light Emitting Diode) A low power electronic light source commonly used as an indicator light. It uses less power than an incandescent light bulb but more than a Liquid Crystal Display (LCD). LED Illuminator LED technology used as an extended lighting source in which extra optics added to the chip allow it to emit a complex radiated light pattern.
- Page 85 DECLARATION OF CONFORMITY Datalogic Automation S.r.l. Via S. Vitalino 13 40012 - Lippo di Calderara Bologna - Italy dichiara che declares that the déclare que le bescheinigt, daß das Gerät declare que el Matrix 4XX YYY-ZZZ e tutti i suoi modelli and all its models et tous ses modèles...
- Page 86 www.automation.datalogic.com...
Need help?
Do you have a question about the MATRIX 400 and is the answer not in the manual?
Questions and answers