Table of Contents
Advertisement
Quick Links
Advertisement
Table of Contents

Subscribe to Our Youtube Channel
Related Manuals for Vatech A9 PHT-30CSS


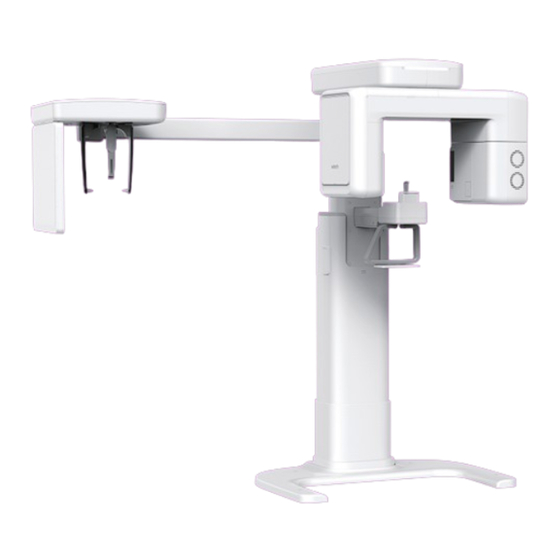
Summary of Contents for Vatech A9 PHT-30CSS
- Page 1 A9 Technical manual Model : PHT-30CSS Version : 1.01 English...
- Page 2 Revisions and redistribution of this manual may occur due to upgrades or design modifications. The Information on this manual is the confidential property of VATECH Co., Ltd., and any unauthorized distribution or copying of this document is strictly prohibited.
-
Page 3: Table Of Contents
Before you begin ..........................4 Chapter 1. Hardware Part Service Guide ..................9 1.1. vatech A9(PHT-30CSS) System Block Diagram ................9 1.2. vatech A9 (PHT-30CSS) Board Configuration ................10 1.3. vatech A9(PHT-30CSS) Connection Diagram ................24 1.4. Disassembly of vatech A9(PHT-30CSS) Covers ................32 Chapter 2. - Page 4 Chapter 9. Command-List Guide ....................213 9.1. Communication Protocol ......................213 9.2. vatech A9(PHT-30CSS) Command-List ..................215 9.3. Procedure for using remote exposure function ................ 222 9.4. Error Message List ........................224 Chapter 10. Console software error message List ..............226 10.1.
-
Page 5: Before You Begin
Before you begin Conventions in This Manual This Manual is intended only for VATECH Co., Ltd. authorized engineers only to avoid personal injury and damage. VATECH Co., Ltd. holds no liability for the problems caused by unauthorized engineers. To effectively describe safety information, the following signs are used in this manual:... - Page 6 X-Ray hazards. To operate and service the device, follow the instructions contained in this manual. Operator Qualifications This equipment can only be operated or serviced by VATECH authorized engineers who are fully trained. To operate this equipment, all operators must: •...
- Page 7 2 minutes before the operation begins. • Do not connect this equipment to any device without authorization from VATECH Co., Ltd. • Do not connect this equipment to a Multiple Portable Socket- Outlet (MPSO) or extension wires •...
- Page 8 Radioactive Warnings It is important to read this manual carefully and strictly abide by all warnings and cautions stated. Since rules and regulations concerning radiation safety differ by country, it is the users’ responsibility to comp ly with all applicable rules and regulations concerning radiation safety and protection in their area.
- Page 9 Pre-check points for Service Technician The following checkpoints must be confirmed before performing the next procedure. Check Point Pass Fail Do the equipment power, and PC condition work fine? □ □ Is the power off before the equipment repair begins? □...
-
Page 10: Chapter 1. Hardware Part Service Guide
Chapter 1. Hardware Part Service Guide 1.1. vatech A9(PHT-30CSS) System Block Diagram Page 9 of 244... -
Page 11: Vatech A9 (Pht-30Css) Board Configuration
1.2. vatech A9 (PHT-30CSS) Board Configuration The position of the board mounted on the equipment is as follows. Page 10 of 244... - Page 12 1.2.1. Vertical Frame Part Page 11 of 244...
- Page 13 The following boards are mounted on the vertical unit Ethernet Grabber Noise Filter Power board MCU028 board Page 12 of 244...
- Page 14 1.2.1.1 Ethernet Grabber Function • 12V/24V DC Input • RS232 to MCU • CAN to MCU (Reserve) • 2 Optic signal input (Tx 1550/Rx 1310) • 1 G-Ethernet output • 4Gbyte memory Page 13 of 244...
- Page 15 1.2.1.2 Main MCU BOARD (MCU028) Function • LAN communication to PC • CAN communication to Sensor, Inverter, Key Pad • Motor control Rotator 1 axis Generator Tilting Column Up/Down Collimator Moving Sensor Moving CEPH Sensor Moving • Fan control • Sensor Power On/ Off control •...
- Page 16 1.2.1.3 Power Board (VT-PWR-016) Function • 24V DC Output : System, Motor, Sensor, Inverter • 380V DC Output : Generator • Emergency Switch Input : Power Shutdown 1.2.1.4 Noise Filter Page 15 of 244...
- Page 17 1.2.2. Handle Unit Remove the cover from the Handle Unit as shown in the image below. Handle frame Page 16 of 244...
- Page 18 Remove the cover from the Handle frame as shown in the image below. Circuit Breaker Speaker Emergency (UP/DOWN switch) Switch Sensor 1.2.2.1 Touch Keypad Page 17 of 244...
- Page 19 1.2.3. Rotating Unit Part Disassemble the ROTATOR PANO as shown in the image below. SUB056 Inverter Sensor Sensor Motor ASSY GENERATOR part Page 18 of 244...
- Page 20 1.2.3.1 Sensor Interface (SUB056) Function • Control Signal Interfacing of : Sensor moving motor, Rotator motor, and the Sensor • Control Power Interfacing of Sensor 1.2.3.2 Inverter Function Supply High DC/AC Power • Page 19 of 244...
- Page 21 1.2.3.3 CT/PANO Sensor (Xmaru1314CF) 1.2.3.4 Generator Interface (SUB055) Function Control Signal Interfacing • : Generator, Generator Tilting motor, Laser, Laser motor, Collimator, Fan, Sensor (CT/PANO) Control Power Interfacing • : Sensor (CT/PANO), Collimator * Generator Part Interfacing Board Page 20 of 244...
- Page 22 1.2.3.5 Generator (DG-07E22T2) Page 21 of 244...
- Page 23 1.2.4. CEPH Unit Disassemble the CEPH Unit as shown in the image below. SUB075 CEPH Sensor Page 22 of 244...
- Page 24 1.2.4.1 CEPH Sensor (Xmaru2602) 1.2.4.2 CEPH Interface (SUB075) Function • Interfacing : Main MCU Board (MCU026) and CEPH Motors • CEPH sensor control • Sensor power regulation : 24V → ± 5V Page 23 of 244...
-
Page 25: Vatech A9(Pht-30Css) Connection Diagram
1.3. vatech A9(PHT-30CSS) Connection Diagram 1.3.1. Power and Ground Connection Diagram Page 24 of 244... - Page 26 Page 25 of 244...
- Page 27 Page 26 of 244...
- Page 28 1.3.2. Main MCU and SENSOR Connection Diagram MCU028(MAIN CONTROL UNIT) MCU028_PWR (X )H 00 3204 A SE N 24V_1 (VT-PWR-016) ROTATOR1 SE N 24 GND _1 (X )H 00 3216 A SE N 24V_2 (SUB056) SE N 24 GND _2 GT MO _OU TA R M O_ OU T2A P 24 VM...
- Page 29 SUB056 (SENSOR PART) ROTATOR1 W_PANO (X)H 00 3216 A SEN SO R PAR TS (X)H 00 3225 A (SUB056) GT MO _OU TA R M O_ O UT2A S 9VS C AN L GT MO _OU TB R M O_ O UT2B S 9VS C ANH N /C...
- Page 30 1.3.3. Sensor Part Connection Diagram Page 29 of 244...
- Page 31 1.3.4. CEPH SENSOR Part Connection Diagram Page 30 of 244...
- Page 32 1.3.5. Connection Diagram (Total assembly) Page 31 of 244...
-
Page 33: Disassembly Of Vatech A9(Pht-30Css) Covers
1.4. Disassembly of vatech A9(PHT-30CSS) Covers • The truss head screws on the cases of equipment are covered with rubber caps. Remove the rubber caps before unscrewing the truss head screws. • In this manual, the procedures for removing the rubber caps are omitted for convenience. - Page 34 By doing this, you can access - Ethernet Grabber - Main MCU BOARD (MCU028) - Power Board - Noise Filter Page 33 of 244...
- Page 35 1.4.2. Rotating Unit Part DISASSEMBLY OF THE ROTATOR COVERS To disassemble the rotator cover, follow the steps below: 1. Rotate the rotator as shown in the image below and remove the side cover of the rotator. 2. Loosen four bolts and remove the cover on the side of the rotator. Page 34 of 244...
- Page 36 3. Remove the six bolt caps on the top of the rotator and loosen the six bolts. 4. Remove the cover from the top of the rotator. Page 35 of 244...
- Page 37 5. Loosen the two bolts as shown in the image below. 6. Remove three bolt caps and loosen three bolts as shown in the image below. Page 36 of 244...
- Page 38 7. Remove the cover by pulling it down as shown in the image below. By doing this, you can access - Sensor - Rotator motor - SUB056 Page 37 of 244...
- Page 39 8. Remove four bolt caps and loosen four bolts as shown in the image below. 9. Remove the cover as shown in the image below. Page 38 of 244...
- Page 40 10. Remove the six bolt caps on the top of the rotator and loosen the six bolts. 11. Loosen two bolts as shown in the image below. Page 39 of 244...
- Page 41 12. Remove the cover as shown in the image below. 13. Remove the cover as shown in the image below. Page 40 of 244...
- Page 42 14. Loosen six bolts as shown in the image below. 15. See the image below for the appearance after removing the bolt and removing the generator. Page 41 of 244...
- Page 43 16. Loosen ten bolts as shown in the image below. Page 42 of 244...
- Page 44 17. Remove the cover as shown in the image below. By doing this, you can access - Inverter - Generator - SUB056 Page 43 of 244...
- Page 45 1.4.3. Handle Frame Unit Part DISASSEMBLY OF THE HANDLE FRAME COVERS To disassemble handle frame covers: Remove the Chinrest as shown in the image below. Loosen the four bolts as shown in the image below. Page 44 of 244...
- Page 46 Remove the handle as shown in the image below. Loosen the four bolts as shown in the image below. Remove the parts as shown in the image below. Page 45 of 244...
- Page 47 Remove four bolt caps and loosen four bolts as shown in the image below. Remove the cover as shown in the image below. Remove the bolt cap and loosen three bolts as shown in the image below. Page 46 of 244...
- Page 48 Remove the part as shown in the image below. 10. Loosen the two bolts as shown in the image below. 11. Remove the cover as shown in the image below. Page 47 of 244...
- Page 49 By doing this, you can access - Circuit Breaker (UP/DOWN switch) - Speaker - Emergency Switch - ORG Sensor - Touch Keypad Page 48 of 244...
- Page 50 DISASSEMBLY OF THE OTHERS Remove the switch holder by loosening three bolts as shown in the image below. Page 49 of 244...
- Page 51 1.4.4. CEPH Unit Part DISASSEMBLY OF THE CEPH COVERS To disassemble CEPH covers: Loosen the two bolts as shown in the image below. Loosen the four bolts as shown in the image below. Page 50 of 244...
- Page 52 Loosen the four bolts as shown in the image below. Remove the cover as shown in the image below. Page 51 of 244...
- Page 53 Loosen the five bolts as shown in the image below. Remove the cover as shown in the image below. Page 52 of 244...
- Page 54 Loosen the six bolts as shown in the image below. Remove the cover as shown in the image below. Page 53 of 244...
-
Page 55: Chapter 2. Ct Image Optimization
FDD: Distance from the X-ray source to the sensor (584.6 mm) • FOD: Distance from the X-ray source to the center of rotation (353.6 mm) • vatech A9 FOV: 80 x 80 54 / 172 COPYRIGHT© 2020 VATECH VDH-TeM-085 ALL RIGHTS RESERVED... -
Page 56: Equipment Default Values
2.2. Equipment default values 2.2.1. Check the equipment horizontal level Check the equipment level at the same position as the picture above (standard: ± 0.1° or less). At the position where the sensor is looking at the column, visually check whether the vertical and the part marked by the red dotted line of the rotator are parallel. - Page 57 2.2.2. Check the sensor horizontal level Place the digital level at the position as shown in the picture above and check the horizontal level. (Standard: ± 0.1° or less) If the sensor level does not meet the standard, loosen the 4-point bolts in the red circle, adjust it to meet the standard, and then refasten it.
- Page 58 2.2.4. Bite location (CT mode) Move the bite’s location for CT mode as illustrated below: CT Mode: The position combined with the stopper in the opposite direction (right side) of the column. Page 57 of 244...
-
Page 59: Ct Sensor Calibration
2.3. CT Sensor Calibration To ensure CT image quality, perform CT sensor calibration according to this section. To assure image quality, perform sensor calibration in various temperature and humidty settings. 2.3.1. CT Sensor Calibration Standard See the tables below for dark and bright calibration standards. Dark Calibration Median Value Standard Median value 2300... - Page 60 Remove the normal chinrest. Diassemble the tube cases following the steps in Chapter 1. Go to 1.4 Disassembly of vatech A9 (PHT-30CSS) Covers. Rename the CAL folder for backup If you are using an old collimator, ensure to reassemble the cu filter as illustrated below.
- Page 61 2.3.3. CT Sensor Setting To set the CT sensor, use the following commands: Function Command [SPM_ARCT] CT mode [SPM_CSON] CT sensor power on [SPM_FISS_0001] Normal Mode : 4x4 binning & High gain [SPM_FIPM_0001] Sensor size setting [SPM_FISM_0001] Sensor clock (1:External, 0: Internal) [SPM_FREQ_0100] Sensor frequency 100 Hz Collimator Open Position...
- Page 62 2.3.4. CT sensor: Dark Calibration Back up the folders from the previous CT sensor calibration before starting a new CT sensor calibration. Path for CT Sensor Calibration folders: C:\VCaptureSW\Acquisition\CBCT\WidePANO\CAL. To perform a dark calibration: Run the VAKAP.exe file. (Path: C:\VCaptureSW\Acquisition\CBCT\WidePANO\VACAP.exe) On the dialog box, Select Soft Calib and send the following commands to MCU to set CT sensor and collimator: [SPM_ARCT], [SPM_CSON], [SPM_FIPM_0001],...
- Page 63 Click Dark to capture an image. Check if the median value of the capture image satisfies the standards below. Median value 2300 If the median value from the captured image does not meet the dark calibation standards, replace the sensor and repeat the calibaration procedure. The wrong median value from the captured image indicates that your sensor is defective.
- Page 64 2.3.5. CT sensor: Bright Calibration Stay outside of the X-ray room (imaging room) when the system is collecting the bright calibration data. 2.3.5.1 How to Perform 2-Point Bright Calibration To perform a 2-point bright calibration: Run the C:\VCaptureSW\Acquisition\CBCT\WidePANO\VACAP.exe file. Click the Settings tab and follow the step below. ①...
- Page 65 Click the Soft Calib tab. Send the following commands to the MCU to set CT sensor and move collimator to an open position: [SPM_ARCT], [SPM_CSON], [SPM_FIPM_0001], [SPM_FISS_0001], [SPM_FISM_0001] and [SPM_COLM_0003]. Command Function [SPM_ARCT] CT mode [SPM_CSON] CT sensor power on [SPM_FISS_0001] Normal Mode : 4x4 binning &...
- Page 66 Click Bright. When you see the message, “HOLD THE BUTTON FOR ~3 SEC” on the status window, press the X-ray exposure switch. Release the switch when the message, “RELEASE THE BUTTON” shows up in the status window. Repeat steps 7 to 8 unti you acquire two bright calibration data files. Point 1 Point 2 10.
- Page 67 11. Click each file in View 16 and check whether each median value meets that standard below: Bright Cal Point 1 4500 5500 Median value Cal Point 2 9500 10500 [2-Point Bright Standard Value] If the median value does not satisfy the standard, adjust kVp0 and kVp1 values from the table below (adjustment range:±10) and repeat the bright calibration procedure.
- Page 68 2.3.5.2 How to Perform 4-Point Bright Calibration: To perform 4-point bright calibration: Run the VAKAP.exe file. (Path:C:\VCaptureSW\Acquisition\CBCT\WidePANO\VACAP.exe) On the dialog box, select Settings and follow the steps below to set exposure condition: ① ② ③ ④ 1) Go to [BrightCalibration] and enter 4 for the NumPoints 2) Go to the 4-point section and check whether the tube voltage(kVp) and current(mA) meets the standards.
- Page 69 On the dialog box, select Soft Calib. Send the following commands to the MCU to set CT sensor and collimator: [SPM_ARCT], [SPM_CSON], [SPM_FIPM_0001], [SPM_FISS_0001], [SPM_FISM_0001], [SPM_COLM_0004]. Click Dark. Click the Bright. When you see the message, “HOLD THE BUTTON FOR ~3 SEC” on the status window, press the X-ray exposure switch.
- Page 70 Repeat steps 7 to 8 until you acquired four bright calibration data files. Point 1 Point 2 Point 3 Point 4 10. Click the V to open View16. 11. Click each file in View 16 and check whether each median value satisfies the standards in the table below: Bright Cal Point 1...
- Page 71 13. After bright calibration, return to the dialog box and follow the steps below to create an auto bad pixel map. 1) Select Settings. 2) Go to [BrightCalibration] and enter 6 for NumbPoints. 3) Click Save. ① ② 4) Select Soft Calib and click Check. ④...
-
Page 72: Ct Bad Pixel Verification
2.4. CT Bad Pixel Verification 2.4.1. Bad pixel definition • Dead pixel: no responsive pixel (value : 0 or 16384) • Non-uniform response pixel: Pixels with ±30% response deviation from neighboring pixels 2.4.2. Bad line definition Bad pixels over 50% of effective area width and height are defined as bad lines ... - Page 73 2.4.4. Bad Pixel Verification To verify bad pixels: Run the VAKCAP.exe file. Select Soft Calib. Click the V button to open the View16 program. VAKCAP.exe file Path : C:\VCaptureSW\Acquisition\CT\WidePANO. Select S from the M box and click the 184x686BPM.raw from the raw file list Examine the sensor effective area to check if there is a bad pixel of a bad line.
-
Page 74: Ct Geometry Calibration
2.5. CT Geometry Calibration 2.5.1. Sensor U Offset Setting If you installaed a new sensor, ensure to balance your sensor before starting the CT geometry calibration. CT phantom jig consists of upper and lower jigs. Upper Jig Lower Jig The image above is provided as an example. The actual CT phamtom jig may be different from the illustration. - Page 75 Place a cone phantom at the center of the CT phantom jig. (See blow) Center Run VAKCAP.exe file. (Path:C:\VCaptureSW\Acquisition\CBCT\WidePANO) On the dialog box, select Capture/Recon and send the following commands: [SPM_ARCT], [SPM_CSON], [SPM_FISS_0001], [SPM_FISM_0001], [SPM_FIPM_0001], [SPM_COLM_0003], [SPM_AAMS] Command Function [SPM_CSON] CBCT sensor Power On [Sensor Sensitivity &...
- Page 76 On the dialog box, select Soft Calib and click Dark to capture dark calibration data. On the dialog box, select Capture/Recon then #20: Bead(reconstruction.vxm) for Recon mode. Click Capture and press the X-ray exposure switch to take an image. On the dialog box, click PANO and Process to generate the average.raw of PROJ files. 3.Set the Bead(Reconstruction.vxm) 1.
- Page 77 10. Click V Proj and follow the steps below to view the averaged PROJ file 2.Choose the R. 3.Check the Offset (Standard range: - 82±1 pixel) 1.Click the average image. 11. If the acquired file does not meet the standard, sends out the following commands to adjust the sensor: When the ofs value increases, move the sensor to the ORG direction : ...
- Page 78 13. When the CMCT value is determined, enter the PMCT value as (CMCT value + 149). ex. [SPM_CMCT_431] → [SPM_PMCT_580] Page 77 of 244...
- Page 79 2.5.2. Bead Phantom Image Acquisition Please check: Geometry Related File path: C:\VCaptureSW\Acquisition\CBCT\WidePANO\REC Geometry Related Files: reconstruction.vxm, reconstruction_Bead.vxm, reconstruction_GEO.vxm Follow the steps below to acquire an image with a bead phantom: Filename Function Parameter file used when reconstructing Reconstruction.vxm objects Parameter file used for bead phantom Reconstruction_Bead.vxm...
- Page 80 Ensure to use the right phantom for your imaging method. The new phantom and old phantom are distinguished by bead locations. [New Phantom] [Old Phantom] SAP code: A0003289 SAP code: M000470 When acquiring the image, the phantom’s bottom must be placed on a jig or plate.
- Page 81 2.5.2.1 Positioning Bead Phantom Case 1: When Using the New Phantom To position the new phantom : Attach a phantom jig to the chinrest. Place a new phantom at the center of the phantom jig. Place the phantom at the center of the jig (red dot) [Top View] [Side View]...
- Page 82 Case 2: When Using the Old Phantom To position the old phantom: Prepare a tripod and move closed to the handle frame Mount the phantom jig on the tripod plate. Place an old phantom on the jig. When placing the phantom, the side with longer empty space must come to the bottom.
- Page 83 2.5.2.2 Capturing a Bead Phantom Image To capture a bead phantom image: Run VAKCAP.exe file. (Path:C:\VCaptureSW\Acquisition\CBCT\WidePANO) On the dialog box, select Capture/Recon and send the following commands: [SPM_ARCT], [SPM_CSON], [SPM_FISS_0001], [SPM_FISM_0001], [SPM_FIPM_0001], [SPM_COLM_0003]. Command Function [SPM_CSON] CBCT sensor Power On [Sensor Sensitivity &...
- Page 84 3.Set the Bead(Reconstruction.vxm) 1. Select Capture /Recon 2. Send the command. 4. Click Capture CTB after obtaining the Dark When the VAKPAR screen shows, press the X-ray exposure switch. Release the button when the image acqustion is 10% completed. On the dialog box, go to View and click the V Proj to open View 16. Check the height of the bead with Capture CTB.
- Page 85 1. Set the bead 2. Send the [SPM_ABMS] command. 3. Click Capture after obtaining the Dark 3. Click the Reconstruction button. 4.Click the V vol button to check the bead image. Located in the center of the image. Check the 4 rows. The bead position must be presented at the center of the image;...
- Page 86 15. When the bead position is confirmed, click the Properties button. Click the Properties button. 16. Click the Generate GEO button to perform geometry cal. (BeadThres value: ≥2000) Page 85 of 244...
- Page 87 17. The fiollowing dialog box appears after clicking the Generate GEO button. You must be able to see 4 groups and 28 points in total. (BeadThres value: ≥2000) 18. When the geometry generation result appears in a pop-up, click the OK button. 19.
- Page 88 20. Click the view Geo button to check the set geometry graphically: 1) Check the result to see if there is a problem in a straight line such as bending. 2) If you find a problem, repeat Angle.bin before operation RCP.bin before the operation Angle.bin after operation RCP.bin after the operation...
- Page 89 2.5.3. CT Bad Pixel Verification 2.5.3.1 Bad pixel definition • Dead pixel: no responsive pixel (value : 0 or 16384) • Non-uniform response pixel: Pixels with ±30% response deviation from neighboring pixels 2.5.3.2 Bad line definition Bad pixels over 50% of effective area width and height are defined as bad lines ...
- Page 90 2.5.3.4 Bad Pixel Verification If a BPM file is not created after clicking the Check button, skip the bed pixel verification. Run VAKCAP.exe file. In the Soft Calib tab, click the V button to open the View 16 program. Path : C:\VCaptureSW\Acquisition\CT\WidePANO. VAKCAP.exe file Go to the M box, select S in a drop-down list Click the 184 x 686BPM.raw in the raw file list.
- Page 91 2.5.4. Handle Frame Align 2.5.4.1 Rotator Position setting command Make sure that the Handle Frame Align Jig is at the Bite position in PANO Mode as shown in the picture below and then fasten. Handle Frame Align Jig Side View Run the VAKCAP.exe file in C:\VCaptureSW\Acquisition\CBCT\WidePANO.
- Page 92 Enter the (HFST value worked in step 2.3) + 3600. ex. If it is [SPM_HFST_200], input [SPM_HFST_3800]. Click the Capture_CTB button to acquire an image. Click the V Proj button to check the image. Enter 92 on the X-axis and check if the three pins are aligned in a line as shown in the image below.
- Page 93 2.5.4.2 Pin Alignment If the pins are not aligned, follow the instructions below Unscrew the two bolts (1) When rotating the chinrest module counterclockwise, the top pin moves to the right clockwise, the top pin moves to the left. When rotating the chinrest module Repeat the process 1) to 3) until all three pins are aligned in a stright line.
- Page 94 2.5.4.3 Pin Center Alignment (X-axis:95) Follow the instructions below to align the pin center: Unscrew three bolts (1). Turn the side bolt (2) to move the chinrest handle right or left. When moving the handle right, the pin center moves to the right. •...
- Page 95 2.5.4.4 Rotator Y, Z-axis setting Put the chin block and the normal bite on the unit as shown below. Run VAKCAP.exe file. Click the Capture/Recon tab and send the [SPM_ARCT] command to initiate the system into CT mode. When the equipment stops operating, send the following commands in the table below to supply power to the CBCT Sensor.
- Page 96 Click the Capture/Recon tab and set the parameters and then click the Capture button 3. Set the Bead(Reconstruction.vxm) Click Capture button after optiating the Dark. 1. Send the [SPM_ABMS] command. 4. Click the Reconstruction button. When the VAKPAR screen shows, press the X-ray exposure switch button. When the exposure is completed, click the V Proj button to open the raw files.
- Page 97 10. Click the height of the chinrest block in the recorded PROJ file. 2. X: Choose 92 3. M: Choose C 4. Max : 11000 Check the Y position Min : 0 (Standard: 665 ~ 675) 1. Choose the 0190.RAW file Chinrest block standard: 10~ 20 pixels (1.98 ~ 3.96 mm) : Y value = 665~675 ※...
- Page 98 6. Click the V Vol button. X axis - reference range: 220 ~ 230 - 220 or less: move to the left based on the column - Over 230: Move to the right based on the column Angle setting When moving to the right, Start angle: 0 ~ 10 When moving to the left, Start angle: 350 ~ 359 When the start angle is found, it is applied to the following folders.
-
Page 99: Ct Collimator Alignment
2.6. CT Collimator Alignment 2.6.1. CT Collimator Manual Alignment Run the C:\VCaptureSW\Acquisition\CBCT\WidePANO\VACAP.exe file. Send the following commands to the command window to set the CT sensor and collimator: [SPM_ARCT], [SPM_CSON], [SPM_FIPM_0001], [SPM_FISS_0001], [SPM_FISM_0001], [SPM_COLM_0001]. In the Scan parameters mesnu, set the voltage 94 kvp and the current 7.0 mA and click Capture CTB button to acquire the image. - Page 100 Use the Collimator control command to find a value that satisfies the standard below. Command Function [SPM_CCST_03450] PANO collimator position movement control [SPM_CAST_09200] CEPH collimator position movement control [SPM_CFST_06350] CT collimator position movement control Run EzEval.exe file (Path : C:\VCaptureSW\Utility\EzEval_Phantom) Choose EzEvaluation for the tap menu on the top left, and choose collimator viewer from the tap menu on the top right.
- Page 101 Choose the 0010raw file. Set Threshold to 75 and click the Apply button. area marked in red. ▲ Upper/Lower Collimator Setting Page 100 of 244...
- Page 102 2.6.2. CT Collimator Alignment with EzAlign Follow the steps below to set CT collimator using EzAlign: Start the EzAlign-S and click Modality Align. Click CBCT and START. After clicking these buttons, the system moves to its capturing position and the collimator auto-alignment starts. If you want to use the auto irradiation function, click AUTO EXPOSE.
- Page 103 Remove the bite block and set the handle frame for the CT mode. Press and hold the X-ray exposure switch wheen you see the message “HOLD THE BUTTON” (marked in the white box). Release the switch when you see the message “RELEASE THE BUTTON” (marked in the white box).
-
Page 104: Dap Calibration
2.7. DAP Calibration Follow the steps below to start a DAP calibration: 1. Position the dosimeter as illustrated below: Place the dosimeter at the area The end of dosimeter must be indicated by the white arrow. placed at the white line. 2. - Page 105 Check the dosimeter’s location again the PROJ file. If the dosimeter is not located in the circle, re-locate the dosimeter and capture an image again. Set to X: 92, Y: 490, M: 50, and set the dosimeter position so that the dosimeter's sensor is located in the circle.
- Page 106 After confirming of position, capture the image to measure DAP. Run the Console Software, and set as below and capture the image. 1. Choose the CBCT. 2. Choose the FOV: 8x8 3. Choose the High resolution. 4. Choose the Standard. 7.
- Page 107 When 8.5mGy is measured at 95kVp, input the mA value to PwrParam_CBCT.ini. (C:\VCaptureSW\Acquisition\CBCT\WidePANO\UserParam\PwrParam_CBCT.ini) MAN_HARD = kVp, mA MAN_STAN = kVp, mA MAN_SOFT = kVp, mA 10. If 8.5 mGy is measured at 95 kVp 7.3 mA, input all mA values in the above exposure condition table as +30 increments.
-
Page 108: Ct Number Calibration
2.8. CT Number Calibration To optimize CBCT image quality, the operator should perform the CBCT CT Number Calibration according to the following procedures. Make sure that the operator should use TYPE A as CT PHANTOM JIG during the CT Number Calibration. (SAP Code - Type A: M0103175 / Type B: M0104116) <Type A(>... - Page 109 Follow the steps below to start the CBCT number calibration: Run the C:\VCaptureSW\Acquisition\CBCT\WidePANO\VAKCAP.exe file. Open the Reconstruction.vxm file. (C:\VCaptureSW\Acquisition\CBCT\WidePano\REC) Change to POSTPROCESSING = 0, UseCTNumCal = 0, UseArcCut = 0 and save the file. Page 108 of 244...
- Page 110 2.8.1. Acquire CT Phantom Image Follow the steps below to capture a CT phantom image: 1. Choose the CBCT. 2. FOV: Choose the 8x8 3. Choose the High resolution. 4. Choose the Standard. 7. Click the CONFIRM. 6. Choose the 5.
- Page 111 Water Bone Put CT Number Phantom on the Phantom Jig. Phantom Jig and CT Number Phantom Position Click the Ready button and acquire the image. Page 110 of 244...
- Page 112 Click the Ready button. Click the V Vol button. Page 111 of 244...
- Page 113 Total number of slices-Slice XY(Z) = measured slice number Find the central slice of the water-filled area as follows. Find the central slice of the water-filled section. Ex) Total number of slices-Slice XY(Z) = number of slices measured 450 - 100 = 350 Page 112 of 244...
- Page 114 M : 15 Check the ave value. Choose Slice. Water Bone Open the measurement slice and measure air, water, and bone as above. 1. Click the Setting button. 2. Choose Engineer and enter vatech. Page 113 of 244...
- Page 115 FOV Info (CBCT) Choose HD Tap and input CT Number value measured at high resolution. Enter the measured CT Number value and click the Save button. When CT Number Calibration is completed, open Reconstruction.vxm and recover the parameter as shown below. •...
- Page 116 Parameter LSL(Lower Specification Limit) USL(Upper Specification Limit) Teflon(Bone) 1100 11. If CT Number does not meet the standard as above, adjust the CT Number value. Page 115 of 244...
-
Page 117: Chapter 3. Ct Image Evaluation
Chapter 3. CT Image Evaluation 3.1. Spatial Resolution(MTF) evaluation 3.1.1. Spatial Resolution (MTF) standards Parameter LSL (Lower Specification Limit) USL (Upper Specification Limit) MTF 10% <lp/mm> 1.00 3.50 3.1.2. Phantom Specification QUART: DVT Phantom Page 116 of 244... - Page 118 3.1.3. Test Method Run Console Software and click CBCT to go into CBCT mode. Choose FOV 8x8/Adult/Normal/High Resolution/Standard as the image option and click the Confirm button. Put the Phantom jig on the unit and make the phantom jig level by using bubble level and three align pins.
-
Page 119: Contrast Evaluation
3.2. Contrast evaluation 3.2.1. Contrast standards Parameter LSL (Lower Specification Limit) USL (Upper Specification Limit) Contrast<1000HU> 3.2.2. Phantom Specification QUART: DVT Phantom 3.2.3. Test Method The evaluation is conducted in the same manner as in the evaluation method in Section 1.3. Page 118 of 244... - Page 120 3.2.4. Test Result Parameter Measurement value Pass/Fail Contrast<1000HU> Page 119 of 244...
-
Page 121: Noise Evaluation
3.3. Noise evaluation 3.3.1. Noise standards Parameter LSL (Lower Specification Limit) USL (Upper Specification Limit) Noise 5.00 3.3.2. Phantom Specification QUART: DVT Phantom 3.3.3. Test Method The evaluation is conducted in the same manner as in the evaluation method in Section 1.3. 3.3.4. -
Page 122: Homogeneity Evaluation
3.4. Homogeneity evaluation 3.4.1. Homogeneity standards Parameter LSL (Lower Specification Limit) USL (Upper Specification Limit) Homogeneity 10.00 150.00 3.4.2. Phantom Specification QUART: DVT Phantom 3.4.3. Test Method The evaluation is conducted in the same manner as in the evaluation method in Section 1.3. 3.4.4. -
Page 123: Ct Number Accuracy Evaluation
3.5. CT Number Accuracy evaluation 3.5.1. CT Number standards Parameter LSL (Lower Specification Limit) USL (Upper Specification Limit) -1030 -900 Water Teflon 1100 3.5.2. Phantom Specification CT Number Phantom Page 122 of 244... - Page 124 3.5.3. Test Method Put the Phantom jig on the unit and make the phantom jig level by using bubble level and three align pins. Put the CT Number Phantom on the phantom jig. Run the Console Software and click the CBCT button to go into CBCT mode. Choose the FOV 8x8/Adult/Normal/High Resolution/Standard as the image option and click the Confirm button.
-
Page 125: High Contrast Resolution Evaluation
3.6. High Contrast Resolution evaluation 3.6.1. High Contrast Resolution standards Parameter LSL (Lower Specification Limit) USL (Upper Specification Limit) High Contrast Resolution 1.0 mm 3.6.2. Phantom Specification S&C Phantom Page 124 of 244... - Page 126 3.6.3. Test Method Put the Phantom jig on the unit and make the phantom jig level by using bubble level and three align pins. Put the S&C Phantom on the phantom jig. Run the Console Software and click the CBCT button to go into CBCT mode. Choose the FOV 8x8/Adult/Normal/High Resolution/Standard as the image option and click the Confirm button.
-
Page 127: Low Contrast Resolution Evaluation
3.7. Low Contrast Resolution evaluation 3.7.1. Low Contrast Resolution standards Parameter LSL (Lower Specification Limit) USL (Upper Specification Limit) Low Contrast Resolution 9.0 mm 3.7.2. Phantom Specification S&C Phantom 3.7.3. Test Method The evaluation is conducted in the same manner as in the evaluation method in Section 6.3. 3.7.4. -
Page 128: Slice Thickness Evaluation
3.8. Slice Thickness Evaluation 3.8.1. Slice Thickness Standard Parameter LSL (Lower Specification Limit) USL (Upper Specification Limit) Slice Thickness 38.0 mm 42.0 mm 3.8.2. Phantom Specification QUART: DVT Phantom 3.8.3. Test Method Open the CT_DVT Phantom image captured in Section 1.3 through the 3D Viewer Measure the length of the phantom in the Sagittal view. -
Page 129: Collimator Alignment Evaluation
3.9. Collimator Alignment Evaluation 3.9.1. Collimator Alignment Standard Parameter LSL (Lower Specification Limit) USL (Upper Specification Limit) Left Threshold Right Upper Threshold Lower BOTTOM RIGHT LEFT Page 128 of 244... - Page 130 3.9.2. Test Method Complete the collimator setup and acquire the image in the stopped state. Run the C:\VCaptureSW\Util\EzEval_Phantom\EzEval.exe program. Input the threshold 75%, and check the upper and lower. Input the threshold 95%, and check the left and right. Check whether the Collimator Alignment Result is satisfied with the standard. 3.9.3.
-
Page 131: Chapter 4. Pano Image Optimization
Chapter 4. PANO Image Optimization 4.1. Geometry information • FDD: Distance from the X-ray source to the sensor (584.6 mm) • FOD: Distance from the X-ray source to the center of rotation (425.6 mm) Page 130 of 244... -
Page 132: Equipment Default Values
4.2. Equipment default values 4.2.1. Bite location (PANO mode) Move the bite position according to the Modality as shown in the image above. PANO Mode: The position combined with the stopper in the direction (Left side) of the colum 4.3. PANO Sensor Calibration To optimize PANO image quality in the equipment, the operator should perform the Sensor setting &... - Page 133 4.3.2. Before PANO sensor calibration 1. Remove the Normal Chin Block from the equipment. 2. Disassemble the Tube case (Refer to Chapter 1. Hardware Part Service Guide). 3. Rename the CAL folder (C:\VCaptureSW\Acquisition\PANO\WidePANO\CAL) name for backup. If you are using an old collimator, ensure to reassemble the cu filter as illustrated below. Before reassembling Cu filter After reassembling Cu filter New Collimator Information is as listed below:...
- Page 134 4.3.3. PANO Sensor Setting VAKCAP.exe file is required for PANO Sensor Calibration operation. Path: C:\VCaptureSW\Acquisition\PANO\WidePANO Before the PANO Sensor Calibration operation begins, the operator must back up the prior PANO Sensor Calibration folder. PANO Sensor Calibration file folder : C:\VCaptureSW\Acquisition\PANO\WidePANO\CAL To set the PANO sensor, use the command from the list below: Command Function...
- Page 135 4.3.4. PANO Sensor: Dark Calibration Follow the steps below to start a dark calibration: Run the VACAP.exe file (Path: C:\VCaptureSW\Acquisition\Pano\WidePANO\VACAP.exe) On the dialog box, Select Settings. Click the OK and restart the program. On the dialog box, select Capture/Recon. Send the following commands to MCU to set the sensor and collimator: [SPM_PANO], [SPM_CSON], [SPM_FISS_0001], [SPM_FIPM_0004], [SPM_FISM_0001], [SPM_COLM_0004].
- Page 136 Click Dark. Select 30x686d.raw and click V to open View 16. Check if the median value of the selected raw file fall into a range of the standard values (700 ~2300). 1588 1339.9 1343 1143 Page 135 of 244...
- Page 137 4.3.5. PANO Sensor: Bright Calibration Stay outside of the X-ray room during Bright Calibration data achievement. Run the VACAP.exe file (Path: C:\VCaptureSW\Acquisition\Pano\WidePANO\VACAP.exe) On the dialog box, select Settings and follow the steps below to set exposure condition: ① ② ③ Go to [BrightCalibration] and enter 5 for NumPoints.
- Page 138 Click Dark. Click Bright. Press and hold the X-ray exposure switch when you see the message “HOLD THE BUTTON FOR ~3 SEC.” Release the switch when you see the message “RELEASE THE BUTTON.” Repeat step 6 to 7 until you acquire five bright calibration data files. Point 1 Point 2 Point 3...
- Page 139 10. Click the Point 1 bright calibration data file from the View 16. Check whether the median value of the selected file falls into a range of the standards values. (See the table below) 66.4 ※ Bright standard value: 5 points with Cu 1 mm filter Bright Cal Point 1 Median...
-
Page 140: Pano Collimator Alignment
4.4. PANO Collimator Alignment 4.4.1. PANO Collimator Alignment Run the C:\VCaptureSW\Acquisition\PANO\WidePANO\VACAP.exe file. Send [SPM_PANO], [SPM_PSON], [SPM_FIPM_0004], [SPM_FISS_0001], [SPM_FISM_0001], [SPM_COLM_0007] commands to the command window to set the PANO sensor and collimator. Send [SPM_HV___0740], [SPM_HA___1200], and [SPM_SSB_] commands in the VACAP’s Command window, and acquire the image. - Page 141 4.4.2. PANO Collimator Alignment with EzAlign Follow the steps below to set PANO collimator with EzAlign: Start the EzAlign-S and click Modality Align. Click PANO and START button. After clicking these buttons, the systemmoves to its capturing position and the collimator auto-alignment starts. If you want to use the auto irradiation function, click AUTO EXPOSE.
- Page 142 Remove the bite block and set the handle frame for PANO mode. Press and hold the X-ray exposure switch when you see the message “HOLD THE BUTTON” (marked in the white box). Release the switch when you see the message “RELEASE THE BUTTON” (marked in the white box).
-
Page 143: Pano Collimator Speed Alignment
4.5. PANO Collimator Speed Alignment 4.5.1. PANO Collimator Speed Alignment Follow the steps below to start the PANO collimator speed alignment: Run the console software. Press the shortcut key [Ctrl+s] to open the Serial Communication command window. Send the [PPON_0] command in the red square. Press the Exit button to exit the command window. - Page 144 After running the EzEval.exe.file, follow the step 1 and 2. Step 1. Check if the left cutting pixel at the middle position is 2 pixels Apply Threshold 70% and check whether the number of pixels cut based on the left of the average projection at the middle position is 2 pixels.
- Page 145 ▲ The trend of Left Cutting Pixel according to CPIO value Step 2. Checking the reference of the end position from the beginning If Step 1 is satisfied, check if the Left Cutting Pixel of the average projection at the Beginning/Middle/End position satisfies the standard range below.
- Page 146 ▲ The trend of the number of Left Cutting Pixels in the exposure section according to PSCR When the standard range is satisfied by i, ii, but vertical lines are expressed in the final skull image (Refer to the image below) ▲...
- Page 147 ▲ Projection Left Cutting Pixel image - Fail In case of the above situation, check the hardware part related to the movement of the collimator and sensor. ▲ Projection Left Cutting Pixel image - Pass ▲ Normal Skull image after work If step 2 is completed, the collimator speed correction is complete.
- Page 148 4.5.2. PANO Collimator Speed Alignment with EzAlign After PANO Auto Alignment is completed, PANO Collimator Speed Alignment will be started automatically. When you see the message HOLD THE BUTTON as marked in the white box below, press and hold the exposure switch until RELEASE THE BUTTON message appears. If the system displays the HOLD THE BUTTON message again instead of the succeeding message, repeat step 2.
-
Page 149: Pano Geometry Calibration
4.6. PANO Geometry Calibration 4.6.1. PANO Geometry Calibration Standard Prepare a PANO ball phantom 2.0 before the PANO geometry calibration. Check the measurement with raw file when conducting the PANO geometry calibration with the PANO ball phantom 2.0. • PANO BALLPHANTOM RIGHT/LEFT PIN DISTANCE ERROR within ±30 pixels •... - Page 150 4.6.2. Right and Left Pin Distance Calibration Make sure to move the Chin Block to the PANO Mode Position. Attach the PANO ball phantom 2.0 to the chinrest. 1. Click the Phantom Capture Mode. 2. Click the PANO mode. 3. Click the Capture buton. Run the Console Software and click the Phantom Capture Mode icon.
- Page 151 PANO image size: 3208 (variable) x 1372 (constant) Center Pin Position: 1574 ±10 pixel Right/Left Pin Distance: ±30 pixel: ±30 pixel Center Pin Position is not correct, as shown in the picture below, loosen the three points of the Chinrest drive and move it. When moving to the right, the center of the image moves to the left.
- Page 152 4.6.3. Center Pin Position Calibration (POFS) If Center pin position does not meet the standard by adjusting chinrest, adjust POFS value." Open a phantom image after the acquistion. Make sure that the center pin pixel number meets the standard and the ghost image has bilateral symmetry as shown above.
- Page 153 4.6.4. Center Ball Size Calibration Acquire the PANO Ball Phantom image and open it. Enter 5 in the Z box, and drag the mouse to see the Center Balls Click the starting point of the Right Center Ball and read the X value by pixel. Click the end point of the Right Center Ball and read the X value by pixel.
-
Page 154: Vertical Laser Beam Alignment
4.7. Vertical Laser Beam Alignment Run the Console Software. Click the Confirm button and attach the ball phantom with a laser beam jig. Click the laser beam mode to check whether the vertical beam is located at the reference line of the ball phantom. If the position is not correct, loosen the assembly point with an M4 wrench and move it left/right so that it comes to the reference line. -
Page 155: Chapter 5. Pano Image Evaluation
Chapter 5. PANO Image Evaluation 5.1. Line Pair Resolution evaluation 5.1.1. Resolution standards Parameter LSL (Lower Specification Limit) USL (Upper Specification Limit) Lp/mm 5.1.2. Phantom Specification QUART Phantom QUART - Ball Phantom 2.0 5.1.3. Test Method Attach the ball phantom 2.0 and quart phantom to the chinrest. Run the Console Software and click the PANO button to go into PANO mode. -
Page 156: Low Contrast Resolution Evaluation
5.2. Low Contrast Resolution evaluation 5.2.1. Low Contrast standards Parameter LSL (Lower Specification Limit) USL (Upper Specification Limit) Hole 1.5 mm 5.2.2. Phantom Specification QUART Phantom QUART - Ball Phantom 5.2.3. Test Method The evaluation is conducted in the same manner as in the evaluation method in Section 1.3. 5.2.4. -
Page 157: Noise Evaluation
5.3. Noise evaluation 5.3.1. Noise standards Parameter ROI 1 ROI 2 ROI 3 Remark Noise(Dev) 40 or less 30 or less 5.3.2. Phantom Specification QUART Phantom QUART - Ball Phantom 5.3.3. Test Method Run the Console Software and click the PANO button to go into PANO mode. Choose the PANO Phantom mode, and click the Confirm button. -
Page 158: Homogeneity Evaluation
5.4. Homogeneity evaluation 5.4.1. Homogeneity standards Parameter ROI 1 ROI 2 ROI 3 Remark Homogeneity The difference between ROI 1,2 8000 or more 1200 or more values is 10% or less (Ave) 5.4.2. Phantom Specification QUART Phantom QUART - Ball Phantom 5.4.3. -
Page 159: Collimator Alignment Evaluation
5.5. Collimator Alignment Evaluation 5.5.1. Collimator Alignment Standard Parameter (Lower Specification Limit) (Upper Specification Limit) Upper Lower Threshold Left Right LEFT RIGHT BOTTOM [Collimator Alignment Image] Page 158 of 244... - Page 160 5.5.2. Test Method Complete the collimator setup and acquire the image in the stopped state. Run the C:\VCaptureSW\Util\EzEval_Phantom\EzEval.exe program. Input the threshold 75%, and check whether the Collimator Alignment Result is satisfied with the standard. 5.5.3. Test Result Parameter Measurement value Pass/Fail Upper Lower...
-
Page 161: Chapter 6. Ceph Image Optimization
Chapter 6. CEPH Image Optimization 6.1. CEPH Sensor Calibration 6.1.1. Before CEPH Sensor Calibration Before CEPH sensor calibration, install VAKCAP.com program. Path: C:\VCaptureSW\Acquisition\Ceph\WideCeph\Norm\ folder Ensure to save all existing CEPH sensor calibration folder before starting a new calibration. You can find the previous folders at C:\VCaptureSW\Acquisition\CEPH\WideCeph\Norm\CAL Follow the steps below to prepare the system for a CEPH sensor calibration: Remove the normal chin block. - Page 162 6.1.2. CEPH Sensor Setting To set CEPH sensor, use the following commands: Command Function [SPM_CEPH] CEPH mode [SPM_HSON] CEPH sensor power on [SPM_FREQ_0160] Norm Mode Sensor Frequency Setting [SPM_FREQ_0313] Fast Mode Sensor Frequency Setting Collimator Open Position (without cu filter) [SPM_COLM_0003] If the collimator is not completely opened, adjust with [SPM_CDST_XXXX]...
- Page 163 6.1.3. CEPH Sensor: Dark Calibration To perform a dark calibration: Run the VAKAP.exe file. Norm C:\VCaptureSW\Acquisition\CEPH\WideCEPHG\Norm Fast C:\VCaptureSW\Acquisition\CEPH\WideCEPHG\Fast On the dialogbox, Select Soft Calib and send the following commands to the command window to set FPS. Norm [SPM_CEPH]→[SPM_HSON]→[SPM_CFRQ_0160] Fast [SPM_CEPH]→[SPM_HSON]→[SPM_CFRQ_0313] Click Dark to capture an image.
- Page 164 6.1.4. CEPH Sensor: Bright Calibration To perform a bright calibration Run the VAKAP.exe file. Norm C:\VCaptureSW\Acquisition\CEPH\WideCEPHG\Norm Fast C:\VCaptureSW\Acquisition\CEPH\WideCEPHG\Fast On the dialogbox, click Bright. Check if the median values of the captured images meets the standards below: ※ Filter by calibration point Bright 4 point 1 point...
- Page 165 6.1.5. 1-Point Bright Calibration To perform a 1-point bright calibration. Run the VAKAP.exe file. Norm C:\VCaptureSW\Acquisition\CEPH\WideCEPHG\Norm Fast C:\VCaptureSW\Acquisition\CEPH\WideCEPHG\Fast On the dialog box, Select Settings and follow the steps to set exposure conditions: ① ② ③ Go to [BrightCalibration] and enter 1 for the NumbPoints. Check if the tube voltage (kVp) and current (mA) are set as the table below.
- Page 166 Select Soft Calib on the Vakcap dialog box. Send the following commands to the command window to set the FPS Norm [SPM_CEPH]→[SPM_HSON]→[SPM_CFRQ_0160]→[SPM_COLM_0003] Fast [SPM_CEPH]→[SPM_HSON]→[SPM_CFRQ_0313]→[SPM_COLM_0003] Send [SPM_COLM_0003] to the command window to move the colimater to open position. Command Function [SPM_CEPH] Ceph mode [SPM_HSON] Ceph sensor power on...
- Page 167 Click Bright. When you see the message, “HOLD THE BUTTON FOR ~3 SEC” on the status window, press the X-ray exposure switch. Release the switch when the message, “RELEASE THE BUTTON” shows up in the status window. 10. Click V to open View16. 11.
- Page 168 6.1.6. 4-Point Bright Calibration To capture 4-point bright calibration data: Run the VAKAP.exe file. Norm C:\VCaptureSW\Acquisition\CEPH\WideCEPHG\Norm Fast C:\VCaptureSW\Acquisition\CEPH\WideCEPHG\Fast On the dialog box, Select Settings and follow the steps to set exposure conditions: ① ② ③ Go to [BrightCalibration] and enter 4 for the NumbPoints. 2) Check if the tube voltage (kVp) and current (mA) are set as the table below.
- Page 169 Select Soft Calib on the Vakcap dialog box. Send the following commands to the command window to set the FPS. Norm [SPM_CEPH]→[SPM_HSON]→[SPM_CFRQ_0160]→[SPM_COLM_0004] Fast [SPM_CEPH]→[SPM_HSON]→[SPM_CFRQ_0313]→[SPM_COLM_0004] Send [SPM_COLM_0004] to the command window to move the collimator to open position. Command Function [SPM_CEPH] Ceph mode [SPM_HSON] Ceph sensor power on...
- Page 170 Click Bright. When you see the message, “HOLD THE BUTTON FOR ~3 SEC” on the status window, press the X-ray exposure switch. Release the switch when the message, “RELEASE THE BUTTON” shows up in the status window. 10. Repeat steps 8 to 9 until you capture four data files. 11.
- Page 171 12. Click each data file in View 16. Ensure that the median value of each file meets the standards below ※ Norm Bright standard value: 4 points with Cu 1 mm filter Bright Cal Point 1 Cal Point 2 Median value Cal Point 3 Cal Point 4 1000...
- Page 172 15. After finishing the bright calibation on the norm mode, return to the Vakcap dialogbox to create an auto bad pixel map. 1) Enter 4 for the Numbpoint 2) Click Save. 3) Select Soft Calib and click Check. Page 171 of 244...
- Page 173 6.1.7. Bad Pixel Definition and Specifications 6.1.7.1 Bad pixel definition Dead pixel: no responsive pixel (value : 0 or 16384) Non-uniform response pixel: Pixel that shows a ±30% response deviation from neighboring pixels. 6.1.7.2 Bad line definition Bad pixels over 50% of effective area width and height are defined as bad lines ...
-
Page 174: Ceph Geometry Calibration
6.2. CEPH Geometry Calibration 6.2.1. Lateral Mode Start Position Setting Identify the starting position using the CEPH standard phantom. Attach 0.8T of Cu in front of the collimator and set the exposure condition to 80kVp 10mA. Attach CEPH standard phantom to the ear rod, click the console software as shown in the picture below, and capture the Normal LAT Mode. - Page 175 As shown in the image below, adjust [SPM_XRFA_xxxx] so that the center value is 605~625 pixels. * As the value decreases, it moves to the left and moves about 10 pixels per value. Check the center coordinates. CEPH standard phantom image Page 174 of 244...
- Page 176 6.2.2. PA Mode Start Position Setting Attach Cu 0.8T in front of the collimator. Attach the CEPH standard phantom to the ear rod Click the Console software as shown in the picture below to capture the Normal PA Mode. 1. Choose the CEPH. Choose High 3.
- Page 177 As shown in the image below, adjust [SPM_UBTT_xxxx] so that the center value is 1160~1180 pixels.* As the value decreases, it moves to the left and moves about 10 pixels per value. Check the center coordinates. (Standard range: 1160 to 1180) CEPH standard phantom image Page 176 of 244...
- Page 178 6.2.3. Line Pair Resolution Capture PA mode with Ceph phantom and Quart Phantom, and check Line Pair & Low Contrast Resolution. [Line Pair Resolution] Make sure that the lines can be seen clearly at 2.5 lp/mm [Low Contrast Resolution] Make sure that 1 or more holes can be seen clearly. Checking Line Pair Standards (Standard range: 2.5 Lp/mm or more)
- Page 179 6.2.4. CEPH Ear-Rod Alignment 1. Run the Console Software. 2. Click CEPH > High Resolution > Lateral > CONFIRM and wait until READY button is enabled. 3. Turn CEPH Ear-Rod to the Lateral Mode position as shown in the figure. 4.
- Page 180 10. Select 50 in the M box and click the center of the flat washer. Page 179 of 244...
- Page 181 11. Select 20 in the M box and make sure that the Ear-Rod guide pin is in the blue ROI area. 12. If the pin is out of the blue ROI area, do the steps that follow Disassemble the top cover from CEPH Unit. Refer to Chapter 2. Hardware Part Service Guide.
-
Page 182: Ceph Collimator Alignment
6.3. CEPH Collimator Alignment 6.3.1. CEPH Collimator Alignment Run the C:\VCaptureSW\Acquisition\CEPH\WideCEPH\Norm\VACAP.exe file. Send [SPM_CEPH], [SPM_HSON], [SPM_FREQ_0160], [SPM_COLM_0005], [SPM_CAMS], [SPM_RET_], and [SPM_ERDY] commands to the Command window to configure the CEPH sensor and collimator. Set 90kvp, 10mA in VACAP, send the [SPM_SSB_] command to the Command window, and click the Capture button to acquire the image. - Page 183 Set the Threshold value concerning the following standard, and check 0010.raw to check if it satisfies the collimator alignment standard. The collimator alignment standard is as follows. ※ Collimator Alignment standard value Collimator Min pixels Max pixels Left Right Threshold Upper Lower If the red pixel count is out of the permitted value, change the collimator position values by...
- Page 184 6.3.2. CEPH Collimator Alignment with EzAlign Follow the steps below to set CEPH collimator with EzAlign: Start the EzAlign-S and click Modality Align. Click CEPH and START. After clicking these buttons, the system moves to its capturing position and the collimator auto-alignment starts. If you want to use the auto irradiation function, click AUTO EXPOSE.
- Page 185 Press and hold the X-ray exposure switch when you see the message “HOLD THE BUTTON” (marked in the white box). Release the switch when you see the message “RELEASE THE BUTTON” (marked in the white box). If the system does not show this message, repeat step 3. 6-1.
-
Page 186: How To Use V.i
1. Run the C:\VCaptureSW\Util\VIPS.exe file. 2. Set options for each mode, as shown in the picture below. 1. Click the Option button. 2. Enter vatech. 3. Click the Log In button. 4. Check the image size. * 76 x 2592 5. - Page 187 7. Click the button. 8. Click the Save button. 9. Click the Search button. 10. Choose the image. 11. Click the Open button. Page 186 of 244...
- Page 188 6.4.1. Point Setting Method for Lateral Mode Image The Row Guide Line sets the lower part without the influence of the collimator. Use the Histogram of the column guideline to set within the range before the curve descends rapidly. When you complete the settings, as shown in the pictures from 3 to 7, 8, choose the Apply button.
- Page 189 As in [5], Row Points 1 and 5 set the endpoint without the influence of the left and right collimators. This is set at the point before the left, and the right curves descend sharply in the raw histogram. As in [6], Row Points 2, 3, and 4 are set to positions that can reflect the trend of the histogram. In the histogram, set the part where the curve increases and decreases.
- Page 190 10. Complete the CEPH Calibration, and choose the ①CEPH Processing button, as shown in [8]. 11. When the Mode Confirm button is chosen, Level 1~3 images are created. * Level 1~3: Level 3 has the highest contrast due to the difference in contrast. 12.
- Page 191 6.4.2. Point Setting Method for Frontal Mode Image The values set in Frontal Mode are the same as SMV, Carpus, and Waters View. The lateral image Point setting method is the same, and the column guideline is set on the left. Page 190 of 244...
- Page 192 6.4.3. Cautions When Setting V.I.P.S Point The point should not be set in the histogram irregular area caused by object or noise in the image. Countermeasures when background noise occurs even after calibration is applied In the case of lateral images, the column guideline is basically set on the right side, and it is ...
-
Page 193: Chapter 7. Ceph Image Evaluation
Chapter 7. CEPH Image Evaluation 7.1. Lateral Mode Start Position Evaluation 7.1.1. Lateral Mode Starting position standard Parameter LSL (Lower Specification Limit) USL (Upper Specification Limit) LAT start position 7.1.2. Phantom Specifications CEPH Phantom QUART Phantom 7.1.3. Test Method Run Console Software and click the CEPH to go into ceph mode. Set the High-Resolution/Lateral Mode/exposure condition 80 kVp, 10 mA, and click the Confirm button. - Page 194 605~625 pixel 7.1.4. Test Result Parameter Measurement value Pass/Fail LAT start position Page 193 of 244...
-
Page 195: Pa Mode Start Position Evaluation
7.2. PA Mode Start Position Evaluation 7.2.1. PA Mode Starting Position Standard Parameter LSL (Lower Specification Limit) USL (Upper Specification Limit) PA Start Position 1160 1180 7.2.2. Phantom Specifications CEPH Phantom QUART Phantom 7.2.3. Test Method Acquire images in High-Resolution PA Mode. The evaluation is conducted in the same manner as in the evaluation method in Section 1.3. - Page 196 7.2.4. Test Result Parameter Measurement value Pass/Fail PA Start Position 1160 1180 Page 195 of 244...
-
Page 197: Line Pair Resolution Evaluation
7.3. Line Pair Resolution Evaluation 7.3.1. Noise Standards Parameter LSL (Lower Specification Limit) USL (Upper Specification Limit) Line Pair Resolution 7.3.2. Phantom Specifications CEPH Phantom QUART Phantom 7.3.3. Test Method The evaluation is conducted in the same manner as in the evaluation methods of 1.3 and 2.3. 7.3.4. -
Page 198: Low Contrast Resolution Evaluation
7.4. Low Contrast Resolution Evaluation 7.4.1. Homogeneity Standards Parameter LSL (Lower Specification Limit) USL (Upper Specification Limit) Low Contrast Resolution 2.5 mm 7.4.2. Phantom Specifications CEPH Phantom QUART Phantom 7.4.3. Test Method The evaluation is conducted in the same manner as in the evaluation methods of 1.3 and 2.3. 7.4.4. -
Page 199: Chapter 8. How To Upgrade Your Firmware
Chapter 8. How to Upgrade Your Firmware The MCU (Micro Controller Unit) operates the system by installed the Firmware program. Therefore, when new functions or patches are released, Firmware files should be upgraded to apply the changes. 8.1. Firmware Upgrade Procedure (Ethernet Communication) Run the Flexspeed2000Manager. - Page 200 When the download is complete, the Success button appears as shown below. Click the Close button to exit. Page 199 of 244...
-
Page 201: Installing Firmware Upgrade Software (Serial Communication)
8.2. Installing Firmware Upgrade Software (Serial Communication) Run the flash_loader_demo_v2.8.0.exe file. You can download the software at http://www.st.com/en/development- tools/flasher-stm32.html. Continue with installation procedures, as shown below: Page 200 of 244... -
Page 202: Firmware Upgrade Procedure (Serial Communication)
8.3. Firmware Upgrade Procedure (Serial Communication) RS232 cable must be connected between PC and System. Run STMFlashLoader Demo.exe. C:\Program Files (x86)\STMicroelectronics\Software\Flash Loader Demo You can find a demonstrator GUI by searching the program by keyword. Attach RS232, depending on the choose connection method, set switch 4 on the board. (S200 switch No. - Page 203 Run Terminal v1.9b and set the Com Port, Baud rate(19200), Data bits(8), Parity(none), Stop bits(1), and click the Connect button. send the [rom] command and click the Disconnect button. Page 202 of 244...
- Page 204 Check the Port Name is COM1 button and click the Next button. Port Name must be the same Port as the Terminal v1.9b program. Check the Target is readable. Confirm the phrase Please click the “Next” to proceed. and click the Next button. Page 203 of 244...
- Page 205 Choose STM32F4_27_37_29_39_2048K corresponding to STM32F427II MCU, and click the Next button. Choose Download to device and browse a firmware to upgrade and open the file. Page 204 of 244...
- Page 206 Click the Next button to continue with a firmware upgrade. 10. When the firmware upgrade is completed, the "Download operation finished successfully" message will show up. Page 205 of 244...
- Page 207 11. Click the Close button to exit the program. 12. Run Terminal v1.9b and input the [RUN] command in the Command window, and check the serial message. Page 206 of 244...
-
Page 208: Checking Firmware Version (Serial Communication)
8.4. Checking Firmware Version (Serial Communication) 1. Run Terminal v1.9b. 2. Send the [SPM_TVER] command. 3. Check the Firmware Version of the MCU Boards. Page 207 of 244... -
Page 209: Appendix
8.5. Appendix 8.5.1. Main MCU Board Parameters Page 208 of 244... - Page 210 To check the saved Parameter value in MAIN MCU BOARD, send the [SPM_PVER] command in the Terminal 1.9b program. The Parameter values in this manual are random numbers only for explanation. Thus do not refer to the Parameter Values written in this manual since the actual Parameter Values for your system differ from these values.
- Page 211 5: Scan CEPH (Table Control) ~~~~~~~~~~~~~~~~~~~~~~~~~~~~~~~~~~~~~~~~~~~~~~~~~~~~~~~~~~~~~~ ~~~ceph sensor start position offset~~~ 1700=>(spm_UATT_xxxx)CEPH_TABLE_A_START_OFFSET_COUNT (0165 = 16.5cm). 0300=>(spm_UBTT_xxxx)CEPH_TABLE_B_START_OFFSET_COUNT (0165 = 16.5cm). 1700=>(spm_UCTT_xxxx)CEPH_TABLE_C_START_OFFSET_COUNT (0165 = 16.5cm). 0350=>(spm_UDTT_xxxx)CEPH_TABLE_D_START_OFFSET_COUNT (0165 = 16.5cm). 1700=>(spm_UETT_xxxx)CEPH_TABLE_E_START_OFFSET_COUNT (0165 = 16.5cm). 0350=>(spm_UFTT_xxxx)CEPH_TABLE_F_START_OFFSET_COUNT (0165 = 16.5cm). 1700=>(spm_UGTT_xxxx)CEPH_TABLE_G_START_OFFSET_COUNT (0165 = 16.5cm). 0350=>(spm_UHTT_xxxx)CEPH_TABLE_H_START_OFFSET_COUNT (0165 16.5cm).0313(HZ)=>(spm_CFRQ_xxxx)CEPH PULSE HZ SET 1790=>(spm_XRFA_xxxx)CEPH_REF_X1_START POSITION (1730 = 17.3cm)
- Page 212 20000 =>(SPM_HMRT_0001) H_M_RUN_TORQUE 01000 =>(SPM_HMST_0001) H_M_STOP_TORQUE ~~~~~~~~~~~~~~~~~~~~~~~~~~~~~~~~~~~~~~~~~~~~~~~~~~~~~~~~~~~~~~ Disabled (3D camera lighting) 00600 =>(SPM_CWFQ_0600) CWLED_PULSE_HZ 00050 =>(SPM_CWDT_0050) CWLED_PULSE_DT ~~~~~~~~~~~~~~~~~~~~~~~~~~~~ Door lock setting 0000=>(spm_DROP_000x)DOOR_TYPE 0: NO door switch Mode 1: Using door switch mode Tube tilting setting 0001=>(spm_TITY_000x)TILT_TYPE 0: NO tube tilting Mode (for only PANO Model) 1: Using tube tilting mode Auto Return setting ...
- Page 213 3000=>(spm_RDTS_000x)Ready Delay Time Set Patient detection options setting(not used) 0000=>(spm_PDSS_000x)Patient Detect Sensor Set Touch sound effect options setting 0000=>(spm_TSES_000x)Touch Sound Effect Set set the location of the sensor and collimator when exposure CT, 0344 =>(SPM_CSMV) ct_sensor_move_val 0664 =>(SPM_CCMV) collimator_move_val ~~~~~~~~~~~~~~~~~~~~~~~~~~~~ MP3 language setting ...
-
Page 214: Chapter 9. Command-List Guide
Chapter 9. Command-List Guide The command listed on this document is intended to communicate with equipment. The command is a directive to PC acting as an interpreter to perform a specific task to VATECH equipment. 9.1. Communication Protocol 9.1.1. Communication Settings The vatech A9 commands input and output data by Serial communication in HyperTerminal Program. - Page 215 9.1.2. Command Formation Command format = '[' + 'prefix' + '_' + 'command' + '_' + 'parameter' + ']' Ex) [SPM_CTCX_0123] Prefix Command Parameter 4 digit number or SPM, CT__, 5 digit number PANO CEPH, Ex)0123,12345 CTCX ‘[‘ = Start symbol ‘prefix’...
-
Page 216: Vatech A9(Pht-30Css) Command-List
9.2. vatech A9(PHT-30CSS) Command-List Command Remark [SPM_PANO] Command to enter PANOrama mode [SPM_CEPH] Command to enter CEPH mode [SPM_ARCT] Command to enter Arch-CT mode [SPM_RET_] Move to the shooting start position for each mode (PANOrama, CEPH, CT) [SPM_ERDY] Exposure switch press-ready command... - Page 217 Command Remark [SPM_FANT_0000] Set the reference temperature at which the tube fan turns on (ex. 400 = 40 degrees or more, Fan ON) [SPM_COLM_0000] 4-Axis Collimator Move Instruction 0001: CT inner circle position 0002: CT outer circle position 0003: Cu filter position 0004: Al filter position 0005: Scan CEPH 0007: PANO position...
- Page 218 Command Remark [SPM_TITY_000x] Enable/disable the tube tilting function 0000: Tube tilting not used (Disable tilting for Pan-only models) 0001: Tube tilting used (default) [SPM_TIT?] Indicate whether to use the currently set tube tilting function (0000: don't use, 0001: don't use) [SPM_TIPA] Tube tilting in pano direction [SPM_TICE]...
- Page 219 Command Remark [SPM_ISRK] Indicate whether the auto-return is completed after capture [SPM_SNUM_xxxxxxxxx] Omit the "-", ex) 123-4567 => send [SPM_SNUM_1234567] [SPM_SNU?] Request the Serial Number [SPM_SMRT_0000] Sensor motor Run Torque Value Setting [SPM_SMST_0000] Sensor motor Stop Torque Value Setting [SPM_CMRT_0000] Collimator motor Run Torque Value Setting [SPM_CMST_0000] Collimator motor Stop Torque Value Setting...
- Page 220 Command Remark [SPM_TEST_xxxx] Commands for test purposes such as Input/Output Check and Motor Aging test [SPM_FISS_xxxx] Command to set CT sensor sensitivity and binning mode (FISS) and to read its value (FISR) 0000: High Gain, 2x2 Binning 0001: High Gain, 4x4 Binning 0002: Low Gain, 2x2 Binning (Default when equipment power On/Off and not saved.) 0003: Low Gain, 4x4 Binning...
- Page 221 Command Remark [SPM_FO?_] Requesting the image rotator start position offset value in FAST PANO mode [SPM_CFRQ_0000] Setting CEPH Sensor Supply Frequency (Normal Scan) [SPM_CFR?] Request CEPH sensor supply frequency value (Normal Scan) [SPM_CCTM_0000] Setting CEPH Total Recording Time (Normal Scan) [SPM_CCT?] Requesting CEPH Total Recording Time Value (Normal Scan)
- Page 222 Command Remark [SMP_ECHK_0002] At the end of abnormal shooting by releasing the irradiation switch, Messages sent before [SMP_STOP_0000]-Purpose of identifying the cause of the outage [SMP_CPOF] This command is to turn off the power of the sensor and notify it when there is no command input for 30 minutes. [SPM_STIT_0000] Xxxx captures in CT stitching mode PANO mode sensor reference position setting command...
-
Page 223: Procedure For Using Remote Exposure Function
9.3. Procedure for using remote exposure function Ensure to get an approval from the hosptal staff before using the remote exposure function. (In some cases, hosptial staffs may need to sign in. DO NOT use the remote exposure function when taking an X-ray image with a patient. - Page 224 9.3.4. How to Run a XTST Test To run a XTST test: Run the Terminal or the VAKCAP.exe file. Send the [SPM_XRES] command to activate the remote exposure mode. Set and input the desired exposure time using the [SPM_XTST_xxxx] command, X-ray exposure proceeds for the set time Page 223 of 244...
-
Page 225: Error Message List
9.4. Error Message List 9.4.1. Tube Error Message Sent from MCU To PC Command Description [SMP_ERRR_0001] The tube is not ready [SMP_ERRR_0002] Tube Mono Block and Inverter Board Cable are not connected [SMP_ERRR_0003] Current is more than maximum permissible current while Inverter Board is working (X-Ray exposure) [SMP_ERRR_0004] This error occurs when there is a problem with the tube voltage... - Page 226 [SMP_ERRR_0014] During X-Ray exposure, mA Feedback is less than 50% off from the setting value. Error “5” is displayed on Inverter Board. [SMP_ERRR_0015] During X-Ray exposure, mA Feedback is more than 150% off from the setting value. Error “6” is displayed on Inverter Board. 9.4.2.
-
Page 227: Chapter 10. Console Software Error Message List
Chapter 10. Console software error message List 10.1. Hardware Error Code • Error code sending method Method: Serial communication (RS232) Format : [SMP_ERRR_####] - #### Error code, tail code only Classify sub code using Converting function. • Error code output method [Code : E001.000.000] Multilingual error phrases output Main... - Page 228 - his error occurs when there is no TUBE EXP OFF exposure off command within 0.5 COMMAND ERROR seconds after the exposure switch is turned off during exposure. -This error occurs when kV Feedback TUBE kV feedback (-)error differs by -20kV from the set value during X-ray exposure.
- Page 229 - This error occurs while moving the Motor 4 Collimator up axis origin of the 4-axis collimator Up. error - This is an error that occurs while Motor 4 Collimator down moving the 4-axis collimator down the axis error origin. - This error occurs while moving the 2- Motor 2 Collimator axis collimator UP/Down origin.
-
Page 230: Software Error Code
10.2. Software Error Code • Error code sending method Method: Self-return • Error code output method [Code : E002.001.001] Print out additional error information, print out multilingual error phrases Main Code Sub Code Tail Code Description E002 ------ ------ Console Software related error ------ Success ------... - Page 231 - Ping Delay ------ [ Library related ] - Loading ------ [ Library related ] - Calculate ------ [ Library related ] - Parameter ------ [ Library related ] - Action ------ [ Library related ] - initialization ------ [ Library related ] - End ------ [ Library related ] - Cancellation - Unknown error...
- Page 232 ------ [ File related ] - Loading failed ------ [ File related ] - Open failed ------ [ File related ] - Read failed ------ [ File related ] - Write failed ------ [ File related ] - Deletion failed ------ [ File related ] - Find failed ------...
- Page 233 - Out of memory - Memory allocation failure - Insufficient storage capacity - Read property - NULL - Out of range ------ [ Mode related ] - Condition failed ------ [ Mode related ] - Scope failed - Unknown error - Incorrect mode entry - Incorrect Case entry - Out of Maximum range...
- Page 234 - Invalid file size - No access rights - Out of memory - Memory allocation failure - Insufficient storage capacity - Read property - NULL - Does not exist ------ [Database related] - Assignment failed ------ [Database related] - Loading failed ------ [Database related] - Read failed ------...
-
Page 235: Acquisition Module Error Code
10.3. Acquisition Module Error Code • Error code sending method Method: Broadcast Message MsgName: K-DEVICE WParam : HIWord = Main Code (If less than 0, an error) LoWord : 0xAAAA LParam : HIWord = Sub Code LoWord : 0xAAAA or Tail Code [Code : E003.000.000] Multilingual error phrases output Main... -
Page 236: Image Processing Error Code
10.4. Image Processing Error Code • Error code sending method Method : Function return Format : LPARAM enabled : Highword=SubCode, Lowword=TailCode [Code : E004.000.000] Multilingual error phrases output Main Tail Description Code Code Code E004 ------ ------ Image Processing related error ------ Success ------... - Page 237 - When invalid memory is accessed - If an error occurs when releasing the memory used inside the library ------ [ ZeusDBP related ] - Unknown error - When an error occurs in function 1 of the DBP image processing module ︙...
- Page 238 processing module - If the path of the input configuration file is invalid - If the section name of the input configuration file is invalid - When the method type value received is invalid - When the input image size information is invalid - When the specific pixel value of the input image is outside the specified range - When invalid memory is accessed...
-
Page 239: Stitching Sw Error Code
10.5. Stitching SW Error Code • Error code sending method Method: Broadcast Message Format : LPARAM Enabled : Highword=SubCode, Lowword=TailCode [Code : E007.000.000] Multilingual error phrases output Main Tail Description Code Code Code E007 ------ ------ Stitching related error ------ Success ------ [Internal function related]... -
Page 240: Chapter 11. Dose Measurement Guide
Chapter 11. Dose Measurement Guide There are three ways to measure radiation dose from vatech A9. Read and choose the procedure that is most suitable for your situation. 11.1. Using Dose Measurement Mode Dose measurement mode is a unique feature of vatech A9. Using this mode, the inspector can measure radiation dose without removing the sensor sticker or the rotating unit’s cover. - Page 241 Dose measurement mode and phantom mode share settings. When you customize the voltage and current for dose measurement mode, the settings for the phantom mode are also changed. Check if the current and voltage settings are correct before you start a phantom mode. Return to the main window;...
-
Page 242: Removing The Sensor Sticker
11.2. Removing the Sensor Sticker If the measured results exceed the recommended values, measure the radiation dose again after removing the sensor sticker: 1. Remove the sticker attached in front of the sensor. The sticker can be removed by hands Sensor sticker 2. -
Page 243: Removing The Rotating Unit Covers
11.3. Removing the Rotating Unit Covers If you cannot attach the dosimeter to the sensor after removing the sticker, disassemble the sensor’s front and back covers and measure the radiation dose again: 1. Remove the sticker in front of the rotating unit. 2. - Page 244 A9 www.vatech.com...
Need help?
Do you have a question about the A9 PHT-30CSS and is the answer not in the manual?
Questions and answers