Table of Contents
Advertisement
Advertisement
Table of Contents

Related Manuals for Orbic Q10


Summary of Contents for Orbic Q10
-
Page 2: Table Of Contents
Table of Contents Overview ............6 Getting Started ................6 Assemble Your Device ........8 Installing a SD Card/SIM Card ..........8 Charging the Battery ...............8 Set Up Your Device ........10 Turn Your Device ON/OFF ..........10 Initial Setup ................10 Secure Your Device ............... 10 Touchscreen Gestures ............11 Know Your Device ........ - Page 3 Using the Recent Call Menu ..........35 Messaging ............. 39 Sending a Message..............39 Replying / Forwarding a Message ........39 Deleting a Message/Thread ..........40 Message Settings ..............40 Sending a Multimedia Message (MMS) .....40 Resuming a Draft Message ..........41 Searching Messages ..............41 Email ............... 42 Adding an Account ..............42 Removing an Account ............42 Composing an Email .............42...
- Page 4 Editing Photos ................54 Creating an Animation or Collage........54 Music .............. 55 Viewing your Music Library ..........55 Copying Music Files to the Device ........55 Getting Connected ........56 Wi-Fi ....................56 Bluetooth ..................57 USB Cable ..................58 Chrome ............59 Opening Chrome ..............59 Accessing or Searching the Webpage......59 Using Browser Options ............59 Downloading Files ..............60...
- Page 5 FCC SAR Warning ..............79 HAC Statement ................79 Battery Use ............ 81 Troubleshooting .......... 82...
-
Page 6: Overview
Overview Thank you for purchasing the Orbic Q10 (RC609L). Read this manual before operating your device and keep it for future reference. Getting Started This guide helps you learn about your device hardware, assembl procedures, and how to get started using your device. - Page 7 Keys Description Receiver To listen to the call Front Camera To take pictures and videos of yourself Touch Panel To navigate on the phone Back Key To navigate to the previous screen Home Button To navigate to the home screen. Overview Button To access recently used apps Volume Button...
-
Page 8: Assemble Your Device
Assemble Your Device Prior to use, it is necessary to install the SIM card, memory card and charge the battery. Your device uses a nano-SIM card. A SIM card may be preinstalled or may be able to use your previous SIM card. Installing an SD Card/SIM Card To install a SIM card or a micro-SD, power off the device and follow the below steps –... - Page 9 NOTE: • Charge your device's battery with the device turned off to maximize efficiency. • Over time, battery life decreases steadily. • Do not charge the battery for longer than eight hours.
-
Page 10: Set Up Your Device
Set Up Your Device Turn Your Device ON/OFF The instructions below explain how to turn your device ON or OFF. To Turn the Device ON • Press and hold the Power/Lock key until the device turns NOTE: The first time you use your phone, you’ll need to set it up. To Turn the Device OFF •... -
Page 11: Touchscreen Gestures
Touchscreen Gestures You can select on-screen items such as appli- cation icons or settings buttons by touching them with your finger. Tap and Hold Touch and hold your finger over the item to open its options. Swipe or Slide Drag your finger horizontally or vertically across the screen. -
Page 12: Know Your Device
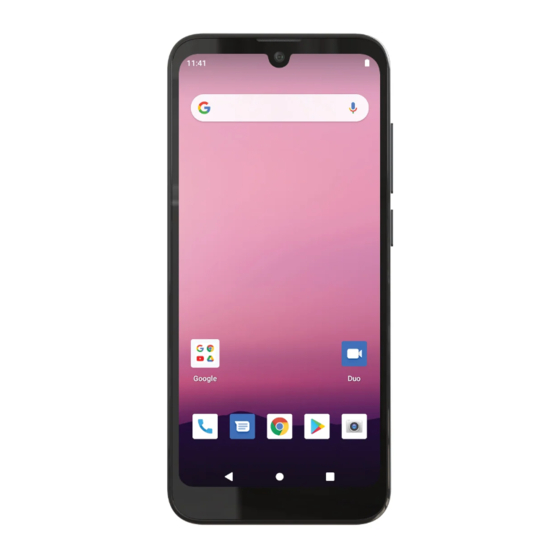
Know Your Device Home Screen The Home screen serves as the start of your experience. -
Page 13: Previewing The Home Screen
The Home screen is displayed when the device is in idle mode. The Home screen allows you to add shortcuts, folders, and wid- gets to your favorite apps to be easily accessible. To access the Home screen • Press Home to return to the center of the home screen. -
Page 14: Widgets
Changing the Wallpaper of the Home Screen 1. From the Home screen, tap and hold any empty area on the Home screen for a few seconds. 2. Tap Wallpapers. Choose a photo from your camera gallery or memory card. 3. Tap Set Wallpaper. Widgets Widgets are extensions for applications that appear on the Home screen. -
Page 15: App Shortcuts
App Shortcuts You can add a shortcut to the Home screen. Adding an App Shortcut 1. Touch and hold any preloaded or downloaded app on the Home screen. 2. Drag the app to the screen and release it. Removing the Shortcut 1. -
Page 16: Status Bar
Status Bar The Status Bar at the top of the home screen provides device information (such as network status, battery charge, and time) on the right side and notification alerts on the left. Status Icons Signal Strength No Signal Network Connected Wi-Fi Signal Strength Airplane Mode Bluetooth ON... -
Page 17: Notification Panel
Missed Call Alarm Set New Voicemail Missed Google DUO Call New Gmail Data Downloading Data Uploading New Message MicroSD Card Status Wi-Fi ON Notification Panel Notification icons on the Status Bar display calendar events, de- vice status, and more. Viewing and Responding to Notifications 1. -
Page 18: Using The Onscreen Keyboard
Using the On-screen Keyboard Type your text input using the onboard keyboard. The keyboard opens automatically in some applications. For others, tap any- where in a text field to launch the keyboard. 1. Tap each letter on the on-screen keypad. 2. - Page 19 • Tap the key marked 3 above while you type. When you release the key, the lowercase letters reappear. • Turn caps lock on - double-tap or touch & hold. • Tap the key marked 3 and tap the shift key again to return to lowercase.
-
Page 20: Editing Text
Adding/Editing/Deleting Words in the User Dictionary The predictive text dictionary may require the addition of a word, for example, a name or a technical term. If you want to add a word to your User Dictionary while typing, • Double-tap it to highlight it, tap and hold the word, and select Add to dictionary. - Page 21 Editing Text You can select, copy or cut the text you’ve entered, then paste it in another text field within the user interface. NOTE: Some applications may offer different text editing meth- ods. Select the Text 1. Tap the text field. 2.
- Page 22 • If you tap Cut, the selected text is removed from the text field. In this case, the text is saved to the clipboard, so that you can paste it into another text field. Paste the Text 1. Cut or copy the text to paste. 2.
-
Page 23: Selecting Text
NOTE: When you type, the notification panel will have a “selectin- put method” so you can set the input methods. Glide Typing The Google Keyboard allows you to slide your finger across the letters to spell the word. To enable glide typing 1. - Page 24 Adding a word manually 1. From the Home screen, Swipe up to reveal all your Apps > find and tap the Settings > System. 2. Tap Language & input > Personal dictionary. 3. Tap the plus sign and type the word and the shortcut. 4.
-
Page 25: Screen Timeout/Sleep Mode On
Cutting and Copying the Text 1. Double-click to select the text to cut or copy it. 2. Tap and hold the selected text. 3. Tap Cut or Copy in the menu that opens. • If you tap Cut, the selected text is removed from the text field. - Page 26 Screen Timeout/Sleep Mode ON Sleep mode saves battery power by turning off your display. You will still receive messages and calls when the display is turned . Switching to Screen timeout mode 1. Press Power/Lock to switch your phone to Screen timeout mode.
-
Page 27: Adjusting Volume
Activating Secure Screen Lock 1. From the Home screen, Swipe up to reveal all your Apps > then find and tap Settings > Security > Screen lock. • If you have already configured the screen lock, tap Screen lock to change. 2. -
Page 28: Connecting Your Phone To The Computer
Adjusting Volume Ringtone and Media volume are independent of each other and adjusted separately. Adjusting the Ringer Volume From the Home screen, press Volume up or Volume down on the right side of the phone to • Adjust the ringer volume to your desired level. •... -
Page 29: Phone Calls
Connecting Your Phone to the Computer You can copy your music, photos, and other files to the microSD card of your phone. NOTE: This option is available only when a microSD card is inserted into the slot of your phone. While your phone is connected to a computer, USB Mass storage mode prevents you from using appli- cations that access the memory card. -
Page 30: Calling From The Recents Call Menu
Phone Calls Making Calls The simplest way to make a call is to dial the number directly. You can also call numbers listed in your call log or Contacts list. Making a call from the dialer screen 1. From the Home screen, tap Phone . -
Page 31: Answering Or Rejecting Calls
Calling from the Recents Call Menu Your phone logs all incoming and outgoing calls. 1. From the Home screen, tap Phone > Recents. 2. Tap Dial at the right of any entry to dial. • Calls are listed with the most recent at the top. •... - Page 32 Making an emergency call 1. From the Home screen, tap Phone. 2. Tap the emergency number for your location. • This is usually 911, *911 or #911. 3. Tap Dial 4. To end the emergency call, tap End Call. Making an emergency call while the phone is locked 1.
-
Page 33: Using In-Call Options
Answering or declining an incoming call 1. A notification of an incoming call will appear towards the top of the screen. 2. Press DECLINE to reject the call or press ANSWER to answer the call. • If you were already in a call, the first call is placed on hold during answering the new call. -
Page 34: Using The Recent Call Menu
Checking missed calls • If you miss a call, is displayed in the Status bar. • If you open the Notifications panel, you will see the number of missed calls. Tap the notification to be taken to the call log and view detailed information. Using In-Call Options When a call is in progress, the following options are available: Dial Pad... - Page 35 Using the Recent Call Menu The phone stores the numbers of all incoming and outgoing calls in the Call log. The recent call displays the details of the call including time, date, and duration. Opening the Recents menu 1. From the Home screen, tap Phone >...
- Page 36 Calling a number from the Recents menu 1. From the Home screen, tap Phone > Recents. 2. If you want to call a number directly, tap to the right of the entry. Or select a contact > tap Dial. • If you want to edit a number before calling, tap and hold the desired entry, and then tap Edit number before call.
- Page 37 Clearing the Call log 1. From the Home screen, tap Phone > Recents. 2. Tap Option > Call History > Tap Option > Clear call history > OK. • To remove just one entry from the Recents menu, touch and hold the entry. In the pop-up options, tap Delete >...
-
Page 38: Messaging
2. Say the name of the contact you want to call or follow one of the suggestions for dialing a number or controlling your phone in other ways. -
Page 39: Deleting A Message/Thread
Messaging Use the Message app to send and receive SMS and MMS. To access message • From the Home screen, tap to open the message screen. • Tap an existing message thread to open a conversa- tion. • to search for a message using keywords. Sending a Message 1. -
Page 40: Resuming A Draft Message
Deleting a Message/Thread 1. On the message screen, touch and hold the message or the message thread that you want to delete. 2. Tap Delete Conversation > Delete. 3. Confirm the prompt to delete the selected message/thread. Message Settings 1. On the message screen, tap and tap Customize. -
Page 41: Email
• Slideshow- Create a slideshow from up to 10 of your photos. 6. From the message body, tap: • View: To view the attached item. • Replace: To change attached files. • Remove: To remove attached files. 7. Tap Send MMS. •... -
Page 42: Responding To An Email
Email Use the Email app to view and manage your email accounts. You can add multiple email accounts to your Orbic device. To access the email account • Tap Home key > swipe up for apps > Settings > Accounts. -
Page 43: Switching Between Google Accounts
• If entering the recipients manually, enter additional recipients by separating each with a semicolon (;) 4. Enter the subject for the email and compose the message. • Tap to insert an attachment (Files, Images, Audio, and much more), if required. 5. -
Page 44: Email Settings
Labeling an Email 1. From the Home screen, Swipe up to reveal all your Apps > then find and tap on Gmail 2. When reading a message, tap > Change labels. 3. Select a label > tap OK. Viewing emails by label 1. -
Page 45: Google™ Apps
Google™ Apps Enjoy the below apps from Google™. NOTE: Certain apps require you to sign into your Google account. Chrome Use the Chrome to browse the Internet. Drive Store files on Google™ Drive with upto 15GB of free storage. Make high-quality video calls. Gmail Send and recieve email. - Page 46 Play Store Find and download new apps, games, music, TV shows, and more. YouTube View and upload video from your device. YT Music Play music and audio files on your device.
-
Page 47: Maps
Maps Use Maps to find your current location and get directions. You can search for addresses, landmarks and businesses directly on a street map or satellite image. Note: You need an active mobile data or Wi-Fi connection to use Maps. To see your location and get directions, you must turn on location services. - Page 48 • A balloon opens over the location, with summary information. 3. Tap the balloon to see the address or more information. Viewing a location in Street view Street view mode provides a street-level view of the location. Street view may not be available for all areas. 1.
- Page 49 Viewing map layers Initially, Google Maps opens with a street map. You can view addi- tional map layers, such as satellite images and traffic information. You can also view custom Web created Google Maps. 1. From the Home screen, Swipe up to reveal all your Apps >...
-
Page 50: Camera
Camera Use the Camera app to take pictures and record videos. To access camera • From the Home screen > tap Capturing a Photo 1. Tap to access the camera. 2. Aim the camera at the subject using the device main display screen as a viewfinder. -
Page 51: Camera Settings
Camera fast menu When in camera mode, settings are displayed on the screen. Be- fore taking the photo, you can adjust your camera settings or leave the controls in automatic mode. 1. From the Home screen, Swipe up to reveal all your Apps >... -
Page 52: Calendar
Calendar Use the calendar app to manage your tasks and events. To access calendar • Tap the Home key > swipe up for apps > Calendar Creating an Event 1. Tap Calendar > tap Add Calendar > New event. 2. Enter the name, time, location, description, and optional details for your event. -
Page 53: Clock
Clock Use the Clock app to keep track of time and set the alarm. To access the clock 1. Tap the Home key > swipe up for apps > Clock 2. Tap a tab to use a feature: • World Clock – Tap for the clock to view the time of other parts of the world. -
Page 54: Google Photos
Google Photos Use the Google Photos app to view, edit, and manage photos and videos. To access Google Photos • From the Home screen > tap Google Photos Sharing Albums, Photos, or Videos 1. Tap an album, photo, or video to view it. 2. -
Page 55: Music
Music Use the Play Music app to view and play music files on your device. To access Play Music • From the Home key > swipe for apps > tap Play Music Viewing your Music Library 1. Tap the Home key >... -
Page 56: Getting Connected
Getting Connected The instructions below describe how to connect your device through Wi-Fi, Bluetooth, and USB cable. Wi-Fi Wi-Fi refers to certain types of Wireless Local Area Networks (WLAN) and Communication via Wi-Fi requires an access point. Turn Wi-Fi ON Turning on Wi-Fi will make your device discover and connect to wireless APs within range. -
Page 57: Bluetooth
Forgetting a Wi-Fi network 1. Touch the Home key > swipe up for apps > Settings > Network & Internet > Wi-Fi. 2. Tap Network > Remove. Bluetooth Bluetooth, or short-range communications, allows you to wireless- ly connect your device to several Bluetooth devices that are com- patible with your devices such as headsets, computers, printers, and wireless devices that are Bluetooth-enabled. -
Page 58: Usb Cable
3. Tap the name of the device you want to pair with. NOTE: The Bluetooth passkey, if required, may be fixed for some devices. Try 0000 or 1234, or refer to the instructions that came with the device. Forgetting a Bluetooth Device 1. -
Page 59: Chrome
Chrome Search for information or browse web pages using the Chrome web browser. To access the internet, you must have an active data or Wi-Fi connection. Opening Chrome 1. From the Home screen, Swipe up to reveal all your Apps > then find and tap on Chrome. -
Page 60: Downloading Files
3. Finding the text on the current page • While viewing any web pages, tap Option > Find in page. • Enter the search term. 4. Sharing a webpage • While viewing any web pages, tap Option > Share page. •... -
Page 61: Using Bookmarks
Using Bookmarks Browser bookmarks are stored shortcuts which allow you to quick- ly access webpages without having to type in its full address. 1. Bookmarking a webpage • While viewing webpages, tap Option > tap Save to bookmarks. • Edit the name or location if needed > tap OK 2. -
Page 62: Settings
Settings The instructions below guide you to configure your device’s con- nections, settings, and features. To access settings, • Tap the Home key > swipe up for apps > Settings Network & internet Setup and manage connections to a variety of networks and devices. - Page 63 • Data warning & limit - You can also customize data warnings and limits from Mobile network. • Preferred network type - Choose the desired network. • Wi-Fi calling - Activate the call over mobile network. • Access Point Names - : Choose or add APNs, which have the network settings your device needs to con- nect to.
-
Page 64: Connected Devices
Data Saver Use Data saver to reduce your data consumption by preventing selected apps from sending or receiving data in the background. To activate data saver 1. Tap Settings > Network & internet > Data Saver. 2. Tap Use Data Saver to turn ON the data saver. •... -
Page 65: Battery
Manage Notifications You can configure notifications from apps. To enable app notifications, 1. Tap Settings > Notifications > App settings under Manage. 2. Tap besides each application to receive notifications. 3. To view recent and snoozed notifications, tap Notification history. Do Not Disturb You can Block sounds and notifications while this mode is turned ON. -
Page 66: Storage
Storage You can view the device memory and usage details. Sound You can configure the sounds and vibrations use to indicate notifi- cations, screen tap, and other activities. Adjust the volume You can set the system volume level and set defalt volume for notifications and other media. -
Page 67: Display
Display You can configure your display’s brightness and screen timeout delay. 1. Tap Settings > Display. • Brightness level - Drag the brightness slider to adjust the brightness. • Adaptive brightness - Tap to enable this option. • Lock screen - Display sensitive content only when device is unlocked. -
Page 68: Accessibility
Accessibility There are accessibility settings for people who need help seeing, hearing, or otherwise operating their device. Accessibility services are special features that make using the device easier for every- one. Screen reader You can use special controls and settings that lets you navigate wthout the need to view the screen. -
Page 69: Security
• High contrast text - Adjust the color and outline of the text to increase the contrast with the background. Security You can secure your device and protect your data by using a screen lock. With this option enabled, you can use your finger to draw a pattern or enter a PIN to unlock your device's screen. - Page 70 • None: Never use a screen lock. • Swipe: Swipe the screen to unlock. • Pattern: Create a pattern that you draw on the screen to unlock your device. • PIN: Select a PIN to use for unlocking the screen. •...
-
Page 71: Privacy
App Pinning You can use app pinning to keep one app in view, preventing other users from switching to other apps and accessing your personal information. To pin an app 1. Tap Security > App pinning. 2. Tap the ON/OFF Switch. Privacy You can use these options to configure advanced security settings to better protect your device. -
Page 72: Location
Location Location services use a combination of GPS, mobile network and Wi-Fi to determine the location of your device. To access location 1. Tap the Home key > swipe up for apps > Settings > Location. 2. Tap Use location to turn on the location. App location permissions You can configure permissions for apps that want to access your location information. -
Page 73: Digital Wellbeing & Parental Controls
Add an Account You can add and sync all your email, picture, and video sharing accounts. To add an account 1. Tap Passwords & accounts > Add account. 2. Tap one of the account types. 3. Follow the prompts to enter your credentials and set up the account. -
Page 74: System
2. Choose the desired settings and preferences. • • Autofill • Backup • Devices & sharing • Fing My Device • Mobile data & messaging • Parental controls • Set up & restore • Settings for Google apps System You can cutomize the system settings and preferences. To access system •... - Page 75 6. Tap Pointer speed under Tools to set the speed of the pointer. 7. Tap Text-to-speech output under Tools to customize the options. • Speech rate - Set the speed at which the text is spo- ken. • Pitch - Set the tone at which the text is spoken. Date &...
-
Page 76: About Phone
• Backup all your information prior to a software update. • Make sure the device is powered ON with a fully charged battery. • Never turn OFF the device during the software update. • During the updating period, the device will reboot twice.Do not operate the device until the update is complete. -
Page 77: Product Specifications
Product Specifications Display 6.088" HD+ 1560x720 Scratch Resistant Glass Camera 8-2MP AF with Flash, 5MP FF Memory 3/32GB MicroSD slot up to 128GB Operating System Android S Connectivity IEEE 802. 11 ac/b/g/n/a 2.4 & 5GHz,BT 5.0 Sensors ALS Sensor, G Sensor FP, Light and proximity sensor, Barom- eter Battery... -
Page 78: Safety Hazards
Safety Hazards Do not operate the Phone in an environment that might be suscep- tible to radio interference resulting in danger. FCC Statement This device with FCC ID: 2ABGH-RC609LTM complies with Part 15 of the FCC Rules. Operation is subject to the following two conditions: 1. -
Page 79: Fcc Sar Warning
Caution: Any changes or modifications not expressly approved by the party responsible for compliance could void the user's authori- ty to operate this equipment. This transmitter must not be co-located or operating in conjunc- tion with any other antenna or transmitter. FCC SAR Warning This device meets the government’s requirements for exposure to radio waves. - Page 80 The ANSI standard for hearing aid compatibility contains two types of ratings: • M-Ratings: Rating for less radio frequency interference to enable acoustic coupling with hearing aids. • T-Ratings: Rating for inductive coupling with hearing aids in telecoil mode. Not all phones have been rated. A phone is considered hearing aid compatible under FCC rules if it is rated M3 or M4 for acoustic coupling and T3 or T4 for inductive coupling.
-
Page 81: Battery Use
Battery Use Handle and store batteries properly to avoid injury or damage. Most battery issues arise from improper handling of removable batteries and, particularly, from the continued use of damaged batteries. • Do not disassemble, open, crush, bend, deform, puncture, or shred. -
Page 82: Troubleshooting
Troubleshooting Here are a few things you can try before contacting the service center. Your device displays network or service error messages. You may lose reception when you are in areas with weak signals or poor reception. Move to another location and try again. Your device does not turn ON. - Page 83 3. Resetting the device • If the methods above do not solve your problem, per- form a factory data reset. Calls are not connected. • Ensure you have accessed the right network. • Ensure that you have not set call barring for the phone number you dial.
Need help?
Do you have a question about the Q10 and is the answer not in the manual?
Questions and answers
Can I use a wireless charger on my Orbic RC609l
Yes, you can use a wireless charger with the Orbic Q10. The wireless charger is specifically compatible with the Orbic Q10 and charges the device when placed on the charging pad.
This answer is automatically generated
Can the keyboard be activated without a sim card