Table of Contents
Advertisement
Quick Links
Advertisement
Table of Contents

Related Manuals for Waves Calrec SoundGrid


Summary of Contents for Waves Calrec SoundGrid
- Page 1 Calrec SoundGrid I/O User Guide...
-
Page 2: Table Of Contents
3. Installation and Configuration Overview ............8 3.1 Installing the Calrec SoundGrid Interface ..............8 3.2 Configuring the Calrec SoundGrid Interface in MultiRack SoundGrid ......8 3.3 Configuring the Calrec SoundGrid Interface in SoundGrid Studio ......10 3.3.1 Setting up SoundGrid Studio ................10... -
Page 3: Introduction
Adding a SoundGrid DSP server enables recording and monitoring with very low latency and moves processing away from the host computer to the server. The Calrec SoundGrid card enables integration of Calrec consoles with Waves SoundGrid systems via a single Ethernet cable, allowing live engineers to use the SoundGrid technology for low-latency plugin processing, multitrack recording and playback, and audio networking. -
Page 4: Typical Uses
SoundGrid Configuration In a SoundGrid configuration, the Calrec SoundGrid card is used to connect to a SoundGrid network for plugin processing and simultaneous DAW playback/recording. The SoundGrid configuration uses a dedicated SoundGrid DSP server to power the plugin processing, enabling super-low latency, high plugin counts, and networking capabilities, with the option of adding a backup DSP server. - Page 5 Native Configuration In a Native configuration, the Calrec SoundGrid card is used in order to connect a console to the SoundGrid ASIO/Core Audio driver for plugin processing and/or DAW playback/recording. Since the Native configuration utilizes the computer’s CPU to power the plugin processing, plugin count and overall system latency depend on the computer’s CPU and sound driver capabilities.
-
Page 6: Native/Soundgrid Comparison Table
1.3 Native/SoundGrid Comparison Table Features Native SoundGrid Low Latency Processing Recording Simultaneous Recording and Processing Dedicated SoundGrid DSP CPU Load Your DAW computer's CPU server Backup DSP Server Networking I/O Interface Calrec Calrec Plugin Host Software MultiRack Native MultiRack SoundGrid Plugin Licenses Native SoundGrid... -
Page 7: Hardware And Connectors
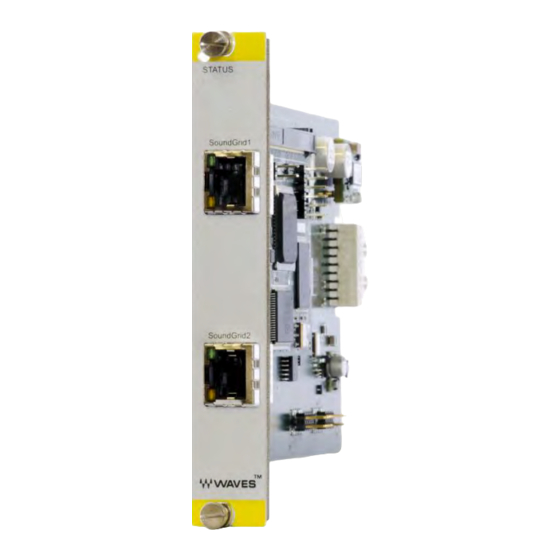
2. Hardware and Connectors SoundGrid ports 1-2 (Ethernet) connect the SoundGrid Network. Colors and status for both ports are as follows: • Link/Act LED = flashing green • GigE (Gigabyte Connection Indicator) = solid green... -
Page 8: Installation And Configuration Overview
3. Installation and Configuration Overview The ASIO/Core Audio drivers and control panel for the Calrec SoundGrid card are installed using the Waves Central application, which also installs the SoundGrid driver and the SoundGrid Studio Application required for DAW recording and playback. - Page 9 1. If you are using a redundant SoundGrid DSP server, assign it as number 2. 8. Assign your Calrec SoundGrid card/s in the Assign column. Use consecutive numbers for multiple devices, with the first unit assigned as number 1.
-
Page 10: Configuring The Calrec Soundgrid Interface In Soundgrid Studio
3.3 Configuring the Calrec SoundGrid Card in SoundGrid Studio This is a quick overview of what you need to know about SoundGrid Studio software to get your network up to speed. There’s enough here to configure a simple network, assess network status, and set up your I/O devices. - Page 11 The first time you launch SoundGrid Studio, the Wizard will open. It scans the network, inventories its assets, and then configures the devices. If the Wizard does not start automatically, click the START Auto Config button, which is next to the Network Port. Choose “NEXT”...
- Page 12 To add another SoundGrid device, click on the arrow in an empty rack slot. From the list of available devices, choose the one that you want to add—in this case, a second Calrec SoundGrid audio interface. In this image, Calrec SoundGrid is grayed out (and therefore unavailable) since it is already claimed.
-
Page 13: Firmware Status And Updates
Now you know how to assign I/O devices and designate a device as the clock master. Click on the Gear symbol in the device slot to open the Calrec SoundGrid control panel in order to set up clock details and configure preamps.
Need help?
Do you have a question about the Calrec SoundGrid and is the answer not in the manual?
Questions and answers