
Related Manuals for GASLAND chef OTR1902B

Summary of Contents for GASLAND chef OTR1902B
- Page 1 Over The Range Microwave Oven Installation Instructions Available Color Black/Stainless Steel 1 (844) 538-7890 www.gaslandchef.com support@gaslandchef.com 3330-A Marathon Ct Charleston, SC 29418...
-
Page 2: Precautions To Avoid Possible Exposure To Excessive Microwave Energy
(2). HINGES AND LATCHES (broken or loosened) (3). DOOR SEALS AND SEALING SURFACE (d). The oven should not be adjusted or repaired by anyone except properly qualified service personnel. Specifications Model: OTR1902S OTR1902B Rated Voltage: 120V~60Hz 120V~60Hz Rated Input Power(Microwave): 1500 W 1500 W... -
Page 3: Important Safety Instructions
IMPORTANT SAFETY INSTRUCTIONS When using electrical appliances basic safety precautions should be followed, including the following: WARNING -To reduce the risk of burns, electric shock, fire, injury to persons or exposure to excessive microwave energy: 1. Read all instructions before using the appliance. 2. - Page 4 near water - for example, near a kitchen sink, in a wet basement, near a swimming pool, or similar location. 12. Do not immerse cord or plug in water. 13. Keep cord away from heated surface. 14. Do not let cord hang over edge of table or counter. 15.
- Page 5 4). After heating, allow the container to stand in the microwave oven for a short time before removing the container. 5). Use extreme care when inserting a spoon or other utensil into the container. 18. Do not operate any heating or cooking appliance beneath the appliance.(Exception: A microwave oven investigated for use above another heating appliance.) 19.
-
Page 6: Grounding Instructions
GROUNDING INSTRUCTIONS This appliance must be grounded. In the event of an electrical short circuit, grounding reduces the risk of electric shock by providing an escape wire for the electric current. This appliance is equipped with a cord having a grounding wire with a grounding plug. - Page 7 3. If a long cord or extension cord is used: 1). The marked electrical rating of the cord set or extension cord should be at least as great as the electrical rating of the appliance. 2). The extension cord must be a grounding-type 3-wire cord.
-
Page 8: Radio Interference
RADIO INTERFERENCE Operation of the microwave oven may cause interference to your radio, TV or similar equipment. When there is interference, it may be reduced or eliminated by taking the following measures: 1). Clean door and sealing surface of the oven 2). -
Page 9: Materials You Can Use In Microwave Oven
Materials you can use in microwave oven Utensils Remarks Follow manufacturer s instructions. The bottom of browning dish Browning dish must be at least 3/16 inch (5mm) above the turntable. Incorrect usage may cause the turntable to break. Microwave-safe only. Follow manufacturer’s instructions. Do not Dinnerware use cracked or chipped dishes. -
Page 10: Materials To Be Avoided In Microwave Oven
Materials to be avoided in microwave oven Utensils Remarks Aluminum tray May cause arcing. Transfer food into microwave-safe dish. Food carton with metal May cause arcing. Transfer food into microwave-safe dish. handle Metal or Metal shields the food from microwave energy. Metal trim may metal-trimmed cause arcing. -
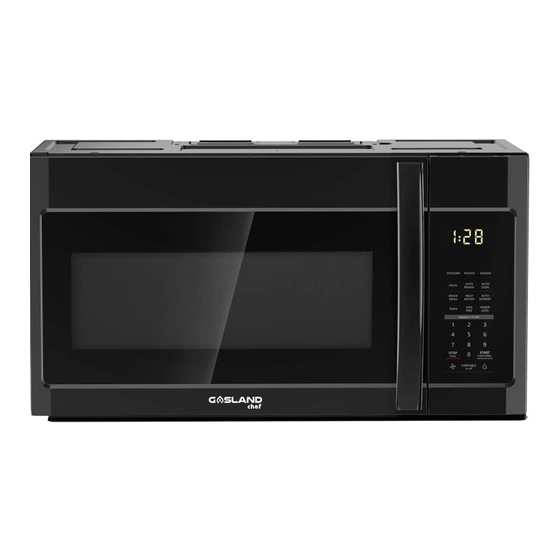
Page 11: Part Names
PART NAMES FRONT VIEW BOTTOM VIEW Front Rear... - Page 12 1. Microwave oven door with see-through window 2. Door hinges 3. Waveguide cover: DO NOT REMOVE. 4. Turntable motor shaft 5. Microwave oven light It will light when microwave oven is operating or door is open. 6. Rack holders 7. Safety door latches The microwave oven will not operate unless the door is securely closed.
-
Page 13: Control Panel
CONTROL PANEL The 7-digit Interactive Display spells out operating steps and shows cooking hints. Number next to the control panel key illustration indicates pages on which there are feature descriptions and usage information. - Page 14 (2) Auto Cook (1) Display: (3) Auto Reheat The display includes a clock and (4) Pizza indicators that show the time of day, cooking time settings, cook powers, (5) Auto Defrost sensor, quantities, weights and (6) Melt/Soften cooking functions selected. (7) Potato (1-4 potatoes) la.
-
Page 15: To Set The Clock
• Before operating your new oven make sure you read and understand this Use and Care Guide completely. • The clock can be disabled when the microwave is first plugged in and the STOP key is selected. To re-enable the clock follow clock instructions. 1. -
Page 16: Manual Cooking
MANUAL COOKING 1. Time Cooking Your Over the Range Microwave Oven can be programmed for 99 minutes 99 seconds (99 :99). Always enter the seconds after the minutes, even if they are both zeros. 1). Suppose you want to cook for 5 minutes, 30 seconds at 100% power Touch Display Shows:... -
Page 17: Using Add 30 Sec
4. Using Add 30 Sec. This is a time-saving pad. It is a simplified feature that lets you quickly set and start microwave cooking at 100% power. 1). Suppose you want to cook for one minute. Touch Display Shows: 1. START/Enter/+30Sec 2. -
Page 18: Setting Two-Stage Cooking
6. Setting Two-Stage Cooking For best results, some recipes call for different power levels during a cook cycle. You can program your oven for two power level stages during the cooking cycle. 1). Suppose you want to set a 2-stage cook cycle. The first stage is a 3 minute cook time at 80% cook power then a 7 minute cook time at 50% cook power. -
Page 19: Using The Rack
PRESS POWER LEVEL APPROXIMATE COMMON WORDS FOR PAD NUMBER OF TIMES PERCENTAGE OF POWER LEVELS FOR DESIRED POWER POWER POWER LEVEL x 5 POWER LEVEL x 6 Medium POWER LEVEL x 7 POWER LEVEL x 8 Med Low/Defrost POWER LEVEL x 9 POWER LEVEL x 10 POWER LEVEL x 11 8. - Page 20 For either raw or previously cooked frozen food the rule of thumb is approximately 4 minutes per pound. For example, defrost 4 minutes for 1 pound of frozen spaghetti sauce. Always stop the oven periodically to remove or separate the portions that are defrosted.
-
Page 21: One Touch Cook
ONE TOUCH COOK 1. Popcorn Press “Popcorn” key and LED displays 3.3 oz. and the “PRESS AGAIN FOR OPTIONS” icon. You can press “Popcorn” key again to select 3.0 oz. or 1.75oz. You also can press number keys to choose the weight of pizza(3.3 oz., 3.0 oz., 1.75 oz ) . - Page 22 Amount Press popcorn pad 3.3 Oz once 3.0 Oz 2 times 1.75 Oz 3 times NOTES Remove the metal shelf from microwave oven when cooking popcorn. Do not use regular paper bags. Do not re-pop unpopped kernals. Do not cook popcorn in glass cookware.
- Page 23 3. Snack Menu Snack Menu is for cooking/heating foods that take a short amount of time! 1). Suppose you want to reheat 3 hot dogs. Touch Display Shows: 1. Snack 2. START/Enter/+30Sec 4. START/Enter/+30Sec Time counting down 4. Snack Menu chart FOOD AMOUNT PROCEDURE 1 - 6...
-
Page 24: Baked Potato Chart
5. Potato 1). Suppose you want to cook 1 to 4 baked Potatoes. Touch Display Shows: 1. Potato 2. START/Enter/+30Sec Time counting down NOTES 1. Cooking times are based on an average 8 ounce potato. 6. Baked Potato chart FOOD AMOUNT PROCEDURE Pierce with fork in several places. -
Page 25: Setting Melt/Soften
Amount Press pizza pad 6.0 Oz once 8.0 Oz 2 times 8. Setting Melt/Soften The oven uses low power to melt and soften items. See the following table. 1). Suppose you want to melt 2 sticks of Butter. Touch Display Shows: 1. -
Page 26: Auto Reheat
AUTO REHEAT 1. Auto reheat Food Amount Auto reheat x1 Beverage 1 - 3 Cups Auto reheat x2 Dinner Plate 1 - 2 Plates Auto reheat x3 Soup/Sauce Auto reheat x4 Casserole Auto reheat x5 Rolls 1 - 3 Slices 2. - Page 27 3. Auto Cook Food Amount Auto Cook x1 Bacon 1 - 3 Slices Auto Cook x2 Frozen Dinner 10Oz/20Oz Auto Cook x3 Rice 1 - 2 Cups Auto Cook x4 Frozen Breakfast 8Oz/12Oz 4. Quick Meals 1). Suppose you want to cook Frozen Dinner for 1 serving . Touch Display Shows:...
-
Page 28: Using Auto Defrost
AUTO DEFROST 1. Using Auto Defrost The auto defrost feature provides you with the best defrosting method for frozen foods. The cooking guide will show you which defrost sequence is recommended for the food you are defrosting. For added convenience, the Auto Defrost includes a built-in beep mechanism that reminds you to check, turn over, separate, or rearrange the food in order to get the best defrost results. - Page 29 2. Operating Tips 1). For best results, remove fish, shell fish, meat and poultry from its original closed paper or plastic package (wrapper). Otherwise, the wrap will hold steam and juice close to the foods, which can cause the outer surface of the foods to cook.
-
Page 30: Auto Defrost Table
Equivalent Weight 12.8 0.80 14.4 0.90 16.0 1.0 One Pound NOTES If between two decimal weights, choose the lower weight for the best defrosting results. 4. Auto Defrost Table NOTE: Meat of irregular shape and large, fatty cuts of meat should have the narrow or fatty areas shielded with foil at the beginning of the defrost sequence. - Page 31 FOOD SETTING AT BEEP SPECIAL INSTRUCTIONS Turn over. Cover Place in a microwave safe Rib Roast MEAT warm areas with dish. aluminum foil. Rolled Turn over. Cover Place in a microwave safe Rump MEAT warm areas with dish. Roast aluminum foil. LAMB Turn over.
- Page 32 Auto Defrost Table (Continued) Poultry Settings FOOD SETTING AT BEEP SPECIAL INSTRUCTIONS Place chicken breast-side CHICKEN Turn over breast side up in a microwave safe Whole down. dish. Finish defrosting (up to 6 Cover warm areas with by immersing in cold lbs) aluminum foil.
-
Page 33: Defrosting Tips
FOOD SETTING AT BEEP SPECIAL INSTRUCTIONS SHELLFISH Crab Break apart. Turn FISH Place in a microwave safe dish. meat over. Lobster Turn over and FISH Place in a microwave safe dish. tails rearrange. Separate and Shrimp FISH Place in a microwave safe dish. rearrange. -
Page 34: Convenient Features
CONVENIENT FEATURES 1. User pref The microwave oven has settings that allow you to customize the operation for your convenience. Below is the table showing the various settings. Touch the “User pref“ key multiple times to scroll to the desired setting function. Key press Option User pref x1... - Page 35 3. Setting Control Lock On/Off To turn ON Control Lock . Touch Display Shows: 1. User pref 2. User pref 3. START/Enter/+30Sec 4. Turning Sound Low/Med/High/Off Audible signals are available to guide you when setting and using your oven. 1). A programming tone will sound each time you touch a pad. 2).
-
Page 36: Clock Display On/Off
5. Setting Weight Lb/Kg 1). Suppose you want to toggle weight between pounds & kilograms. Touch Display Shows: 1. User pref 2. User pref 3. User pref 4. User pref START/Enter/+30Sec 6. Clock Display on/off 1). Suppose you want to set the clock display on. Touch Display Shows:... -
Page 37: Setting Kitchen Timer
7. Setting Demo Mode On/Off 1). Suppose you want to enter Demo mode. When Demo mode is ON programming functions will work in a rapid countdown mode with no cooking power. Touch Display Shows: 1. User pref 2. User pref 3. -
Page 38: Using Vent Fan
Touch Display Shows: 3. START/Enter/+30Sec Timer starts counting down 9. Using Vent Fan The pad controls the 2-speed vent fan. If the vent fan is OFF, the first touch of the Vent pad will turn the fan on HIGH, second touch LOW and third touch OFF. -
Page 39: Setting Turntable On/Off
11. Setting Turntable On/Off Press Turntable On-Off to turn the turntable on or off. For best cooking results, leave the turntable on. It can be turned off for large dishes. Touch Display Shows: 1. Turntable On-Off 2. Turntable On-Off NOTE Sometimes the turntable can become hot to the touch during and after cooking. -
Page 40: Maintenance
MAINTENANCE Troubleshooting Check your problem by using the chart below and try the solutions for each problem. If the microwave oven still does not work properly, contact the nearest authorized service center. TROUBLE POSSIBLE CAUSE POSSIBLE REMEDY Oven will not start a. - Page 44 1 (844)538-7890 www.gaslandchef.com...
Need help?
Do you have a question about the OTR1902B and is the answer not in the manual?
Questions and answers