
Related Manuals for GASLAND chef OTR1603B

Summary of Contents for GASLAND chef OTR1603B
- Page 1 Over The Range Microwave Oven Installation Instructions Available color Black/Stainless steel 1 (844) 538-7890 www.gaslandchef.com support@gaslandchef.com 3330-A Marathon Ct Charleston, SC 29418...
-
Page 2: Precautions To Avoid Possible Exposure To Excessive Microwave Energy
(2) HINGES AND LATCHES (broken or loosened) (3) DOOR SEALS AND SEALING SURFACE (d) The oven should not be adjusted or repaired by anyone except properly qualified service personnel. Specifications Model OTR1603B/OTR1603S Rated Voltage 120V~60Hz Rated Input Power(Microwave) 1550 Watt Rated Output Power(Microwave) - Page 3 3. This appliance must be grounded. Connec only to properly grounded outlet. See "GROUNDING INSTRUCTIONS" found on page 3. 4. Install or locate this appliance only in accordance with the provided installatio ninstructions. 5. Some products such as whole eggs and sealed containers - for example, closed glass jars - are able to explode and should not be heated in this oven.
-
Page 4: Grounding Instructions
THIS COULD RESULT IN VERY HOT LIQUID SUDDENLY BOILING OVER WHEN THE CONTAINER IS DISTURBED OR A UTENSIL IS INSERTED INTO THE LIQUID. To reduce the risk of injury to persons: 1) Do not overheat the liquid. 2) Stir the liquid both before and halfway through heating it. 3) Do not use straight-sided containers with narrow necks. -
Page 5: Radio Interference
DANGER - Electric Shock Hazard Touching some of the internal components can cause serious personal injury or death. Do not disassemble this appliance. WARNING - Electric Shock Hazard Improper use of the grounding can result in electric shock. Do not plug into an outlet until appliance is properly installed and grounded. -
Page 6: Materials You Can Use In Microwave Oven
Utensils CAUTION - Personal Injury Hazard Tightly-closed utensils could explode. Closed containers should be opened and plastic pouches should be pierced before cooking. See the instructions on "Materials you can use in microwave oven or to be avoided in microwave oven." There may be certain non-metallic utensils that are not safe to use for microwav- ing. -
Page 7: Materials To Be Avoided In Microwave Oven
Utensils Remarks Paper towels Use to cover food for reheating and absorbing fat. Use with supervision for a short-term cooking only. Parchment paper Use as a cover to prevent splattering or a wrap for steaming. Utensils Remarks Plastic Microwave-safe only. F ollow the manufacturer* instructions. Should be labeled "Microwave Safe". -
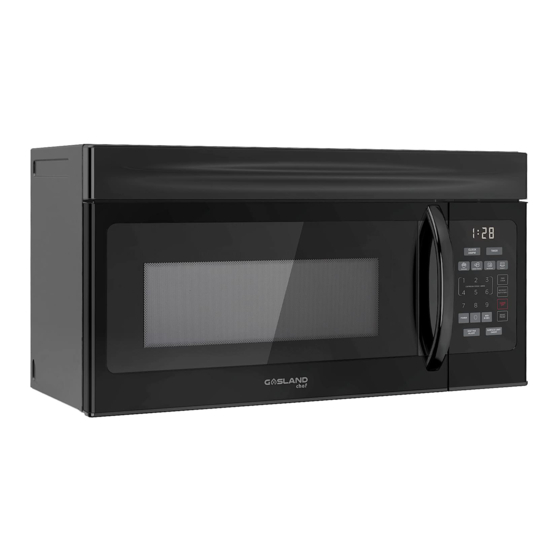
Page 8: Part Names
Part Names Microwave features Front View Bottom View Front Rear 1 . Window 2 . Interlock system 3 . Door assembly 4 . Turntable ring assembly 5 . Turntable shaft 6 . Turntable glass tray 7 . Control panel 8 . Front vent grill 9. -
Page 9: Operation
Operation Control panel and features CLOCK TIMER AM/PM POPCORN BAKED POTATO BEVERAGE REHEAT TIME COOK EXPRESS COOK 1-6MIN DEFROST AUTO/TIME (10) CLEAR (11) START POWER PAUSE 30 SEC. (12) (13) VENT FAN SURFACE LIGHT H/L/OFF ON/OFF (1) Clock AM/PM: to set the (2) Timer (3) Auto Menu (4) Number Keys... - Page 10 Operation Instructions 1. Clock Setting 1). Press "CLOCK/AM/PM", the unit enters the clock setting mode. AM indicator will light up. "0:00" flashing will allow you to input the time. 2). Press "CLOCK/AM/PM" again to select AM or PM. The responding AM or PM indicator will light up.
- Page 11 5) Press "1","5","0","0" to input cooking time; 6) Press "POWER" to select the microwave power; 7) Press "8" to choose 80% microwave power; 8) Press "START/PAUSE" to start cooking. Note: a. Microwave cooking can be for two stages only. Defrost program and auto menu cannot be set here.
- Page 12 6. Hood Function 1) When the exhaust fan is in the off mode, press "VENT FAN/H/L/OFF" once to select the fan with high speed; 2) Press "VENT FAN/H/L/OFF" twice to select the fan with low speed; 3) Press "VENT FAN/H/L/OFF" three times to select the fan to be off. 4) The fan can be adjusted anytime, except during the lock mode.
-
Page 13: Maintenance
The menu chart: Menu Weight Power 1.75 Oz P100 Popcorn 3.0 Oz P100 3.5 Oz P100 P100 Baked potato P100 P100 P100 Beverage P100 P100 8.0 Oz P100 16.0 Oz P100 Reheat 24.0 Oz P100 11. Inquiring Function 1) During microwave cooking mode, press “POWER” to check the power level. - Page 14 Trouble Possible Cause Possible Remedy Oven will a. Electrical cord for oven a. Plug into the outlet. not start is not plugged in. b. Close the door and try b. Door is open. again. c. Wrong operation is set. c. Check instructions. Arcing or a.
-
Page 15: Cleaning And Care
Cleaning And Care Disconnect the power cord before cleaning or leave the door open to deactivate the oven during cleaning. Cleaning the exhaust filters The oven ventilation exhaust filters should be removed and cleaned often; generally at least once every month. CAUTION To avoid risk of personal injury or property damage, do not operate oven hood without filters properly in place. -
Page 16: Surface Light Replacement
Surface light replacement CAUTION To avoid risk of personal injury or property damage, wear gloves when replacing the light bulbs. 1. Unplug the microwave oven or turn off power at the main circuit breaker. 2. Remove the bulb cover mounting screws at both light positions under the microwave. -
Page 17: Oven Light Replacement
4. Remove the charcoal filter by pushing it inwards, then turn and pull it away from the unit. Oven light replacement Remove the per instructions 1-4 above and charcoal filter, if used. 1. Open light cover located behind filter mounting by carefully pulling up on the front edge. -
Page 18: Cleaning Suggestions
Note: DO NOT USE BULB LARGER THAN 30 WATTS. 3. Replace the microwave oven light cover by carefully pushing into place. Replace the charcoal filter. Push the vent grill back into place (engaging both the bottom and top tabs) and replace the vent grill mouting screws. Cleaning And Care Disconnect the power cord before cleaning or leave the door open to deactivate the oven during cleaning. - Page 19 • Wash the oven door window with very mild soap and water. Be sure to use a soft clean cloth to avoid scratching. • If steam accumulates inside or outside the oven door, wipe with a soft cloth. Steam can accumulate when operating the oven in high humidity and in no way indicates microwave leakage.
- Page 20 1 (844)538-7890 www.gaslandchef.com...
Need help?
Do you have a question about the OTR1603B and is the answer not in the manual?
Questions and answers