Table of Contents
Advertisement
Quick Links
Advertisement
Table of Contents

Related Manuals for Teltonika Energy TeltoCharge


Summary of Contents for Teltonika Energy TeltoCharge
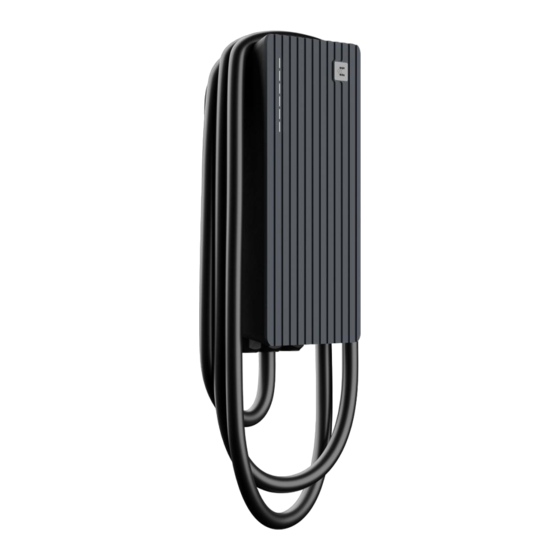
- Page 1 TeltoCharge Quick User Guide...
-
Page 2: Table Of Contents
Quick User Guide TABLE OF CONTENT Download and Set-up Authorization Bluetooth Status Load balancing TeltoCharge Menu Connectivity Firmware Update Date & Time Installer Menu LED Indicators Charging Status Additional Information App Version... - Page 3 DOWNLOAD A TELTONIKA ENERGY APP To begin TeltoCharge set-up, download and install a Teltonika Energy app to your smartphone. The app is necessary to access and manage smart features of your EV charger. Teltonika Energy app is available for download on...
- Page 4 Quick User Guide PAIR TELTOCHARGE WITH A SMART DEVICE Enable Bluetooth on your smart device. Turn on the Teltonika Energy app. “Add new device” Press the button. ! Note: With the same smart device you can pair more than one TeltoCharge EV chargers.
- Page 5 Quick User Guide PAIR TELTOCHARGE WITH A SMART DEVICE “Add new device” After you press button, wait until your phone finds a Teltocharge device. Then select an EV charger from the list. After a few seconds a pairing table will pop up requiring a code to complete the pairing process.
- Page 6 Quick User Guide PAIR TELTOCHARGE WITH A SMART DEVICE If you want to pair a second smart device with TeltoCharge, first of all, you will need to reboot the EV charger. Then you will have 5 minutes to pair a different smartphone. After you pair the EV charger with the smartphone, a device recovery window will open up.
- Page 7 Quick User Guide FINISH THE SET UP Change your TeltoCharge device name. Set you local currency. Set average electricity price for kWh. “Continue” Press button.
- Page 8 Quick User Guide FINISH THE SET UP If needed, turn on authorization feature and add an NFC card (this can be done later). If you decide to enable authorization later “Confirm” on, press button to finish set-up. ! Note: Enabled authorization allows you to pair the NFC card/tag with the charger.
-
Page 9: Bluetooth Status
Quick User Guide BLUETOOTH STATUS “My Devices” After a succesfull set-up, a “AVAILABLE” window with the status will pop up. This status indicates that your TeltoCharge is available for connection with your smart device. “NOT AVAILABLE” If the status appears, it indicates that your EV charger is out of Bluetooth range, or it is paired with another smart device (only one smart device could... -
Page 10: Teltocharge Menu
Quick User Guide TELTOCHARGE MENU To access the menu of a TeltoCharge device, press on the TeltoCharge image in “My devices” window. In the main window of the menu you will see the status of TeltoCharge connection with your EV. With the slider, you will be able to authorize yourself. -
Page 11: Firmware Update
Quick User Guide FIRMWARE UPDATE To update firmware, first of all download the latest firmware version from a Teltonika Energy Wiki page. After downloading the latest firmware version, go to the settings menu at the top right corner. “Device info”. There you In the menu list, press will find information about your EV charger. - Page 12 Quick User Guide FIRMWARE UPDATE “Check for updates” Press button to open the firmware update menu. “Browse files” Press and select the ‘.bin’ format file that you have just downloaded from the Teltonika Energy Wiki page.
- Page 13 Quick User Guide FIRMWARE UPDATE “Update After you select the file, press firmware” button and wait until update is completed. ! Note: While update is in progress, your smart devices has to be within the Bluetooth range (near the EV charger).
-
Page 14: Installer Menu
Quick User Guide INSTALLER MENU To access installer’s menu, open TeltoCharge menu and go to the settings at the top right corner. “Installer menu”. In the settings menu, select... - Page 15 Quick User Guide INSTALLER MENU To open installer’s menu, an installer is required to type in the security code. The security code sticker could be found on the middle plate of a TeltoCharge device. After typing in the security code, tick the warning box. “Continue”...
- Page 16 Quick User Guide INSTALLER MENU / MAX POWER FROM GRID This configuration can be used in two different ways, depending whether you enable dynamic load balancing or not. If you have enabled dynamic load balancing, use this value to set the maximum current per phase that can be supplied to the whole electrical installation.
- Page 17 Quick User Guide INSTALLER MENU / SUPPLY VOLTAGE In case of a need, an installer can change supply voltage (the voltage between phase and neutral wires) and set it according to the voltage of a site.
- Page 18 Quick User Guide INSTALLER MENU / SUPPLY VOLTAGE The default value for TeltoCharge is set to 230 V +/- 10 %. However, an installer can change the upper/lower voltage tolerance. ! Note: If the input voltage goes over or under the set limits, the EV charger goes to the error state and stops the entire charging process.
- Page 19 Quick User Guide INSTALLER MENU / THREE PHASE CHARGING If there is a need for a three-phase EV charging, an installer can enable it via the app. If an EV charger is connected to a three-phase network, single-phase charging can be turned “Three phase charging”...
- Page 20 Quick User Guide INSTALLER MENU / PHASE PRIORITY “Phase priority” With a function, an installer can prioritize which phase should be used for a single-phase charging.
- Page 21 Quick User Guide INSTALLER MENU / DYNAMIC LOAD BALANCING / USE PREFERRED PHASE Dynamic load balancing configuration has to be enabled if dynamic load balancing will be applied. While dynamic load balancing is turned on and charging is performed on the single phase, “Use preferred there is a possibility to enable phase”...
- Page 22 Quick User Guide INSTALLER MENU / ADDITIONAL FEATURES There are EVs which do not use state B in the charging process. In such cases, a charging state goes from A to C. It means that for this “Allow simplified kind of vehicles it is needed to charging sequence”.
- Page 23 Quick User Guide INSTALLER MENU / FACTORY DEFAULT SETTINGS There are 2 types of factory reset: In the Installer menu – it can be done only by an installer and It restores all configurations the default settings. “Device info” In the section –...
-
Page 24: Charging Status
Quick User Guide CHARGING STATUSES No EV connected – a charging cable is not connected to the EV Requires authorization – hold an NFC/RFID card near the NFC/RFID reader on the EV charger or swipe the button for authorization Connected –... - Page 25 Quick User Guide CHARGING STATUSES...
-
Page 26: App Version
Quick User Guide APP VERSION To know which app version you are using at the “My devices” moment, go to the main window and open settings menu at the top right corner. At the bottom of the window you will find the current app version. -
Page 27: Authorization
Quick User Guide AUTHORIZATION Authorization can be turned on in the TeltoCharge settings menu. In the same menu window, you can add an NFC card(s). Type the name of your card. - Page 28 Quick User Guide AUTHORIZATION Touch the NFC card to the side of the EV charger. Wait for the pop-up window to indicate a successful addition of your card.
- Page 29 Quick User Guide AUTHORIZATION Touch the card to the side of an EV charger with an NFC reader. Wait for the pop-up window to indicate a successful addition of your card. Back in the TeltoCharge setting menu you should see the card added.
- Page 30 Quick User Guide AUTHORIZATION To see the NFC card information or update it, press on it in the TeltoCharge settings menu. To update the name of your card, press the field with a name, type the new one and press “Update”...
- Page 31 Quick User Guide AUTHORIZATION To see the NFC card information or update it, press on it in the TeltoCharge settings menu. To update the name of your card, press the field with a name, type the new one and press “Update”...
-
Page 32: Load Balancing
Quick User Guide LOAD BALANCING To lower or increase the current up to the value set by the installer in the Installer menu, “Load balancing”. press on the Use the slider to adapt the current value and save you changes. -
Page 33: Connectivity
Quick User Guide CONNECTIVITY TeltoCharge can be connected to the Internet in three different ways. WiFi - select your network from the list, insert the password and connect. Mobile – to use cellular data, first of all, you need to insert a nano sim card inside the EV charger and then you can configure settings inside app. - Page 34 Quick User Guide CONNECTIVITY TeltoCharge also has the ability to connect to the party charge point management servers. To connect, you have to insert server URL address. Note that URL adress has to end with “/” symbol Insert charge point identity information. Enable the OCPP feature “Save”...
- Page 35 Quick User Guide CONNECTIVITY After enabling OCPP connection, you will see a different TeltoCharge settings menu. Some of the configurations will be hidden to avoid request duplication from the server and the app.
-
Page 36: Date & Time
Quick User Guide DATE & TIME “Date & Time” Inside the tab, you will be able to set date and time. We recommend syncing it with the phone. But you can set custom date and time and press “Save” button. -
Page 37: Led Indicators
Quick User Guide LED INDICATORS Red – four middle LEDs turn on White – LEDs pulsing Yellow – LEDs pulsing Authorization from the TeltoCharge is in a standby TeltoCharge is in a standby cloud server is declined. mode and waiting for an mode with default settings. - Page 38 Quick User Guide LED INDICATORS Blue – four middle LEDs pulsing Blue – LEDs lighting up from the middle Yellow – all LEDs on TeltoCharge is waiting to TeltoCharge does not require permission, it is TeltoCharge is not charging, add a new NFC card. waiting for an EV to initiate the charging process simplified charging sequence (go to state C).
- Page 39 Quick User Guide LED INDICATORS Green – all LEDs pulsing Blue – all LEDs pulsing Green – all LEDs on Initialization of charging. Permission to charge is not granted, TeltoCharge TeltoCharge finished charging. requires authorization.
- Page 40 Quick User Guide LED INDICATORS Purple – all LEDs turn on White – LEDs rolling from the bottom to Green – four middle LEDs turn on the top TeltoCharge requires ventilation Authorization from the cloud (charging is done in a state server is accepted.
- Page 41 Quick User Guide LED INDICATORS Green – LEDs rolling upwards from the bottom TeltoCharge is in the charging process.
- Page 42 Quick User Guide TROUBLESHOOTING (1) Input voltage Overvoltage; Undervoltage; Wrong wiring; Troubleshooting: Check if input wiring is connected correctly; Measure input voltage; Check if supply voltage and voltage tolerance are in accordance with the measured input voltage in the Installer menu settings.
- Page 43 Quick User Guide TROUBLESHOOTING (2) Output voltage or current fail Overvoltage; Undervoltage; Output current; Troubleshooting: Disconnect a charging cable from the EV and check if the issue remains. Reboot an EV charger and try to connect the EV again.
- Page 44 Quick User Guide TROUBLESHOOTING (3) Current leakage detected Current leakage detected Troubleshooting: Disconnect the charging cable from the EV and check if the error persists. If the error is cleared, try to start charging. If the error occurs once again, try the following steps:...
- Page 45 Quick User Guide TROUBLESHOOTING (3) Troubleshooting: Check if a charging cable is fully plugged into a socket and/or EV. Check if the inside of both the socket and the plug has no foreign materials inside (is clean). Visually check if the cable is not damaged. Check if the boards are not covered in dust and/or other materials.
- Page 46 Quick User Guide TROUBLESHOOTING (4) Input voltage Cable lock; PP fail; Car diode; Troubleshooting: Check if the charging cable is connected correctly from the EV charger side (socket version) and from the EV side; Try to reconnect the charging cable to the EV and EVSE (if it is a socket version).
- Page 47 Quick User Guide TROUBLESHOOTING (4) Troubleshooting: Listen if you can hear a clicking sound from the TeltoCharge when you plug the cable to EV. The EV charger should lock a cable plug. If you cannot hear it, try to unplug the cable (from EVSE side) while it is plugged from the EV side.
- Page 48 Quick User Guide TROUBLESHOOTING (5) Temperature Temperature reached 85°C Troubleshooting: Check the temperature inside the Teltonika Energy app > Device info. If the temperature is higher than 85°C wait while the EV charger cools down.
- Page 49 Quick User Guide TROUBLESHOOTING (6) Internal errors -12V Troubleshooting: Restart TeltoCharge.
- Page 50 Quick User Guide TROUBLESHOOTING (7) Faulty connection to EV CP fail Troubleshooting: Try to reconnect charging cable from the EV side. There might be control pilot communication problem which can occur with different EV models.
-
Page 51: Additional Information
For more information regarding Teltonika Energy app functionalities and features, follow the below link: https://wiki.teltonika-energy.com/teltocharge/ Note: The Teltonika Energy app Instructions were produced with Teltonika Energy App v1.0 in mind. Always refer to the latest version, which can be found on our WIKI page.
Need help?
Do you have a question about the Energy TeltoCharge and is the answer not in the manual?
Questions and answers