Advertisement
取扱説明書
INSTRUCTION MANUAL
取付方法
Installation
[
1.
スピーカーコンセント(ソケット側)を本体よりはずす
1.
Remove the socket.
スピーカーコンセント(ソケット側)
図 1
Fig. 1
Socket
2 .
スピーカー線を接続する
2.
Connect the speaker wires into the input terminal.
●ねじターミナルをゆるめスピーカー線の芯線を角座金の
下に差し込みしっかリ締め付ける(図2参照)
スピーカーコンセント(ソケット側)
図 2
Socket
Fig. 2
_
O M
) C
( C
W )
( 3
3 k
Ω
3 .
W )
( 1
k Ω
1 0
注)ねじターミナルのねじは 3回転以上ゆるめない。
ねじがはずれてターミナル部脱落の原因になります。
NOTE
Never loosen the Screw more than 3 turns to prevent
the screw terminal from falling the ground.
壁面に沿ってスピーカー線を配線する場合
Wiring the speaker wire along the wall face.
図 7
コンセント(ソケット側)の上部2カ所(矢
スピーカー線
Fig. 7
Speaker wire
印)をニッパーなどで折ります。スピーカー
線をとおし、取付方法の手順 3の説明に従
って壁面にコンセントを取り付けてくださ
い。 (図4/5/7参照)
[
"Installation 3". (See to Fig. 4/5/7)
注)スピーカーの重量に充分耐えられる場所または、補強を施した場所に取り付けてください。尚、取付場所の強度不充分、取
付方法の不備による事故に対する一切の責任は負いかねます。
NOTE:
Be sure to install the speaker on the wall whose face is strong enough to withstand the weight of the speaker. If the
wall face is not enough to hold the speaker, reinforce it before installing. We cannot assume responsibility for any
accident or damage due to the insufficiency of mounted wall face's strength or bad installation.
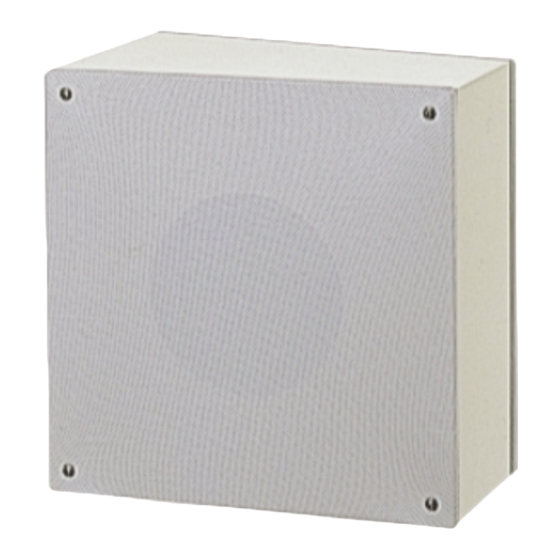
このたびは、両面形キャビネットスピーカーをお買い上げいただき、誠にありがとうございます。
矢印の方向にはずす
CS-289A
Loosen the screw
接続線ムキシロ
terminal and insert
Peeling zone
the speaker wire onto
the metal plate then
screw up tightly. (See
9〜11mm
to Fig.2)
For further details,
see "Connecting" in page 4.
※P4の配線方法の項を参照
Pluck off the 2 parts (shown by
allows) on the upper side of socket
by using a nipper.
Lead the
speaker wire through and fit the
socket on the wall according to
キャビネットスピーカー
Model
3.
スピーカーコンセント(ソケット側)を壁面に取り付ける
3.
Fit the socket on the wall as shown in Fig. 3/4.
□ボックスに取り付ける場合
・Fit the socket on the box.
図 3
スピーカーコンセント
Fig. 3
(プラグ側)
Plug
ねじ(付属)
M4×14
Screw
ご注意
この範囲内が平坦な壁面に
コンセントを取り付ける。
注)取付前に必ず確認してください。
Fit the socket on the wall with
flat surface. Be sure to check
the wall face before
(※ 1)スピーカー本体取付時のスライド幅
(※ 1) Sliding length to fit the speaker.
スピーカーコンセント (ソケット側)
4 .
スピーカーを壁面に取り付ける
4.
Fit the speaker on the wall as shown in Fig. 6.
1.スピーカー本体側と壁面側のコンセント部を互いにはめ合わせる。
2.スピーカー本体を下方向へスライドさせる。 (図6参照) 必ず取付
状態を確認してください。
1.Put the speaker and the
socket on the wall together.
2.Fit them sliding the speaker
downward. (See to Fig.6)
Be sure to confirm installation
conditions.
図 8
・
スピーカー線を本体上部の
Fig. 8
凹部分より引出し、 取 付方法
スピーカー線
の手順 4の説明に従ってス
Speaker wire
ピーカー本体を壁面に取り
凹部分
付けてください。 (図6/8参
照)
・Lead the speaker wire
through the exit
section for speaker
壁面
Wall
cable on the upper side
of enclosure and fit the
speaker on the wall
according to
スピーカー本体
"Installation 4".
Speaker
(See to Fig. 6/8)
1
Cabinet Speaker
定格入力 ( Rated input ) 6W
CS - 289A
□壁面に取り付ける場合
・Fit the socket on the wall.
図 4
Fig. 4
ねじ(付属)
φ4×20
ボックス
Screw
Box
図 5
Note:
Fig. 5
Socket
図 6
注)スピーカー線はターミナル上側より入れ
接続し、端子カバーの上に載らないよう
にしてください。 (図9参照)
Note) Connect the speaker wire from
the upper side of socket so as not
to bend the speaker wire. (See to
Fig. 9)
図 9
Fig.9
壁面
Wall
90
90
単位( mm )
Fig. 6
OM
OM
(C )C
(C )C
(3 W)
(3 W)
Ω
3. 3k
3. 3k
Ω
(1 W)
(1 W)
10 kΩ
10 kΩ
端子カバー
Advertisement
Table of Contents

Related Manuals for Uni-Pex CS-289A


Summary of Contents for Uni-Pex CS-289A
- Page 1 スピーカーコンセント Fig. 3 Fig. 4 (プラグ側) Plug 壁面 Wall ねじ(付属) ねじ(付属) φ4×20 M4×14 ボックス CS-289A Screw Screw 図 5 ご注意 Note: Fig. 5 この範囲内が平坦な壁面に スピーカー線を接続する コンセントを取り付ける。 Connect the speaker wires into the input terminal. 注)取付前に必ず確認してください。 Fit the socket on the wall with ●ねじターミナルをゆるめスピーカー線の芯線を角座金の...
- Page 2 安全に正しくお使いいただくために この取扱説明書および製品への表示では、製品を安全に正しくお使いいただき、あなたや他の人々への危害や財産への損 害を未然に防止するために、いろいろな絵表示をしています。 その表示と意味は次のようになっています。 内容をよく理 解してから本文をお読みください。 絵表示の例 △記号は注意(危険・警告)を ◯ 記号は禁止の行為であるこ ●記号は行為を強制したり指 \ 促す内容があることを告げる とを告げるものです。 図の中 示する内容を告げるものです。 ものです。 図の中に具体的な に具体的な注意内容が描かれ 左図の場合は一般的な行為を 注意内容が描かれています。 ています。 指示する表示です。 ●ご使用の前に必ず、この取扱説明書の「安全上のご注意」 と取付工事に関する説明をよくお読みの上、正しくお使いください。 ●お読みになったあとは、必ず保存してください。 この表示を無視して、誤った取扱いをすると、人が この表示を無視して、誤った取扱いをすると、人が 警告 注意 傷害を負う可能性が想定される内容および、物的 死亡または重傷を負う可能性が想定される内容を 損害のみの発生が想定される内容を示しています。 示しています。 油煙や湯気が当たるような場所に置かない 異常が起きたときは、ただちに使用をやめる 火災・感電の原因となることがあります。 煙が出ている、においや音がする、水や異物が入った、落とし て破損したなど、火災・感電の原因となります。ただちに使用 を中止し、工事店などにご連絡ください。 長時間音が歪んだ状態で使わない...
- Page 3 INSTRUCTION MANUAL [ For safety ] In this Instruction Manual or indication on the product, we specifies various drawings for correct and safe use which should be followed to prevent personal injury or property's damage. The drawings and those meanings are as follows. Read the body carefully after understanding them.
- Page 4 属 品 取扱説明書 1、バインドねじ(M4×14) 2、木ねじ(φ4×20) 2 適 用 規 格 国土交通省電気設備工事共通仕様書適合 ・非常用放送設備認定品 Specifications Model CS-289A Rated input Rated impedance 1.7kΩ (6W), 5kΩ (2W) Output sound Pressuer level 91dB (at 1m/1W) Frequency response 100Hz〜15kHz Speaker φ16cm dynamic cone speaker (8Ω) 2 pcs.
Need help?
Do you have a question about the CS-289A and is the answer not in the manual?
Questions and answers