
Related Manuals for Pivot SHUTTLE LT


Summary of Contents for Pivot SHUTTLE LT
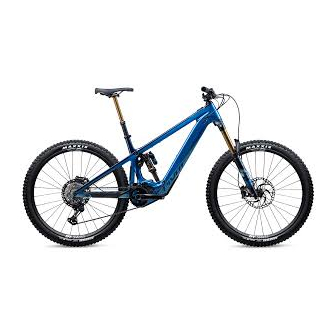
- Page 1 SHUTTLE LT www.pivotcycles.com info@pivotcycles.com 1.877.857.4868 Original Operational Instructions...
- Page 2 Shimano STEPS E-bike System. This document contains some helpful diagrams and reference material to make sure you have everything necessary to maintain your Shuttle LT and enjoy it to the fullest.
-
Page 3: Table Of Contents
- Recommended Tire Pressure 3. Charging - Charging the Battery - Charger LED Lamp - USB-C Charging on the Shuttle LT - Battery Removal and Installation 4. Shimano STEPS System - Connecting to E-Tube Project App - Main Menu for E-Tube Project... -
Page 4: Quick Start Guide
QUICK START GUIDE This "Quick Start Guide" provides the essential information to set up your bike. Suspension/Tire Set-up COMPONENT QUICK START SETTING Body Weight in [kg] to [bar] 0.15 × Body Weight [kg] + 0.7 [bar] Shock Air Pressure Body Weight in [kg] to [psi] 2.2 ×... -
Page 5: Assist Switch And Shifter Function
QUICK START GUIDE Assist Switch and Shifter Function • On start-up, the assist mode will be off. There are three levels of assistance: Eco, Trail, and Boost. • The switch on the left side of the handle bar controls the level of assistance provided by the system. •... -
Page 6: Bike Set-Up
BIKE SET-UP Setting Proper Sag Always set sag with the blue compression lever to the open position. (fig. 1) If your shock has additional compression and rebound adjustments ensure they are adjusted to be fully open, com- pression to the softest setting, and rebound to its fastest setting. -
Page 7: Setting Rebound Damping On The Fox Float X
Setting Air Pressure on the Fox 38 Fork • Fox recommends setting sag between 15% and 20% of the total fork travel. The Shuttle LT comes with a 170mm fork, so the proper sag measurement is 25.5 - 34.0mm. •... -
Page 8: Setting Compression Damping On The Fox 38 Forks
BIKE SET-UP Setting Compression Damping on the Fox 38 Grip 2 Fork • To set compression, start from the open (or fastest) position by turning the black (LSC) dial & blue (HSC) dial counterclockwise until they stop clicking. • A good starting point for most riders is to turn the black (LSC) dial clockwise 5 clicks & turn the blue (HSC) dial clockwise 2 clicks. -
Page 9: Charging
Charging Failure * Remove AC Power and plug-in again. If symptoms still occur take your bike and charger to a authorized dealer. USB-C Charging on the Shuttle LT • The power button also houses a USB-C port for accessory charging. -
Page 10: Battery Removal And Installation
CHARGING Removing the Battery • The battery may need to be removed to swap batteries or to charge the battery if there is no power supply near the bike. NOTE: If the bike is sitting level on its wheels the battery will touch the ground before it is removed from the frame. -
Page 11: Shimano Steps System
4. A list of nearby devices will be listed on the screen. Choose your bike. 5. When the connection is successful, a list of "confirmed units" will appear. These are all the devices connected to the Shuttle LT. The units listed should include: the battery, drive unit, cyclecomputer, & assist switch. -
Page 12: Assist Profiles In E-Tube Project
Move the colored dot (corresponding to the selected assistance level), to the desired value for that feature. • The Shuttle LT comes with two preloaded profiles: 1. Pivot Factory Default: Optimized for balance and control 2. Maximum assistance permitted for all levels... -
Page 13: Troubleshooting
TROUBLESHOOTING Cycle Computer Warning Codes • Warnings may appear on the cycle computer display if the system detects an issue. • The warning code will clear once the issue is resolved. • If any issues persist after the suggestions below, contact the place of purchase. -
Page 14: Cycle Computer Error Codes
TROUBLESHOOTING Cycle Computer Error Codes • An error message may appear on the cycle computer if the system detects an issue. • If any issues persist after the suggestions below, contact the place of purchase. OPERATIONAL CODE ISSUE REMEDY RESTRICTION A system abnormality was detected in the Power assistance is not Turn the power off and back on again... -
Page 15: Schematics
SCHEMATICS Shimano STEPS E-bike System Schematic LETTER PART DESCRIPTION PART NAME Cycle Computer SC-EM800A Assist Switch SW-EM800-L Front Chainring SAMOX NWP201-34T Crank Arm FC-M8150 Drive Unit DU-EP800 Speed Sensor EW-SS301 Battery DARFON 756 Wh Battery Charger (US) DARFON BK.01240.304 Battery Charger (EU) DARFON BK.01240.301 Battery Charger Adapter (For Off-the-bike Charging - Sold Separately) DARFON 5J.E4C0G.0E1... -
Page 16: Small Parts Schematic
SCHEMATICS SHUTTLE LT CONTINUED Small Parts Schematic www.pivotcycles.com info@pivotcycles.com 1.877.857.4868... -
Page 17: Small Parts Table
SCHEMATICS Small Parts Table SHUTTLE LT Hardware NUMBER PART NUMBER DESCRIPTION TORQUE FP-UDH-TA-12MM-BLK-V 1-R 1 Universal Rear Derailleur Hanger Universal Rear Derailleur Hanger Bolt 25 Nm (18 lb·f t) Universal Rear Derailleur Hanger Washer FP-LNK-UL-84MM-V 1-R 1 84mm Upper Link... -
Page 18: Wiring Diagrams
SCHEMATICS Shuttle LT Wiring Diagram • The diagrams below will help illustrate how the wires are to be routed through the internal cable guides and how the handlebar switches are attached to the cycle computer. • The routing shown below will help minimize the likelihood of pinching a wire when removing and installing the motor for maintenance purposes. -
Page 19: Additional Information
If transported by commercial third parties (e.g. by air freight, logistics companies, or postal service) special conditions apply to packing and labeling. For questions about transporting batteries, please contact your local Pivot dealer. •... - Page 20 • Remove the rechargeable battery if you do not use your Pivot e-bike for a long period of time (e.g. during the winter season). Store the rechargeable battery in a dry room at temperatures between 5 - 20°C (41 - 68°F) .
-
Page 21: Sources
STEPS software and mobile apps to fully utilize the connectivity and customizability of the Shimano STEPS System visit: https://bike.shimano.com/ Pivot Shuttle LT • For FAQs and additional technical documents regarding the maintenance of the Pivot Shuttle LT can be found at: https://global.pivotcycles.com/products/shuttle-lt Sources •... - Page 22 Notes: www.pivotcycles.com info@pivotcycles.com 1.877.857.4868...
- Page 23 Notes: www.pivotcycles.com info@pivotcycles.com 1.877.857.4868...
- Page 24 6720 South Clementine Court Tempe, AZ 85283 T + 1 480 467 2920 info@pivotcycles.com www.pivotcycles.com...
Need help?
Do you have a question about the SHUTTLE LT and is the answer not in the manual?
Questions and answers