Table of Contents
Advertisement
Available languages
Available languages
KOBALT and logo design are trademarks
or registered trademarks of LF, LLC. All rights reserved.
ATTACH YOUR RECEIPT HERE
Serial Number
Questions, problems, missing parts? Before returning to your retailer, call our customer
service department at 1-888-3KOBALT (1-888-356-2258), 8 a.m.-8 p.m., EST,
Monday - Sunday. You could also contact us at partsplus@lowes.com.
AS21758
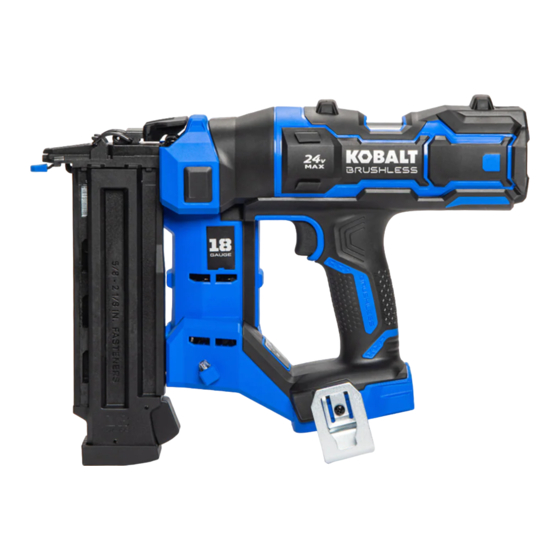
BRAD NAILER
Purchase Date
ITEM # 4913877/4965674
18GA
MODEL # KNA 124B-03
Español p.17
Advertisement
Chapters
Table of Contents

Related Manuals for Kobalt KNA 124B-03


Summary of Contents for Kobalt KNA 124B-03
- Page 1 ITEM # 4913877/4965674 18GA BRAD NAILER MODEL # KNA 124B-03 KOBALT and logo design are trademarks Español p.17 or registered trademarks of LF, LLC. All rights reserved. ATTACH YOUR RECEIPT HERE Serial Number Purchase Date Questions, problems, missing parts? Before returning to your retailer, call our customer service department at 1-888-3KOBALT (1-888-356-2258), 8 a.m.-8 p.m., EST,...
-
Page 2: Table Of Contents
TABLE OF CONTENTS Product Specifications ..................2 Package Contents .................... 3 Safety Information .................... 5 Preparation ....................... 9 Operating Instructions ..................10 Care and Maintenance ................... 14 Troubleshooting....................16 Warranty ......................16 PRODUCT SPECIFICATIONS COMPONENT SPECIFICATIONS Rated voltage 24 V d.c. Magazine Capacity 110 Nails Nail Type... -
Page 3: Package Contents
PACKAGE CONTENTS PART DESCRIPTION PART DESCRIPTION Power switch Jam release latch Mode selector button Trigger switch LED work light Handle Magazine release button Depth adjustment dial Magazine No-mar pad (3pcs) Nail indicator windows No-mar pad storage Workpiece contact Belt clip Jam release 2"... - Page 4 PACKAGE CONTENTS WARNING: • Remove the tool from the package and examine it carefully. Do not discard the carton or any packaging material until all parts have been examined. WARNING: • If any part of the tool is missing or damaged, do not attach the battery pack or use the tool until the part has been repaired or replaced.
-
Page 5: Safety Information
SAFETY INFORMATION Please read and understand this entire manual before attempting to assemble or operate this product. If you have any questions regarding the product, please call customer service at 1-888-3KOBALT, 8 a.m. - 8 p.m., EST, Monday - Sunday. You could also contact us at partsplus@lowes.com. - Page 6 SAFETY INFORMATION Some of the following symbols may be used on this tool. Please study them and their meaning. Proper interpretation of these symbols will allow you to operate the tool better and more safely. SYMBOL DEFINITION SYMBOL DEFINITION Volts Direct Current or d.c.
- Page 7 SAFETY INFORMATION • If operating a power tool in a damp location is unavoidable, use a ground fault circuit interrupter (GFCI) protected supply. Use of an GFCI reduces the risk of electric shock. Personal Safety • Stay alert, watch what you are doing and use common sense when operating a power tool.
- Page 8 SAFETY INFORMATION • Keep handles and grasping surfaces dry, clean and free from oil and grease. Slippery handles and grasping surfaces do not allow for safe handling and control of the tool in unexpected situations. Battery Tool Use and Care •...
-
Page 9: Preparation
SAFETY INFORMATION • Do not use this nailer for fastening electrical cables. It is not designed for electric cable installation and may damage the insulation of electric cables thereby causing electric shock or fire hazards. • Hold power tool by insulated gripping surfaces, when performing an operation where the fastener may contact hidden wiring. -
Page 10: Operating Instructions
OPERATING INSTRUCTIONS 1. To Attach Battery Pack a. Align the raised portion on the battery pack with the grooves on the bottom of the tool, and then Battery-release slide the battery pack onto the tool as shown. buttons b. Make sure that the latch on the battery pack snaps into place and the battery pack is secured to the tool before beginning operation. - Page 11 OPERATING INSTRUCTIONS 4. To Load Or Remove Brad Nails WARNING: • Keep the tool pointed away from yourself and others when loading nails. Failure to do so could result in possible serious personal injury. • Use only the nails recommended for use with this tool.
- Page 12 OPERATING INSTRUCTIONS 6. Driving Brad Nails WARNING: Never wedge or hold back the workpiece contact mechanism during operation of the tool. Doing so could result in possible serious injury. NOTICE: If no other action is taken after the power switch (A) is pressed, the nailer will turn off automatically after 30 minutes.
- Page 13 OPERATING INSTRUCTIONS 7. Dry-Fire Lockout When the magazine has 0-6 nails remaining, the dry-fire lockout feature will not allow continued operation. To resume operation, reload the tool with nails. 8. LED Work Light The LED work light (C), shown in FIG. 8, will illuminate when the trigger switch (J) or the workpiece contact (G) is depressed.
-
Page 14: Care And Maintenance
CARE AND MAINTENANCE All maintenance should only be carried out by a qualified service technician. 10. Cleaning Before cleaning or performing any maintenance, remove the battery pack from the tool. For safe and proper operation, always keep the tool and its ventilation slots clean. Always use only a soft, dry cloth to clean your nailer;... - Page 15 CARE AND MAINTENANCE Diagnostic Lights The LED lights under the power switch and under the mode button also provide feedback to indicate problems with the tool and/or battery pack. Refer to the table below to interpret the message behind the flashing LED lights and possible solutions. LED Indicator Lights –...
-
Page 16: Troubleshooting
TROUBLESHOOTING WARNING: Turn off the tool and detach the battery pack from the tool before performing troubleshooting procedures. CORRECTIVE PROBLEM POSSIBLE CAUSE ACTION Too few nails in the Reload the magazine magazine. with nails. Workpiece contact element does not depress fully - tool does not operate. Workpiece contact Remove the battery pack element is jammed. - Page 17 ARTÍCULO NO. 4913877/4965674 CLAVADORA DE PUNTILLAS KOBALT y el diseño del logotipo son marcas CALIBRE 18 comerciales o marcas registradas de LF, LLC. Todos los derechos reservados. MODELO # KNA 124B-03 ADJUNTE SU RECIBO AQUÍ Fecha de compra Número de serie ¿Preguntas, problemas, piezas faltantes? Antes de volver a la tienda, llame a nuestro...
-
Page 18: Especificaciones Del Producto
ÍNDICE Especificaciones del producto ................ 18 Contenido del paquete ................... 19 Información de seguridad ................21 Preparación ....................26 Instrucciones de funcionamiento ..............27 Cuidado y mantenimiento ................32 Solución de problemas ................... 34 Garantía ......................34 ESPECIFICACIONES DEL PRODUCTO COMPONENTE ESPECIFICACIONES Voltaje nominal... -
Page 19: Contenido Del Paquete
CONTENIDO DEL PAQUETE PIEZA DESCRIPCIÓN PIEZA DESCRIPCIÓN Interruptor de encendido Pestillo de desbloqueo Botón selector de modo Interruptor tipo gatillo Luz de trabajo LED Manija Botón de liberación del cargador Dial de ajuste de profundidad Cargador Almohadilla antimarcas (3 pzs.) Almacenamiento de almohadillas Ventanas indicadoras de clavos antimarcas... - Page 20 CONTENIDO DEL PAQUETE ADVERTENCIA: • Retire la herramienta del paquete y examínela cuidadosamente. No deseche la caja ni ningún material de embalaje hasta después de examinar todas las piezas. ADVERTENCIA: • Si falta alguna pieza de la herramienta o si alguna pieza está dañada, no coloque el paquete de baterías ni use la herramienta hasta reparar o reemplazar la pieza.
-
Page 21: Información De Seguridad
INFORMACIÓN DE SEGURIDAD Lea y comprenda completamente este manual antes de intentar ensamblar u operar este producto. Si tiene preguntas relacionadas con el producto, comuníquese con Servicio al Cliente al 1-888-3KOBALT, de lunes a domingo de 8 a.m. a 8 p.m., hora estándar del Este. También puede ponerse en contacto con nosotros en partsplus@lowes.com. - Page 22 INFORMACIÓN DE SEGURIDAD Algunos de los siguientes símbolos pueden aplicarse al uso de esta herramienta. Obsérvelos y aprenda su significado. La interpretación correcta de estos símbolos le permitirá utilizar la herramienta de manera eficaz y segura. SÍMBOLO DEFINICIÓN SÍMBOLO DEFINICIÓN Voltios Corriente continua o cc...
- Page 23 INFORMACIÓN DE SEGURIDAD • No exponga las herramientas eléctricas a la lluvia o a condiciones de humedad. Si ingresa agua en una herramienta eléctrica, el riesgo de descarga eléctrica aumentará. • No maltrate el cable. Nunca use el cable para transportar, jalar ni desenchufar la herramienta eléctrica.
- Page 24 INFORMACIÓN DE SEGURIDAD • Desconecte el enchufe de la fuente de alimentación o retire el paquete de baterías, si fuera posible, de la herramienta eléctrica antes de realizar cualquier ajuste, cambiar accesorios o almacenar herramientas eléctricas. Este tipo de medidas de seguridad preventivas reduce el riesgo de arranques accidentales de la herramienta eléctrica.
- Page 25 INFORMACIÓN DE SEGURIDAD • Siga todas las instrucciones de carga y no cargue el paquete de baterías ni la herramienta fuera del rango de temperatura especificado en las instrucciones. La carga inadecuada o a temperaturas fuera del rango especificado podría dañar la batería y aumentar el riesgo de incendio.
-
Page 26: Preparación
PREPARACIÓN Conozca su clavadora de puntilllas • Su clavadora ha sido diseñada para clavar clavos en piezas de madera. • Antes de intentar usar la clavadora de puntillas, familiarícese con todas las características de funcionamiento y requisitos de seguridad. ADVERTENCIA: •... -
Page 27: Instrucciones De Funcionamiento
INSTRUCCIONES DE FUNCIONAMIENTO 1. Para fijar el paquete de baterías a. Alinee la parte elevada del paquete de baterías con las ranuras de la parte inferior de la Botones de herramienta y luego deslice el paquete de liberación de la baterías hacia dentro de la herramienta, como batería se muestra. - Page 28 INSTRUCCIONES DE FUNCIONAMIENTO 3. Base para evitar rayones La almohadilla antimarcas (M) unida a la punta de la herramienta ayuda a evitar dañar y abollar la superficie de trabajo cuando se usan maderas más blandas. ADVERTENCIA: retire el paquete de baterías de la herramienta antes de quitar o reemplazar la almohadilla antimarcas.
- Page 29 INSTRUCCIONES DE FUNCIONAMIENTO NOTA: puede observar la cantidad de clavos restantes a través de las ventanas indicadoras de clavos (F) y cargar más clavos según sea necesario. Para quitar clavos sin cabeza a. Retire el paquete de baterías de la herramienta. b.
- Page 30 INSTRUCCIONES DE FUNCIONAMIENTO 6. Colocando clavos sin cabeza ADVERTENCIA: nunca calce o retenga el mecanismo de contacto de la pieza durante el funcionamiento de la herramienta. El incumplimien- to de dicho paso podría causar lesiones personales graves. AVISO: si no se realiza ninguna otra acción después de presionar el interruptor de encendido (A), la clavadora se apagará...
- Page 31 INSTRUCCIONES DE FUNCIONAMIENTO g. Mantenga el gatillo apretado, reubique la herramienta en el siguiente punto de clavado y empuje la herramienta contra la pieza de trabajo para colocar otro clavo. h. Suelte el gatillo (J) cuando termine. NOTA: • El modo de actuación por contacto aún conserva la lógica del modo de actuación secuencial única.
-
Page 32: Cuidado Y Mantenimiento
INSTRUCCIONES DE FUNCIONAMIENTO NOTA: si clava los clavos demasiado profundamente en el material, el exceso de escombros o los clavos atascados puede hacer que la hoja del destornillador se atasque en su posición inferior. Por lo general, la cuchilla impulsora puede volver a su posición de funcionamiento presionando el elemento de contacto de trabajo contra un trozo de madera y apretando el gatillo. - Page 33 CUIDADO Y MANTENIMIENTO Luces de diagnóstico Las luces LED debajo del interruptor de encendido y debajo del botón de modo también brindan información para indicar problemas con la herramienta y/o el paquete de baterías. Consulte la tabla siguiente para interpretar el mensaje detrás de las luces LED parpadeantes y las posibles soluciones.
-
Page 34: Solución De Problemas
SOLUCIÓN DE PROBLEMAS ADVERTENCIA: apague la herramienta y retire el paquete de baterías de la herramienta antes de realizar los procedimientos de solución de problemas. PROBLEMA CAUSA POSIBLE ACCIÓN CORRECTIVA Muy pocos clavos en el Coloque clavos en el El elemento de contacto de la cargador.
Need help?
Do you have a question about the KNA 124B-03 and is the answer not in the manual?
Questions and answers
My kobalt nail gun will not shoot nails battery is full light comes on when trigger is pulled but will not shoot,yes has correct size nails.
The Kobalt KNA 124B-03 nail gun may not be shooting nails despite having a full battery and the correct size nails due to the following possible causes:
1. Too Few Nails in the Magazine – Reload the magazine with nails.
2. Workpiece Contact Element is Jammed – Remove the battery pack and clear any debris.
3. Driving Mechanism is Dirty – Clean the nail channel as described in the maintenance section.
4. Dirty Magazine – Clean the magazine to ensure smooth operation.
5. Damaged Nails – Replace nails if they are bent or defective.
If the issue persists after these checks, further troubleshooting may be needed.
This answer is automatically generated