Table of Contents
Advertisement
Advertisement
Table of Contents

Subscribe to Our Youtube Channel
Related Manuals for Axygen MAXYGENE II


Summary of Contents for Axygen MAXYGENE II
- Page 3 patent owned or controlled...
- Page 4 2.1 F ........................2 EATURES 2.2 P .......................2 RODUCT VERVIEW 3.1 U ........................6 NPACKING 3.2 I ......................6 NITIAL PERATION 3.3 H ........................6 EATED 3.4 L ....................7 PENING LOSING 3.5 F ......................10 UNCTION 3.6 K ..................... 11 NTRY YSTEM 3.7 L .................. 11 OADING THE EACTION ESSEL...
-
Page 5: Table Of Contents
9.1 D ........................26 9.2 D & T ........................27 9.3 L ......................27 EMPERATURE 9.4 B .........................28 EEPER 9.5 A ......................28 DMINISTRATOR 9.6 S ......................28 ERVICE 9.7 R ......................28 AMPING PEED 9.8 T ......................29 ALCULATOR 10.1 C ....................30 LEANING THE UNIT 10.2 C ..................30 LEANING THE HEATED LID 10.3 R... - Page 7 Before using the MaxyGene II thermal cycler for the first time, please read this entire operating manual carefully. To guarantee problem free, safe operation of the MaxyGene II thermal cycler, it is essential to observe the following points. Do not use the machine in a potentially explosive environment or with potentially explosive chemicals.
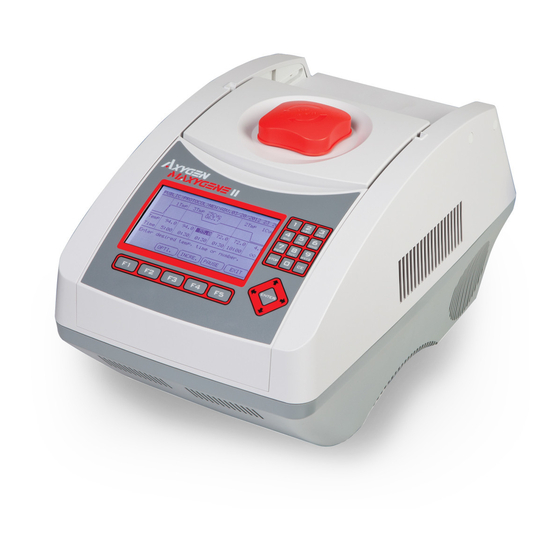
- Page 8 The MaxyGene II thermal cycler is a powerful, reliable and affordable thermal cycler. It is equipped with a gradient function that enables the user to set a maximum 24 C temperature gradient between the BLOCK 1 to BLOCK 6 (16 well/block).
- Page 9 Use the function keys (F1 to F5) to activate the “button” displayed on the screen above the key; for example, F1 for RUN. The four Directional Arrow keys can move the cursor into different directions. The current selection is activated or accepted when the ENTER key is pressed.
- Page 10 The lid with heating pad is designed to protect against evaporation resulting from heating of the reaction tube and reaction plate. Rotate Lid Knob in clockwise will lower the heating plate to place pressure on the cap of tubes. This forces the tubes to sit firmly in the block for better contact.
- Page 11 Power cable socket and fuse. Power On/Off switch Control the brightness of LCD panel. Please use Philip-head screw driver to adjust it. For run summary download to computer For run summary download to computer For air output Indicate the model name, serial number, power specification, and other important information...
- Page 12 When using plates it is highly recommended to use a Silicone Compression Mat (Axygen TC96-CM-10, for 96-well models), to assist in placing even pressure on the plates. Note: 1. If MaxyGene II is started cold, approximately two to three minutes will be required before heated lid is at operating temperature.
- Page 13 2. To avoid heat dissipation, the Heated Lid should be closed and tighten during a protocol run. Keeping the heated lid open during a protocol run might cause “HEATER ERROR”, because the heated lid fails to reach the set temperature. 3.
-
Page 16: Data Log
The User Screen includes 5 function options; 1) folders under selected User folder, (Create) a User, 3) a User, 4) a User, 5) . Once a user folder is selected and the password is approved, users can; 1) a Protocol, (Create) a protocol, 3) a Protocol, and 4) a Protocol. - Page 17 T, U, V, t, u, v, 8 W, X, Y, Z, w, x, y, z, 9 For the optimal performance of the MaxyGene II, we recommend Axygen tubes and plates. The recommended sample volume for 0.2 ml tubes or 96-well plates is 5-100ul. If using...
- Page 18 After the unit is turned on, the initial screen which contains software version and manufacturer’s name will show up for 10 seconds and then enter User Folder screen. Pressing any key will go to User Folder screen immediately. A sample screen is shown below. Date &...
- Page 19 as shown in the screen below. After the PIN is entered, press key to confirm the PIN. To run a Protocol, please refer Section 5.1. > > Under User Folder screen, press can create a new User folder. After entering the new User name, press to accept the new User folder name.
- Page 20 selected User folder. You are required to enter the PIN and press . The screen will prompt “Do you want to delete”. Press confirm the deletion. Press to abort the deletion. Note: User folders which contain any protocols can’t be deleted except by administrator.
- Page 21 After entering the selected User Folder, users can press keys to a selected Protocol as shown below. > > 1. Press to run the selected Protocol under the User folder screen. The screen will show as below. > > > >...
- Page 22 2. Users are required to select a Temperature Control Mode before running the Protocol. Enable system operation with simulated temperature control. If Mode 1 is selected, users are required to input the sample volume : 5-100ul. In this mode, temperature control is based on Block temperature and an algorithm which estimates sample temperature based on the block temperature and the sample volume.
- Page 23 > > > > 94.0 94.0 55.0 72.0 72.00 4.00 1. Press key in the bottom-left side of the Alphanumeric keypad to terminate a running protocol. 2. The display will show message “Do you want to abort?” as below. 3. Press key again to terminate the Protocol.
- Page 24 A new Protocol can be created by going to the User Folder and selecting and editing a basic Protocol format, and then assigning it a new name. 1. Select User name on User screen. Press button to enter User Folder. 2.
- Page 25 The temperature and time ranges are shown below. Temperature Segment can be inserted or deleted by selecting key. The inserted or deleted temperature segment is dependent upon the location on the temperature segment where the cursor is positioned. If the cursor is positioned inside the first multi-temperature/time segment, pressing will insert/delete the whole Multi-Temperature Cycle.
- Page 26 > > > > > > 1. To enter an Optimization Temperature setting, place your cursor on the desired Temperature Segment. Select to enter the screen below. 2. The temperatures of all BLOCK offset are based on BLOCK 1. If press F2:AUTO to set gradient temperature, each BLOCK will add 4 automatically based on the preceding BLOCK.
- Page 27 Figure 10. Block layout of 96-well model The Optimization temperature ranges are shown below. > > > > > > 50.0 58.0 54.0 62.0 70.0 66.0...
- Page 28 To increase or decrease the dwell time or temperature after each repeat you must have more than one cycle repeat. i.e. 55ºC and a dwell time 40 seconds, you could decrement the second step by 5 seconds the second step would be 55ºC and a dwell time of 35 seconds.
- Page 29 Note: Temperature limits 4.0ºC to 99.9ºC. DO NOT exceed. Only Multi-cycle segments will have incremental/ decremental time or temperature function. > > > > Position your cursor on desired temperature segment. Press to add a pause action during operation. The “ ”...
- Page 30 An editing Protocol can be saved under a new name (newly created Protocol) or under the same name (edited Protocol). Under the User’s Folder, choose the Protocol to be edited. Select to edit the selected Protocol. This displays the existing Protocol and enables editing of the temperature segment and numerical values as shown below.
- Page 31 > > Note: Protocols in the Preset Protocols Folder can’t be deleted, while Protocols in the Public Folder can be deleted by any user if not password protected. System Setup contains 6 functions: Data Log: contains the history of the latest-run Protocol. Date &...
- Page 32 & & The Data Log records a log of activity for the most recently run Protocol. Executing a new Protocol updates the history log by overwriting previous log. To export log to a PC a Hyper Terminal communication protocol must be installed. Hyper Terminal communication protocol comes free with Windows.
- Page 33 Users can change the date type, default date and time of this unit by selecting Date &Time screen as shown below under SYSTEM screen. Please remember to press to store your settings. > & > & Users can change the temperature of lid of this unit by selecting Lid Temperature screen as shown below under SYSTEM screen.
- Page 34 Users can turn ON or OFF the sound of this unit by selecting the Beeper screen as shown below under SYSTEM screen. Please remember to press to store your settings. > > The password of Administrator is “ ”. The Administrator of this unit has rights to delete any User Folder and any Protocols inside a User’s Folder.
-
Page 35: Ramping Speed
> > Users can press the number of the bases of A, T, C and G in the sequence, then press to get the Tm value of the sequence. > >... - Page 36 Air vents should be vacuumed to remove dust. Make sure the MaxyGene II is unplugged and cooled down. To clean the heated slide the lid back on the tracks until the front black pins align with the two slots, taking care that the rolleiflex cable is clear.
-
Page 37: Operating Temperature Environment May Be Unsuitable
the unit. Slide the new block into place and connect the plug. Gently slide the block until the two screw holes are lined up. Replace the two screws and plugs. Shut the face panel and secure it with two screws. The display is off even when 1. - Page 38 2. Faulty LCD panel 2. Return unit service. Display is too dark or light Backlight brightness is not Adjust Display Brightness adjusted properly. Potentiometer. Lid will not close. 1. Foreign matter, between Remove the foreign object or lid heater and sample matter.
- Page 39 Sample Capacity 0.2ml x 96 tubes Temperature Ranges 4 ~ 99.9 C Temperature Accuracy +/- 0.5 C ( 30 to 99.9 C) Temperature Uniformity +/- 0.5 C Max. Temp. Increment/Decrement Rate 4 C / 3 C Gradient Temperature 30 ~ 99 C (Max. temp. difference: 24 C) Max.
- Page 40 > > > > > > > >...
- Page 41 > > > > > > > >...
- Page 42 33210 Central Avenue Union City, CA 94587 U.S.A. MaxyGene II Thermal Cycler THERM-1000/ THERM-1001 All models comply with the following European standards: EN 61326 (Group 1, Class B) EN 61010-1 and EN 61010-2-010 To the best of my knowledge and belief, these units conform to these standards.
- Page 43 Users are required to purchase the USB or RS-232 cable to connect the MaxyGene II and the PC. For USB connection, users are required to install the USB driver. Click on the start tab of Windows and go to accessories.
- Page 44 Compression Mat TC96-CM-10 Silicone Compression Mat Sealing Tape Clear sealing tape will seal 96 and 384 well Plates when used with Axygen compression mat this polypropylene film eliminates well to well contamination and cross-over in PCR applications Functional Temperature range -40ºC to +104ºC...
- Page 45 -80ºC to +104ºC Cat# TC-AS-100. Silicone Compression Mat is used to seal 96 well plates when using the MaxyGene II Thermal Cycler heated lid function. These silicone mats can be cleaned and sterilized by either 10% hypochlorite solution and ddi water rinse, or by autoclaving at 121ºC for 15 minutes.
Need help?
Do you have a question about the MAXYGENE II and is the answer not in the manual?
Questions and answers