Linortek Netbell-NTG Setting Instructions Manual
Master-slave setting for emergency notification
Hide thumbs
Also See for Netbell-NTG:
- Wiring instructions (4 pages) ,
- Using manual (7 pages) ,
- Quick start manual (3 pages)
Advertisement
Quick Links
Master-Slave Setting Instructions for Emergency Notification Using
All of the devices we manufacture include a remote function that can deliver a signal from one controller to control
other device(s) in multiple locations. With the capability of playing live and pre-recorded messages on the
industrial PA
system, you can use it with the
notification system. The feature is useful for schools or factories that have a need for audible signals in separate areas or
multiple buildings where running additional wiring is too expensive or not practical.
In this instruction, we use a Netbell-NTG PA system and two remote switches to activate the emergency sound. Each
remote switch is connected to a digital input of the Koda 100.
Environments:
•
The system will be installed on the same building, all network switches are on the same subnet.
•
Running wires across the buildings are not practical.
Functions required for the system:
•
Any person on the plant floor/office can press an alarm switch if an emergency is spotted and the speakers in
the facility will play the pre-recorded emergency sound.
•
After the pre-recorded message is played, it will turn off automatically unless you push one of the switches to
trigger the sound again.
Devices to use
•
One Netbell-NTG PA system: One Netbell-NTG tone generator controller, multiple horn speakers, one mixer-
amplifier.
•
Two Koda 100 Ethernet I/O controllers: Each push switch will need a Koda 100 controller to send the signals to
the Netbell-NTG controller to activate
the sound.
•
Two Push Switches.
Devices installation map
As shown on the map. Here are the devices
installed in the building, to better explain the
system setup process and software
configuration, the Netbell-NTG is used as the
Slave controller and named SLAVE in the
software configuration. The Koda 100 devices
are used as Master controller, named as
Master 1 and Master 2.
Netbell-NTG and Koda100 Controllers
Koda 100 Ethernet I/O controllers
to build a network emergency
1
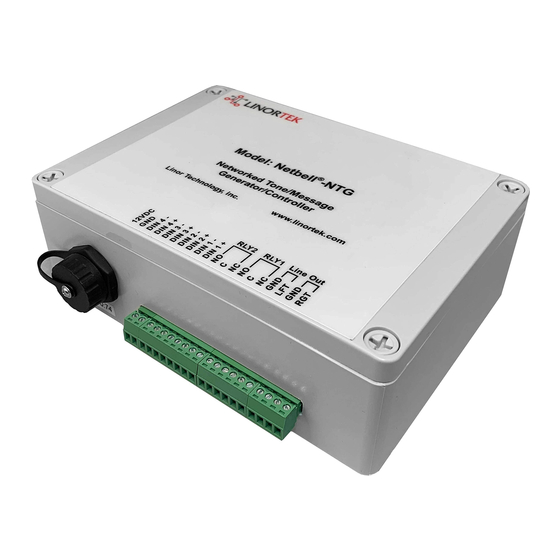
Netbell-NTG
Advertisement

Related Manuals for Linortek Netbell-NTG


Summary of Contents for Linortek Netbell-NTG
- Page 1 In this instruction, we use a Netbell-NTG PA system and two remote switches to activate the emergency sound. Each remote switch is connected to a digital input of the Koda 100.
- Page 2 Wiring 1. Wire Netbell-NTG PA System For details on how to wire the Netbell-NTG PA system, please refer to the Wiring the Netbell-NTG section on the Netbell-NTG User Manual, below is the wiring diagram from the manual for your reference: 2.
-
Page 3: Software Configuration
For instructions on how to find the IP address for each device, please refer to Finding the IP Address to Access the Software section on the Netbell-NTG User Manual. 1. Network Configuration Each device uses SERVER as the default name, when you have multiple devices on the same network, you can change the device name for easy management. - Page 4 2.1 Assign a tone to a relay You can use any custom messages up to 10 hours on the Netbell-NTG as long as you convert the messages to OGG format. We recommend to use a sound file that is not less than 15 seconds for better results.
- Page 5 2.1.2 Assigning Audio tone to Relay As we use a relay to trigger a tone on the Netbell-NTG controller, the relay is just a tool for this purpose and not functioning as a physical switch in this case. You can assign the audio tone to any relays (1-8), when you link the Master controller to the Slave, you just need to link to the same relay you have assigned a tone to at this step.
- Page 6 3. Configure the Master Controller (Koda 100) Login to Master 1 webpage 3.1 Link the Slave controller to Master-1 controller through its IP address • Go to Configure menu, then select Remote Device Config from the drop-down menu. • On the Remote Device page, enter the Slave device information, including Device Name, IP Address, Login User Name and Password.
- Page 7 3.2 Activate the digital input To set the push switch to trigger the relay. Go to Services – In/Out page, click Input 1 (IN1) edit icon if you connect the switch to input 1, you will be at Set Digital Input page. •...
- Page 8 3.3 Use Master relay 1 to trigger Slave relay 1 Go to Service – In/Out page, select Relay 1, click the Edit icon, you will be at the Set Relay page. • Name: Give this relay a name if you like. •...
-
Page 9: Contact Support Team
Master 1 above. For more information on Netbell User Manual, Video Tutorials for installation and schedule settings are available on our website Download page: https://www.linortek.com/downloads/ CONTACT SUPPORT TEAM: Phone: 001-336-485-6566 Email: support@linortek.com...
Need help?
Do you have a question about the Netbell-NTG and is the answer not in the manual?
Questions and answers