Table of Contents
Advertisement
Advertisement
Table of Contents

Related Manuals for Asus ProArt PA348CGV Series


Summary of Contents for Asus ProArt PA348CGV Series
- Page 1 PA348CGV Series LCD Monitor User Guide...
- Page 2 Product warranty or service will not be extended if: (1) the product is repaired, modified or altered, unless such repair, modification of alteration is authorized in writing by ASUS; or (2) the serial number of the product is defaced or missing.
-
Page 3: Table Of Contents
Contents Contents ...................... iii Notices ......................iv TCO certified ....................vi Safety information ..................vii Care & Cleaning ..................viii Takeback Services ..................ix Product information for EU energy label ..........ix Chapter 1: Product introduction Welcome! ..................1-1 Package contents ................. 1-1 Monitor introduction .............. -
Page 4: Notices
Notices Federal Communications Commission Statement This device complies with Part 15 of the FCC Rules. Operation is subject to the following two conditions: • This device may not cause harmful interference, and • This device must accept any interference received including interference that may cause undesired operation. - Page 5 All ASUS products with the ENERGY STAR logo comply with the ENERGY STAR standard, and the power management feature is enabled by default. The monitor and computer are automatically set to sleep after 10 and 30 minutes of user inactivity.
-
Page 6: Tco Certified
TCO certified A third-party certification according to ISO 14024 Toward sustainable IT products Say hello to a more sustainable product IT products are associated with a wide range of sustainability risks throughout their life cycle. Human rights violations are common in the factories. -
Page 7: Safety Information
Safety information • Before setting up the monitor, carefully read all the documentation that came with the package. • To prevent fire or shock hazard, never expose the monitor to rain or moisture. • Never try to open the monitor cabinet. The dangerous high voltages inside the monitor may result in serious physical injury. -
Page 8: Care & Cleaning
AEEE yönetmeliğine uygundur Care & Cleaning • Before you lift or reposition your monitor, it is better to disconnect the cables and power cord. Follow the correct lifting techniques when positioning the monitor. When lifting or carrying the monitor, grasp the edges of the monitor. Do not lift the display by the stand or the cord. -
Page 9: Takeback Services
These documents are not part of the standard package. Takeback Services ASUS recycling and takeback programs come from our commitment to the highest standards for protecting our environment. We believe in providing solutions for our customers to be able to responsibly recycle our products, batteries and other components as well as the packaging materials. -
Page 11: Welcome
Thank you for purchasing the ASUS LCD monitor! The latest widescreen LCD monitor from ASUS provides a broader, brighter and crystal-clear display, plus a host of features that enhance your viewing experience. With these features, you can enjoy the convenience and delightful visual... -
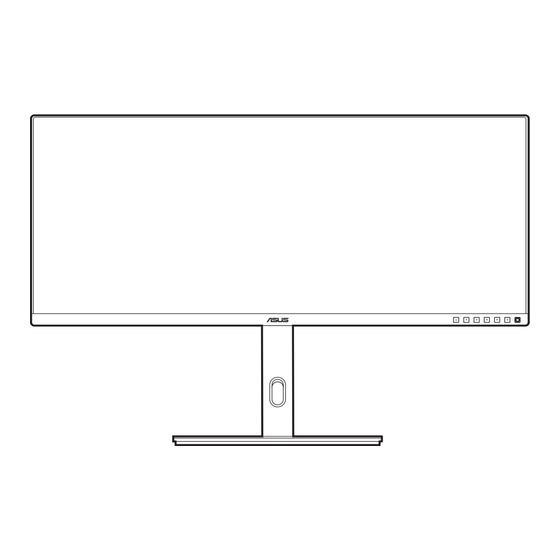
Page 12: Monitor Introduction
Monitor introduction 1.3.1 Front view Power button/power indicator • Turns the monitor on/off. • The color definition of the power indicator is as the below table. Status Description White Amber Standby mode • Press this button to display the OSD menu when the OSD is off. Preset button: •... - Page 13 When the input signal message appears, you can switch to the next existed input source by quickly double tapping on this button. • Push the 5-way button down for over 5 seconds to toggle the Key Lock function between on and off. ASUS PA348CGV Series LCD Monitor...
-
Page 14: Back View
1.3.2 Back view Kensington lock slot. Power switch. Press the switch to turn on/off power. AC-IN port. This port connects the power cord. Earphone jack. This port is only available when an HDMI/DisplayPort cable is connected. HDMI-1 port. This port is for connection with an HDMI compatible device. -
Page 15: Assembling The Monitor Arm/Base
Fix the base to the arm by fastening the bundled screw. We recommend that you cover the table surface with soft cloth to prevent damage to the monitor. Base screw size: M6 x 16.2 mm. ASUS PA348CGV Series LCD Monitor... -
Page 16: Using The C-Clamp (Optional)
Using the C-Clamp (optional) The C-Clamp attaches the monitor to surfaces up to 10 cm thick. Before starting, make sure you have enough room to fit the entire clamp and the surface is sturdy and flat. Follow the illustrations below to mount the monitor. We recommend that you cover the table surface with soft cloth to prevent damage to the monitor. -
Page 17: Detaching The Arm/Base (For Vesa Wall Mount)
• The VESA wall mount kit (100 x 100 mm) is purchased separately. • Use only the UL Listed Wall Mount Bracket with minimum weight/load 22.7kg (Screw size: M4 x 10 mm) ASUS PA348CGV Series LCD Monitor... -
Page 18: Adjusting The Monitor
Adjusting the monitor • For optimal viewing, we recommend that you look at the full face of the monitor, then adjust the monitor to the angle that is most comfortable for you. • Hold the stand to prevent the monitor from falling when you change its angle. •... -
Page 19: Connecting The Cables
When these cables are connected, you can choose the desired signal from the Signal item in the OSD menu. If you need to replace the power cord or the connection cable(s), please contact ASUS customer service. ASUS PA348CGV Series LCD Monitor... -
Page 20: Turning On The Monitor
Turning on the monitor Press the power button . See page 1-2 for the location of the power button. The power indicator lights up in white to show that the monitor is ON. Chapter 2: Setup... -
Page 21: Osd (On-Screen Display) Menu
Menu (5-way) button up/down to change the settings of the selected function. To exit and save the OSD menu, press the button or move the Menu (5-way) left repeatedly until the OSD menu disappears. To adjust other functions, repeat steps 1-4. ASUS PA348CGV Series LCD Monitor... -
Page 22: Osd Function Introduction
3.1.2 OSD function introduction Preset This function contains 10 sub-functions you can select for your preference. Each mode has the Reset selection, allowing you to maintain your setting or return to the preset mode. Preset Signal Brightness PA348CGV 3440x1440 120Hz Standard Mode DisplayPort Standard Mode... - Page 23 (Default) Enable Fixed Enable Fixed Enable Enable Fixed Gamma Disable Disable (2.2) (2.2) (2.4) 2.2/2.6 only (2.2) (2.2) Enable Enable Enable Enable Enable Enable Input Range Disable Disable Disable (Auto) (Auto) (Auto) (Auto) (Auto) (Auto) ASUS PA348CGV Series LCD Monitor...
- Page 24 Blue Light In this function, you can adjust the blue light filter level. Preset Signal Brightness PA348CGV 3440x1440 120Hz Standard Mode DisplayPort Level 0 Preset Level 1 Level 2 Blue Light Level 3 Level 4 Palette Image Sound Back Enter Exit •...
- Page 25 Color Reset: Current mode color reset: Resets the color settings of current color mode to the factory default value. All modes color reset: Resets the color settings of all color modes to the factory default value. ASUS PA348CGV Series LCD Monitor...
- Page 26 Image Set the image related setting from this menu. Preset Signal Brightness PA348CGV 3440x1440 120Hz Standard Mode DisplayPort Sharpness Preset Trace Free Aspect Control Blue Light Input Range Palette Image Sound Back Enter Exit • Sharpness: The adjusting range is from 0 to 100. •...
- Page 27 To activate this function, you need to do the following: turn off Freesync Premium Pro/VRR and disable HDR on your device. Preset Signal Brightness PA348CGV 3440x1440 120Hz Standard Mode DisplayPort PIP/PBP Mode PIP/PBP PIP/PBP Source PIP Size QuickFit Plus Signal Settings Shortcut Back Enter Exit ASUS PA348CGV Series LCD Monitor...
- Page 28 • PIP/PBP Mode: Selects PIP, PBP function, or turn it off. To scale both displays to full screen in PBP mode, set resolution settings for both as 1720 x 1440 in OS display settings. (And make sure that the scaling option is "Maintain Display Scaling" if you are using an Intel graphic card.) •...
- Page 29 FreeSync Premium Pro (DisplayPort, USB Type-C)/ VRR (HDMI) Allows an FreeSync Premium Pro supported* graphics source to dynamically adjust display refresh rate based on typical content frame rates for power efficient, virtually stutter free and low-latency display update. ASUS PA348CGV Series LCD Monitor...
- Page 30 * FreeSync Premium Pro can only be activated within 48Hz~120Hz (DisplayPort, USB Type C). VRR can only be activated within 48Hz ~100Hz (HDMI). * For supported GPUs, minimum PC system and driver requirements, please contact the GPU manufactures. To activate this function, you need to do the following: turn off PIP/PBP, set Aspect Control to Full, set DisplayPort Stream to DisplayPort 1.2 or DisplayPort 1.4.
- Page 31 When a certain function is selected or activated, your shortcut key may not support. Available function choices for shortcut: Blue Light, Brightness, Contrast, PIP/PBP, Color Temp., Volume, sRGB Mode, Rec. 709 Mode, User Mode 1, User Mode 2. ASUS PA348CGV Series LCD Monitor 3-11...
-
Page 32: Specifications Summary
3.2 Specifications summary Panel Type TFT LCD Panel size 34” (21:9, 86.36 cm) wide screen Max. Resolution 3440 x 1440 Pixel pitch 0.2325 mm x 0.2325 mm Brightness (Typ.) 350 cd/m (SDR), 400 cd/m (HDR) Contrast Ratio (Typ.) 1000:1 Viewing angle (H/V) CR>10 178˚/178˚... - Page 33 PSB, Energy Star , TCO, CEC, RoHs, ® Windows 10/11 WHQL, Flicker Free, Low Blue Light, CECP *Specifications are subject to change without notice. **Measuring a screen brightness of 200 nits without audio/USB/Card reader connection. ASUS PA348CGV Series LCD Monitor 3-13...
-
Page 34: Outline Dimensions
Outline dimensions 192.45 [7.58] 245.95 [9.68] 167.40 [6.59] 23.17 [0.91] 334.8 (13.18)-Active-Area 8.90 [0.35] 200.76 [7.90] 368.20 [14.50] 568.96 [22.40] 12.15 [0.48] 14.90 [0.59] 115.00 [4.53] 277.66 [10.93] 439.05 [17.29] 200.76 [7.90] 100.00 [3.94] 3-14 Chapter 3: OSD (On-Screen Display) menu... -
Page 35: Troubleshooting (Faq)
Type C cable is properly connected to the monitor and the computer. • Adjust the volume settings of both your monitor and HDMI/DisplayPort/USB Type C device. • Ensure that the computer sound card driver is properly installed and activated. ASUS PA348CGV Series LCD Monitor 3-15... -
Page 36: Supported Operating Modes
Supported operating modes Resolution Horizontal Vertical Frequency Pixel Frequency Frequency (KHz) (Hz) (MHz) 640 x 480 31.47(N) 59.94(N) 25.18 640 x 480 37.87(N) 72.82(N) 31.5 640 x 480 37.5(N) 75.00(N) 31.5 720 x 400 31.47(N) 70.08(P) 28.32 800 x 600 35.16(P) 56.25(P) 800 x 600... - Page 37 Resolution Vertical Frequency (Hz) 50Hz 1920 × 1080p 60Hz 50Hz 1280 × 720p 59.94Hz 60Hz 720 × 576p 50Hz 59.94Hz 720 × 480p 60Hz 640 × 480p 60Hz ASUS PA348CGV Series LCD Monitor 3-17...
Need help?
Do you have a question about the ProArt PA348CGV Series and is the answer not in the manual?
Questions and answers
Connect iPad to monitor via WiFi