
Subscribe to Our Youtube Channel
Related Manuals for GreenWorks Pro ULTRAPOWER 60V PH60L210


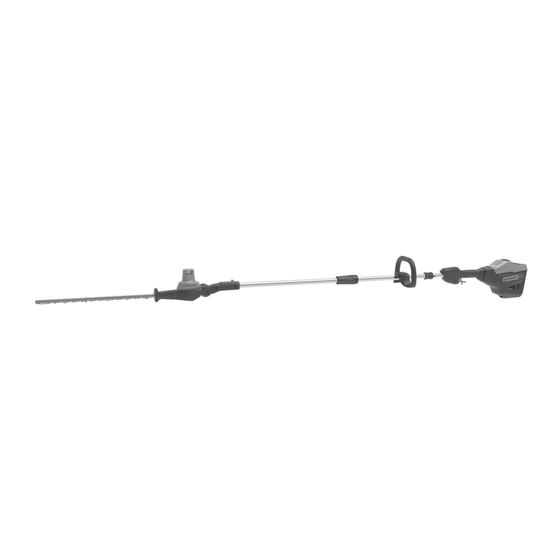
Summary of Contents for GreenWorks Pro ULTRAPOWER 60V PH60L210
- Page 1 PH60L210 PH60L00 POLE HEDGE TRIMMER OPERATOR MANUAL CORTASETOS TELESCÓPICO MANUAL DEL OPERADOR PTC401 www.greenworkstools.com...
-
Page 3: Table Of Contents
English Install the pivoting head........7 Description......... 4 Remove the pivoting head......... 7 Purpose.............. 4 Attach the auxiliary handle........8 Overview............4 Install the battery pack........8 General power tool safety Remove the battery pack........8 warnings..........4 Operation........... 8 Work area safety..........4 Start the machine.......... -
Page 4: Description
English DESCRIPTION • Always use two hands when operating the power tool. Hold the power tool with both hands to avoid loss of control. PURPOSE ELECTRICAL SAFETY This machine is intended for cutting and trimming hedges and bushes in domestic use. •... -
Page 5: Battery Tool Use And Care
English before use. Many accidents are caused by poorly wiring. Cutter blades contacting a "live" wire may make maintained power tools. exposed metal parts of the power tool "live" and could give the operator an electric shock. • Keep cutting tools sharp and clean. Properly maintained cutting tools with sharp cutting edges are less •... -
Page 6: Symbols On The Product
English • Use extreme care when approaching blind corners, SYM- SIGNAL MEANING doorways, shrubs, trees, or other objects that may obscure your view of a child who may run into the path of the DANGER Indicates an imminently haz- machine. ardous situation, which, if not avoided, will result in death SYMBOLS ON THE PRODUCT... -
Page 7: Unpack The Machine
English INSTALL THE PIVOTING HEAD WARNING If the battery pack cracks or breaks, with or without leaks, do not recharge it and do not use. Discard it and replace with a new battery pack. DO NOT TRY TO REPAIR IT! To prevent injury and risk of fire, explosion, or electric shock, and to avoid damage to the environment: •... -
Page 8: Attach The Auxiliary Handle
English ATTACH THE AUXILIARY WARNING HANDLE • If the battery pack or charger is damaged, replace the battery pack or the charger. • Stop the machine and wait until the motor stops before you install or remove the battery pack. •... -
Page 9: Start The Machine
English START THE MACHINE ADJUST THE TRIMMER HEAD ANGLE 1. Push forward on the lock-out lever (5) and pull the trigger (6). WARNING Hold the machine with two hands during operation. STOP THE MACHINE The trimmer head can be locked into 7 positions. 1. -
Page 10: Operation Tips
English WARNING ① Remove the battery pack from the machine before maintenance. 10.1 CLEAN THE MACHINE WARNING Keep the machine and the motor free of leaves, branches or excessive oil to prevent fire risks. • Use a moist cloth with a mild detergent to clean the ②... -
Page 11: Troubleshooting
English TROUBLESHOOTING Charger model CAC801, CH60DP01, CH60R00 and other CAC Problem Possible cause Solution series Make sure that LIMITED WARRANTY The battery pack is you tighlty instal- not installed tight- led the battery pack in the ma- The motor shuts chine. -
Page 12: Exploded View
English Mooresville, NC 28115 L3Y 8K3 EXPLODED VIEW Part No. Description R0201827-00 Auxiliary handle R0202334-00 Knob assembly RB37902144C Shoulder strap... - Page 13 Español Descripción........14 Desembalaje de la máquina....17 Finalidad............14 Instalación del cabezal articulado....17 Perspectiva general.......... 14 Retirada del cabezal articulado......18 Advertencias generales de Fijación del asa auxiliar........18 Instalación de la batería........18 seguridad para herramientas Retirada de la batería........18 eléctricas...........14 Funcionamiento.......
-
Page 14: Descripción
Español DESCRIPCIÓN polvo que puedan inflamarse. Las herramientas eléctricas generan chispas que pueden encender el polvo o los gases. FINALIDAD • Mantenga alejados a los niños y los transeúntes Esta máquina se ha diseñado para cortar y podar setos y mientras utilice una herramienta eléctrica. -
Page 15: Utilización Y Cuidado De Herramientas A Batería
Español con mayor seguridad a la velocidad para la que se ojos, acuda al médico inmediatamente. El líquido diseñó. despedido de la batería puede provocar irritación o quemaduras. • No utilice la herramienta eléctrica si el interruptor no la enciende y la apaga. Cualquier herramienta eléctrica SERVICIO que no pueda controlarse con el interruptor es peligrosa y debe repararse. -
Page 16: Propuesta 65
Español PROPUESTA 65 Símbolo Explicación Debe leer y entender todas las instruc- AVISO ciones antes de manejar el producto, Este producto contiene una sustancia química conocida en así como seguir todas las advertencias el estado de California como causante de cáncer, defectos e instrucciones de seguridad. -
Page 17: Eliminación De Batería Segura Para El Medio Ambiente
Español DESEMBALAJE DE LA SÍMBO- INDICACIÓN SIGNIFICADO MÁQUINA PRECAUCIÓN (Sin símbolo de alerta sobre AVISO seguridad) Indica una situa- ción que puede provocar da- Asegúrese de montar correctamente la máquina antes del ños materiales. uso. AVISO ELIMINACIÓN DE BATERÍA SEGURA PARA EL MEDIO •... -
Page 18: Retirada Del Cabezal Articulado
Español INSTALACIÓN DE LA BATERÍA AVISO Compruebe las conexiones periódicamente para asegurarse de que estén bien apretadas. RETIRADA DEL CABEZAL ARTICULADO ② ① ① ② 1. Deje la máquina en el suelo. 2. Afloje el acoplamiento. 3. Saque el cabezal articulado. FIJACIÓN DEL ASA AUXILIAR AVISO •... -
Page 19: Puesta En Marcha De La Máquina
Español AJUSTE DEL ÁNGULO DEL AVISO CABEZAL DE CORTE Si la cuchilla se atasca en un cable o línea eléctrica, ¡NO TOQUE LA CUCHILLA! PUEDE TENER CORRIENTE Y SER PELIGROSA. Realice estos pasos: 1. Sujete el asa posterior aislada o deje la máquina lejos de usted. -
Page 20: Consejos De Funcionamiento
Español MANTENIMIENTO ① PRECAUCIÓN No permita que líquidos de frenos, gasolina y otros derivados del petróleo toquen las piezas de plástico. Las sustancias químicas pueden dañar el plástico y hacer que quede inservible. PRECAUCIÓN No utilice disolventes o detergentes fuertes en la carcasa o los componentes de plástico. -
Page 21: Solución De Problemas
Español SOLUCIÓN DE PROBLEMAS Modelo de batería LB602, LB6025, LB603, LB604, LB605, LB606 y Problema Posible causa Solución otras series BAC Modelo de cargador CAC801, CH60DP01, Asegúrese de que CH60R00 y otras series La batería no se ha ha instalado bien instalado bien. -
Page 22: Vista Despiezada
Español Dirección en EE.UU.: Dirección en Canadá: Greenworks Tools Greenworks Tools Canada Inc. P.O. Box 1238 P.O. Box 93095, Newmarket, Ontario Mooresville, NC 28115 L3Y 8K3 VISTA DESPIEZADA Nº Nº pieza Descripción Cant. R0201827-00 Asa auxiliar R0202334-00 Conjunto del mando RB37902144C Correa de hombro... - Page 25 BL60L01 BL60L251 BLOWER OPERATOR MANUAL SOPLADOR MANUAL DEL OPERADOR BLC402 www.greenworkstools.com...
- Page 27 English 10.4 Remove the battery pack........7 Description......... 4 10.5 Attach the shoulder strap........7 Purpose.............. 4 11 Operation........... 7 Overview............4 Important safety instructions...4 11.1 Start the machine..........7 11.2 Stop the machine..........8 Battery-operated power tools...4 11.3 Cruise control lever........... 8 Child safety........
-
Page 28: Description
English DESCRIPTION • Do not operate power tools in an explosive atmosphere, such as in the presence of flammable liquids, gases, or dust. Power tools create sparks that may ignite the dust or PURPOSE fumes. The machine is used to propel air out of a tube to move •... -
Page 29: Child Safety
English PROPOSITION 65 • Prevent unintentional starting. Ensure the switch is in the off-position before connecting to battery pack, picking up or carrying the appliance. Carry the power tool with your WARNING finger on the switch or energize power tool that have the This product contains a chemical known to the state of switch on invites accidents. -
Page 30: Risk Levels
English WARNING Symbol Explanation Discard all toxic materials in a specified manner to prevent Keep all bystanders at least 50 feet away. contamination of the environment. Before discarding damaged or worn out Li-ion battery, contact your local Failure to keep loose clothing from being waste disposal agency, or the local Environmental drawn into air intake could result in per- Protection Agency for information and specific instructions. -
Page 31: Install The Blower Tube
English 10.2 INSTALL THE BLOWER TUBE 2. Push the battery pack into the battery compartment until the battery pack locks into place. 3. When you hear a click, the battery pack is installed. 10.4 REMOVE THE BATTERY PACK 1. Push and hold the battery release button. 2. -
Page 32: Stop The Machine
English MAINTENANCE 3. Release the trigger to decrease the speed. 11.2 STOP THE MACHINE CAUTION Do not let brake fluids, gasoline, petroleum-based materials 1. Release the trigger to stop the machine. touch the plastic parts. Chemicals can cause damage to the plastic, and make the plastic unserviceable. -
Page 33: Troubleshooting
English TROUBLESHOOTING LIMITED WARRANTY PROBLEM POSSIBLE SOLUTION CAUSE Make sure that The battery pack is you tighlty install The motor does not installed tight- the battery pack in not start when the machine. you pull the trig- ger. The battery pack is Charge the battery out of power. -
Page 34: Exploded View
English EXPLODED VIEW No. Part No. Qty Description R0201910-00 Blower tube R0201909-00 Concentrator nozzle RB37902144 Shoulder strap... - Page 35 Español 10.3 Instalación de la batería........15 Descripción........12 10.4 Retirada de la batería........15 Finalidad............12 10.5 Fijación de la correa de hombro...... 15 Perspectiva general.......... 12 11 Funcionamiento....... 16 Instrucciones importantes de 11.1 Puesta en marcha de la máquina......16 seguridad..........
-
Page 36: Descripción
Español DESCRIPCIÓN polvo, pelusas, pelos y cualquier cosa que pueda reducir el flujo de aire. FINALIDAD • Mantenga el cabello, la ropa suelta, los dedos y todas las partes del cuerpo lejos de las aberturas y de las piezas La máquina se utiliza para expulsar aire por un tubo para móviles. -
Page 37: Seguridad Infantil
Español SEGURIDAD INFANTIL • Recargue solo con el cargador especificado por el fabricante. Un cargador adecuado para un tipo de batería puede dar lugar a un riesgo de incendio cuando se usa con Pueden producirse accidentes trágicos si el operario no es otra batería. -
Page 38: Niveles De Riesgo
Español Símbolo Explicación SÍMBO- INDICACIÓN SIGNIFICADO Corriente PRECAUCIÓN (Sin símbolo de alerta sobre Potencia seguridad) Indica una situa- ción que puede provocar da- Tiempo ños materiales. Revoluciones, carreras, velocidad de su- /min perficie, órbitas, etc., por minuto ELIMINACIÓN DE BATERÍA Corriente continua SEGURA PARA EL MEDIO Debe leer y entender todas las instruc-... -
Page 39: Instalación
Español INSTALACIÓN 2. Conecte la boquilla en el tubo hasta que el tubo se bloquee en la boquilla. 10.1 DESEMBALAJE DE LA MÁQUINA SUGERENCIA AVISO Puede utilizar la boquilla para aumentar el flujo de aire en zonas estrechas. Asegúrese de montar correctamente la máquina antes del uso. -
Page 40: Funcionamiento
Español 2. Póngase la correa de hombro. 1. Tire de la palanca de control de crucero en sentido horario para aumentar la velocidad. Esto bloqueará la 3. Ajuste la longitud de la correa a una posición cómoda. velocidad en el ajuste deseado. FUNCIONAMIENTO 2. -
Page 41: Limpieza De La Máquina
Español 12.1 LIMPIEZA DE LA MÁQUINA PROBLEMA POSIBLE CAU- SOLUCIÓN PRECAUCIÓN El interruptor de La máquina debe estar seca. La humedad supone un riesgo encendido está de- de descargas eléctricas. fectuoso. Las piezas defec- tuosas deben ser La máquina no se El motor está... -
Page 42: Garantía Limitada
Español GARANTÍA LIMITADA VISTA DESPIEZADA Por la presente Greenworks garantiza este producto, al comprador original con el comprobante de compra, durante un periodo de cuatro (4) años frente a defectos en materiales, piezas o mano de obra. A su entera discreción Greenworks reparará...
Need help?
Do you have a question about the ULTRAPOWER 60V PH60L210 and is the answer not in the manual?
Questions and answers