Walker Edison D51L29 Assembly
Hide thumbs
Also See for D51L29:
- Assembly instructions manual (10 pages) ,
- Assembly instructions manual (10 pages) ,
- Assembly instructions manual (19 pages)
Table of Contents
Advertisement
Quick Links
Model No. D51L29
A
B
C
D
E
F
G
H*
I*
J
*Note: These parts come preassembled for shipping purposes and must be disassembled for assembly
For our most up to date assembly instructions or to request missing, lost, or broken parts, or for any other
customer service issue, please visit our website at www.walkeredison.com or call us toll free at 877-207-5906.
Component List
1
wrench
8
small screws
16
medium bolts
4
large bolts
rubber suction
16
cups
4
CPU feet
8
desk feet
keyboard tray
2
bracket
keyboard tray
2
arm
keyboard tray
L = 1, R = 1
support frame
Important
K
L
M
N
O
P
Q
R
S
T
1
desk glass
2
1
middle glass
keyboard tray
1
glass
4
desk leg
2
cross bar
cross bar for
2
frame keyboard
side
cross bar for
2
frame non key-
board side
1
CPU stand
1
middle frame
keyboard tray
1
frame
Advertisement
Table of Contents

Related Manuals for Walker Edison D51L29


Summary of Contents for Walker Edison D51L29
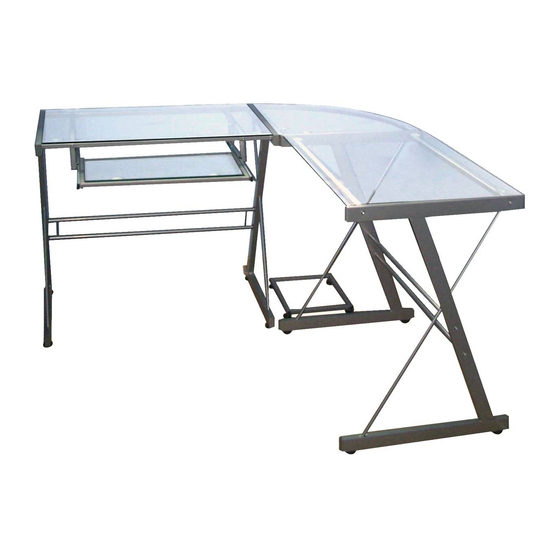
- Page 1 Assembly Diagram Model No. D51L29 Component List desk glass wrench middle glass small screws keyboard tray medium bolts glass large bolts desk leg rubber suction cross bar cups cross bar for CPU feet frame keyboard side cross bar for desk feet...
- Page 2 Assembly Diagram Model No. D51Z29 Model No. D51L29 Step 1 Screw desk feet (G) into the bottom of desk legs (N). Step 2 For the left side of the desk, take leg (N) and screw in the medium bolts (C) into and through the leg (N) and into the left upper cross bar (P).
- Page 3 Assembly Diagram Model No. D51L29 Step 5 Screw in keyboard support tray frame (J) between left upper cross bars (P) using medium bolts (C). Step 6 Disassemble the keyboard tray brackets (H) and the keyboard tray arm (I) by pressing down the small lever and pulling up.
- Page 4 Assembly Diagram Model No. D51L29 Step 8 To construct the keyboard tray you need to take the keyboard tray brackets (H) and secure them to the keyboard frame (T) using small screws (B) as shown in the illustration. *Note: Ensure the open end of keyboard tray arm (I) faces front side of desk.
- Page 5 Assembly Diagram Model No. D51L29 Step 10 Find the CPU stand (R) and screw in the CPU feet (F) into the under side of the frame. Final Assembly For our most up to date assembly instructions or to request missing, lost, or broken parts, or for any other customer...
Need help?
Do you have a question about the D51L29 and is the answer not in the manual?
Questions and answers