Walker Edison D51L29 Assembly Instructions Manual
Hide thumbs
Also See for D51L29:
- Assembly instructions manual (10 pages) ,
- Assembly (5 pages) ,
- Assembly instructions manual (19 pages)
Advertisement
Quick Links
Advertisement

Related Manuals for Walker Edison D51L29


Summary of Contents for Walker Edison D51L29
- Page 1 Assembly Instructions...
-
Page 2: Parts List
Parts List... -
Page 3: Component List
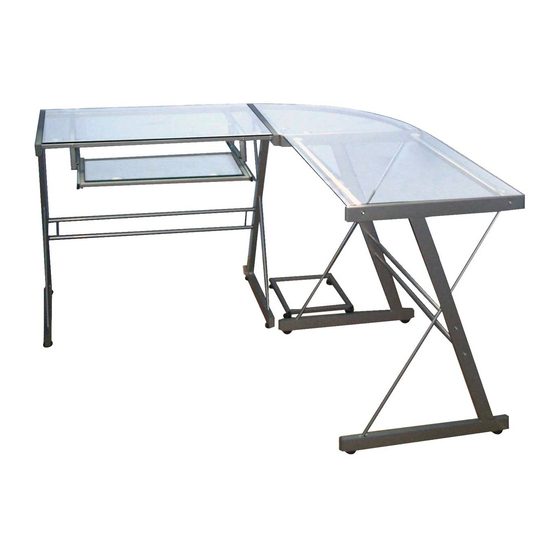
Component List 4 pcs Upper crossbar 2 pcs Lower crossbar 2 pcs Keyboard tray support 2 pcs Corner frame 1 pc Upper crossbar 2 pcs Keyboard tray frame 1 pc Glass 2 pcs Corner glass 1 pc Keyboard tray glass 1 pc CPU stand 1 pc... -
Page 4: Hardware List
Hardware List Short bolt Medium bolt Long bolt Rubber suction cup Foot *Note: This piece comes preassembled for shipping purposes and must be disassembled to complete the desk assembly. A Phillips head screwdriver is required for assembly (not included) - Page 5 Screw feet (F) into legs (1) and CPU stand (11). Attach upper crossbars (2) to keyboard tray supports (4) using medium bolts (C). Note the proper alignment of all bolt holes as shown above. Tighten medium bolts (C) with wrench (A).
- Page 6 Attach upper crossbars (2) and lower crossbar (3) to leg (1) using medium bolts (C). Tighten medium bolts (C) with wrench (A). Attach leg (1) and corner frame (5) to the assembly from the previous step using long bolts (D). Ensure that the glass supports of corner frame (5) are facing up (reference Steps 8 and 9).
- Page 7 Tray arm Tray bracket Disassemble keyboard tray slider (G) by sliding the tray arm and tray bracket apart. Depress the small lever of the tray bracket and carefully pull the two pieces apart. Repeat this process for both keyboard tray sliders (G).
- Page 8 Attach leg (1) to upper crossbars (6) and lower crossbar (3) using medium bolts (C). Tighten medium bolts (C) with wrench (A). Tray bracket Tray bracket Attach the tray brackets of keyboard tray sliders (G) to keyboard tray frame (7) using short bolts (B). Ensure that the open end of each tray bracket is near the back of keyboard tray frame (7).
- Page 9 Tray arm Tray bracket Carefully slide keyboard tray frame (7) into place. The tray brackets attached to keyboard tray frame (7) will slide into the tray arms attached to the keyboard tray supports (4). Insert rubber suction cups (E) into the desk frame as shown above.
Need help?
Do you have a question about the D51L29 and is the answer not in the manual?
Questions and answers