VIA Technologies Mobile360 Calibration Manual
Fleet calibration tool
Hide thumbs
Also See for Mobile360:
- Quick start manual (20 pages) ,
- Installation manual (62 pages) ,
- Quick start manual (18 pages)
Table of Contents
Advertisement
Quick Links
Advertisement
Table of Contents

Subscribe to Our Youtube Channel
Related Manuals for VIA Technologies Mobile360


Summary of Contents for VIA Technologies Mobile360
- Page 1 CALIBRATION GUIDE VIA Mobile360 Fleet Calibration Tool ADAS/DSS/SVS 1.07-20220317...
- Page 2 OTHERWISE MADE AVAILABLE TO YOU THROUGH VIA, INCLUDING, BUT NOT LIMITED TO DIRECT, INDIRECT, INCIDENTAL, PUNITIVE, AND CONSEQUENTIAL DAMAGES, UNLESS OTHERWISE SPECIFIED IN WRITING. VIA Technologies, Inc. reserves the right the make changes to the products described in this manual at any time without prior notice.
- Page 3 Revision History Version Date Remarks 1.07 17/03/2022 Updated DMs to DSS (Driver Safety System) Updated, DMS Calibration, Bitrate Encoding and VIA Mobile360 ADAS 1.06 17/02/2022 Display support 1.05 08/11/2021 Updated Front ADAS pattern Placement steps Updated Front ADAS camera calibration steps and pattern placement calculations for new VIA Mobile360 Front ADAS cameras.
-
Page 4: Table Of Contents
DSS Camera Installation ..........................19 VIA Mobile360 Fleet Calibration Tool ......................20 VIA Mobile360 Fleet Calibration Tool Installation ................20 Connect Host PC to VIA Mobile360 System ..................21 Modifying the Static IP Address ......................23 Settings ............................... 24 5.4.1 Camera Setup .......................... - Page 5 VIA Mobile360 Holistic View Warnings and Layout .............. 53 6.1.3 VIA Mobile360 Holistic Demo View ..................... 54 6.1.3.1 VIA Mobile360 Holistic Demo View Warnings and Layout ............ 55 6.1.4 VIA Mobile360 ADAS View ......................56 6.1.4.1 VIA Mobile360 ADAS View Warnings and Layout ..............57 6.1.5...
- Page 6 List of Figures Figure 01: Mounting bracket parts ........................3 Figure 02: Installing the VIA Mobile360 M820 onto the top casing ..............3 Figure 03: Installing the base cover ........................4 Figure 04: Securing the top casing and base cover together ................4 Figure 05: Mounting the VIA Mobile360 M820 ....................
-
Page 7: Product Overview And Installation
The vehicle speed is required to calculate the "Time to Collision" (TTC) warning. To get the vehicle speed, the VIA Mobile360 system needs to be connected to the vehicle's CAN Bus to calculate the vehicle speed and TTC warning. If gear CAN Bus information is provided then the FCW alerts will only be active when in "D"... -
Page 8: Supported Via Mobile360 Systems
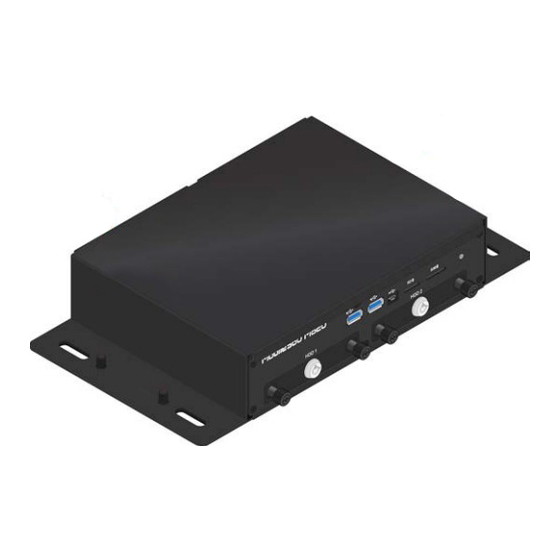
1.1.1 Supported VIA Mobile360 Systems The following VIA Mobile360 Fleet Calibration tool supports the following VIA Mobile360 systems: • VIA Mobile360 M820 •... -
Page 9: Via Mobile360 System Installation
Figure 01: Mounting bracket parts Step 1 Flip over the VIA Mobile360 M820. Install it onto the top casing of the bracket as shown in the figure below. Figure 02: Installing the VIA Mobile360 M820 onto the top casing... -
Page 10: Figure 03: Installing The Base Cover
VIA Mobile360 Fleet Calibration Guide Step 2 Flip over the base cover. Align the four screws on the base cover with the screw holes on the top casing, and then gently install the base cover. Figure 03: Installing the base cover Step 3 Secure the top casing and base cover together with the four M6 nuts as shown in the figure below. -
Page 11: Via Mobile360 M810
Figure 05: Mounting the VIA Mobile360 M820 1.3.2 VIA Mobile360 M810 The VIA Mobile360 M810 supports VESA mounts and can be installed on the side panel, floor bed or any flat surface in the vehicle suitable for mounting. 1. Prepare a 100cm x 100cm VESA bracket. -
Page 12: Adas Pattern Placement And Camera Installation
Figure 06 provides an overview of the pattern placement around the vehicle in order to calibrate the ADAS features for the VIA Mobile360 Front ADAS camera, VIA Mobile360 BSD cameras as well as the VIA Mobile360 Rear camera. For optimal calibration it is suggested to park the vehicle on a flat smooth surface with at least 3m of free room on the left, right and rear sides of the vehicle and at least 8m in front of the vehicle. -
Page 13: Front Adas Camera Installation And Pattern Placement
2.1 Front ADAS Camera Installation and Pattern Placement This section will explain how to install the front VIA Mobile360 Front ADAS camera and place the ADAS Calibration pattern in front of the vehicle in order to calibrate the camera correctly for Forward Collision and Lane Departure Warnings. -
Page 14: Front Adas Camera Installation
Figure 09: Front ADAS camera installation area Note: Please refer to the corresponding VIA Mobile360 system User Manual for camera mount assembly instructions. For vehicles with a hood, the camera must be installed above a minimum height to ensure that the camera view is not obscured. -
Page 15: Figure 11: Scenario 2 Example
VIA Mobile360 Fleet Calibration Guide 4. After installing the camera, measure the distance from the bottom of the camera lens to the ground to obtain the camera installation height. 5. Next input the actual camera installation height "ch" in the field below to determine the correct distance to place the calibration pattern in front of the vehicle. -
Page 16: Front Adas Pattern Placement
VIA Mobile360 Fleet Calibration Guide 2.1.2 Front ADAS Pattern Placement To place the ADAS Calibration pattern, find the center point of the vehicle, then mark a perpendicular line out which equals the calculated "Distance A" (must be between the min and max value calculated) obtained in the previous section. -
Page 17: Bsd Camera Installation And Pattern Placement
2.2 BSD Camera Installation and Pattern Placement This section will explain how to install the VIA Mobile360 BSD camera and place the two BSD/SVS Calibration patterns beside the vehicle in order to calibrate the camera correctly for Blind Spot Detection warnings. -
Page 18: Bsd Camera Installation
2.2.1 BSD Camera Installation Two VIA Mobile360 BSD cameras need to be installed with the included BSD mounting brackets under the side view mirrors or on the side of the vehicle on either side of the vehicle facing towards the rear for the BSD function. -
Page 19: Rear Adas Camera Installation
2.3 Rear ADAS Camera Installation This section will explain how to install the VIA Mobile360 Rear camera with the mounting bracket and place the ADAS Calibration pattern behind the vehicle in order to calibrate the camera correctly to provide drivers with a rear view when in reverse as well as PAS and rear Pedestrian alerts. -
Page 20: Figure 18: Rear Adas Camera Installation
VIA Mobile360 Fleet Calibration Guide Below are best practice rules to follow for determining the camera installation point: 1. The camera should be mounted within 50cm to the left or right of the center of the rear panel of the vehicle. It is recommended to place the camera above the rear license plate where possible between a minimum height of 50cm and a maximum height of 300cm. -
Page 21: Svs Camera Installation And Pattern Placement
Figure 20 provides an overview of the pattern placement around the vehicle in order to calibrate and stitch the SVS view for the VIA Mobile360 SVS cameras. For optimal calibration it is suggested to park the vehicle on a flat smooth surface with plenty of space around the vehicle. It is recommended to have at least 300cm of free room on all sides of the vehicle and ensure patterns are parallel/squared to one another. -
Page 22: Svs Camera Installation And Pattern Placement
Figure 21: Frame vehicle with tape The VIA Mobile360 Surround View system uses a special pattern to calibrate the Mobile360 SVS cameras. The size of the BSD/SVS Calibration pattern is 152.5cm x 152.5cm, with each inside grid pattern 30.5cm x 30.5cm. -
Page 23: Svs Camera Installation
When doing the SVS calibration step in the VIA Mobile360 Fleet Calibration Tool, the angle may require a slight adjustment depending on the body of the vehicle. -
Page 24: Svs Camera Installation Height Determination
VIA Mobile360 Fleet Calibration Guide Figure 24: SVS camera placement 3.2.1 SVS Camera Installation Height Determination The ideal camera installation height is calculated by dividing the length of the vehicle by 4 with a tolerance of ±0.25m. Example: If the length of the vehicle is 12m then the ideal SVS camera installation height is 3 ±0.25m. -
Page 25: Dss Camera Installation
4. DSS Camera Installation Calibration for the VIA Mobile360 DSS camera does not require any special patterns in order to use the feature but the camera needs to be positioned in front of the driver and pointed at where their head will be. -
Page 26: Via Mobile360 Fleet Calibration Tool
Follow these steps to install the VIA Mobile360 Fleet Calibration Tool on an Windows PC. 1. To begin, install the VIA Mobile360 Fleet Calibration Tool on a Windows 10 laptop or PC which will be used as the host PC. -
Page 27: Connect Host Pc To Via Mobile360 System
Mobile360 system to begin the software calibration process. The host PC and VIA Mobile360 system need to be configured on the same IP domain in order to make a connection. All VIA Mobile360 systems are pre-configured with a static Ethernet IP address of 192.168.1.200. - Page 28 If the connection cannot be established a warning will be displayed. Check the network settings and retry. Note: VIA Mobile360 systems come preloaded with an initial configuration file based on the options purchased. Only the enabled features will be displayed on the home screen. To enable more features see section 7.2.
-
Page 29: Modifying The Static Ip Address
Note: The host PC and VIA Mobile360 system need to be configured on the same IP domain in order to make a connection. 4. After changing the default IP, use the new IP assigned to the VIA Mobile360 system to connect with the web-based utility. -
Page 30: Settings
VIA Mobile360 system as well as the cable length used for each camera. A VIA Mobile360 M820 system with SVS, FCW, LDW, BSD and DSS is used in this example (total of 8 cameras) showing the 4 SVS cameras in CAM A, the 3 ADAS cameras in CAM B and the DSS camera in CAM C. - Page 31 Changes will be reflected on the left-hand side of the page showing where to connect each corresponding camera. The system will be pre-configured based on the initial file loaded on the VIA Mobile360 system and will have the correct number of cameras selected for the features purchased.
- Page 32 VIA Mobile360 Fleet Calibration Guide VIA Mobile360 M820 FAKRA Ports The VIA Mobile360 M820 supports 16 standard configurations. Please refer to the following table to identify which FAKRA port to connect each camera to depending on the initial file that has been preloaded. Initial...
-
Page 33: Enable Recording / Adding Dvr Cameras
5.4.1.1 Enable Recording / Adding DVR Cameras The VIA Mobile360 systems allow for the recording of cameras in each CAM group as follows: 1 Camera - 1x1 @ 1280x720p 2 Cameras - 2x1 @ 2560x720p... - Page 34 "Recording Settings" section in the top-right corner. The default location is the "System Storage". Available options will be displayed when selecting the "Recording Path". • VIA Mobile360 M820 - System Storage, MicroSD Card, SSD (M.2) and 2.5" HDD • VIA Mobile360 M810 - System Storage, MicroSD Card, and SSD (M.2) Note: The system storage should only be used for testing and debugging purposes.
- Page 35 VIA Mobile360 Fleet Calibration Guide 3. This will bring up a pop-up menu to select an existing folder or the option to create a new one. To create a new folder click the "add folder" icon in the top-right corner. 4. Enter the name of the new folder and click "Add".
-
Page 36: Adas Settings
Repeat the steps for the other CAM groups to be recorded. The video clip file names will be generated based on the following criteria: CamGroup_yearmonthday_hourminuteseconds_videoxvideo_feature.mp4 Example: For the example of a VIA Mobile360 M820 system with SVS, FCW, LDW, BSD and DSS (total of 8 cameras) configured as: • CAM A: 4 SVS cameras •... - Page 37 VIA Mobile360 Fleet Calibration Guide • *PAS - Enable/disable parking assistance. Bott's Dots Example Note: If a feature has not been enabled, it will be grayed out from the Detection Features list. *A Rear ADAS camera as well as CAN Bus information for gear signal (reverse) must be provided to enable the Pedestrian Detection feature while the PAS feature also requires wheel/turn angle.
-
Page 38: Svs Settings
VIA Mobile360 Fleet Calibration Guide 5.4.3 SVS Settings If enabled (the number of cameras in the SVS Camera Setup = 4), the "SVS" settings tab allows the stream source and the calibration file storage path to be set and to enable or disable the alert functions for Pedestrian Detection and PAS. -
Page 39: Dss Settings
" icon in the top right-hand corner of the screen. This will bring up a pop-up window to either save the changes and reboot the system or disregard any changes and exit back to the home page of the VIA Mobile360 Fleet Calibration Tool. -
Page 40: Adas Calibration
Fleet Calibration Tool. To begin the ADAS Calibration follow these steps: 1. Select the ADAS icon from the home page of the VIA Mobile360 Fleet Calibration Tool. (The example below represents a system with 4 ADAS cameras enabled.) 2. This will open the "Start" tab of the ADAS calibration process. -
Page 41: Front Adas Camera Calibration
VIA Mobile360 Fleet Calibration Guide 5.5.1 Front ADAS Camera Calibration To calibrate the Front ADAS camera for LDW and FCW, click on the "Front (LDW/FCW)" icon along the bottom of the screen. The front camera view will be displayed. The ADAS Calibration pattern should be centered in the lower 1/2 of the screen. - Page 42 Next, adjust the camera angle so that the front edge of the pattern is within the horizontal red zone of the virtual pattern. (See the corresponding Mobile360 system user manual for more information.) Once it is determined the camera is positioned correctly, drag each corner of the blue overlay square to the corresponding corner of the pattern in the camera feed.
-
Page 43: Bsd Camera Calibration
VIA Mobile360 Fleet Calibration Guide Clicking the "Reset Config" button will reset all values to the default settings. Once all information is filled in and the 4 anchor points have been positioned correctly click "Apply" to save the values. Note: "Apply" must be clicked in order to proceed to the next calibration stage. - Page 44 VIA Mobile360 Fleet Calibration Guide Advanced Configurations: • Top-View Preview - Provides a top down view to ensure the overlay is square with the actual pattern in the image. • Gridlines - Adds gridlines to the "Top-View Preview" Click the boxes to enable the "Top-View Preview" and "Gridlines" to help check if the 4 anchor points have been positioned correctly over the pattern.
-
Page 45: Rear Adas Camera Calibration
VIA Mobile360 Fleet Calibration Guide 5.5.3 Rear ADAS Camera Calibration After completing the Right (BSD) Camera calibration, select the "Rear (PAS)" icon along the bottom of the screen. Ensure that the camera is positioned such that the pattern can be clearly seen, and the camera view is not obstructed by the rear bumper of the vehicle. -
Page 46: Save/Export Adas Calibration File
"Apply" must be clicked in order to proceed to the next calibration stage. 5.5.4 Save/Export ADAS Calibration File In order to export the calibration settings to the VIA Mobile360 system, click "Finish" along the bottom of the screen. From here, there are two options to either save locally or to export directly to the VIA Mobile360 system. -
Page 47: Svs Calibration
Fleet Calibration Tool. To begin the SVS Calibration follow these steps: 1. Select the SVS icon from the home page of the VIA Mobile360 Fleet Calibration Tool. This will open the "Start" tab of the SVS calibration process. The icons along the bottom of the screen indicate the current stage. -
Page 48: Calibration
VIA Mobile360 Fleet Calibration Guide Model Configuration: • New Calibration - Select to begin a new calibration. • Load Model Configuration - Select to upload a previous calibration .xml file. Vehicle Model Selection: Change the 3D model of the vehicle used between the three default vehicles of a car, van or bus or click the upload button to import a custom 3D model to use. - Page 49 VIA Mobile360 Fleet Calibration Guide Bad Positioning - Too much vehicle in view Bad Positioning - Too much vehicle in view 2. Adjustment Rule for Visibility: Ensure both SVS Calibration patterns are clearly and completely visible in the camera view as shown below: Good Positioning Bad Positioning - Left pattern not clearly visible 3.
-
Page 50: Model
VIA Mobile360 Fleet Calibration Guide 5.6.2 Model The "Model" tab presents a 3D preview of the stitched surround view model. There are 3 sections to make adjustments for the SVS calibration: 1. Corner Slicing - The number of slices to be used to modify the blending level in the model. A higher corner slicing will decrease the occlusion of objects in the blended region while a lower value will reduce the ghost effect in the blended region. - Page 51 VIA Mobile360 Fleet Calibration Guide The following diagrams illustrate how each of the 3D model parameters function. Scale - Resize the 3D model X - Stretch the width of the vehicle Y - Stretch the height of the vehicle Z - Stretch the length of the vehicle...
-
Page 52: Parking Assist
VIA Mobile360 Fleet Calibration Guide Rotate - Rotate the 3D Model X - Rotate the vehicle around the X axis Y - Rotate the vehicle around the Y axis Z - Rotate the vehicle around the Z axis Front Le� Right Back Bo�om Note: To change the view in the preview window, click on the screen and use the mouse to rotate the view. -
Page 53: Save/Export Svs Calibration File
VIA Mobile360 Fleet Calibration Guide 5.6.3 Save/Export SVS Calibration File In order to export the calibration settings to the VIA Mobile360 system, click "Finish" along the bottom of the screen. From here, there are two options to either save locally or to export directly to the VIA Mobile360 system. -
Page 54: Dss Camera Calibration
VIA Mobile360 systems support playback of recorded SVS, ADAS and DSS videos through the selected VIA Mobile360 System App. When video clips are selected, they will be used as the source for the system to use for detection. The system will output alerts the same as when using live camera streams. - Page 55 VIA Mobile360 Fleet Calibration Guide 1. Open the VIA Mobile360 Fleet Calibration Tool and establish the remote connection to the target VIA Mobile360 system. 2. Click the "Settings" icon on the home screen and then click the SVS tab along the bottom of the screen.
-
Page 56: Via Mobile360 Display Options
VIA Mobile360 Fleet Calibration Guide 6. VIA Mobile360 Display Options VIA Mobile360 systems can provide visual displays with the optional 7" or 10" LCD display or the VIA Mobile360 ADAS display. The sections below provide descriptions of the interfaces for each device. 6.1 LCD Display Views VIA Mobile360 systems offers 4 distinct views to provide drivers with critical road information and alerts without distracting their attention from the road. -
Page 57: Via Mobile360 View Launch On Boot-Up
In order for changes to take effect VIA Mobile360 system App will need to reboot. To use the "Custom" option from the list, users will need to use the VIA Mobile360 AI SDK to build a custom application and push the library to the VIA Mobile360 M810/M820 system. -
Page 58: Via Mobile360 Holistic View
6.1.2 VIA Mobile360 Holistic View The VIA Mobile360 Holistic View integrates the SVS view as the main display to provide drivers with a real-time 360° view of events around their vehicle as well as ADAS + DSS alerts in a single interface. -
Page 59: Via Mobile360 Holistic View Warnings And Layout
6.1.2.1 VIA Mobile360 Holistic View Warnings and Layout Below each example image of the warnings and views which are displayed in the VIA Mobile360 Holistic View, is the vehicle information required to enable the full functionality of the feature. An asterisk (*) indicates the information is mandatory. -
Page 60: Via Mobile360 Holistic Demo View
6.1.3 VIA Mobile360 Holistic Demo View VIA Mobile360 Holistic Demo View provides a split screen view of the SVS, ADAS and DSS camera feeds with detection and alert overlays to allow for a deeper testing and analysis of each feature. The view provides SVS- ADAS-DSS functions with either real-time streaming or video playback. -
Page 61: Via Mobile360 Holistic Demo View Warnings And Layout
6.1.3.1 VIA Mobile360 Holistic Demo View Warnings and Layout Below each example image of the warnings and views displayed in the VIA Mobile360 Holistic Demo View is the vehicle information required to enable the full functionality of the feature. An asterisk (*) indicates the information is mandatory. -
Page 62: Via Mobile360 Adas View
6.1.4 VIA Mobile360 ADAS View The VIA Mobile360 ADAS View is intended for installations without the SVS feature and Integrates the VIA ADAS + DSS alerts in a single interface. The lane and vehicle detection result is shown as virtual 3D scene. -
Page 63: Via Mobile360 Adas View Warnings And Layout
6.1.4.1 VIA Mobile360 ADAS View Warnings and Layout Below each example image of the warnings and views displayed in the VIA Mobile360 ADAS View is the vehicle information required to enable the full functionality of the feature. An asterisk (*) indicates the information is mandatory. -
Page 64: Via Mobile360 Adas Demo View
6.1.5 VIA Mobile360 ADAS Demo View The VIA Mobile360 ADAS Demo View is intended for installations without the SVS feature and provides the Front ADAS camera view with object detection and alert overlays. The DSS camera feed is overlaid in the top left-hand corner of the screen to allow for better analysis of DSS alerts. -
Page 65: Via Mobile360 Adas Demo View Warnings And Layout
6.1.5.1 VIA Mobile360 ADAS Demo View Warnings and Layout Below each example image of the warnings and views displayed in the VIA Mobile360 ADAS Demo View is the vehicle information required to enable the full functionality of the feature. An asterisk (*) indicates the information is mandatory. -
Page 66: Via Mobile360 Adas Display
6.2 VIA Mobile360 ADAS Display The VIA Mobile360 ADAS Display is intended for use with VIA Mobile360 systems which include ADAS featuresi and to provide timely delivery of visual and audio alerts to drivers. It is equipped with an LED display panel, an echo-canceling microphone array, a 2W speaker and a driver alert/two-way calling button. -
Page 67: System Status Leds
VIA Mobile360 Fleet Calibration Guide 6.2.1 System Status LEDs The VIA Mobile360 ADAS Display accessory has three LED indicators located in its front LED panel to display system status. Device Bootup Recording SD Card Error Hotspot Startup Recording Error Mic Error Mobile Network Startup... - Page 68 VIA Mobile360 Fleet Calibration Guide The table below explains the necessary conditions for detection to be active for the various AI features. Speed > 60km/h, corresponding turn signal not Speed, Turn signal Watch your lane active Speed > 0km/h, Low: 0.8s > Time to Collision > 0.4s...
-
Page 69: Troubleshooting And Upgrades
VIA Mobile360 system, any issues with the following items occur, use the debug feature in the VIA Mobile360 Calibration Tool to create a binary file of all critical files to send to the VIA FAE support team to help troubleshoot. -
Page 70: Upgrading
7.2 Upgrading If more cameras and AI features are desired to be added to the VIA Mobile360 system after the initial purchase, talk with a Sales or FAE contact at VIA. Inform them of which additional features are required and the team at VIA will send corresponding cameras and a new initial file to update the VIA Mobile360 system with to unlock the desired features. - Page 71 VIA Mobile360 Fleet Calibration Guide 5. After the system has been updated, a notification will appear. Click "Restart" to restart the system. 6. After the system has restarted, the new features will be available. 7. Go through the according steps to install and calibrate the new features added as described in this guide.
- Page 72 Taiwan Headquarters Japan China 1F, 531 Zhong-zheng Road, 940 Mission Court 3-15-7 Ebisu MT Bldg. 6F, Tsinghua Science Park Bldg. 7 Xindian Dist., New Taipei City 231 Fremont, CA 94539, Higashi, Shibuya-ku No. 1 Zongguancun East Road, Taiwan Tokyo 150-0011 Haidian Dist., Beijing, 100084 Japan China...
Need help?
Do you have a question about the Mobile360 and is the answer not in the manual?
Questions and answers