Table of Contents
Advertisement
Quick Links
Visit the Signature Choral Risers web page at www.wengercorp.com
C
for detailed instructions and videos.
ONTENTS
Safety Precautions . . . . . . . . . . . . . . . . . . . . . . . . . . . . . . . . .2
Warranty . . . . . . . . . . . . . . . . . . . . . . . . . . . . . . . . . . . . . . . . .2
Important User Information . . . . . . . . . . . . . . . . . . . . . . . . . . .3
General . . . . . . . . . . . . . . . . . . . . . . . . . . . . . . . . . . . . . .3
Manufacturer . . . . . . . . . . . . . . . . . . . . . . . . . . . . . . . . .3
Intended Use . . . . . . . . . . . . . . . . . . . . . . . . . . . . . . . . .3
Parts List . . . . . . . . . . . . . . . . . . . . . . . . . . . . . . . . . . . . . . . . .4
Hardware Pack . . . . . . . . . . . . . . . . . . . . . . . . . . . . . . .4
Step Assembly . . . . . . . . . . . . . . . . . . . . . . . . . . . . . . . .5
Chassis Assembly . . . . . . . . . . . . . . . . . . . . . . . . . . . . .5
Stringer Assembly . . . . . . . . . . . . . . . . . . . . . . . . . . . . . .6
Back Rail Assembly . . . . . . . . . . . . . . . . . . . . . . . . . . . .6
Note: Please read and understand these Assembly and Owner's Instructions before assembling
the parts.
Note: Remove all items from the shipping cartons and arrange them in a convenient location.
Refer to the illustrations on the following pages. If you need additional information,
contact the Wenger Corporation using the information below.
©Wenger Corporation 2014
Wenger Corporation, 555 Park Drive, P.O. Box 448, Owatonna, Minnesota 55060-0448
Questions? Call.....USA: 800-4WENGER (493-6437) • Worldwide: 1-507-455-4100 • www.wengercorp.com
Assembly/Owner's Manual
Signature
Before Assembly . . . . . . . . . . . . . . . . . . . . . . . . . . . . . . . . . . .7
Assembly . . . . . . . . . . . . . . . . . . . . . . . . . . . . . . . . . . . . . . . .8
Chassis Assembly . . . . . . . . . . . . . . . . . . . . . . . . . . . . .8
Back Rail Assembly . . . . . . . . . . . . . . . . . . . . . . . . . . . .9
Step Assembly . . . . . . . . . . . . . . . . . . . . . . . . . . . . . . . .12
Safety Check . . . . . . . . . . . . . . . . . . . . . . . . . . . . . . . . .12
Moving and Storing Risers . . . . . . . . . . . . . . . . . . . . . . . . . . .13
Connecting Multiple Riser Units . . . . . . . . . . . . . . . . . . . . . . .14
Straight Configuration . . . . . . . . . . . . . . . . . . . . . . . . . . . . . . .15
Printed in USA 05/14
Choral Riser
®
4-Step Model
Part #098D499-04
Advertisement
Table of Contents

Related Manuals for Wenger Signature Choral Riser 4-Step


Summary of Contents for Wenger Signature Choral Riser 4-Step
-
Page 1: Table Of Contents
Refer to the illustrations on the following pages. If you need additional information, contact the Wenger Corporation using the information below. ©Wenger Corporation 2014 Printed in USA 05/14 Part #098D499-04 Wenger Corporation, 555 Park Drive, P.O. Box 448, Owatonna, Minnesota 55060-0448 Questions? Call..USA: 800-4WENGER (493-6437) • Worldwide: 1-507-455-4100 • www.wengercorp.com... -
Page 2: Safety Precautions
AFETY RECAUTIONS Throughout this manual you will find cautions and warnings which are defined as follows. • WARNING means that failure to follow the instruction may result in serious injury or death. • CAUTION means that failure to follow the instruction may result in serious injury or damage to property. -
Page 3: Warranty
Wenger Corporation. Wenger Corporation does not assume any responsibility for any errors that may appear in this manual. In no event will Wenger Corporation be liable for technical or editorial omissions made herein, nor for direct, indirect, special, incidental, or consequential damages resulting from the use or defect of this manual. -
Page 4: Parts List
ARTS ARDWARE Fasteners are shown actual size. (2) Carriage Bolt, ZP, (4) Socket Screw, B HD, 3/8-16 x 2-3/4 3/8-16 x 1 (4) Carriage Sleeve, (10) Nut, Lock, (6) Nut, SIG, ZP NY.IN, Full, Jam Lock, ZP, 3/8-16 NY.IN, ZP, 3/8-16 (For Use On Back Rail Only) 7/32"... -
Page 5: Step Assembly
ARTS CONTINUED SSEMBLY Item Qty Description Item Qty Description 1st Step Unit Connector Bracket 2nd Step Screw, SM, 1/4-20 x 1, Self Drill 3rd Step Capscrew, GD2, ZP, 5/16-18 x 5/8 4th Step Wing Nut, 3/8-16 HASSIS SSEMBLY Item Qty Description Item Qty Description... -
Page 6: Stringer Assembly
ASTENERS AND ARTS CONTINUED TRINGER SSEMBLY Item Qty Description Item Qty Description Item Qty Description Stringer Assembly Socket Screw, B HD, 3/8-16 x 3/4 Nylon Spacer, 0.913 x 0.635 x 0.641 Plug, 1-1/4 Bushing, 3/8-16 Back Rail Plate Bearing Sleeve, 1/2” Dia SSEMBLY Item Qty Description... -
Page 7: Before Assembly
EFORE SSEMBLY Each riser is shipped in two cartons, one shorter carton containing the chassis and the hardware pack and one longer carton containing the Back Rail and Steps. Assembling a riser will likely involve kneeling. Use carpeting, a rug, or the cardboard carton to soften a hard floor and prevent scratching riser surfaces. -
Page 8: Assembly
SSEMBLY HASSIS SSEMBLY 1. Remove the Chassis Assembly, two Stringer Assemblies, and Hardware Pack from the carton. Place the Chassis Assembly (wheels down) on the floor. 2. Rotate the Link Bars to the backside of the Chassis Assembly. Truss Truss 3. -
Page 9: Back Rail Assembly
SSEMBLY CONTINUED SSEMBLY Outer Nylon 1. Remove the Upright Tubes, Horizontal Tubes and Spacers Silver Step Assemblies from the carton. Rotate Back Screw 2. Using the 7/32” hex key wrench, remove the Rail Plate three silver Screws from inside surface of Inner Nylon the first Back Rail Plate and set them aside. - Page 10 SSEMBLY CONTINUED SSEMBLY CONTINUED 7. Rotate the Back Rail Plate to the original position and reinstall the three screws. Tighten them securely using a 7/32” hex key wrench. 8. Repeat this procedure to attach the other Upright Tube to the second Back Rail Plate. 9.
- Page 11 SSEMBLY CONTINUED SSEMBLY CONTINUED 11. Locate the three Horizontal Tubes. Remove and discard the protective rubber Horizontal caps from the threaded studs. Lock Tubes Nuts 12. Insert the threaded studs of the Horizontal Tubes through the pre-drilled holes in the front side of the Upright Tubes.
-
Page 12: Step Assembly
SSEMBLY CONTINUED SSEMBLY 1. Remove the four Wing Nuts from each of the four Steps and set them aside. Note: Do not discard the Wing Nuts, they will used to attach the Steps to the Riser. 2. Start with the longest Step at the top and place the Steps on the Stringer Assemblies in descending order with the widest end at the rear as shown. -
Page 13: Moving And Storing Risers
OVING AND TORING ISERS The Riser must be put into the Storage Position to be moved and stored. To place the Riser in the Storage Position: 1. Lift up on the First Step and fold it up to the Back Rail. 2. -
Page 14: Connecting Multiple Riser Units
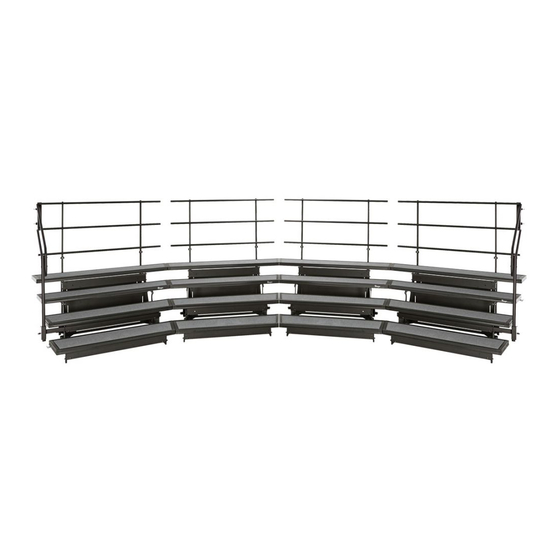
ONNECTING ULTIPLE ISER NITS Risers can be connected to additional units using the Unit Connector Brackets installed on the Steps. To connect risers together: 1. Roll an additional riser to be aligned as close as possible with the riser already placed in the Performance Position. -
Page 15: Straight Configuration
TRAIGHT ONFIGURATION The previous assembly instructions were for Arc Configurations. To arrange risers in a Straight Configuration, every other riser in the configuration must have the positioning of the Steps and the Back Rail Horizontal Tubes reversed. 1. With the riser in the Performance Position, remove the four Wing Nuts from the underside of each Step. - Page 16 This page is intentionally blank.
Need help?
Do you have a question about the Signature Choral Riser 4-Step and is the answer not in the manual?
Questions and answers