Table of Contents
Advertisement
Available languages
Available languages
Quick Links
Advertisement
Table of Contents

Related Manuals for PROEL PLLED110


Summary of Contents for PROEL PLLED110
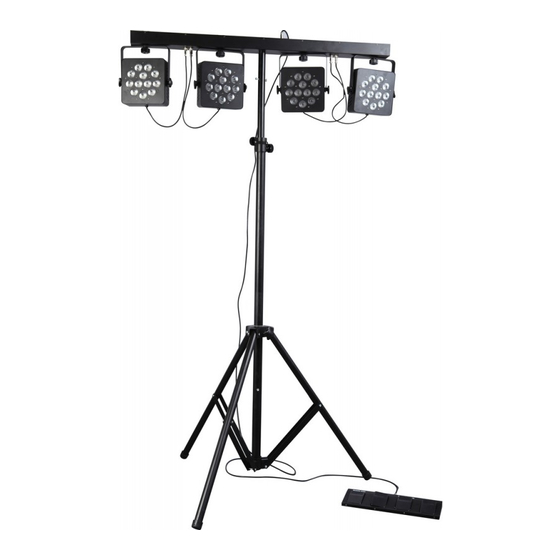
- Page 1 PORTABLE LED SYSTEM KIT PLLED110...
-
Page 2: Table Of Contents
INDICE NORME DI SICUREZZA....................3 ALIMENTAZIONE ......................4 CONNESSIONE CON UNA LINEA DMX ..............5 MESSA IN FUNZIONE...................... 6 MANUTENZIONE......................9 DATI TECNICI........................9 TABLE OF CONTENTS MAIN GUIDELINES......................10 AC POWER........................11 DMX 512 CONNECTION ....................12 OPERATION........................13 BASIC SERVICE ........................16 TECHNICAL DATA......................16 Rev.01- 04/10... -
Page 3: Norme Di Sicurezza
Si prega di contattare un distributore PROEL per ricevere assistenza per qualsiasi dubbio su come attivare l’apparecchiatura in modo sicuro. Rivolgersi ad un tecnico qualificato per qualsiasi operazione di manutenzione non descritta nel presente manuale. -
Page 4: Alimentazione
ALIMENTAZIONE Prima dell’attivazione assicurarsi che le impostazioni di fabbrica relative a tensione e frequenza siano conformi alla rete locale. Collegare sempre l’apparecchiatura a terra elettricamente. Usare esclusivamente fonti di alimentazione AC conformi alle normative locali ed alle convenzioni elettriche e che siano dotate delle protezioni contro sovraccarico e contro difetti nel sistema di messa a terra. -
Page 5: Connessione Con Una Linea Dmx
CONNESSIONE CON UNA LINEA DMX Proiettore 2 Proiettore 2 Proiettore 1 Indirizzo 13 (DMX mode 1) Indirizzo 7 (DMX mode 1) Indirizzo 1 Indirizzo 31 (DMX mode 2) Indirizzo 16 (DMX mode 2) DMX-512 Controller I cavi DMX non devono venire a contatto con altri cavi, in tal caso infatti gli apparecchi potrebbero non funzionare correttamente o non funzionare affatto. -
Page 6: Messa In Funzione
MESSA IN FUNZIONE Dopo aver connesso il proiettore alla rete di alimentazione, esso può essere acceso. Ogni proiettore occupa 6 o 15 canali DMX. Per fare in modo che il segnale di controllo sia correttamente ricevuto da ogni proiettore, è necessario che ognuno di essi sia indirizzato. Questo può essere fatto per ogni singolo proiettore tramite il display, come indicato di seguito. - Page 7 6. Modalità musicale: Premere il pulsante MODE. Quando sul display comparirà la scritta “SU.XX”, premere i pulsanti UP / DOWN per impostare il livello sonoro da 0 a 31. 7. Modalità slave: Premere il pulsante MODE fino a quando sul display non compare la scritta “SLAU”. Tale modalità è utile per linkare una o più...
- Page 8 DMX modo 2 CH 1 CH 2 CH 3 CH 4 CH 5 CH 6 000 – 009 000 – 255 Rosso Verde dimmer dimmer (faro 1) (faro 1) (faro 1) 010 – 029 programma 1 030 – 049 programma 2 050 –...
-
Page 9: Manutenzione
MANUTENZIONE Per mantenere elevata la qualità delle prestazioni di PLLED110, è fondamentale una pulizia regolare degli elementi dell’asse ottico, così come dei fori di aerazione e della ventola di raffreddamento. Importante! Polvere eccessiva, depositi di fumo ed altre scorie riducono le prestazioni e causano surriscaldamento. -
Page 10: Main Guidelines
If you have questions about how to operate the fixture safely, please contact a PROEL distributor for assistance. Refer any service operation not described in this manual to a qualified technician. -
Page 11: Ac Power
AC POWER Before operation ensure that factory setting of voltage and frequency match local power supply. Always ground (earth) the fixture electrically. Use only a source of AC power that complies with local building and electrical codes and has both overload and ground-fault protection. -
Page 12: Dmx 512 Connection
DMX-512 CONNECTION Projector 3 Projector 2 Projector 1 Address 13 (DMX mode 1) Address 7 (DMX mode 1) Address 1 Address 31 (DMX mode 2) Address 16 (DMX mode 2) DMX-512 Controller The wires must not come into contact with each other, otherwise the fixtures will not work at all, or not will work properly. -
Page 13: Operation
OPERATION After you connected the effect to the mains, the fixture starts running. During the reset, the motors are trimmed and the device is ready for use afterwards. Each projector occupies 6 or 15 DMX channels. To ensure that the control signals are properly directed to each projector, the projector requires addressing. - Page 14 6. Sound mode: Press MODE button. When on the display it will appear “SU.XX”, press UP / DOWN buttons to set the sound level from 0 to 31. 7. Modalità slave: Press MODE button until on the display it will appear “SLAU”. This mode is useful to link more bars (slave to the first bar (master), controlled by foot switch or DMX controller (max 32 bars).
- Page 15 DMX mode 2 CH 1 CH 2 CH 3 CH 4 CH 5 CH 6 000 – 009 000 – 255 Green Blue dimmer dimmer (panel 1) (panel 1) (panel 1) 010 – 029 program 1 030 – 049 program 2 050 –...
-
Page 16: Basic Service
BASIC SERVICE Regular cleaning of the elements in the optical path, as well as the air vents, is vital to maintaining the operational quality of the PLLED110. Important! Excessive dust, smoke fluid, and particulate build-up degrades performance and causes overheating and damage to the fixture that is not covered by the warranty.
Need help?
Do you have a question about the PLLED110 and is the answer not in the manual?
Questions and answers