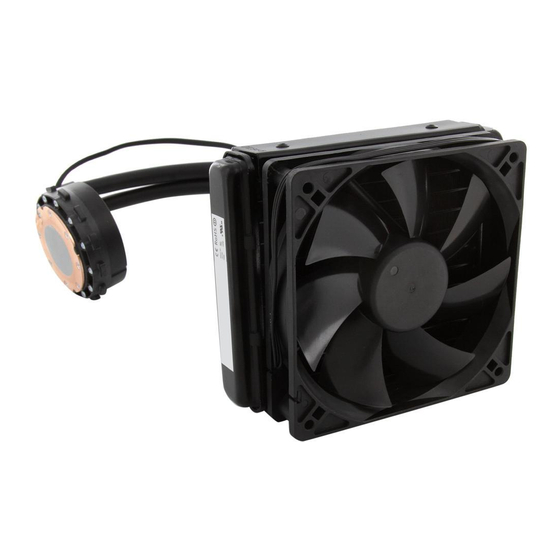
Corsair HYDRO Series Quick Start Manual
Liquid cpu cooling upgrade kit
Hide thumbs
Also See for HYDRO Series:
- Quick start manual ,
- Installation manual (66 pages) ,
- Manual (18 pages)
Advertisement
Quick Links
corsair.com
support@corsair.com
EMAIL:
facebook.com/corsairmemory
FACEBOOK:
BLOG:
corsair.com/blog/
USA and CANADA: (510) 657-8747 | INTERNATIONAL: (888) 222-4346 | FAX: (510) 657-8748
47100 Bayside Parkway • Fremont • California • 94538 • USA
© 2015 Corsair Components, Inc. All rights reserved. Corsair and the sails logo are registered trademarks, and Corsair is a trademark
in the United States and/or other countries. All other trademarks are the property of their respective owners. Product may vary slightly from those pictured.
Document Number: 49-001170 rev AC
forum.corsair.com
FORUM:
twitter.com/corsairmemory
TWITTER:
H55 PAGE:
corsair.com/h55
QUICK START GUIDE
GUIDE DE DÉMARRAGE RAPIDE
SCHNELLSTARTANLEITUNG
GUÍA BREVE DE INICIO
快速入门指南
LIQUID CPU COOLING UPGRADE KIT
TM
Advertisement

Subscribe to Our Youtube Channel
Summary of Contents for Corsair HYDRO Series
- Page 1 LIQUID CPU COOLING UPGRADE KIT © 2015 Corsair Components, Inc. All rights reserved. Corsair and the sails logo are registered trademarks, and Corsair is a trademark in the United States and/or other countries. All other trademarks are the property of their respective owners. Product may vary slightly from those pictured.
-
Page 2: Included Hardware
Note: Most newer PC cases include a CPU cutout to Included Hardware Highlighted parts for Intel installation only • Les sections en surbrillance concernent allow access to the bottom of the motherboard. If uniquement l'installation Intel • Die markierten Passagen beziehen sich nur auf die Intel Componentes de instalación solamente para Intel •... - Page 3 Prepare Retention Ring for Installation Assemble and Install Intel Backplate Préparez l'anneau de retenue pour l'installation • Halterungsring für die Installation präparieren Assemblez et installez la plaque arrière Intel • Intel-Rückwand zusammenbauen und montieren Prepare la anilla de sujeción para su instalación • Ensamble e instale la placa de soporte Intel •...
- Page 4 Install Assembled Intel Retention Ring and Clip onto Pump Head Install the Radiator Installez l'anneau de retenue et le clip sur la tête de pompe • Intel-Halterungsring und -clip Installez le radiateur • Kühler installieren • Instale el radiador auf dem Pumpenkopf montieren • Instale la anilla de sujeción Intel ensamblada y la abrazadera •...
- Page 5 Install Assembled Pump Head onto CPU Connect Power to Fan and Pump Installez la tête de pompe assemblée sur le processeur • Zusammengebauten Pumpenkopf Reliez les ventilateurs et la pompe à l'alimentation • Lüfter und Pumpe anschließen auf Prozessor montieren • Instale sobre la CPU el cabezal de bombeo ensamblado Conecte la alimentación de los ventiladores y la bomba •...
- Page 6 Included Hardware Highlighted parts for AMD installation only • Les sections en surbrillance concernent uniquement l'installation AMD • Die markierten Passagen beziehen sich nur auf die AMD Prepare Retention Ring for Installation Componentes de instalación solamente para AMD • AMD • 包含的硬件 Préparez l'anneau de retenue pour l'installation •...
- Page 7 Assemble and Install AMD Backplate Install Assembled AMD Retention Ring and Clip onto Pump Head Assemblez et installez la plaque arrière AMD • AMD-Rückwand zusammenbauen und montieren Installez l'anneau de retenue et le clip AMD sur la tête de pompe • AMD-Halterungsring Ensamble e instale la placa de soporte AMD •...
- Page 8 Install the Radiator Install Assembled Pump Head onto CPU Installez le radiateur • Kühler installieren • Instale el radiador Installez la tête de pompe assemblée sur le processeur • Zusammengebauten Pumpenkopf • 安装散热器 auf Prozessor montieren • Instale sobre la CPU el cabezal de bombeo ensamblado •...
- Page 9 Hauptplatine. Um ein optimales Kühlergebnis zu erreichen, empfiehlt Corsair, den Kühler mit der Leitung nach unten zu montieren. Enchufe el conector de alimentación de la bomba a uno de los cabezales de ventilador de 3 ó 4 patillas de la placa base.
- Page 10 2. ¿Puedo reutilizar la pasta térmica que venía aplicada en el H55 para volver a instalar el refrigerador? Please visit: corsair.com/h55 to download a detailed user guide or to obtain technical support. Para volver a instalar el refrigerador H55 es preciso limpiar a fondo la pasta térmica que venía aplicada de fábrica y aplicar una capa de pasta nueva, adquirida a tal efecto.


Need help?
Do you have a question about the HYDRO Series and is the answer not in the manual?
Questions and answers