
Subscribe to Our Youtube Channel
Related Manuals for ROSIERES RFZ317IPNI


Summary of Contents for ROSIERES RFZ317IPNI
- Page 1 USER INSTRUCTIONS OVENS MANUALE D’ISTRUZIONI FORNO CANDY HOOVER GROUP S.R.L. • Via Comolli 16 • 20861 Brugherio (MB) - Italy...
- Page 2 Safety Indications • During cooking, moisture may condense inside the oven cavity or on the glass of the door. This is a normal condition. To reduce this effect, wait 10-15 minutes after turning on the power before putting food inside the oven. ln any case, the condensation disappears when the oven reaches the cooking temperature.
- Page 3 The socket must be suitable for the load indicated on the tag and must have ground contact connected and in operation. The earth conductor is yellow-green in colour. This operation should be carried out by a suitably qualified professional. ln case of incompatibility between the socket and the appliance plug, ask a qualified electrician to substitute the socket with another suitable type.
- Page 4 use protection available from stores. Aluminium foil or any other protection, in direct contact with the hot enamel, risk melting and deteriorating the enamel of the insides. • WARNING: Never remove the oven door seal. • CAUTION: Do not refill the cavity bottom with water during cooking or when the oven is hot.
-
Page 5: Table Of Contents
Summary General Instructions 1.1 Safety indications 1.2 Electrical safety 1.3 Recommendations 1.4 Installation 1.5 Waste management 1.6 Conformity declaration Product Description 2.1 Overview 2.2 Accessories 2.3 First use Use of the Oven 3.1 Display description 3.2 Cooking modes Oven Cleaning and Maintenance 4.1 General notes on cleaning 4.2 Maintenance •... -
Page 6: General Instructions 1.1 Safety Indications
1. General Instructions We thank you for choosing one of our products. For the best results with your oven, you should read this manual carefully and retain it for future reference. Before installing the oven, take note of the serial number so that you can give it to customer service staff if any repairs are required. -
Page 7: Recommendations
NOTE: as the oven could require maintenance work, it is advisable to keep another wall socket available so that the oven can be connected to this if it is removed from the space in which it is installed. The power cable must only be substituted by technical service staff or by technicians with equivalent qualifications. -
Page 8: Product Description 2.1 Overview
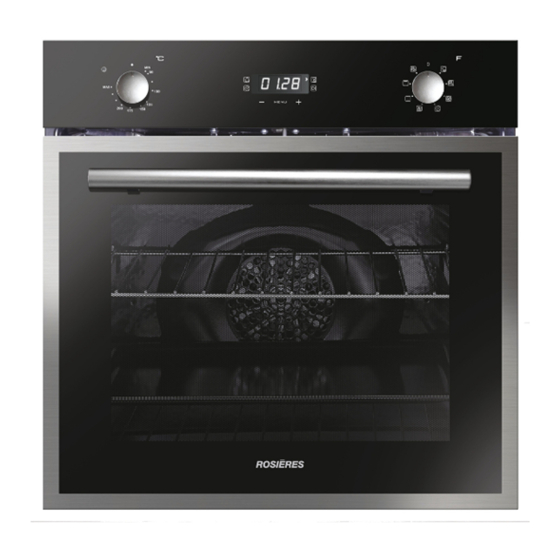
2. Product Description 2.1 Overview 1. Control panel 2. Shelf positions (lateral wire grid if included) 3. Metal grill 4. Drip pan 5. Fan (behind the steel plate) 6. Oven door 2.2 Accessories Drip pan Lateral wire grids It located at both sides of the oven cavity. It holds Collects the residues that drip during the cooking metal grills and drip pans. -
Page 9: Use Of The Oven
3. Use of the Oven 3.1 Display description WARNING : the first operation to carry out after the 1. Minute minder oven has been installed or following the 2. Clock setting interruption of power supply (this is recognizable 3. Cooking time the display pulsating and showing 12:00 ) is setting 4. - Page 10 FUNCTION HOW TO USE HOW TO DEACTIVATE WHAT IT DOES WHY IT IS NEEDED •Child Lock function is •Child Lock function is activated by touching Set deactivated by touching (+) for a minimum of 5 touchpad Set (+) again KEY LOCK s e c o n d s .
-
Page 11: Cooking Modes
3.2 Cooking Modes Function T °C T °C Function (Depends on the oven model) Dial default range LAMP: Turns on the oven light. DEFROST: When the dial is set to this position. The fan circulates air at room 40 ÷ 40 temperature around the frozen food so that it defrosts in a few minutes without the protein content of the food being changed or altered. -
Page 12: Oven Cleaning And Maintenance
4. Oven cleaning and maintenance 4.1 General notes on cleaning The lifecycle of the appliance can be extended through regular cleaning. Wait for the oven to cool before carrying out manual cleaning operations. Never use abrasive detergents, steel wool or sharp objects for cleaning, so as to not irreparably damage the enamelled parts. -
Page 13: Removal And Cleaning Of The Glass Door
REMOVAL AND CLEANING OF THE GLASS DOOR 1. Open the oven door. 2.3.4. Lock the hinges, remove the screws and remove the upper metal cover by pulling it upwards. 5.6. Remove the glass, carefully extracting it from the oven door (NB: in pyrolytic ovens, also remove the second and third glass (if present)). -
Page 14: Changing The Bulb
CHANGING THE BULB 1. Disconnect the oven from the mains supply. 2. Undo the glass cover, unscrew the bulb and replace it with a new bulb of the same type. 3. Once the defective bulb is replaced, replace the glass cover. 5. - Page 15 Indicazioni di Sicurezza • Durante la cottura, l'umidità può condensarsi all'interno del vano cottura o sul vetro della porta. Questa è una condizione normale. Per ridurre questo effetto, attendere 10-15 minuti dopo l'accensione prima di mettere gli alimenti all'interno del forno. In ogni caso, la condensa scompare quando il forno raggiunge la temperatura di cottura.
- Page 16 effettuate dai bambini senza sorveglianza. • Non utilizzare materiali ruvidi, abrasivi o raschietti metallici affilati per pulire le porte in vetro del forno, dato che possono graffiare la superficie e causare la frantumazione del vetro. • Il forno deve essere spento prima di rimuovere le parti rimovibili. •...
- Page 17 • Questa operazione deve essere eseguita solo da un tecnico adeguatamente addestrato. Il conduttore di terra (giallo-verde) deve essere circa 10 mm più lungo degli altri conduttori. Per qualsiasi tipo di riparazione, fare riferimento unicamente al Reparto di Assistenza Cliente e richiedere l'utilizzo di ricambi originali. •...
- Page 18 Sommario Avvertenze Generali 1.1 Suggerimenti sulla sicurezza 1.2 Sicurezza elettrica 1.3 Raccomandazioni 1.4 Installazione 1.5 Gestione dei rifiuti 1.6 Dichiarazione di conformità Descrizione del Prodotto 2.1 Panoramica 2.2 Accessori 2.3 Primo utilizzo Utilizzo del Forno 3.1 Descrizione del display 3.2 Modalità di cottura Pulizia e Manutenzione del Forno 4.1.Note generiche di pulizia 4.2 Manutenzione...
-
Page 19: Avvertenze Generali
1. Avvertenze Generali Vi ringraziamo per aver scelto uno dei nostri prodotti. Per utilizzare il forno in modo ottimale è consigliabile leggere con attenzione questo manuale e conservarlo con cura per ogni ulteriore consultazione. Prima di installare il forno, prendere nota del numero di serie in modo da poterlo comunicare al personale del servizio di assistenza in caso di richiesta di intervento. -
Page 20: Raccomandazioni
messa a terra con una continuità difettosa. NOTA: poiché il forno potrebbe richiedere interventi di assistenza, è consigliabile prevedere la disponibilità di un’ulteriore presa a muro a cui collegare il forno dopo che è stato rimosso dallo spazio in cui è stato installato. Il cavo di alimentazione deve essere sostituito solo dal personale dell’assistenza tecnica o da tecnici con qualifiche analoghe. -
Page 21: Dichiarazione Di Conformità
1.6 Dichiarazione di conformità Apponendo il marchio su questo prodotto, confermiamo la conformità a tutti i requisiti di legge europei in materia di sicurezza, salute e tutela ambientale applicabili per legge a questo prodotto. ttiva 2014/53/UE. 2. Descrizione del Prodotto 2.1 Panoramica 1. -
Page 22: Primo Utilizzo
2.3 Primo utilizzo PULIZIA PRELIMINARE Pulire sempre il forno prima di utilizzarlo per la prima volta. Pulire le superfici esterne con un panno morbido leggermente inumidito. Lavare tutti gli accessori e pulire l’interno del forno con del detergente per piatti ed acqua calda. Verificare che il forno sia vuoto, impostare la temperatura massima e lasciarlo acceso per almeno 1 ora, così... - Page 23 FUNZIONE COME SI ATTIVA COME SI SPEGNE COSA FA A COSA SERVE •Tenere premuto per 5 •Tenere premuto per 5 secondi il tasto (+), Da secondi il tasto (+). Da questo momento lo questo momento tutle BLOCCO s c h e r m o v i s u a l i z za l e f u n z i o n i s o n o BAMBINO a l t e r n a t i v a m e n t e...
-
Page 24: Modalità Di Cottura
3.2 Modalità di cottura Manopola T° preim- Intervallo Funzione (a seconda del modello) commuta- postata di T° tore LAMPADA: accende la luce interna. SCONGELAMENTO: questa posizione permette di far circolare l’aria a 40 ÷ 40 temperatura ambiente intorno al cibo surgelato facendolo così scongelare in pochi minuti senza modificare od alterare il contenuto proteico. -
Page 25: Pulizia E Manutenzione Del Forno
4. Pulizia e manutenzione del forno 4.1 Note generiche di pulizia La vita di servizio dell’apparecchio si allunga se questo viene pulito ad intervalli regolari. Attendere che il forno si raffreddi prima di effettuare le operazioni di pulizia manuali. Non utilizzare mai detergenti abrasivi, pagliette di ferro o oggetti appuntiti per lapulizia, per non danneggiare in modo irreparabile le parti smaltate.Utilizzare solo acqua, sapone o detergenti a base di candeggina (ammoniaca). -
Page 26: Rimozione E Pulizia Della Porta In Vetro
RIMOZIONE E PULIZIA DELLA PORTA IN VETRO 1. Aprile la porta del forno. 2.3.4. Bloccare le cerniere, rimuovere le viti e rimuovere la copertura metallica superiore tirandola verso l’alto. 5.6. Rimuovere il vetro, estraendolo con molta cura, dalla controporta del forno (NB: nei forni pirolitici, rimuovere anche il secondo e terzo vetro (se presente)). -
Page 27: Sostituzione Della Lampadina
SOSTITUZIONE DELLA LAMPADINA 1. Scollegare il forno alla rete. 2. Allentare la copertura in vetro, svitare la lampadina e sostituirla con una nuova dello stesso modello. 3. Una volta sostituita la lampadina difettosa, riavvitare la copertura in vetro. 5. Risoluzione dei Problemi 5.1 FAQ PROBLEMA POSSIBILE CAUSA... - Page 28 INSTALLAZIONE INSTALLATION Opening/Apertura 560 mm 460 mm x 15 mm 580 mm 595 mm 546 mm 595 mm 22 mm Se il mobile ha un fondo posteriore, praticare un foro per il 560 mm x 45 mm passaggio del cavo di alimentazione. If the furniture is coverage with a bottom at the back part, provide an opening for the power supply cable.
Need help?
Do you have a question about the RFZ317IPNI and is the answer not in the manual?
Questions and answers