TP-Link TL-WA901ND Installation Manual
Hide thumbs
Also See for TL-WA901ND:
- Quick installation manual (121 pages) ,
- User manual (80 pages) ,
- Specifications (2 pages)
Advertisement
Quick Links
CONTENTS
English ·············································································· 1
Azərbaycan dili ······························································ 13
հայերեն·········································································· 25
Қазақша ·········································································· 37
Русский язык·····································································49
Українська мова ·······························································61
ქართული···········································································73
Advertisement

Related Manuals for TP-Link TL-WA901ND


Summary of Contents for TP-Link TL-WA901ND
- Page 1 CONTENTS English ·············································································· 1 Azərbaycan dili ······························································ 13 հայերեն·········································································· 25 Қазақша ·········································································· 37 Русский язык·····································································49 Українська мова ·······························································61 ქართული···········································································73...
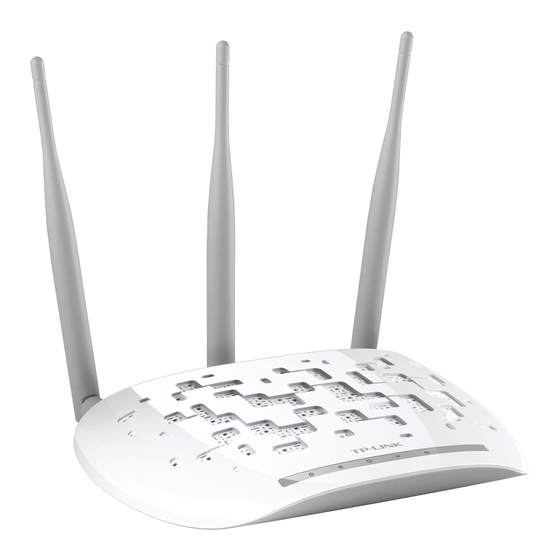
- Page 2 Installation The product model shown in this QIG for Wireless Access Point is Note "TL-WA901ND", as an example. Information for technical support can be found in the last page.
- Page 3 Connecting the Device for Configuration Connect to the Access Point with the Ethernet cable or via wireless. The default wireless network name (SSID) Access Point TP-LINK_AP_XXXXXX. Please check the label at the bottom of the unit for more details. Plug the provided power adapter into the power jack on the back of the Access Point, and the other end to a standard electrical wall socket.
- Page 4 LED explanation: Status Indication Power off. Power on. The device has a system error. The device is initialising. Flashing The device is working properly. There is no device linked to the corresponding port. There is a device linked to the corresponding port but no activity.
- Page 5 Then you will see the Start page shown as below. Select your region and click Next to continue. The Operation Mode page will appear then. The TL-WA901ND supports up to five operation modes. Please select the proper operation mode according to...
- Page 6 a) Access Point Mode Introduction In this mode, the product will act as a wireless central hub for your wireless LAN clients, giving a wireless extension for your current wired network. Settings 1. Create an easy-to-remember name for your wireless network. 2.
- Page 7 b) Repeater (Range Extender) Mode Introduction In this mode, the product can extend the coverage of another wireless Access Point or Router. Settings 1. Select the repeater mode, Universal Repeater is recommended as for better compatibility. Click Survey. 2. The window displaying a list of available SSIDs will appear. 3.
- Page 8 c) Bridge with AP mode Introduction In this mode, the product can wirelessly connect two or more remote LANs together. Settings 1. Click Survey. 2. Find the SSID of the main Router/AP that you want to bridge, and then click Connect in the corresponding row.
- Page 9 d) Client Mode Introduction In this mode, the product will act as a wireless adapter to connect your wired devices (e.g. IPTV Set-top-box, Smart TVs, Game Consoles, DVD and Blu-ray Players, etc.) to a wireless network. Settings 1. Click Survey. 2.
- Page 10 Settings 1. Select ON to enable VLAN function for this access point. 2. Configure the SSID and its corresponding VLAN ID. You can create up to 4 SSIDs and rename them. 3. Configure the wireless security for each SSID. 4. Click Next. Note For the configuration of VLAN, please refer to the User Guide on the Resource CD.
- Page 11 Note For advanced configurations on this page, please refer to the User Guide on the Resource CD. After Network Settings, the Finish page will appear. Check your settings and click Save to save your settings on your desktop for future reference. Click the Finish button to finish the configuration of the Access Point.
- Page 12 1. Passive PoE Injector supports a maximum cable length up to 30 meters due to the environment. 2. For longer powered cable up to 100 meters, please choose TP-LINK's 48V PoE adapters: TL-POE200 or TL-POE150S & TL-POE10R. Product information can be found on our official website: http://www.tp-link.com.
- Page 13 3. Please make sure your hardware connection is OK. You can confirm this by the LAN LED on the front panel of TL-WA901ND. If the LED of the LAN port, which your Ethernet cable is connected to, is lighting green, your hardware connection is OK;...
- Page 14 QuraûdÖrma 1. Bu QIG-d göst rilmiú m hsul modeli "TL-WA901ND" nümun dir. Qeyd 2. Texniki d st k üçün informasiya sonuncu s hif d dir.
- Page 15 Konfiqurasiya üçün cihazÕn birl údirilm si Giriú nöqt sin Eternet kabeli v ya simsiz qoúulun. Giriú nöqt sinin standart simsiz ú b k adÕ (SSID) TP-LINK_AP_XXXXXX-dÕr. Daha traflÕ m lumat üçün vahidin aúa÷ÕsÕndakÕ etiket baxÕn. T min olunmuú enerji adaptprunun bir hiss sini Giriú Nöqt sinin arxasÕndakÕ giirú...
- Page 16 LED izahÕ: Status Göst riú Sönülü Enerji sönülüdür. YanÕlÕ Enerji yanÕlÕdÕr. Sönülü Cihaz sistem x tasÕna malikdir. YanÕlÕ Cihaz quraúdÕrÕlÕr. øúÕq saçÕr Cihaz lazÕmi ú kild iúl yir. Sönülü Müvafiq porta ba÷lÕ cihaz mövcud deyil. Müvafiq porta ba÷lÕ cihaz mövcuddur, lakin heç bir f aliyy t YanÕlÕ...
- Page 17 (Növb ti) düym sin basÕn. Sonra aúa÷Õda Baúlan÷Õc s hif sini gör c ksiniz. Regionunuzu seçin v davam etm k üçün Next (Növb ti) düym sin basÕn. m liyyat Rejimi s hif si yaranacaq. TL-WA901ND beú q d r m liyyat rejimini d st kl yir.
- Page 18 a) Girú nöqt si rejimi Giriú Bu rejimd cari simli ú b k niz simsiz geniúl nm verm kl m hsul simsiz LAN müút ril riniz üçün simsiz m rk zi hab rolunu oynayacaq. Parametrl r 1. Simsiz ú b k niz üçün asan yadda saxlanÕlan adÕ yaradÕn. 2.
- Page 19 b) T krarlayÕcÕ (SÕra geniúl ndiricisi) rejimi Giriú Bu rejimd , m hsul dig r simsiz Giriú Nöqt si v ya Ruterin dair sini geniúl ndir bil r. Parametrl r 1. T kraralyÕcÕ rejimi seçin, Universal T krarlayÕcÕ daha yaxúÕ uy÷unluq üçün m sl h t görülür.
- Page 20 c) AP rejimi il körpü Giriú Bu rejimd , m hsul iki v ya daha artÕq uzaq LAN-larÕ simsiz ú kild birl údir bil r. Parametrl r 1. Survey (AraúdÕrma) düym sin basÕn. 2. Birl údirm k ist diyiniz sas Ruter/AP-in SSID-ni tapÕn v sonra müvafiq sÕrada Connect (Birl údir) düym sin basÕn.
- Page 21 d) Müút ri rejimi Giriú Bu rejimd , m hsul simli cihazlarÕnÕzÕ (m s. IPTV quraúdÕrma qutusu, Smart TVl r, oyun konsollarÕ, DVD v Blu-ray pleyerl ri v s. ) simsiz ú b k qoúmaq üçün simsiz adaptor rolunu oynyacaq. Parametrl r 1.
- Page 22 Parametrl r 1. Bu giriú nöqt si üçün VLAN funksiyasÕnÕ mümkün etm k üçün ON düym sini seçin. 2. SSID-i v onun müvafiq VLAN ID-ni quraúdÕrÕn. Siz 4- q d r SSIDl ri yarada v onlar yenid n adlandÕra bil rsiniz. 3.
- Page 23 Qeyd Bu s hif d mük mm l konfiqurasiya üçün Resurs CD-d ki østifad çi t limatÕna istinad edin. ù b k Parametrl rind n sonra Bitir s hif si yaranacaq. Parametrl rinizi yoxlayÕn v g l c k istinadlar üçün parametrl ri iúçi masanÕzda saxlamaq üçün Yaddaúda Save...
- Page 24 5. Sonra AP-ni 2 CihazÕn konfiqurasiyasÕna sas n quraúdÕra bil rsiniz. Qeyd 1. Passiv Eternet üz rind enerji injektoru mühit uy÷un olaraq maksimum 30 metr uzunlu÷unda kabeli d st kl yir. 2. 100- q d r daha uzun kabel üçün TP-LINK's 48V Eternet üz rind enerji adaptorlarÕnÕ seçin: TL-POE200 TL-POE150S &...
- Page 25 údirildiyin min olun. 3. S rt disk laq nizin düzgün olmasÕna diqq t yetirin. Siz bunu TL-WA901ND-Õn qarúÕ panelind ki LAN LED il t sdiq ed bil rsiniz. Eternet kabeliniizn birl údirildiyi LAN portundakÕ LED yaúÕl r ngd yanÕrsa sizin s rt disk birl úm niz qaydasÕndadÕr, ks halda s rt disk birl úm sini ehtiyatla yoxlayÕn.
- Page 26 "TL-WA901ND"...
- Page 27 Ethernet (SSID) TP-LINK_AP_XXXXXX : ON/OFF ( Power over Ethernet ( Ethernet- , PoE) 1. PoE...
- Page 28 Ethernet Obtain an IP address automatically ( http://tplinkap.net, Enter (...
- Page 29 User name ( Password ( admin) « » Next ( Next (...
- Page 30 : TL-WA901ND- Next ( WPA-PSK/WPA2-PSK(Recommended) ( Next (...
- Page 31 Introduction Universal Repeater Survey ( SSID- SSID- , Connect ( Next (...
- Page 32 Survey ( SSID- , Connect ( Next (...
- Page 33 IPTV Set-top-box, , DVD Blu-ray Survey ( WISP- SSID- Next (...
- Page 34 SSID- SSID` VLAN- ON ( VLAN SSID- VLAN ID- : 4 SSID SSID- Next (...
- Page 35 VLAN- Next ( Save ( Finish (...
- Page 36 1. PoE 2. Ethernet 3. Ethernet 30 . TP-LINK- TL-POE200 TL-POE150S TL-POE10R: http://www.tp-link.com:...
- Page 37 WPS/RESET . admin, admin; Finish ( AP- ` « » http://tplinkap.net TL-WA901ND- LAN LED- Ethernet...
- Page 38 "TL-WA901ND"...
- Page 39 Ethernet (SSID) TP-LINK_AP_XXXXXX – ON/OFF ( Power over Ethernet (PoE) : PoE...
- Page 40 Ethernet Obtain an IP address automatically (IP- http://tplinkap.net , Enter User name ( Password ( admin) , OK...
- Page 41 Quick Setup ( . Next ( Start ( Next ( Operation Mode ( . TL-WA901ND , Next...
- Page 42 WI-FI 2. WPA-PSK/WPA2-PSK(Recommended) ( 3. Next (...
- Page 43 Universal Repeater ( . Survey ( SSID SSID Connect ( . Next (...
- Page 44 1. Survey ( SSID Connect ( 5. Next (...
- Page 45 , IPTV , Smart TV , DVD Blu-ray . .) 1. Survey ( WISP SSID Connect ( 4. Next ( e) Multi-SSID VLAN SSID...
- Page 46 VLAN ON ( 2. SSID VLAN ID SSID SSID 4. Next ( VLAN Network Setting ( . Next (...
- Page 47 Network Settings ( Finish ( Save ( Finish (...
- Page 48 1: PoE ), PoE Ethernet Ethernet 1. Passive PoE PoE: TL-POE200, TL-POE150S _ TL-POE10R http://www.tp-link.com...
- Page 49 WPS/RESET : admin, admin; Finish ( "Obtain an IP address automatically" (IP- http://tplinkap.net TL-WA901ND . Ethernet...
- Page 50 TL-WA901ND.
- Page 51 Ethernet (SSID) : TP-LINK_AP_XXXXXX. ON/OFF, Power over Ethernet (PoE), PoE.
- Page 52 WPS. WPS. WPS. Ethernet) : Obtain an IP address automatically ( http://tplinkap.net Enter. User name Password ( (admin...
- Page 53 Quick Setup ( Next ( Start ( Next ( Mode ( ). TL-WA901ND Next (...
- Page 54 a) Access Point ( WiFi. WPA-PSK/WPA2-PSK (Recommended) ( Next (...
- Page 55 b) Repeater (Range Extender) ( Universal Repeater ( Survey ( SSID. SSID Connect ( Next (...
- Page 56 ) Bridge with AP ( Survey ( SSID Connect ( Next (...
- Page 57 d) Client ( IPTV- Smart TV, , DVD Blu-ray . .) Survey ( SSID SSID Connect ( Next ( Multi-SSID SSID VLAN.
- Page 58 VLAN SSID VLAN ID. 4 SSID SSID. Next ( VLAN Next...
- Page 59 Network Settings ( Finish ( Save Finish (...
- Page 60 ( ), Ethernet LAN- PoE. Ethernet POE- PoE. 1. Passive PoE- PoE- : TL-POE200, TL-POE150S TL-POE10R. http://www.tp-link.com.
- Page 61 WPS/RESET admin, admin; Finish " ". http://tplinkap.net LAN, Ethernet,...
- Page 62 TL-WA901ND,...
- Page 63 Ethernet ’ ’ (SSID) TP-LINK_AP_XXXXXX. ’ ’ — “ Ethernet” (PoE) Ethernet (PoE).
- Page 64 LED explanation: ’ ’ ’ ’ ’ WPS. WPS. WPS. ’ Ethernet) ’ Obtain an IP address automatically ( http://tplinkap.net Enter. admin)
- Page 65 Next ( Next ( « ». TL-WA901ND ’ Next (...
- Page 66 LAN, ’ ’ WPA-PSK/WPA2-PSK (Recommended)( ’ Next (...
- Page 67 Universal Repeater Survey ( 2. ’ SSID. SSID Connect ( Next...
- Page 68 Survey ( SSID Connect ( ’ Next (...
- Page 69 , IPTV Set-top-box, Smart TV, DVD Blu-ray Survey ( SSID WISP, « » Next ( SSID SSID LAN.
- Page 70 ON ( SSID LAN. SSID. Next ( « ». ’ Next (...
- Page 71 « ». ’ Save ( ’ Finish (...
- Page 72 Ethernet (PoE) ’ ’ LAN ( Ethernet. Ethernet. ’ ’ DC ( — PoE TP-LINK 48V: TL-POE200 TL-POE150S TL-POE10R. http://www.tp-link.com.
- Page 73 WPS/ ’ admin, admin; ’ « ». http://tplinkap.net TL-WA901ND. Ethernet, — ’...
- Page 74 "TL-WA901ND"...
- Page 75 Ethernet- (SSID) TP-LINK_AP_XXXXXX. ON/OFF ” Ethernet- (PoE)” PoE-...
- Page 76 Ethernet- : Obtain an IP address automatically (IP...
- Page 77 http://tplinkap.net Enter. User name Password admin) Next ( Next (...
- Page 78 . TL-WA901ND- Next...
- Page 79 WPA-PSK/WPA2-PSK(Recommended) ( Next ( Universal Repeater ( Survey ( SSID-...
- Page 80 SSID, Connect ( Next ( ” ” LAN. Survey ( SSID, Connect...
- Page 81 Next ( . IP- , Smart TVs, , DVD Blu-ray . .) Survey ( SSID Connect (...
- Page 82 Next ( -SSID SSID VLAN- ON ( VLAN- SSID- VLAN ID- SSID SSID- Next (...
- Page 83 VLAN Next ( Save ( Finish (...
- Page 84 1: PoE- 1. 1. ( ) , 2. 2. Ethernet 3. 3. Ethernet 4. 4. 5. 5. - 100- TP-LINK- 48V PoE : TL-POE200 TL-POE150S & TL-POE10R. http://www.tp-link.com.
- Page 85 WPS/RESET (Wi-Fi- admin, admin; : “Obtain an IP address automatically” (IP http://tplinkap.net TL-WA901ND- Ethernet-...
- Page 86 „ For all other technical support, please contact us by using the following details: Global Tel: +86 755 26504400 E-mail: support@tp-link.com Service time: 24hrs, 7 days a week .: 0-800-505-508 E-mail: support.ua@tp-link.com : 10:00-22:00 .: 8 (499) 754-55-60 ( 8 (800) 250-55-60 E-mail: support.ru@tp-link.com...
Need help?
Do you have a question about the TL-WA901ND and is the answer not in the manual?
Questions and answers