
Subscribe to Our Youtube Channel
Related Manuals for Olimpia splendid PELER 4D


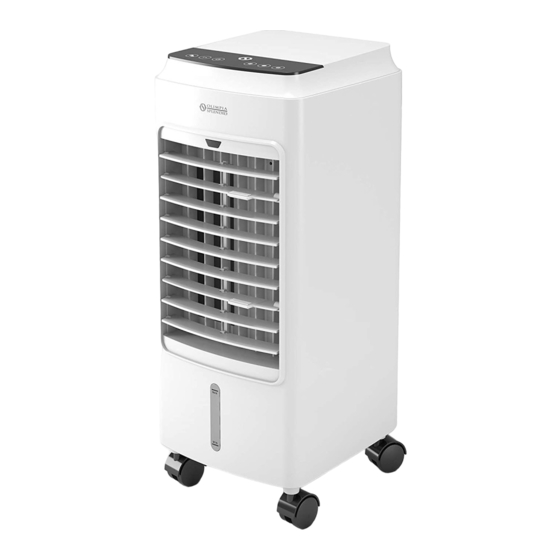
Summary of Contents for Olimpia splendid PELER 4D
- Page 1 PELER 4D INSTRUCȚIUNI DE INSTALARE, UTILIZARE ȘI ÎNTREȚINERE INSTRUCTIONS FOR INSTALLATION, USE AND MAINTENANCE IO...
- Page 3 1. Acest aparat poate fi utilizat de copii cu vârsta de la 8 ani și peste și de persoane cu capacități fizice, senzoriale sau mentale reduse sau cu lipsă de experiență și cunoștințe, dacă au primit supraveghere sau instrucțiuni privind utilizarea aparatului într-un mod sigur și înțeleg pericolele implicate.
- Page 4 1. This appliance can be used by children aged from 8 years and above and person with reduced physical, sensory or mental capabilities or lack of experience and knowledge if they have been given supervision or instruction concerning use of the appliance in a safe way and understand the hazards involved.
- Page 5 PELER 4D...
- Page 6 m i n . 1 5 c m...
-
Page 9: Index Principal
ILUSTRAȚII Ilustrațiile sunt grupate pe paginile inițiale ale manual INDEX PRINCIPAL Indexul principal al acestui manual este dat pe pagina„EN-3” 0 - AVERTIZARE 0.1 - Informații generale În primul rând, dorim să vă mulțumim pentru că ați ales aparatul nostru. 0,2 - SIMBOLU RI Pictogramele din capitolul următor oferă... - Page 10 • Indică faptul că pot fi adăugate informații suplimentare manuale. • Indică faptul că informațiile sunt disponibile în manualul de utilizare sau în manualul de instalare. ATENŢIE Indică faptul că personalul de asistență trebuie să manipuleze aparatul urmând manualul de instalare. RO - 2 PELER 4D...
-
Page 11: Table Of Contents
1. Acest document este limitat în utilizare la termenii legii și nu poate fi copiat sau transferat către terți fără autorizarea expresă a producătorului, OLIMPIA SPLENDID. Mașinile noastre pot fi modificate și unele piese pot apărea diferite de cele prezentate aici, fără ca acest lucru să afecteze în vreun fel textul manualului. - Page 12 și deconectați ștecherul de la priză. Pentru lucrări de reparații contactați numai centrele de service tehnic autorizate de producător și solicitați utilizarea pieselor de schimb originale. Nerespectarea acestui lucru poate afecta siguranța aparatului. RO - 4 PELER 4D...
- Page 13 14. Nu deconectați ștecherul în timpul funcționării. Pericol de incendiu sau electrocutare. 15. Nu așezați obiecte grele sau fierbinți deasupra aparatului. 16. Înainte de conectarea electrică a aparatului, asigurați-vă că datele plăcuței corespund cu cele ale rețelei de distribuție. Placa (23) este amplasată...
- Page 14 Nu folosiți aparatul lângă chiuvete și robinete. 37. Nu scufundați aparatul în apă sau în alte lichide. 38. Schimbați apa frecvent pentru a o menține curată. 39. Această unitate nu trebuie expusă la picurare sau stropire de apă. RO - 6 PELER 4D...
- Page 15 40. Nu instalați unitatea într-un spațiu restrâns, cum ar fi o bibliotecă sau un dulap încorporat. 41.Opriți și deconectați unitatea înainte de a umple cu apă. Asigurați-vă că apa este sub linia „MAX” a nivelului apei. 42. Unitatea nu trebuie reglată sau reparată de nimeni, cu excepția tehnicienilor de specialitate.
- Page 16 60. Dacă nu mai doriți să utilizați acest aparat, acesta trebuie să devină inoperant prin tăierea cablului de alimentare după scoaterea ștecherului din priză. Părțile periculoase ale aparatului trebuie să fie inofensive, mai ales că există riscul ca copiii să se joace cu el. RO - 8 PELER 4D...
- Page 17 0.4 - UTILIZARE CORECTA • Aparatul trebuie folosit doar pentru reîmprospătare, răcire și umidificare, cu unicul scop de a face temperatura din încăpere confortabilă. • Acest aparat este destinat numai pentru uz casnic sau similar. • O utilizare necorespunzatoare a aparatului cu posibile daune cauzate persoanelor, lucrurilor sau animalelor il elibereaza de orice responsabilitate pe OLIMPIA SPLENDID.
-
Page 18: Caracteristici Principale Și Funcționare
14 - Cutie de gheață (2) 15 - Telecomandă Cârlig de fixare rezervor de apă 16 - Filtru de aer Rezervor de apă 17 - Filtru de hârtie Rotile Receptor telecomandă 18 - Broșură de instrucțiuni RO - 10 PELER 4D... -
Page 19: Instalare
2 - INSTALARE 2.1 - MANIPULAREA APARATULUI • Transportul și manipularea aparatului trebuie efectuate în poziție verticală. • Rasturnați aparatul și asamblați cele patru roți (8) în locurile lor, împingându-le până la introducerea completă (Fig.B1). PRUDENȚĂ Mutarea răcitorului pe podele delicate (de exemplu, podea din lemn): •... -
Page 20: Utilizarea Aparatorului
3 - UTILIZAREA APARATULUI Modurile de funcționare a aparatului pot fi selectate fie folosind telecomanda furnizată, fie panoul de control. Recepția funcției selectate este confirmată de emiterea unui „bip” de către sonerie. RO - 12 PELER 4D... - Page 21 3.1 - PANOUL DE CONTROL ȘI TELECOMANDA (Fig.1) B4a B4c PE/OFFcheie B2.LED pentru răcire/ Tasta pentru răcire/umidificator umidificator B3a.„LED mod Tasta de mod normal”. B3b.„LED mod Tasta pentru viteza aerului natural”. B3c.„LED mod de odihnă B4a.LED de viteza Tasta de oscilație redusa B4b.LED de viteza Tasta temporizatorului medie B4c.LED de mare...
- Page 22 Înlocuiți bateriile când nu mai auziți un bip de la aparat când apăsați orice tastă de pe telecomandă. Utilizați întotdeauna baterii noi. Utilizarea bateriilor vechi sau diferite ar putea genera o funcționare defectuoasă a telecomenzii. RO - 14 PELER 4D...
- Page 23 Telecomanda folosește două baterii alcaline uscate de 1,5 V (AAA.) (Fig.E). Când înlocuiți bateriile, înlocuiți ambele și aruncați bateriile uzate în centrele de colectare adecvate și conform legii. • Dacă telecomanda nu este utilizată timp de câteva săptămâni sau mai mult, scoateți bateriile.
- Page 24 • Nu umpleți rezervorul (7) peste nivelul maxim indicat. • Folosiţi întotdeauna apă curată. • Aparatul poate produce un miros ușor sau apa din rezervor (7) poate fi ușor colorată la prima utilizare; aceste evenimente sunt normale și absolut inofensive pentru sănătatea utilizatorului. RO - 16 PELER 4D...
- Page 25 3.4 - INSTRUCȚIUNI DE UTILIZARE A.Introduceți ștecherul în priză. Când aparatul este pornit pentru prima dată, veți auzi un bip și va intra în stand-by. Toate butoanele vor fi dezactivate, cu excepția celui ON/OFF. Funcțiile pot fi activate sau modificate fie de la panoul de control, fie de la telecomandă.
- Page 26 Când aparatul funcționează, apăsați această tastă pentru a porni sau opri funcția de răcire/ umidificator. Apăsați-l o dată pentru a porni funcția; pompa (4) și LED-ul de răcire/umidificator (B4) se aprind. Apăsați a doua oară pentru a opri funcția. RO - 18 PELER 4D...
-
Page 27: Întreținere Și Curățare
Nu permiteți pompei (4) să funcționeze fără apă în rezervor (7) pentru a preveni deteriorarea acesteia. 3.4.g - Utilizarea recipientelor cu gheață (14) Aparatul vine cu două cutii de gheață (14) care pot fi folosite pentru a răci aerul pe care îl emană. - Page 28 Lăsați filtrele să se usuce, apoi puneți-le în corpul aparatului (15). g. Fixați filtrul de aer (16) cu ambele șuruburi (22) (fig.P). Nu folosiți aparatul decât dacă filtrele sunt instalate corect. Nu folosiți aparatul dacă filtrele sunt deteriorate sau uzate. RO - 20 PELER 4D...
-
Page 29: Înainte De Depozitarea Aparatorului La Sfârșitul Sezonului
4.1.c - Curățarea rezervorului Dacă aparatul nu va fi folosit pentru o perioadă lungă de timp: A. Deconectați-l de la priză. b. Rotiți cârligul (6) cu 90° și deschideți rezervorul (7) (fig. Q). c. Mutați cu grijă aparatul într-o poziție potrivită pentru descărcarea apei. d. Scoateți capacul (3) pentru a goli rezervorul (7) (fig e. -
Page 30: Eliminarea
în magazinul de la care ați cumpărat produsul. Acest regulament este valabil numai în statele membre UE. 7 - SPECIFICAȚII Pentru datele tehnice, consultați plăcuța cu caracteristici (23) aplicată pe produs. RO - 22 PELER 4D... - Page 31 ILLUSTRATIONS The illustrations are grouped on the initial pages of the manual MAIN INDEX The main index of this manual is given on page “EN-3” 0 - WARNINGS 0.1 - General information First of all, we would like to thank you for choosing our appliance. 0.2 - SYMBOLS The pictograms in the next chapter provide the necessary informa- tion for correct, safe use of the machine in a rapid, unmistakable...
- Page 32 • Indicates that the assistance personnel must handle the appliance following the installation manual. ATTENTION • Indicates that there may be additional information in attached manuals. • Indicates that information is available in the user manual or in the installation manual. ATTENTION Indicates that the assistance personnel must handle the appliance following the installation manual. EN - 2 PELER 4D...
- Page 33 1. This document is restricted in use to the terms of the law and may not be copied or transferred to third parties without the ex- press authorization of the manufacturer, OLIMPIA SPLENDID. Our machines are subject to change and some parts may ap- pear different from the ones shown here, without this affecting the text of the manual in any way.
- Page 34 For repair work contact solely the technical service centres au- thorised by the manufacturer and ask for original spare parts to be used. Failure to do this can affect the safety of the appliance. EN - 4 PELER 4D...
- Page 35 14. Do not disconnect the power plug during functioning. Fire or electrical shocks hazard. 15. Do not place heavy or hot objects on top of the appliance. 16. Before electrically connecting the appliance, make sure the plate data correspond to those of the distribution network. The plate (23) is located on the sides of the appliance (Fig.C).
- Page 36 37. Do not immerse the appliance in water or in other liquids. 38. Change the water frequently to keep it clean. 39. This unit shall not be exposed to dripping or splashing water. EN - 6 PELER 4D...
- Page 37 40. Do not install the unit in a confined space, such as a bookcase or built-in cabinet. 41. Switch OFF and unplug the unit before filling with water. Make sure the water is below the “MAX” water level line. 42. The unit should not be adjusted or repaired by anyone except specialized technicians.
- Page 38 Hazardous parts of the appliance must be rendered harmless, especially as there is a risk of chil- dren playing with it. EN - 8 PELER 4D...
- Page 39 • This appliance is only intended for a domestic use or similar. • An improper use of the appliance with possible damages caused to people, things or animals releases OLIMPIA SPLENDID from any responsibility. 0.5 - HAzARDOUS zONES • The appliance must not be installed in places with inflammable gas- es, explosive gases or excess humidity (laundries, greenhouses, etc.), or in places with other machines that generate a strong heat...
- Page 40 13 - Upper water compartment Water pump 14 - Ice box (2) Power cord 6 - Water tank fixing hook 15 - Remote control 16 - Air filter Water tank 17 - Paper filter Wheels 18 - Instruction booklet Remote control receiver EN - 10 PELER 4D...
- Page 41 2 - INSTALLATION 2.1 - HANDLING THE APPLIANCE • Transport and handling of the appliance must be carried out in ver- tical position. • Tip the appliance over and assemble the four castors (8) in their seats, pushing them until fully inserted (Fig.B1). CAUTION Moving the cooler on delicate flooring (e.g.
- Page 42 3 - USE OF THE APPLIANCE The appliance operating modes can be selected either using the remote control supplied or the control panel. The reception of the selected function is confirmed by the emission of a “beep” by the buzzer. EN - 12 PELER 4D...
- Page 43 3.1 - CONTROL PANEL AND REMOTE CONTROL (Fig.1) B4a B4c A1. ON/OFF key B2. Cooling/Humidifier LED A2. Cooling/Humidifier key B3a. “Normal” mode LED A3. Mode key B3b. “Natural” mode LED A4. Air speed key B3c. “Rest” mode LED B4a. Low speed LED A5. Oscillation key B4b. Medium speed LED A6. Timer key B4c. High speed LED A7. Display B5. Oscillation LED B1.
- Page 44 Replace the batteries when you no longer hear a beep from the appliance when pressing any key on the remote control. Always use new batteries. The use of old or different batteries could generate malfunctioning of the remote control. EN - 14 PELER 4D...
- Page 45 The remote control uses two dry alkaline 1.5V batteries (AAA.) (Fig.E). When replacing batteries, replace both and dispose of the dead batteries in the appropriate collection centres and as required by law. • If the remote control is not used for several weeks or longer, remove the batteries. Any leaks from the batteries could damage the remote control. Do not re-charge or disassemble the batteries.
- Page 46 • Always use clean water. • The appliance could produce a slight smell or the water in the tank (7) could be slightly coloured during first use; this events are normal and absolutely harmless for the user’s health. EN - 16 PELER 4D...
- Page 47 3.4 - INSTRUCTIONS FOR OPERATION a. Insert the plug in the power socket. When the appliance is switched on for the first time, you will hear a beep and it will go into stand-by. All buttons will be disabled, with the exception of the ON/OFF one. The functions can be enabled or modified either from the control panel or from the remote control.
- Page 48 3.4.f - Cooling/humidifier key (A2) When the appliance is running, press this key to start or stop the cooling/humid- ifier function. Press it once to start the function; the pump (4) and the cooling/humidifier LED (B4) switch on. Press it a second time to stop the function. EN - 18 PELER 4D...
- Page 49 Do not allow the pump (4) to operate without water in the reservoir (7) in order to prevent damage to the same. 3.4.g - Use of ice box containers (14) The appliance comes with two ice boxes (14) that can be used to cool down the air it emits. The use of the “cooling” function with an ice box (14) placed in the water com- partment quickly reduces the temperature of the air emitted by the appliance by 3° C approximately.
- Page 50 Remove the paper filter (17) from the body of the appliance. d. Clean both filters (16 and 17) with water and neutral soap. Rinse the filters well with clean water. e. If necessary, use a soft brush to clean the air filter more deeply (16). Let the filters dry, then replace them into the body of the appliance (15). g. Fix the air filter (16) with both screws (22) (fig.P). Do not use the appliance unless the filters are properly installed. Do not use the appliance if the filters are damaged or worn. EN - 20 PELER 4D...
- Page 51 4.1.c - Cleaning the reservoir If the appliance is not going to be used for a long period of time: a. Unplug it from the power outlet. b. Rotate the hook (6) by 90° and open the reservoir (7) (fig. Q). c. Carefully move the appliance in position suitable to unload water. d. Remove the cap (3) to empty the reservoir (7) (fig e.
- Page 52 Further information about the recycling of this product can be obtained from your local town hall, your refuse collection service, or in the store at which you bought the product. This regulation is valid only in EU member states. 7 - SPECIFICATIONS For the technical data, consult the characteristics plate (23) affixed to the product. EN - 22 PELER 4D...
Need help?
Do you have a question about the PELER 4D and is the answer not in the manual?
Questions and answers