
Related Manuals for Asko OT8637A/BO6CO4I3-42


Summary of Contents for Asko OT8637A/BO6CO4I3-42
- Page 1 Instructions for use OVEN OT8637A / BO6CO4I3-42 OT8637S / BO6CO4I3-42 OT8637A1 / BO6CO4I3-42...
- Page 2 User manual EN 3 - EN 31 Pictograms used Important information EN 2...
-
Page 3: Table Of Contents
CONTENTS Your oven Introduction Description Guide rails/Telescopic guide rails Accessories Door Cooling fan Control panel First use Before using the appliance for the first time Switching on and settings Oven settings Choosing the settings Selecting additional functions Starting the cooking process Switching off the oven Operation Culisensor... -
Page 4: Your Oven
YOUR OVEN Introduction Congratulations on the purchase of this ASKO oven. This product is designed to offer optimum user-friendliness. The oven has a wide range of settings enabling you to select the correct cooking method every time. This manual shows how you can best use this oven. -
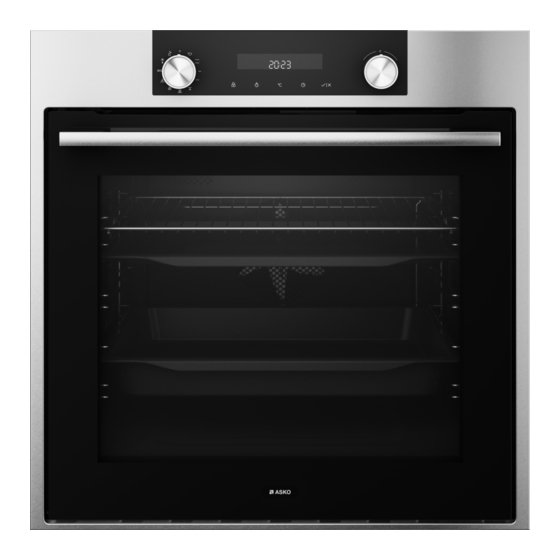
Page 5: Description
YOUR OVEN Description 1. Control panel 2. Rack levels 3. Oven door 4. Handle Guide rails/Telescopic guide rails • The oven has four or five guide rails (Level 1 to 4/5), depending on the model. Level 1 is mainly used in combination with bottom heat. The two upper levels are mainly used for the grill function. -
Page 6: Accessories
YOUR OVEN Accessories Your appliance is accompanied by a range of accessories, depending on the model. Only use original accessories; they are specially suited to your appliance. Be sure that all the accessories that are being used are able to withstand the temperature settings of the chosen oven function. Note: not all accessories are suitable/available for every appliance (it may also differ by country). -
Page 7: Door
YOUR OVEN Door • The door switches interrupt the operation of the oven when the door is openegd during use. The oven continues operating when the door is closed. • This oven has a ‘Soft close door system’. When closing the oven door, this system dampens the movement, from a certain angle, and silently closes the oven door. -
Page 8: Control Panel
YOUR OVEN Control panel 10 1112 Quick preheat Top heat + bottom heat Small grill Large grill Grill with fan Hot air + bottom heat Hot air Bottom heat with fan 10. ECO cooking 11. Defrosting 12. Aqua Clean 13. Display (cooking information and timer) 14. -
Page 9: First Use
FIRST USE Before using the appliance for the first time • Upon receiving the appliance, remove all parts, including any transport equipment, from the oven. Clean all accessories and utensils with warm water and regular detergent. Do not use any abrasive cleaners. -
Page 10: Use
Switching on and settings After connecting your appliance or after an extended power outage, 12:00 will flash on the display and the symbol will light up. Set the time of day. SETTING THE CLOCK Rotate the SETTINGS KNOB (-/+) and first set the minutes; then, the cursor will switch to hours. After three seconds, the settings will be saved. - Page 11 SETTINGS To change the settings, rotate the setting knob to the right and hold it for three seconds. Press the start/sop icon to scroll through respective settings or parameters. To change a parameter, rotate the setting knob to the right or to the left. BRIGHTNESS LEVEL Select between three different options of brightness levels.
- Page 12 By pressing the start/stop icon, user can go out of settings menu back to standby mode. You can go out of settings manu also if you hold selection knob on the left for 3 sec, or it you turn the system knob.
-
Page 13: Oven Settings
Oven settings Use the table to select the right oven function. Also consult the cooking instructions on the food packaging. Function/ Description Recommended temp. °C Quick preheat Use this function to heat the oven quickly to the desired temperature. 160 °C This function is not suitable for cooking food! •... - Page 14 Function/ Description Recommended temp. °C Large grill The heat comes from the top element and the grill element. This setting is particularly 240 °C useful for dishes and baked food that require a real bottom crust or browning. Use this just before the end of the baking or roasting time.
- Page 15 Function/ Description Recommended temp. °C Bottom heat + fan The bottom element heats the dish and the heat is distributed by the fan. This setting 180 °C is used for baking yeasted pastry and preserving fruit and vegetables. • Place the tray at level 2. •...
- Page 16 Each oven function has a number of basic or standard settings that you can adjust. You adjust the settings by pressing the relevant button (before pressing the ‘start/stop’ button). Certain settings are not available for all programmes; if this is the case you will be alerted by a sound signal.
-
Page 17: Choosing The Settings
Choosing the settings Each cooking system features basic or default settings which can be adjusted. Adjust the settings by pressing the relevant key (before pressing the START/STOP key). Some settings are not available with some programs; an acoustic signal will remind you of such cases. - Page 18 TIMER FUNCTIONS First rotate the COOKING SYSTEM SELECTOR KNOB; then, set the temperature. Touch the TIMER key several times to select the symbol. The icon for the selected timer function will light up and the adjustable cooking start/end time will flash on the display. Other icons are dimly lit. Press START to start the cooking process.
-
Page 19: Selecting Additional Functions
Setting the minute minder The minute minder can be used independently of the oven operation. The longest possible setting is 24 hours. During the last minute, the minute minder is displayed in seconds. After the set time expires, the oven will automatically stop operating (end of cooking). An acoustic signal will be heard which you may turn off by touching any key. - Page 20 Oven lighting Oven lighting is switched on automatically when the door is opened or when the oven is switched on. After the end of the cooking process, the light will remain on for another minute. The light inside the oven can be switched on or off by pressing the LIGHT key. 5sek Acoustic signal Loudness of the acoustic signal can be set when no timer function is activated...
-
Page 21: Starting The Cooking Process
Starting the cooking process Start the cooking process by pressing the START/STOP key and holding it for a while. Switching off the oven Turn the COOKING SYSTEM SELECTOR KNOB to position »0«. After the end of the cooking process and after the oven has been switched off, declining temperature is displayed down to 50 °C. -
Page 22: Operation
OPERATION Culisensor If the culisensor is plugged in, the culisensor screen will be shown and a small culisensor icon will appear. The oven operates until the food core reaches the set temperature. The core temperature is measured by means of the temperature probe. 1. - Page 23 OPERATION Hoof/leg well-done 75 ºC Hoof/leg slightly pink 65 - 68 ºC Pork loin slightly pink 65 - 70 ºC Pork shoulder well-done 75 ºC Pork belly/stuff ed well-done 75 - 80 ºC Pork belly well-done 80 - 85 ºC Roast pork hoof well-done 80 - 85 ºC...
-
Page 24: Maintenance
MAINTENANCE Cleaning the oven Clean the oven regularly to prevent fat and leftover food from accumulating, especially on interior and exterior surfaces, the door and seal. • Clean exterior surfaces with a soft cloth and soapy warm water. Wipe afterwards with a clean, damp cloth and dry the surfaces. -
Page 25: Removal And Installation Of The Oven Door
MAINTENANCE Removal and installation of the oven door Keep your fingers away from the hinges of the oven door. The hinges are spring loaded and can cause injury if they spring back. Make sure that the hinge latches are applied correctly to lock the hinges. Remove the oven door 1. -
Page 26: Removing The Oven Window
MAINTENANCE Removing the oven window The glass in the oven door can be cleaned from the inside, but you do need to remove the glass from the door to do this. First remove the oven door (see chapter ‘Removing the oven door’). •... -
Page 27: Aqua Clean Function
MAINTENANCE Aqua Clean function With aqua clean and a damp cloth, you can easily remove grease and dirt from the oven walls. Using aqua clean Only use aqua clean when the oven has cooled down fully. It is more difficult to remove dirt and grease if the oven is hot. -
Page 28: Replacing The Oven Lamp
MAINTENANCE Replacing the oven lamp The lamp in this household appliance is only suitable for illumination of this appliance. The lamp is not suitable for household room illumination. The lamp (E14, 230-240 V, 25 W, 300 °C) is a consumer item and therefore does not fall under the guarantee. -
Page 29: Malfunctions
MALFUNCTIONS General Try the solutions below if you have problems with your oven. You could save yourself the time and effort of an unnecessary phone call to customer services. The food is not cooked • Check whether the timer has been set and you have pressed the ‘start button’. •... - Page 30 MALFUNCTIONS Storing and repairing the oven Repairs may only be performed by a qualified service technician. If maintenance is required, remove the plug from the socket and contact ASKO customer services. Have the following information to hand when you call: •...
-
Page 31: Environmental Aspects
ENVIRONMENTAL ASPECTS Disposal of the appliance and packaging This product is made from sustainable materials. However, the appliance must be disposed of responsibly at the end of its useful life. The government can provide you with information about this. The appliance packaging can be recycled. The following materials have been used: •... - Page 32 The appliance rating label is located on the inside of the appliance. When contacting the service department, have the complete type number to hand. You will find the addresses and phone numbers of the service organisation on the guarantee card.