Table of Contents
Advertisement
Quick Links
Advertisement
Table of Contents

Related Manuals for Cookology TCH603


Summary of Contents for Cookology TCH603
- Page 1 Ceramic Hob Instruction Manual / Installation Manual MODEL: TCH603...
- Page 2 Warning 1)The appliance is not to be used by persons (including children) with reduced physical, sensory or mental capabilities, or lack of experience and knowledge, unless they have been given supervision or instruction. children being supervised not to play with the appliance. 2)WARNING: If the surface is cracked, switch off the appliance to avoid the possibility of electric shock, for hob surfaces of glass-ceramic or similar material which protect live parts.
- Page 3 Warning 13)WARNING: Unattended cooking on a hob with fat or oil can be dangerous and may result in fire. 14)NEVER try to extinguish a fire with water, but switch off the appliance and then cover flame e.g. with a lid or a fire blanket. 15)CAUTION: The cooking process has to be supervised.
-
Page 4: Environmental Note
Environmental note o The packaging materials that we uses are environmentally friendly and can be recycled. o Please discard all packaging material with due regard for the environment. -
Page 5: Important Safety Information
Important safety information Your safety is of the utmost importance to us. Please make sure that read this instruction booklet before attempting to install or use the appliance. If you are unsure of any of the information contained in this booklet, please contact the Customer Care Department. - Page 6 Child Safety o We strongly recommend that babies and young children are prevented from being near to the appliance and not allowed to touch the appliance at any time. During and after use, all surfaces will become hot. o If it is necessary for younger family members to be in the kitchen, please ensure that they are kept under close supervision at all times.
- Page 7 Cleaning o Cleaning of the hob should be carried out on a regular basis. o IMPORTANT: Before attempting to clean the appliance, it should be disconnected from the mains and allowed to cool. o Great care should be taken whilst using this appliance and when following the cleaning procedure.
-
Page 8: Specifications
Specifications Product dimensions: Aperture dimensions: Depth: 520 mm Depth: 490 mm Width: 590 mm Width: 560 mm Height: 46 mm Product specifications: o 2 x 1.80 kW zone (Ø 190mm) o 2 x 1.20 kW zone (Ø 155 mm) o Front touch control operation o 4 individual residual heat indicators o Safety lock o Timer... - Page 9 Electrical details 380-415V 2N~; 50/60Hz Rated Voltage: Supply Connection: 30 A Max Rated Inputs: 6.0 kW 5 core x1.5mm² Mains Supply Lead: For future reference please record the following information which can be found on the rating plate and the date of purchase which can be found on your sales invoice.
-
Page 10: Using The Ceramic Hob
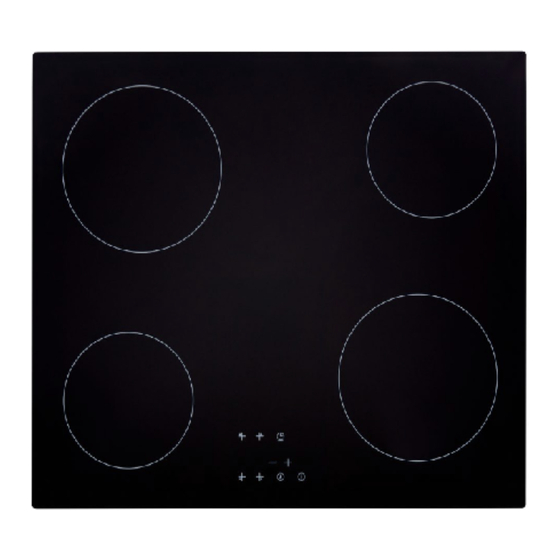
Control panel layout Heating zone selection controls Timer control Minus key Child lock key Plus key ON/OFF control Using the ceramic hob Before first use IMPORTANT: You should clean the ceramic hob surface. Please see the “Cleaning and maintenance” section. o You should switch on one cooking zone at a time, for 5 minutes at the maximum setting. -
Page 11: Locking The Controls
To start cooking 1. Touch the ON/OFF control. After power on, the buzzer beeps once, all displays show “ – “ or “ – – “, indicating that the hob has entered the state of standby mode. 2.Place a suitable pan on the cooking zone that you wish to use. •... -
Page 12: Using The Timer
To unlock the controls 1. Make sure the hob is turned on. 2. Touch and hold the child lock key for 3 seconds, The “Lo “ on the timer indicator will disappear. 3. After the “Lo “ on the timer indicator disappeared.You can start using your hob. - Page 13 4. Touch timer control again, the “1” will flash. 5. set the time by touching the ”-“ or ”+” control (e.g.9), now the timer you set is 95 minutes. 6. When the time is set, it will begin to count down immediately.
- Page 14 4. Touch timer control again, the “1” will flash. 5. set the time by touching the ”-“ or ”+” control (e.g.9), now the timer you set is 95 minutes. 6. When the time is set, it will begin to count down immediately. The display will show the remaining time NOTE: The red dot next to power level indicator will illuminate indicating that zone is at regular time.
-
Page 15: Hob Guidelines
Cancelled the timer 1. Touching the heating zone selection control that you want to cancel the timer 2. Touching the timer control, the indicator flash 3. Touch the “-” and " +" at the same time, the timer is cancelled. IMPORTANT: The countdown timer controls one heating zone. -
Page 16: Cleaning And Maintenance
o The best thickness for the bottom of the pans is 2 – 3 mm of enamelled steel and 4 – 6 mm for stainless steel with sandwich type bottoms. o If these rules are not followed, then there will be a great loss of heat and energy. -
Page 17: Installation
After each use o Wipe the appliance over with a damp cloth. o Dry the appliance by rubbing the surface with a clean cloth. Installation The installation must be carried out by a suitably qualified person, in accordance with the current version of the following. - Page 18 Installing the appliance o Cut a hole in the worktop that corresponds with the drawing shown above. o IMPORTANT: You must observe the ventilation requirements shown in the drawing opposite. MIN. 1.5cm o The air intake vent can be at the rear wall or in the base area.
- Page 19 o IMPORTANT: There are ventilation holes around the outside of the hob. YOU MUST ensure that these holes are not blocked by the work top, when you put the hob into position (see drawing opposite). o NOTE: Your appliance comes fitted with a sealing strip already attached to the underside of the hob.
- Page 20 Electrical connection This appliance must be installed by a qualified person in accordance with the latest edition of the I.E.E. Regulations compliance with instructions. Before connecting the appliance, make sure that the supply voltage marked on the rating plate corresponds with your mains supply voltage.
- Page 21 380-415V~ For 380-415V~ earthed one-phase connection, bridges connect 4-5 terminals, safety wire to o The cable connections must be in accordance with the diagram located on the bottom of the hob (see above). The links must also be positioned as indicated. o You should use a good quality screwdriver to carefully, fully tighten ALL of the terminal screws.
-
Page 22: My Appliance Isn't Working Correctly
Replacing the mains supply cable If the mains supply cable is damaged, then it must be replaced by an appropriate replacement. The mains supply cable should be replaced in accordance with the instructions on the next page: o Switch the appliance off at the socket. o Open the terminal block on the underside of the hob. - Page 23 * This is normal; the sound will disappear when the zone heats up. o The cooking zones have become discoloured. * This maybe caused by burnt on remnants of food. This will not affect the working of the appliance. However you should make sure that the cleaning instructions are being followed regularly.
Need help?
Do you have a question about the TCH603 and is the answer not in the manual?
Questions and answers