Advertisement
Quick Links
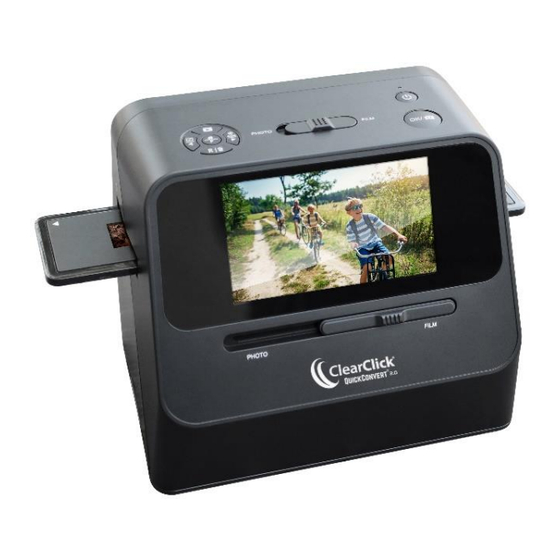
22 MP Photo, Slide, & Negative Scanner
User's Manual & Quick Start Guide
WATCH: Video Tutorial
How To Set Up Your QuickConvert 2.0
www.ClearClick.tech/setup
2-Year Warranty & USA-Based Tech Support
For tech support, email us at:
support@clearclick.tech
Extend your warranty to 3 years for free by registering at:
www.clearclicksoftware.com/Register/
www.ClearClick.tech
Advertisement

Subscribe to Our Youtube Channel
Related Manuals for ClearClick QUICKCONVERT 2.0


Summary of Contents for ClearClick QUICKCONVERT 2.0
- Page 1 22 MP Photo, Slide, & Negative Scanner User’s Manual & Quick Start Guide WATCH: Video Tutorial How To Set Up Your QuickConvert 2.0 www.ClearClick.tech/setup 2-Year Warranty & USA-Based Tech Support For tech support, email us at: support@clearclick.tech Extend your warranty to 3 years for free by registering at: www.clearclicksoftware.com/Register/...
- Page 2 Extend Your Warranty for FREE! Extend your warranty by one year for free simply by registering your product at: www.ClearClick.tech Browse All Our Products! If you’re looking for fun, unique, and easy-to-use technology, we’ve got it! Please visit our website to browse all of our products: www.ClearClick.tech...
-
Page 3: What's In The Box
• User’s Manual • 32 GB SD Memory Card • PhotoPad Pro Software License Card NOTE: Have a part that’s missing or broken? Please contact us directly at parts@clearclick.tech. For all other technical issues or support, please contact us at support@clearclick.tech... -
Page 4: Device Diagram
Device Diagram... - Page 5 WATCH: Video Tutorial www.ClearClick.tech/setup/ Quick Start Guide 1. (Optional) Install and charge battery. Locate the rechargeable lithium battery included with the scanner. Note: If it’s missing, check the very bottom of the box underneath the packing materials. Remove it from its packaging and install it by itself in the battery compartment in the back of the scanner.
- Page 6 Before using the scanner for the first time, please charge the battery at least 2-3 hours. Use the included USB cable to plug the scanner into the included USB wall power adapter. The blue LED next to the power button will illuminate when the battery is charging.
- Page 7 3. Power on the scanner. Hold down the power button until the scanner turns on. You will see the main menu of the scanner. You’re ready to start scanning! 4. How to scan PHOTOS: a. Set BOTH switches (on the front and top of the scanner) to “PHOTO.”...
- Page 8 d. On the left side of the screen, the scanner will display the size of photo that it is set to scan – for example, PHOTO: 4 X 6”. To adjust the size of photo being scanned, press the “Size” (left ) button on top of the scanner.
- Page 9 scan photos without the base by simply placing the scanner on top of the photo. To scan a photo, simply press the “OK/Scan” button and your photo will be scanned in one second or less and saved onto the SD memory card. g.
- Page 10 5. How to scan SLIDES & NEGATIVES: a. Set BOTH switches (on the front and top of the scanner) to “FILM.” b. In the device’s main menu, choose the “Scan Film” option and press the “OK” button. c. Next, the scanner will ask you what type of film you would like to scan.
- Page 11 d. Locate the appropriate slide or negative holder for the type of film you’d like to scan. Each holder is described below: 35mm Negative Holder 2 large openings 35mm Slide Holder = 3 openings 110 Film Holder = 8 openings 126 Film Holder = 7 openings e.
- Page 12 f. Insert the slide or negative holder into the scanner. If the holder is marked with a insert it through the right side of the scanner. If the holder is marked with a , insert it into the left side of the scanner.
- Page 13 g. Adjust the holder so that the image is visible on the LCD screen of the scanner. To scan an image, simply press the “OK/Scan” button and your photo will be scanned in one second or less and saved onto the SD memory card.
- Page 14 To move to the red/green/blue settings, press the Play button. Then, use the right and left arrow keys to adjust the setting. To save the settings, press the “OK” button. 6. Download scanned images to your computer & touch up with software. a.
- Page 15 e. The memory card will now appear on your computer as a removable disk drive. Access it as you normally do a disk drive on your system and browse to the images. The photos will be in the “DCIM”/”100MEDIA” folder (or similar) on the memory card.
- Page 16 How To Clean The Scanner For Film Scanning Use the supplied brush to clean the backlight panel: turn off and disconnect the QuickConvert® 2.0, insert the brush in the slot where you would normally insert the film holders, and brush gently. How To Adjust Brightness &...
- Page 17 How To View or Delete Scanned Images On The Scanner (To view scanned images on your computer instead, please see Quick Start Guide step #6.) If you’d like, you can browse scanned images before transferring them to your computer. To do this, while the scanner is turned on, simply press the play (►) button on the scanner.
- Page 18 How To Connect The Scanner To Your TV If you’d like, you can connect the scanner to your TV to view images while you are scanning them, or during playback mode (see above section). (Note: To view scanned images on your computer instead, please see Quick Start Guide step #6.) To see images on your TV, simply use the included HDMI cable to plug the scanner’s HDMI OUT port into...
- Page 19 Some users like to do this so that the file/image is encoded with the time & date that the images were originally taken. To do this, select the Calendar icon in the main menu to set the date. How To Use The PhotoPad Pro Software To get started with the included PhotoPad Pro software (published by NCH Software), simply follow the steps below.
- Page 20 NOTE: Having trouble with your serial number or with activation? Please email us at licenses@clearclick.tech. 3. Run the software and choose to activate the software by clicking File/PhotoPad → Register. Enter the activation code that was emailed to you.
- Page 21 Explanation of Icons/Indicators...
- Page 22 Explanation of Icons/Indicators (Continued)
-
Page 23: Faqs And Troubleshooting
FAQ’s & Troubleshooting 1. How do I transfer scanned images to my PC or Mac? Please see pages 14-15. 2. My film appears as film/negatives on the scanner, not as photos! Please make sure you are setting the scanner to the appropriate type of film/slides. - Page 24 5. I have a question that isn’t listed here, or need further support. No problem! Please email us at support@clearclick.tech with your order number, and we will get back to you as soon as possible.
-
Page 25: Technical Specifications
Technical Specifications... -
Page 26: Need Help
Need help? Open a support ticket and we’ll get back to you ASAP. We are a USA based small business. Please email us at support@clearclick.tech. www.ClearClick.tech...
Need help?
Do you have a question about the QUICKCONVERT 2.0 and is the answer not in the manual?
Questions and answers