Table of Contents
Advertisement
Quick Links
Table of Contents
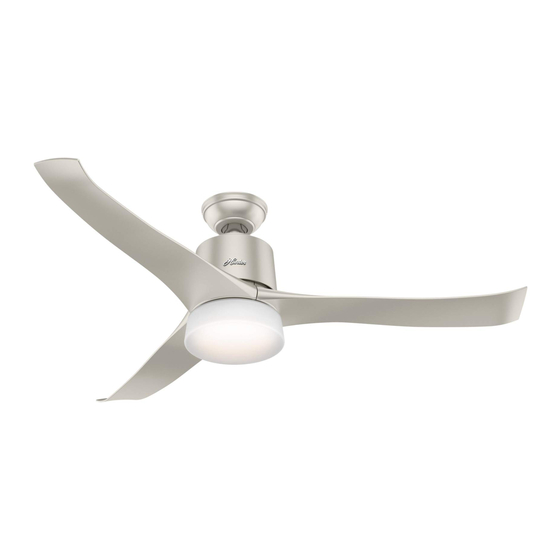
Congratulations on purchasing your new
Hunter® ceiling fan! It will provide comfort
and performance in your home or office for
many years. This installation and operation
manual contains complete instructions for
installing and operating your fan.
We are proud of our work and appreciate
the opportunity to supply you with the best
ceiling fan available anywhere in the world.
Light Kit
13
What to Expect with
Your Installation
7 feet
Downrod
Wiring
6
Remote
Control Cradle
Remote Control
15
Tools Needed
30 inches
2
Ladder
3
Canopy
9
10
Operation,
Maintenance & Cleaning
16
17
1
Mounting Options
Ceiling Bracket
4
Blades
Switch Housing
11
Troubleshooting
?
?
18
5
12
?
19
Advertisement
Table of Contents

Related Manuals for Hunter Symphony


Summary of Contents for Hunter Symphony
- Page 1 Table of Contents Congratulations on purchasing your new Hunter® ceiling fan! It will provide comfort What to Expect with Your Installation Tools Needed Mounting Options Ceiling Bracket and performance in your home or office for many years. This installation and operation manual contains complete instructions for installing and operating your fan.
-
Page 2: What To Expect With Your Installation
Assess location c.1 - All wiring must be in accordance with national and local electrical codes ANSI/NFPA 70. If you are unfamiliar with wiring, use a qualified electrician. c.2 - Use only Hunter replacement parts. You may need a Standard Downrod This equipment has been tested and found to comply with the limits for a friend to help you. -
Page 3: Tools Needed
Tools Needed Pliers Wire Strippers Ladder Do not discard the hardware bags or mix parts from different bags. Make note of the symbol printed on each hardware bag. The symbols can be used to identify Power Drill 9/64” Drill Bit the appropriate hardware for each step. -
Page 4: Mounting Options
CEILING Mounting Options If you have a flat ceiling: Standard Hang your fan by a standard downrod (included). Support Support Mounting Structure Structure If you have an angled ceiling: Ceiling 1. You will need a longer downrod (sold separately). Outlet Box Angled (required) 2. -
Page 5: Ceiling Bracket
Ceiling Bracket For angled ceilings, point opening toward peak. Use wood screws Use machine screws (included) when securing (provided with outlet to support structure with box) when securing to approved electrical outlet existing ceiling fan-rated box. Drill 9/64” pilot holes outlet box. - Page 6 Downrod skip to next page Standard Downrod for ceilings 8-10’ high If you need a different downrod length follow these steps: Steps 1-5 to remove standard downrod pipe Longer Downrod for angled ceilings or ceilings 10’ or higher Shorter Downrod for fans installed close to ceiling Steps 6-10 to reassemble with new pipe...
- Page 7 Downrod (continued) 3/8” 8” KEEP! Remove the pre-installed The wires can be cut, but Hand tighten the downrod (at Tighten the setscrew setscrew so that the downrod leave at least 8” extending least 4-5 full turns) until it stops. with pliers. DO NOT can be inserted.
- Page 8 Downrod (continued) DO NOT PICK THE FAN UP BY THE Put the wires and downrod through the canopy. Let the canopy sit loosely on top CANOPY OR WIRES. Place the downrod of the fan. ball into the slot in the ceiling bracket. WARNING: This receiver cannot be installed in conjunction with any other receiver or hard-wired wall control.
- Page 9 Wiring Not for use in applications where the fan does not have a Note: To connect the wires, wall switch. hold the bare metal leads OPTION 2: together and place a wire connector over them, then twist clockwise until tight. For Dual Switches OPTION 1: For a Single Switch...
- Page 10 Canopy Screw Holes Position the canopy so that, when Lift the canopy into place so that Insert the two canopy screws lifted into place, the canopy fits into the screw holes are aligned. found in the hardware bag. the hanging bracket as shown.
- Page 11 Blades Lightly attach the blade irons to the motor with screws found in the hardware bag, then securely tighten after both screws are attached. Repeat this step for each blade assembly.
-
Page 12: Switch Housing
Switch Housing Screw two light kit screws from the Thread theplug connector from the fan Insert the third screw, found in the hardware bag halfway into the motor through the upper switch housing. Wrap hardware bag, into place and then housing. -
Page 13: Light Kit
Light Kit Screw two light kit screws from the Connect the the plugs from the switch housing Insert the third screw, found in the hardware bag halfway into the switch and the light kit. Push excess wiring into the hardware bag, into place and then housing housing. - Page 14 Light Kit (continued) Notch Install a light bulb in each socket. Lift the globe and align the notches in the When necessary, replace with bulbs of globe with the tabs in the light kit. Attach the same wattage. the globe by lifting and twisting clockwise See next page for remote until it rests firmly in place.
-
Page 15: Remote Control
Remote Control Battery Door Phillips Head Screw To access the battery compartment, remove The remote transmitter is already paired to the the small Phillips head screw that secures the receiver and ready to use. battery door to the transmitter assembly. The Note: If your need to pair your remote, remove the battery battery should be installed with the positive door. - Page 16 Remote Control Cradle You have two options to install the included remote control cradle to the wall. Choose which path works best for you. Option 1: Using Screws Option 2: Using Adhesive Strip Choose your cradle installation location. Slide the cradle onto the If you are installing into drywall, drill two mounted bracket.
- Page 17 Operation, Maintenance, and Cleaning Light Button Button Control Fan Operation: Cleaning the fan - use soft brushes or cloths Press and quickly release the fan button on the to prevent scratching. Cleaning products remote control to turn the fan OFF or ON. Use the may damage the finishes.
-
Page 18: Download The App
Download the app: Visit your app store and search Simpleconnect™ Wi-Fi to find the app. Launch the app. Note: The HomeKit identification number is located on the front cover of the English side of the Parts Guide. Follow the onscreen prompts to set up your fan. Fan not showing up in the list? Pull down to refresh! Need to install the app later? -
Page 19: Troubleshooting
Apple, Apple TV, iPhone, iPad, iPod touch, and Siri are trademarks of Apple Inc., registered in the U.S. and other countries. HomeKit is a trademark of Apple Inc. held at close range • Change battery. Looking for dependable home heating and cooling? Rely on Hunter for quality and long-lasting products.
Need help?
Do you have a question about the Symphony and is the answer not in the manual?
Questions and answers