
Related Manuals for AussieCarHoists High-Lift Equipment YL-350W


Summary of Contents for AussieCarHoists High-Lift Equipment YL-350W
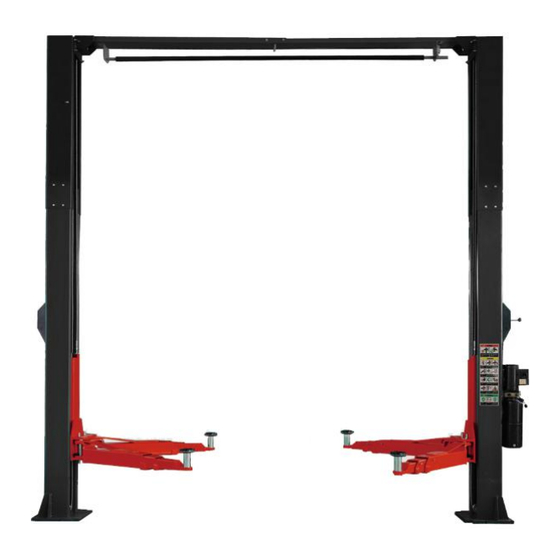
- Page 1 Installation and operation manual TWO POST CLEAR FLOOR CAR HOIST TWO POST BASE PLATE CAR HOIST Model:YL-350W Model:YL-250W...
- Page 2 Mention of no responsibility 1:Please check whether the content of articles is in accordance with the list when the customer accepts the equipment.Please check if your equipment is damaged or lost during the transportation while you receive it from the transport company. 2:Please check carefully if the package looses when you receive the equipment and disassemble it, to do so to avoid damaging the equipment and injuring the person.
-
Page 3: Product Warranty
Product Warranty What is not covered under this warranty: a. Any failure that results from purchaser’s abuse, neglect or failure to operate, maintain or service product in accordance with instructions provided in the owner’s manual(s) supplied. b. Any damage caused by overloading lift beyond rated capacity. c. -
Page 4: Machine Parameters
Machine Parameters • Compact design,minimizes the lift wear parts and breakdown ratio • Dual hydraulic cylinders,designed and made on standards. • Self-lubricating UHMW polyethylene slidrs and bronze bushings • Single point security release and dual security design. YL-350W YL-250W Model Model Two-post Clear floor Hoist Two-post Base plate Hoist... - Page 5 Announcements for safe operation (You must read all of these content) 1. Please read the manual and learn about the safety cautions before you use the equipment. 2. Be careful of your hands and feet, keep them away from the equipment to avoid harm. 3.
- Page 6 Installation Guide impact bit drill(20mm) hammer leveling instrument(300mm) spanner with crossing groove(8mm~24mm) angle ruler Adjustable spanner(350mm) crow bar tailor’s chalk line and chalk flat head screwdriver and crossing groove head screwdriver tape measure(5m) sharp-nose pliers...
-
Page 7: Steps Of Installation
Steps of installation Step1 :Choose installation site Check the follows before installation : 1.Workplace:good building construct,enough work place,no stumbling block to stop working 2.The place where installing the equipment should not be any unsafe element, such as leakage of rain、moist、inflammable、explosive. 3. - Page 8 Step4: Install the master column (column with basement of power unit) 1. Check the dimension of the foot margin before installation to assure the baseboard of the column align with the tailor’s chalk line. 2. Use the holes on the baseboard of the column as formwork to drill holes on the concrete ground (the drill must perpendicular to the ground).
- Page 9 Notice for using the power unit 1. Not allow to start-up the pump if there isn’t any oil in it, lest to destroy the gear pump. 2. The electrical equipment must be kept dry; the damage caused by liquid such as water, acid or detergent isn’t in the guarantee range.
- Page 10 safety locking system Two-post Clear floor Lift Two-post Base plate Lift Two-post Clear floor Lift Two-post Base plate Lift...
- Page 11 steel cables assemble Two-post Clear floor Lift Two-post Base plate Lift 1. ADJUST SYNCHRONIZING CABLES Carriages must be on first set of locks. Use vise grips to hold the cable fitting, meanwhile, use a wrench to tighten the cable nut. Make sure the two cables have the same tension so the carriages lift at the same time.
- Page 12 2. ADJUST THE LOWER SPEED You can adjust the lowering speed of the lift if needed. Loosen the locking nut on the throttle valve and turn the throttle valve clockwise to decrease the lowering speed or counterclockwise to increase the lowering speed. Do not forget to tighten the locking nut after the lowering speed adjustment has been done.
- Page 13 oil tubes Two-post Clear floor Lift Two-post Base plate Lift...
- Page 14 Concrete strength...
- Page 15 Install The Lift Arms Install Inner arm 1. Place the appropriate lift arm assembly in the lift heads. 2. Install the lift head pins into the lift head and through the holes in the arm assembly. 3. Each arm restraint gear can be oriented in a left or right configuration on the arms. Each arm and arm restraint gear must be positioned in the proper location in the lift head 4.
-
Page 18: Maintenance
Exhaust and Debug 1. You need to exhaust and debug when you finish the lift installation. 2. Fill the oil tank with enough oil (not too full) and press the down-up button after connecting the electric power, then the lift up and the hydro-cylinder works. 3. -
Page 19: Troubleshooting
Troubleshooting 1 The lift doesn’t work 2 The lift doesn’t work when it is on load 3 The lift doesn’t lift off or lift much slowly. - Page 20 4 Oil leakage outside 5 The sound is uncommon...
Need help?
Do you have a question about the High-Lift Equipment YL-350W and is the answer not in the manual?
Questions and answers