Advertisement
Quick Links
Advertisement

Subscribe to Our Youtube Channel
Related Manuals for Fransgard W-6011-EH


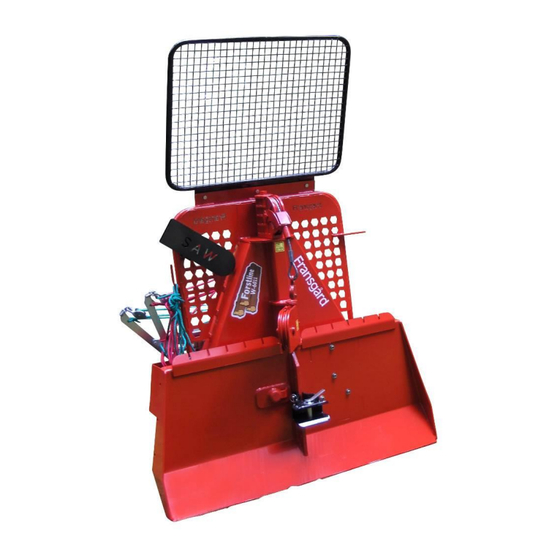
Summary of Contents for Fransgard W-6011-EH
- Page 1 Fransgård Manual W-6011-EH Tractor winch...
- Page 2 Fransgård Maskinfabrik A/S Fredbjergvej 132, Fredbjerg DK - 9640 Farsø Telefon: +45 98 63 21 22 www.fransgard.dk mail@fransgard.dk...
-
Page 3: Table Of Contents
Drum capacity ..............Ø 11mm. - 100 m VDW-PHYTON 6 F-V. Min. calculated breaking load ............134 kN Cable speed ................0,5 - 1,3 m/s. Three-point suspension ..............Kat.2. PTO speed W-6011-EH ............Max. 400 rpm. Weight ..................... 475 kg. - Page 4 WARNING! Before starting to operate the tractor winch, you must have read this manual thoroughly. The owner of the winch is responsible for ensuring that all operators and assistants are familiar with the tractor winch’s operation. Caution! Never attempt to use this tractor winch without sufficient training. Keep hands, feet and clothing away from moving parts.
- Page 5 SAFETY INSTRUCTIONS FOR FORESTRY SKIDDING WINCHES Work safely! The relevant health and safety regulations and the operating instructions must be complied with. Operation and maintenance of the cable winch may only be entrusted to suitable and reliable persons over 18 years of age who are familiar with this type of work. Wear personal safety equipment (helmet, safety shoes, protective gloves).
- Page 6 the load watched by other persons, with constant contact being maintained between the observer and winch operator by means of pre-arranged signals. When cables are being used, there must be no one between the load and the cable winch or in the danger zone between the winch, pulley and load, see figure 2. In the case of skidding on slopes, there must be no one below the log hitched to the cable.
-
Page 7: Instructions For Use
Skidders must be immobilised with a sprag brake or the like. If necessary, secure the tractor with a cable hitched opposite to the pulling direction should the sprag brake not provide sufficient hold owing to the soil conditions. The skidding load and speed must be such that, taking the design and nature of the vehicle, the gradient of the terrain and the soil conditions into account, the vehicle cannot tip over and steering/braking are not affected. -
Page 8: Lubrication And Maintenance
Releasing the brake: Lower the winch so that the slope stabilizers are firmly on the ground, release the brake by pressing button B (page 8, photo E). The brake can also be permanently released by turning knob C (page 8, photo E). Remember the safety distance! Pulling out the steel cable: When the brake is released, the cable can be pulled out. -
Page 9: Tractor Size
ADJUSTMENT OF THE DRIVE CHAINS. After 10 hours operation, the drive chains shall be inspected and if necessary adjusted. fluctuations of the chains must be max 4mm. chains inspected every 100 hours of operation (Page 9, fig G, H) TRACTOR SIZE. As recommended size of tractor a four- wheel drive with enough weight on the front axles, and 10KW engine size for each 10KN maximum pulling capacity. - Page 10 Max.30° Max.30°...
- Page 11 Max 4mm...
- Page 12 Carefully read operator’s manual before handling the Shut off engine and remove key machine. before performing maintenance or Observe instructions and safety repair work. rules when operating. Stay clear of swinging area of Stay clear of darft link machine. lifting range while operating rockshaft controls.
-
Page 14: Warnings
WARNINGS * Hydraulic oil may be harmful to health: If the oil comes into contact with the skin, it may cause allergic reactions. Inhaling oil vapour can cause respiratory problems. * Guidelines for the use of hydraulic oil: Follow the oil supplier’s warnings and recommendations. ... -
Page 15: Refilling Of Oil On The Machine
REFILLING OF OIL ON THE MACHINE The following procedure must be followed closely when refilling oil: Check that the oil tank is completely clean. Always use a filtration device when refilling oil, as the container often contains fine-grained dust and water. The hydraulic oil is very important and must be selected carefully, as it is the oil that transfers the energy and also lubricates the various components in order to minimise friction and heat generation. - Page 16 Damaged and dirty oils must always be returned to an approved reception centre and an oil return point respectively. CHECKS BEFORE START-UP/STARTING Check the following before final start-up: That the oil has been correctly refilled and that the oil level is correct. ...
- Page 17 MAINTENANCE Thorough maintenance is vital to ensure the reliability and durability of the hydraulic system. The system should therefore be checked at regular intervals. Maintenance instructions: Inspect the entire system and not just the damaged component. Start with the pump and then continue on from there until the entire system has been checked.
-
Page 18: Faults And Troubleshooting
FAULTS AND TROUBLESHOOTING Fault Cause Rectification The pump is noisy. The pump has too little or no oil. Clean the tank and suction pipe and repair the Suction pipe Top up the oil. Incorrect rotation direction. Pump is sucking air in. Clean the suction filter and repair the suction pipe. - Page 19 FAULTS AND TROUBLESHOOTING Fault Cause Rectification Oil temperature too high. The oil is too viscous. Replace the oil. Major leak in valve or motor. Repair the pump, motor or valve. Too little oil in the tank. Top up the oil. The directional control valve is not closing fully.
-
Page 20: Dismantling
DISMANTLING When a fault caused by operating problems has been located, the following guidelines for repair or replacement of the relevant component must be followed in connection with the dismantling process. Clean the component and surrounding area thoroughly. This will remove layers of paint and dirt from all bolt assemblies, blocks and hoses.
Need help?
Do you have a question about the W-6011-EH and is the answer not in the manual?
Questions and answers