Advertisement
Quick Links
Advertisement

Related Manuals for Maxcare MAX-78A202S


Summary of Contents for Maxcare MAX-78A202S
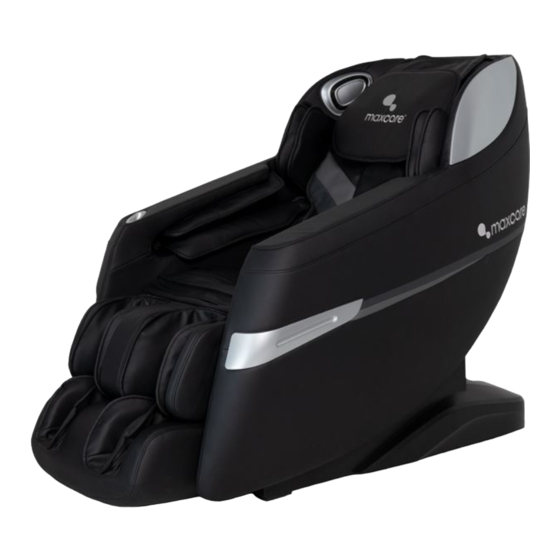
- Page 1 User Manual MAX-78A202S (Silver) MAX-78A202B (Black)
- Page 2 COMPANY PROFILE After two decades of experience in the health industry, founder utilized his knowledge and expertise in massage therapy from an Asian-Pacific perspective to establish our brand - . Our massage therapy business was expanded to Hong Kong in 2012 and is conferred 2017 Hong Kong Top Brand Award. Based in Hong Kong, we are specializing in design &...
-
Page 3: Table Of Contents
Thank you for purchasing ’s products. Before using the product, please read this manual thoroughly, particularly the Safety Precautions section, for the correct use of the product. This manual should be well kept for easy reference. It enables you to perform a safe and efficient operation. -
Page 4: Safety Precautions
Safety Precautions 1. Important safety warning • Please read this manual instruction carefully before operation. • Any other usage that is not listed in this manual instruction is forbidden. • Keep children and pets away from the movable parts of this product to avoid accidents caused by the up-and down-ward movement of the calf rest and back cover. - Page 5 Safety Precautions • Pregnant women or women that are in menses period. • People who got injured or skin diseases. • Children under 14-year old or people mentally unbalanced without being supervised are not allowed to use this machine. • People who are told by doctor to have rest or people who feel unwell. •...
- Page 6 Safety Precautions Warning When the calf rest is ascending during use, do not apply pressure on it. This is to prevent the massage chair from falling forward and causing damage or injury. Do Not Press Warning Prior to sitting on the massage chair, please make sure the mechanical massage hands are not located under the seat.
- Page 7 Safety Precautions Warning In “standby” mode, or when the massage chair has been connected to power, do not allow children to drag/ pull the power cord. Damage to the power plug (or its parts) due to forceful pulling/ dragging will cause damage to the product or possible electric shock. It is advised to unplug the massage chair and tie up the power cord when not in use.
- Page 8 Safety Precautions Warning Take off your belongings before starting the massage chair. (Such as: Keys, hand watch, hard object, and so on. It might cause damage to the product or personal injury. Warning Never unplug and switch off the main power when the massage chair is operating. It might cause damage to the product or personal injury.
- Page 9 Safety Precautions Warning Try no to sleep when using the massage chair. It might cause personal injury. Warning Do not use it with two people at the same time, it will cause damage to the product or personal injury. kids are not allowed to play on the chair with toys, or climb on any parts of the chair, otherwise, it will cause damage to the product or personal injury.
-
Page 10: Name And Function Of Components
Name and Function of Components 1. Headrest 2. Bluetooth Speaker 3. Upper Arm Airbags 4. Arm Airbags 5. Remote Handset Controller 6. Remote Handset Controller Holder 7. Rugged Massage Belt and Magnetotherapy 8. Leg Rest 9. Upper Armrest Decoration 10. Back Cushion 11. - Page 11 Name and Function of Components Function: • This product is equipped with a set of silent smart 3D massage heads which move up and down and front and back. • Capable of automatically detecting and fine-tuning shoulder position; detecting body curve and shiatsu points to adjust accordingly the movement of the massage heads.
-
Page 12: Control Interface
Control Interface TFT LCD Dsiplay Power Button Pause/ Start Auto-massage Function Menu 自動 選項 Zero-gravity Function Confirm Left Right Down Raise Leg Rest Synchronized Sit-up Synchronized Lower Leg Rest Lay-down Note: The display is subject to the actual product. P.09... -
Page 13: How To Use
How to Use 1. Connect to power Massage chair Connect power diagram On / off switch diagram connect diagram 2. Begin Massage 1. Press the power button to activate the massage program. The back and leg rest will be set to the default position. 2. - Page 14 How to Use 1. Shoulder Adjustment When detection is over, there will be “tik tik” sound. Further finetune the position of the massage hands using the “up” and “down” buttons, if needed. There are 11 finetune adjustment levels for shoulder position. If there is no adjustment after 10 seconds, the massage will begin automatically.
- Page 15 How to Use 2. Massage Position Adjustment • After entering the massage program, if it is necessary to adjust the massage position, press the "Menu" key on the manual controller to select the manual program to enter, select the manual program, and then press the "Left" key to return to the information interface (the information interface is changed to the manual program interface).
- Page 16 How to Use 4. Menu Button Press “menu” to enter masaage function interface, where there are auto massage mode, manual mode, air pressure massage, auxilary function, storage and setting, etc. Use the “up” or “down” button to choose the desired function and then press “OK” to confirm.
- Page 17 How to Use Function Description Soothe fatigue and pain on the human body, relax the limbs and Pain Relief improve micro-circulation, relieve joint pain and restore vitality. Neck And Shoulder Massage neck and shoulder area with the special designed program, to effectively relieve shoulder pain and promote blood circulation (to brain).
- Page 18 How to Use B) Manual Massge: (Menu - Manual) - Press “menu” to enter masaage function interface, Use the “up” or “down” button to choose the manual massage function and then press “OK” to confirm. - Manual massage includes: massage modes, areas, width and speed, etc. - Use the “up”...
- Page 19 How to Use Function Mechanical Hand Adjustment STOP Width Knead Speed Speed & Width Knead & Tap Speed 3 speed levels available 3 width levels available Shiatsu Width Knock Speed & Width 3D I Speed 3D II Speed & Width (ii) Manual - Position - Position : Spot,Partial,Upper Back, Lower Back and Full Back.
- Page 20 How to Use (iii) Manual - Width - Width: 3 width levels of adjustment of mechanical hands. - In the manual function, use the “up” or “down” button to choose width function and then press “right” to enter the sub-menu of the said function. Press “OK” to confirm. Click “left”...
- Page 21 How to Use C) Air Pressure Massage: (Menu - Air Pressure) - Press “menu” to enter massage function interface, Use the “up” or “down” button to choose the air pressure function and then press “OK” to confirm. - Air pressure massage: upper body, lower body and air pressure. - In the air pressure massage function, use the “up”...
- Page 22 How to Use (ii) Air Pressure Massgae - Lower Body - In the air pressure massage function, use the “up” or “down” button to choose lower body air pressure function and then press “right” to enter the sub-menu of the said function. Again, use the “up”...
- Page 23 How to Use D) Other Function: (Menu - Auxiliary Function) - Press “menu” to enter massage function interface, Use the “up” or “down” button to choose the auxiliary function and then press “OK” to confirm. - Auxiliary Function includes foot roller, back thermotherapy and calf thermotherapy, etc. - In the auxiliary function, use the “up”...
- Page 24 How to Use (ii) Other Function- Back heating function - Back heating function: thermotherapy in effect after switching on for 3 minutes. - In the auxiliary function, use the “up” or “down” button to choose back thermotherapy function and then press “right” to enter the sub-menu of the said function. Again, use the “up”...
- Page 25 How to Use E) Storage: (Menu - Storage) - Press “menu” to enter massage function interface, Use the “up” or “down” button to choose the storage function and then press “OK” to confirm. - Storage: Memory 1, Memory 2, Memory 3. - In the storage function, use the “up”...
- Page 26 How to Use MENU Setting Bluetooth Auto Mode 自動 選項 Manual Mode Language Air Massage Other Function Customise Setting Select 'up' or 'down' key and ... Select 'navigation' key and press OK. (i) Setting - Bluetooth - Bluetooth: Turn on the Bluetooth function to connect to your smart devices (e.g. mobile phone and computer).
- Page 27 How to Use Massage Adjust Pain Relief Air Power Time Roll power Air power Massage Adjust Shoulder Adjust Select 'navigation' key and press OK. Select 'left' or 'right' key and ... Customization - In the status page, press “left” or “right” button to choose customization function. - Customization includes 3D, air pressure level and time adjustment, etc.
- Page 28 How to Use Pain Relief 自動 選項 Roll power Air power Massage Adjust Shoulder Adjust Select 'left' or 'right' key and ... Zero-gravity Button - Press the zero-gravity button to adjust the zero-gravity position. Choose Zero-gravity I, Zero-gravity II and Zero-gravity III according to your needs. Button Description Zero-gravity Button: leg rest and back will be automatically tuned...
- Page 29 How to Use H) End of Massage - Press the power button when the massage is ongoing will immediately turn off all massage functions. The chair will be set to its starting position. - When the rated time is up, all massage functions will stop. The chair will however remain in the then position.
- Page 30 How to Use 3. Headrest & back cushion installation and use Using the headrest can lessen the massage intensity borne by the neck and shoulders. You may choose to use the headrest according to your own needs (recommended). Back cushion is attached to the back through zipper (1), headrest is attached to the back cushion through zipper(2).
- Page 31 How to Use 5. Method of movement Please make sure unplugged the power. Hold a groove in the back plastic cover to tilt the backrest backward to a certain degree (with the gravity center resting on the wheels), push the chair forward or backward with your hands and finally resume the chair to the normal position in a slow and gentle manner.
- Page 32 Instructions for installation of lower leg - After connecting the lower leg and the air tube on the massage chair with the wire harness, untie the fixed pipeline belt and insert the connecting part into the seat frame (Fig. 1). - Sleeve the lower leg fixing block on the round tubes on the left and right sides of the lower leg (Fig.
-
Page 33: Cleaning And Maintenance
Cleaning and Maintenance Cleaning • Before cleaning, please make sure the switch has been turned off and the power plug has been disconnected from the socket. • Use soft cloths to clean the surface of product and control panel. • Do not pull the plug from the socket with wet hands. •... -
Page 34: Faqs And Solutions
Maintenance and Cleaning of PU Leather PU leather is made by the coating and drying of polyurethane. Compared with genuine leather, PU leather is more resistant to tear, heat and sunlight. Depending on its nature and chemical substances, however, it should be kept away fromany dusty, high/low-tem- perature, humid environment, under direct sunlight or places with corrosive substance. -
Page 35: Technical Specifications
Technical Specifications Product Name : Prime Chair Product Model : MAX-78A202S (Silver) MAX-78A202B (Black) Rated Voltage : 220-240V ~ 50/60Hz Rated Power : 90W Rated Time : 20minutes Noise : ≤ 55dB Product Gross Weight : 88KGS Product Net Weight... - Page 36 商標持有 : 美斯凱實業有限公司 Trademark holder: Maxcare Industrial Limited 客戶服務熱線 Customer Service Hotline : 香港 Hong Kong - (852) 2950-9383 中國 China - (86) 400 882-1883 www.maxcareonlineshop.com www.maxcare.net...
Need help?
Do you have a question about the MAX-78A202S and is the answer not in the manual?
Questions and answers