Table of Contents

Related Manuals for clage Zip CEX9


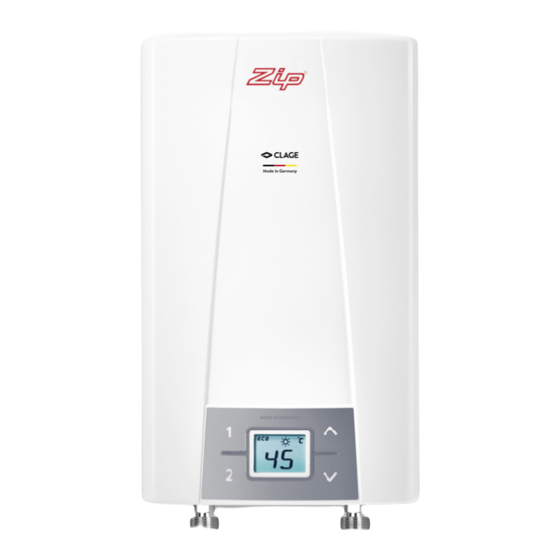
Summary of Contents for clage Zip CEX9
- Page 1 Instantaneous Hot Water Electronically controlled instantaneous water heater CEX9: 27900 - 50 °C model Installation instructions For 50 °C models, the appliance delivers water not exceeding 50 °C in accordance with AS3498...
-
Page 2: Table Of Contents
Contents 1. Safety instructions ....................3 2. -
Page 3: Safety Instructions
1. Safety instructions Please read these instructions carefully before installing or using the appliance! Keep the instructions handy with the appliance for future use! Installation, initial operation and maintenance of this appliance must only be con- ducted by an authorised professional, who will then be responsible for adherence to applicable standards and installation regulations. - Page 4 1. Safety instructions age by an authorised technician in order to avoid any hazards. • For appliances with direct connection, an all-pole disconnecting device with a contact opening width of ≥ 3 mm per phase must be provided at the installation end, according to Australian wiring rules AS/NZ3000.
-
Page 5: Overview
2. Overview When ordering spare parts, please always specify the appliance model and serial number. Pos. Part.-No. Description Pos. Part.-No. Description Inlet filter Grommet Connection piece 1/2“ Connecting terminal Safety thermal cut-out 99394 Flow sensor 99400 Thermal sensor set 99385 Non-return valve Heating element incl. -
Page 6: Technical Data
3. Technical data Model CEX9 Part no. 27900 - 50 °C model Energy efficiency class Rated capacity (Rated current) 6.0 / 9.6 kW (27.3 / 40 A) Chosen capacity (Chosen current) 6.6 kW (28.7 A) 8.8 kW (38.3 A) Electrical connection 1/N/PE 220..240 V AC Min. -
Page 7: Typical Installation
5. Typical installation Wall mounted mixer: Supply for one sink Direct connection: Supply for one outlet MADE IN GERMANY MADE IN GERMANY Direct connection: Supply for multiple outlets MADE IN GERMANY Dimensions in mm (installation example) -
Page 8: Installation
6. Installation The following regulations must be observed: • Installation must comply with all statutory regulations, as well as those of the local electricity and water supply companies. • The rating plate and technical specifications • Only intact and appropriate tools must be used •... -
Page 13: Mounting The Appliance
6. Installation Mounting the appliance 1. Thoroughly rinse the water supply pipes before installation to remove soiling from the pipes. 2. Hold the appliance on the wall, and mark the drill lines at top and bottom, right and left, corresponding to the small notches at the edge of the appliance hood (see bot- tom figure). -
Page 14: Electrical Connection
7. Electrical connection Only by a specialist! Wiring diagram Please observe: • The installation must comply with current IEC and national local regulations or any particular regulations, specified by the local electricity supply company • The rating plate and technical specifications •... -
Page 15: Electrical Installation To A Permanent Connection
7. Electrical connection Alternative: Electrical installation to a permanent connection If, in case of particular local circumstances, connecting to a permanent connection is the only possibility, continue as follows. 1. Disassemble the pre-installed power cable. 2. Dismantle off the power cable so that you can insert the cable with the cladding through the water splash protection sleeve up to the cord grip into the appliance. -
Page 16: Initial Operation
8. Initial operation Before making the electrical connec tion, fill the mains and the appliance with water by carefully opening and closing the hot water tap in order to vent com- pletely. To ensure a maximum flow, remove any existing aerator from the faucet. Flush the warm and cold water pipes each at least for one minute. -
Page 17: Reinstallation
8. Initial operation Reinstallation In case the appliance will be commis sioned again under different installation condi- tions than during its initial ope ration, it may be necessary to adapt the maximum power rating. A temporary short-circuit of the two pins (see figure), will reset all heater para meters to works setting and lock the heating. -
Page 18: Service Menu
9. Service menu The service menu offers an overview of system parameters and is used for diag- Open service menu nostics. Press key and key simultaneously for at least 2 seconds to call up the service menu, the display confirms by “FL” and by a flashing point. Using the arrow keys Press , you can switch between the individual menu items. -
Page 19: Environment And Recycling
9. Service menu on the power electronics, as specified in the chapter “Deactivation of the lock level”. Menu item order of “Service menu“: “nr“: Software version Flow Information about installed software version. Power “Ch“: Radio channel (with wireless module only) Temp in Information about the current radio channel of the water heater and its remote control. - Page 20 Head Office As Zip’s policy is one of continuous product improvement, changes to Zip Water (Aust) Pty. Ltd specifications may be made without ABN: 46 000 578 727 prior notice. Images in this booklet 67-77 Allingham Street have been modified and may not be Condell Park NSW 2200 true representations of the finished Postal: Locked Bag 80...
Need help?
Do you have a question about the Zip CEX9 and is the answer not in the manual?
Questions and answers