Table of Contents
Advertisement
Quick Links
User Manual
FNGL90JFUS
Safety information.......................................2
Safety instructions...................................... 5
Product description.....................................9
Before first use......................................... 10
Hob - Daily use......................................... 11
Hob - Hints and tips.................................. 13
Hob - Care and cleaning...........................14
CONTENTS
Oven - Daily use ...................................... 15
Oven - Clock functions............................. 18
Oven - Using the accessories...................19
Oven - Hints and tips................................ 21
Oven - Care and cleaning.........................25
Troubleshooting........................................28
Installation................................................ 30
Advertisement
Table of Contents

Related Manuals for Frigidaire FNGL90JFUS


Summary of Contents for Frigidaire FNGL90JFUS
-
Page 1: Table Of Contents
User Manual FNGL90JFUS CONTENTS Safety information........2 Oven - Daily use ........15 Safety instructions........5 Oven - Clock functions......18 Product description........9 Oven - Using the accessories....19 Before first use......... 10 Oven - Hints and tips........ 21 Hob - Daily use......... 11 Oven - Care and cleaning......25... -
Page 2: Safety Information
SAFETY INFORMATION Before the installation and use of the appliance, carefully read the supplied instructions. The manufacturer is not responsible for any injuries or damages that are the result of incorrect installation or usage. Always keep the instructions in a safe and accessible location for future reference. - Page 3 SAFETY INFORMATION Do not operate the appliance by means of an external timer • or separate remote-control system. WARNING: Unattended cooking on a hob with fat or oil can • be dangerous and may result in fire. NEVER try to extinguish a fire with water, but switch off the •...
- Page 4 SAFETY INFORMATION WARNING: Use only hob guards designed by the • manufacturer of the cooking appliance or indicated by the manufacturer of the appliance in the instructions for use as suitable or hob guards incorporated in the appliance. The use of inappropriate guards can cause accidents.
-
Page 5: Safety Instructions
SAFETY INSTRUCTIONS • Always use a correctly installed This appliance is suitable for the following shockproof socket. markets: • Do not use multi-plug adapters and extension cables. Installation • Do not let mains cables touch or come near the appliance door, especially when WARNING! the door is hot. - Page 6 SAFETY INSTRUCTIONS combustion. Make sure to connect the • Open the appliance door carefully. The appliance according to current use of ingredients with alcohol can installation regulations. Pay attention to cause a mixture of alcohol and air. requirements regarding adequate WARNING! ventilation.
- Page 7 SAFETY INSTRUCTIONS • Use only the accessories supplied with • Before you close the lid turn all burners the appliance. off. • Do not install a flame diffuser on the • Do not close the lid until the hob and burner.
- Page 8 SAFETY INSTRUCTIONS Disposal WARNING! Risk of injury or suffocation. • Contact your municipal authority for information on how to discard the appliance correctly. • Disconnect the appliance from the mains supply. • Cut off the mains electrical cable close to the appliance and dispose of it. •...
-
Page 9: Product Description
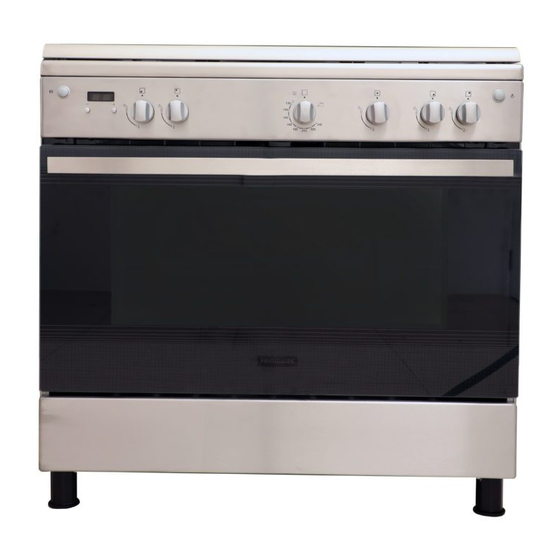
PRODUCT DESCRIPTION General overview Button for the turnspit Electronic programmer Knob for the oven functions Button for the lamp Knobs for the hob Heating element Lamp Turnspit hole Shelf positions Cooking surface layout Auxiliary burner Steam outlet - number and position depend on the model Semi-rapid burner Semi-rapid burner... -
Page 10: Before First Use
BEFORE FIRST USE The appliance can emit an odour and WARNING! smoke. This is normal. Make sure that the airflow is sufficient. Refer to Safety chapters. Let the oven cool down. Dampen a soft Initial Cleaning cloth with warm water and a little mild washing-up liquid and use this to clean the Remove all accessories from the appliance. -
Page 11: Hob - Daily Use
HOB - DAILY USE WARNING! WARNING! Refer to Safety chapters. Do not keep the knob pushed for more than 15 seconds. If the burner does Ignition of the hob burner not light after 15 seconds, release the knob, turn it into the off position and try to light the burner again after minimum 1 minute. - Page 12 HOB - DAILY USE A. Burner cap B. Burner crown C. Ignition candle D. Thermocouple (if applicable) Turning the burner off To put the flame out, turn the knob to the off position WARNING! Always turn the flame down or switch it off before you remove the pans from the burner.
-
Page 13: Hob - Hints And Tips
HOB - HINTS AND TIPS • When the liquid starts to boil, turn down WARNING! the flame to barely simmer the liquid. Refer to Safety chapters. Cookware WARNING! Do not put the same pan on two burners. WARNING! Do not put unstable or damaged pots on the burner to prevent from spill and injury. -
Page 14: Hob - Care And Cleaning
HOB - CARE AND CLEANING WARNING! Be very careful when you replace Refer to Safety chapters. the pan supports to prevent the hob top from damage. General information 2. After you clean the pan supports, make • Clean the hob after each use. sure that they are in correct positions. -
Page 15: Oven - Daily Use
OVEN - DAILY USE WARNING! Refer to Safety chapters. Oven Functions OVEN FUNCTION APPLICATION Off position The appliance is off. Grilling To grill flat food in the middle of the grill. To make toast. Oven lamp To illuminate the oven interior. To use this function, press the button for the lamp. - Page 16 OVEN - DAILY USE Using the grill CAUTION! Always keep the appliance door closed when the grill operates. The grill temperature cannot be 3. At the same time push the knob for the adjusted. To get a lower temperature oven functions and turn it or slower cooking time, lower the grill counterclockwise to the maximum gas pan away from the flame.
- Page 17 OVEN - DAILY USE 5. Preheat the grill for 5 to 10 minutes. 6. Put the oven shelf with the meat on shelf position 3. 7. Put a baking tray or roasting pan below, on shelf position 2, to collect the juices. If there is temporarily no power supply open the oven door hold a flame near the grill burner holes and turn the lnob for the...
-
Page 18: Oven - Clock Functions
OVEN - CLOCK FUNCTIONS Minute Minder Use it to set a countdown time. The maximum time that can be set is 99 min 50 This function has no effect on the operation of the appliance. Press the button to set the countdown time for the minute minder. -
Page 19: Oven - Using The Accessories
OVEN - USING THE ACCESSORIES Put the tray or deep pan on the shelf WARNING! position. Make sure it does not touch the back wall of the oven. Refer to Safety chapters. Using the turnspit Inserting the accessories Wire shelf: WARNING! Be careful when you use the turnspit. - Page 20 OVEN - USING THE ACCESSORIES 4. Snap out one end of the support hook When meat is ready press the turnspit from the oven ceiling A and let it hang button. Turn off the grill. Install the turnspit on the other end. handle.
-
Page 21: Oven - Hints And Tips
OVEN - HINTS AND TIPS cooking time and shelf position to the WARNING! values in the tables. • Use the lower temperature the first time. Refer to Safety chapters. • If you cannot find the settings for a special recipe, look for the similar one. •... - Page 22 OVEN - HINTS AND TIPS Cooking tables Casseroles TEMPERA- SHELF POSI- FOOD QUANTITY (KG) TIME (MIN) TURE (°C) TION 2.5 - 4.0 45 - 50 Lasagna Cannelloni 2.5 - 4.0 45 - 50 Potato gratin 2.5 - 3.0 75 - 85 Macaroni oven 4.0 - 4.5 50 - 60...
- Page 23 OVEN - HINTS AND TIPS Pizza TEMPERATURE SHELF POSI- FOOD QUANTITY (KG) TIME (MIN) (°C) TION Thin 1.5 - 2.5 20 - 25 Thick 1.5 - 2.0 20 - 25 Calzone 1.5 - 2.5 30 - 35 1) Preheat the oven for 15 minutes. Cakes TEMPERATURE SHELF POSI-...
- Page 24 OVEN - HINTS AND TIPS QUANTITY SHELF POSI- FOOD GRILL POSITION TIME (MIN) (KG) TION Mackerel 2.5 - 3.0 half 20 - 25 Toast browning 1.0 - 1.2 max. 7 - 10 Toast Hawai 1.0 - 2.0 max. 15 - 20 1) Preheat the oven for 10 minutes.
-
Page 25: Oven - Care And Cleaning
OVEN - CARE AND CLEANING WARNING! Refer to Safety chapters. Do not loosen the screws. 1. Open the door fully. Notes on cleaning • Clean the front of the appliance with a soft cloth with warm water and a cleaning agent. •... - Page 26 OVEN - CARE AND CLEANING 6. Use a spatula made of wood or plastic (or equivalent) to open the inner door. Hold the outer door, and push the inner 3. Close the oven door to the first opening door against the top edge of the door. position (halfway).
- Page 27 OVEN - CARE AND CLEANING Replacing the lamp Make sure the slot in the hinge A rests Put a cloth on the bottom of the interior of on the edge of the hinge support B the appliance. It prevents damage to the before releasing the oven door.
-
Page 28: Troubleshooting
TROUBLESHOOTING WARNING! Refer to Safety chapters. What to do if... PROBLEM POSSIBLE CAUSE REMEDY There is no spark when you The hob is not connected to Check if the hob is correctly try to activate the spark an electrical supply or it is connected to the electrical generator. - Page 29 TROUBLESHOOTING PROBLEM POSSIBLE CAUSE REMEDY Steam and condensation You left the dish in the oven Do not leave the dishes in settle on the food and in the for too long. the oven for longer than 15 cavity of the oven. - 20 minutes after the cook- ing process ends.
-
Page 30: Installation
INSTALLATION Minimum distances WARNING! DIMENSION Refer to Safety chapters. Location of the appliance You can install your freestanding appliance with cabinets on one or two sides and in the corner. Technical data Keep a distance of about 1 cm between the appliance and the back Voltage 220 - 240 V wall to make sure that the lid opens. - Page 31 INSTALLATION BURNER Ø BYPASS 1/100 MM Oven Grill Gas burners for NATURAL GAS G20 20 mbar NORMAL POWER INJECTOR MARK BURNER REDUCED POWER KW 1/100 MM Triple Crown Rapid Semi-rapid 1.85 0.45 Auxiliary 0.95 0.35 Oven Grill 126p Gas burners for LPG G30 28-30 mbar NORMAL REDUCED POW- INJECTOR MARK...
- Page 32 INSTALLATION WARNING! When installation is complete, make sure that the seal of each pipe fitting does not leak. To check the seal use a soap solution, not a flame. The gas supply ramp is on the rear side of the control panel. WARNING! Before you connect the gas, disconnect the appliance from the...
- Page 33 INSTALLATION You can find this plate in the bag supplied with the appliance. If the supply gas pressure is not constant or it is different from the necessary pressure, install an applicable pressure adjuster on the gas supply pipe. Adjusting the minimum gas level on the hob burner 1.
- Page 34 INSTALLATION 4. Light the burner. Refer to "Hob - Daily use" chapter. 5. Turn the knob for the hob to the minimum position. 6. Remove the knob for the hob again. 7. Screw on slowly the bypass screw till the flame becomes minimum and stable.
- Page 35 INSTALLATION 9. Set the maximum gas flow position on the knob for the oven functions and let the oven heat for at least 10 minutes. 10. Quickly turn the knob for the oven functions from maximum to the minimum gas flow position. Control the flame.
- Page 36 INSTALLATION Levelling CAUTION! Remove all the accessories from the oven. CAUTION! The assembly should be made by two people. 1. Open the lid of the appliance and disassemble it. 2. Disassemble the pan supports and all the burner assemblies. 5. Tilt the cooker forward 30 degrees and repeat the previous step for the back feet.
- Page 37 INSTALLATION To install all the accessories, do the first step in the opposite sequence. Electrical installation WARNING! The manufacturer is not responsible if you do not follow the safety precautions from Safety chapters. This appliance is supplied with a main plug and a main cable.
- Page 38 ENVIRONMENTAL CONCERNS dispose of appliances marked with the Recycle materials with the symbol . Put symbol with the household waste. Return the packaging in relevant containers to the product to your local recycling facility or recycle it. Help protect the environment and contact your municipal office.
Need help?
Do you have a question about the FNGL90JFUS and is the answer not in the manual?
Questions and answers