
Subscribe to Our Youtube Channel
Related Manuals for Dream On Me UNIVERSAL DOUBLE DRESSER


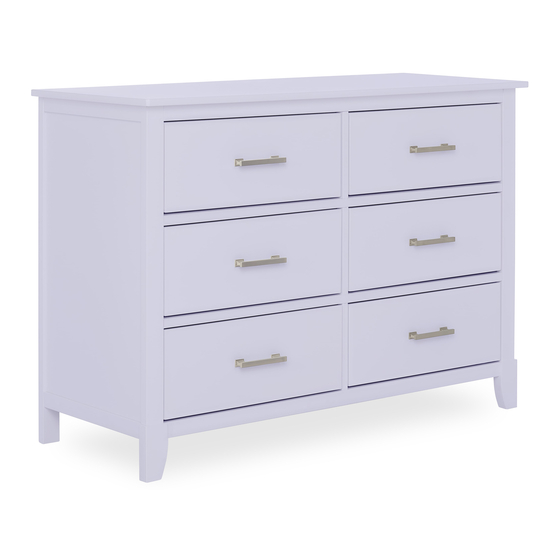
Summary of Contents for Dream On Me UNIVERSAL DOUBLE DRESSER
- Page 1 UNIVERSAL DOUBLE DRESSER Owner’s Manual Scan the QR code to register your product https://dreamonme.com/customercare/registration/ Read all instructions before assembling and using product. IMPORTANT - Keep instructions for future use. 0222R1-599...
-
Page 2: Safety Tips
SAFETY TIPS Small parts may Adult Assembly present choking Required. hazard prior to assembly. DO NOT use the Please read the product if it is instructions damaged, broken, thoroughly. Identify all and/or components are parts & hardware. missing or broken. To protect your parts Improper or unsafe use during assembly,... -
Page 3: Limited Warranty
LIMITED WARRANTY: • Dream On Me warrants its product to be free from defects in material and workmanship and agrees to remedy any such defect. • This warranty covers 1 year from the date of original purchase. - Page 4 OR SHARP EDGES BEFORE AND AFTER ASSEMBLY AND FREQUENTLY DURING USE. • DO NOT USE THIS DRESSER IF ANY PARTS ARE MISSING, DAMAGED OR BROKEN. CONTACT DREAM ON ME - 1532 S. WASHINGTON AVE, PISCATAWAY, NJ 08854 FOR REPLACEMENT PARTS.
- Page 5 PARTS If there are any missing parts, please contact Dream On Me before using the product. Dresser Top Panel Dresser Left Side Dresser Center Panel Panel Dresser Right Side Dresser Top Rear Dresser Top Rail Rear Panel Panel Dresser Bottom...
- Page 6 PARTS (cont.) If there are any missing parts, please contact Dream On Me before using the product. Dresser Centre Drawer Front Dresser Bottom Front Support Feet Panel (x6) Rail Drawer Left Drawer Bottom Drawer Right Panel (x6) Panel (x6) Panel (x6)
- Page 7 HARDWARE If there are any missing parts, please contact Dream On Me before using the product. Bolt 1-3/4” (×13) Bolt 1” (×14) Wooden Dowel 1-1/8” (×14) Curve Washer (×13) Screw 1” (×48) Screw 5/8” (×14) Handle (×6) Screw 3/4” (×12) Allen Key (x1) Screw 3/4”...
- Page 8 DRESSER ASSEMBLY - DRESSER FRAME ASSEMBLY 1a. Place the Dresser Bottom Rear Panel (7) on a soft surface and align Dresser Center Panel (3) as shown in illustration. Attach both using two Wooden Dowels (C). (10) 1b. Attach the Dresser Top Rear Rail (5) to the Center Panel (3) using a Wooden Dowel (C) at the bottom top end of the...
- Page 9 DRESSER ASSEMBLY - DRESSER FRAME ASSEMBLY 2a. Align the Dresser Left Side (A,D) Panel (2) and Dresser Right Side Panel (4) as depicted in the illustration. 2d. Attach them using the Bolts (A) and Curve Washer (D) assembly followed previously. Note: Please do not overtighten the Bolts.
- Page 10 DRESSER ASSEMBLY - DRESSER FRAME ASSEMBLY 3a. Attach the Dresser Center Support Feet (11) to the Center Panel (3) using two Wooden Dowels (C) and tighten them using the Bolt (B). 3b. Ensure the right orientation of the Dresser Center Support Feet (11). 3c.
- Page 11 DRESSER ASSEMBLY - DRESSER FRAME ASSEMBLY 4a. Align the Dresser Top Panel (1) onto the previously made assembly as shown in the illustration. 4b. Attach the Top Panel (1) using Wooden Dowels (C) at shorter Right and Left Side Panels and Center Panel (3).
- Page 12 DRESSER ASSEMBLY - DRESSER FRAME ASSEMBLY 5a. Align the Dresser Top Rear Panel (6) above the Dresser Bottom Rear Panel (7), attach them using the Screws (F). Note: Please do not overtighten the Screws. Screw 5/8” (×14) www.dreamonme.com/help...
- Page 13 DRESSER ASSEMBLY - DRAWER ASSEMBLY (13) 6a. Place one of the Drawer Front Panels (12) on a softer surface and align one (15) of the Drawer Left Panels (15) and Drawer Right Panels (13) as depicted in the diagram. 6b. Attach the above using the Screws (E). 6c.
- Page 14 DRESSER ASSEMBLY - DRAWER ASSEMBLY (16) 7a. Align one of the Drawer Rear Panels (16) onto the Left (13) and Right Panels (15) and attach the same with Screws (E) on all four corners. 7b. Attach the Handle (G) to the Front Panel (12) using Screw (H), by inserting the Screw from behind the Front Panel passing it through the handle.
- Page 15 DRESSER ASSEMBLY - DRAWER ASSEMBLY 8a. Insert the assembled drawers into the grooves present on the dresser frame. 8b. Ensure the right alignment of drawers before inserting them into the frame. www.dreamonme.com/help...
- Page 16 ANTI-TIP SAFETY HARDWARE INSTALLATION Determine the desired location of the FURNITURE dresser. Find a wall stud behind the WALL furniture piece and position one of the Brackets (J) vertically on the stud WALL approximately 1" below the top of FURNITURE the dresser piece.
- Page 17 FURNITURE CARE INSTRUCTIONS ROOM CLIMATE CONTROL: • Wood, when first cut contains more than 50 percent water. When it is prepared for furniture construction it is placed in a Kiln and the moisture content is brought down to 8 to 10 percent. Wood is porous and responds to its environment. If the room has high humidity it will absorb it and expand and if the humidity is low it will lose moisture and shrink.
- Page 18 • Clean with a damp, not wet, cloth. Use only a mild soap. Do not use the abrasive cleaners. • Do not scratch or chip the finish. • Inspect the product periodically, contact Dream On Me Inc for replacement parts or questions. • Do not store the product or any parts in extreme temperatures and conditions such as a hot attic or a damp, cold basement.
- Page 19 1532 S. WASHINGTON AVENUE PISCATAWAY, NJ 08854 www.dreamonme.com Follow Us @dreamonmeinc to get your nursery featured on our social media. Enter our monthly giveaway! Chat with us! Scan the QR code to register. Scan the QR code to Live Chat.
Need help?
Do you have a question about the UNIVERSAL DOUBLE DRESSER and is the answer not in the manual?
Questions and answers