Table of Contents
Advertisement
Quick Links
Advertisement
Table of Contents

Related Manuals for 4EVAC Loopdrive 4E-LDB


Summary of Contents for 4EVAC Loopdrive 4E-LDB
- Page 1 Loopdrive User and installation manual V01R041...
-
Page 2: Table Of Contents
Loopdrive – User and installation manual Contents Loopdrive introduction ........................ 2 1.1. Loopdrive components ......................3 1.2. Main functionality ......................... 5 1.3. Loopdrive indications ......................6 1.4. Fault contact.......................... 7 Installation and commissioning ....................8 2.1. Cables ............................ 8 2.2. How to install LDB in the Voice Alarm System .............. -
Page 3: Loopdrive Introduction
Loopdrive – User and installation manual 1. Loopdrive introduction Loopdrive is EN54 certified system for surveillance of loudspeaker lines in Public Address and Voice Alarm systems. The main task of Loopdrive system is to keep the audio message broadcast in the emergency zone in case of loudspeaker line short circuit. -
Page 4: Loopdrive Components
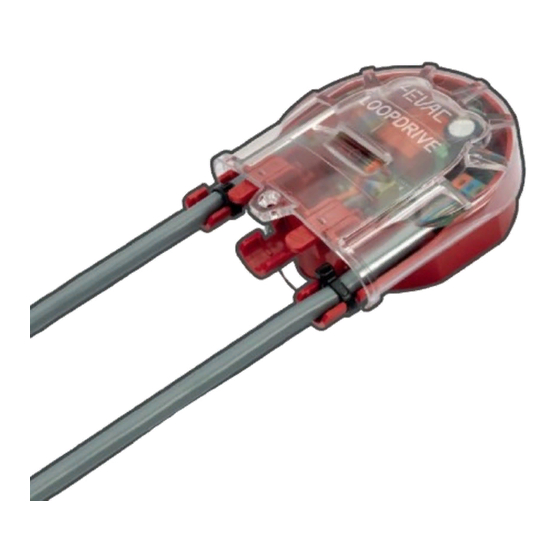
Loopdrive – User and installation manual 1.1. Loopdrive components Loopdrive system comprises of two types of devices which play different roles in the system: LDB (LoopDrive Booster) – is the central unit installed in the Voice Alarm System rack, directly between the amplifier and loudspeaker line. Mounted on a DIN rail LDB works as the DC power supply for FIMs and can also generate special service commands to FIMs. - Page 5 Loopdrive – User and installation manual FIM (Fault Isolator Module) – installed in the field, on the loudspeaker line. FIM functions as the isolator in case of a short-circuit. Responsible for monitoring and reporting faults locally (for local line segments connected to the FIM): - Loop short (only adjacent segments) - T-branch short - T-branch open...
-
Page 6: Main Functionality
Loopdrive – User and installation manual 1.2. Main functionality Architecture of Loopdrive system allows you to create loudspeaker line in closed-loop topology with extra side-spurs called T-Branches. The loop as well as every single T-Branch are constantly monitored and searched for any abnormalities in the load and cabling. -
Page 7: Loopdrive Indications
Loopdrive – User and installation manual 1.3. Loopdrive indications Loopdrive modules feature multi-colour LED indicators with different colour and blinking cycles, which correspond to currently detected state of the loudspeaker line. General principle of LED indications: BLUE – system OK ORANGE –... -
Page 8: Fault Contact
Loopdrive – User and installation manual Table 2. FIM indications -basic Indication Corresponding status BLUE very slow Quiescent mode, system OK BLUE fast Service mode BLUE slow Charging ORANGE fast LOOP SHORT side A (active) ORANGE slow LOOP SHORT side A (memory) ORANGE fast LOOP SHORT side B (active) ORANGE slow... -
Page 9: Installation And Commissioning
Loopdrive – User and installation manual 2. Installation and commissioning Loopdrive system can be installed on both new and existing loudspeaker line installations. Several conditions need to be met first to make all features of Loopdrive system work properly: main loudspeaker line has to be a closed loop, b) T-branch lines fitted with multiple loudspeakers require 47kΩ... - Page 10 Loopdrive – User and installation manual NOTE: Loopdrive bus (DIN rail) interconnects multiple LDB units, supplying 24V/48V DC power, common fault contact output and RS485 serial bus. Due to current limitation single bus can supply with 24V/48V up to 32 LDB units. Larger number of LDBs should be divided and fitted onto separate power rails.
-
Page 11: How To Install Fims On A Loudspeaker Line
Loopdrive – User and installation manual If you’re planning to proceed with installation of FIM modules on the loop, leave the SECONDARY output of LDB disconnected. Go to next chapter for FIM installation instructions. When loop is closed and all FIMs on the loop are working properly, connect the incoming loop cable to SECONDARY output of LDB. - Page 12 Loopdrive – User and installation manual Picture 6. Side A of FIM connected to PRIMARY side of the loop. Connect the outgoing loop cable to the loop connector on the other side of FIM. Mind the cable polarity! If the cabling is correct, FIM will remain in SERVICE MODE. If there’s short circuit on the outgoing cable, FIM will change blinking colour to orange, indicating problem.
- Page 13 Loopdrive – User and installation manual Picture 9. T-Branch line with EOL monitoring. m. Proceed with installation of the next FIM module. When the last FIM is installed on loop go back to the LDB and connect the returning loop cable to SECONDARY output connector of LDB.
-
Page 14: Examples Of Loopdrive Installations
Loopdrive – User and installation manual 2.4. Examples of Loopdrive installations Picture 12. Minimum configuration - equivalent to A/B line. Picture 13. Speakers only on the loop. Picture 14. One FIM per each speaker. -
Page 15: Routine Maintenance Inspection
Loopdrive – User and installation manual Picture 15. T-Branch lines with multiple loudspeakers. Picture 16. Mixed configuration. 3. Routine maintenance inspection In order to check correct Loopdrive operation in case of potential cabling failure, simulate faults and observe system reaction. Perform following procedure: Check if LDB is powered If LDB is indicating FAULT mode (orange LED blinking) go to chapter “Faults”. -
Page 16: Fault Finding - Ldb
Loopdrive – User and installation manual Confirm that fault contact was activated. Remove the connection between L+ or L- to earth. Confirm that EARTH “active” (fast) indication on LDB turns into “memory” (slow). Reset LDB into QUIESCENT mode. Simulate ground wire open fault (optional) Open ground wire on PRIMARY or SECONDARY output of LDB. - Page 17 Two alternative solutions are available: 4EVAC Loopdrive Sniffer (PC application) is the easiest way to go. Use FIM tracking feature for the best result. FIM tracking is automated procedure which allows you to find the exact location of the short fault.
-
Page 18: Open Fault
Loopdrive – User and installation manual 4.2. OPEN fault LDB shows OPEN fault in following cases: Loop cable is open (L+ or L- or both wires) Loop section between FIMs is isolated because of previously detected short circuit. See previous chapter: SHORT indication. - Page 19 Loopdrive – User and installation manual What to do? To find earth leakage in your installation, please use the FIM tracking feature of Loopdrive Sniffer PC application. FIM tracking is automated procedure which allows you to find the exact location of the earth fault. Find more details in the Sniffer manual.
-
Page 20: Fault Finding - Fim
Loopdrive – User and installation manual 5. Fault finding – FIM Next step after identifying a fault on LDB is to investigate and fix the cabling in the field. Indication on FIM will help you finding the exact location and type of the fault. NOTE: Multiple faults can be shown on FIM at the same time. -
Page 21: Open T-Branch
Loopdrive – User and installation manual push RESET button on the FIM module b) send REMOTE FIM RESET command by pressing RESET button on LDB for 10 seconds or via Sniffer application. 5.3. Open T-Branch If 47kΩ EOL resistor on T-Branch is missing, FIM with EOL monitoring will detect T-Branch open. In this case both A and B indicators will blink fast orange alternately with 2 seconds intervals. -
Page 22: Technical Specifications
Loopdrive – User and installation manual 6. Technical specifications Electrical: DC Power supply (powered via loop from LDB) 19 ~ 30 VDC, nominal 30 VDC DC Power consumption inrush current 650 µA (10 ms) idle current 100 µA continuous max. power consumption 20 mW LOOP connection 30 V, max. - Page 23 Loopdrive – User and installation manual Part No. FIM-01 Includes: 1 x IP33 housing 1 x release tool 1 x compression gland for speaker mounting Part No. FIM-ADP-G IP55, Adapter with 3x compression glands Material: ABS/PC-V0 Part No. FIM-ADP-S IP55, Adapter with 3x Plug&Play socket Material: ABS/PC-V0 Electrical: DC Power supply...
- Page 24 Loopdrive – User and installation manual Environmental Operating temperature -10˚C ~ +55˚C Storage temperature -20˚C ~ +70˚C Relative humidity 15% ~ 93% Compliant standards Short-circuit isolators EN 54-17 Voice evacuation EN 54-16 EMC immunity EN62368-1:2020+A11:2020 – Audio, video and similar electronic apparatus EN50130-4:2011+A1:2014 –...
- Page 25 Loopdrive – User and installation manual M A D E T H E N E T H E R L A N D S 4EVAC is a trade name of: Hacousto Holland bv Industrieweg 87 2651BC Berkel & Rodenrijs The Netherlands...
Need help?
Do you have a question about the Loopdrive 4E-LDB and is the answer not in the manual?
Questions and answers