Table of Contents
Advertisement
Quick Links
Advertisement
Table of Contents

Related Manuals for SYSFORM CP340H


Summary of Contents for SYSFORM CP340H
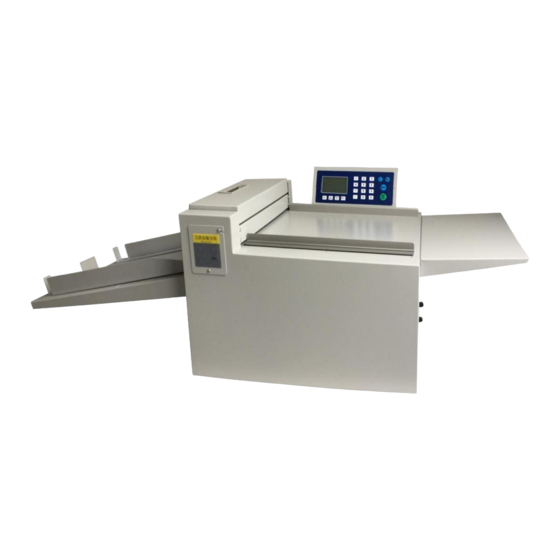
- Page 1 Digital Creasing Machine CP340H AUTO CREASER & PERFORATOR OPERATION MANUAL - 1 -...
-
Page 2: Table Of Contents
Digital Creasing Machine CONTENT Preface and Overview .................... 3 Chapter 1 Safety Requirements ................4 Chapter 2 MainTechnicalIndicators ................ 5 Chapter 3 Initial Installation ................... 6 Chapter4 Operation ................... 7-8 Chapter 5 Related Settings ..................9 Chapter 6 Machine Detection and Error Correction ..........10 Chapter 7 Hardware Settings ................ -
Page 3: Preface And Overview
Digital Creasing Machine Preface and Overview This product is a precision product, which professional design and manufacture of indentation knife mold is extremely durable and high-precision control system guarantees the accuracy and quality of indentation. This machine can complete the indentation of the card without making a template, or crease various dotted lines, tape or saddle-stitched cover indentations, and is suitable for other various application scenarios. -
Page 4: Chapter 1 Safety Requirements
Digital Creasing Machine Chapter 1 Safety Requirements 1.1 Working environment 1. Temperature: 10 ° C -35 ° C; 2. Humidity: 30%-70%; 3. Please use the machine in normal environment, there is no flammable, corrosive gas or oil mist around it. 1.2 Precautions ... - Page 5 Digital Creasing Machine Use paper maximum size 13.39”x 118.11” (width x length) 340X3000mm Creasing capacity 60g~400g Paper Perforating capacity 60g~250g Coated paper Laminating paper Indentation data storage 32 Jobs Maximum number of indentation 16 lines settings No level adjustable Indentation depth adjustment Domestic standard Indentation width 1.0mm Indentation accuracy...
-
Page 6: Chapter 3 Initial Installation
Digital Creasing Machine Chapter 3 Initial Installation After opening the machine package, the hardware installation is very simple, and fixes the paper collecting cardboard and the extended input cardboard directly by 3 screws, as shown in the figure. After the delivery tray is fixed, place each paperboard on the delivery tray. Extended input cardboard Paper collecting cardboard Tool Installation: Install the knife according to the label on the blade gate... -
Page 7: Chapter4 Operation
Digital Creasing Machine Chapter 4 Operation 4.1 Start-up After the machine is properly installed, turn on the power switch on the right side of the machine. After the machine is initialized, the following screen will be displayed, waiting for your operation. Figure 1 boot screen 4.2 Establishing indentation data The machine needs to input the indentation data before perform the indentation operation. - Page 8 Digital Creasing Machine Figure 3 Indentation data preservation The machine can store up to 32 sets of indentation data. After entering the indentation data preservation interface, you can use the “∧” and “∨”buttons, numeric buttons, “C” button to modify the group number data, and press the “SET” button to save the indentation data. 4.3 Indentation data call The machine can store 32 sets of indentation data, press the “Open”...
-
Page 9: Chapter 5 Related Settings
Digital Creasing Machine 4.5 Operation Example First, after determining the indentation data according to actual needs, and press the “New” button to create the indentation data; Second, save the indentation data, or directly press the start button to start the indentation operation, then the indentation data will be automatically saved to the first group;... -
Page 10: Chapter 6 Machine Detection And Error Correction
Digital Creasing Machine Chapter 6 Machine Detection and Error Correction Press and hold the “E” button to turn on the power switch, and the machine enters the background detection and error correction mode, as shown in Figure 7. Figure 7 Detection and error correction Follow the prompts to achieve the detection of each sensor and motor. -
Page 11: Chapter 7 Hardware Settings
Digital Creasing Machine Chapter 7 Hardware Settings Indentation Depth Adjustment The depth of the indentation directly affects the quality of the process. The reason is the gap between the upper and lower knife dies, the depth of the indentation, and the thickness of the paper to be indented. - Page 12 Digital Creasing Machine Indentation skew adjustment If the user finds that the paper that is coming out is skewed (Fold the paper along the indentation line, the sides are not vertical), the side panel of the paper table needs to be adjusted to change the paper feed angle so that obtain a satisfactory indentation direction.
-
Page 13: Chapter 8 Problem Solving In Machine Operation
Digital Creasing Machine Chapter 8 Problem Solving in Machine Operation The paper jam is the normal condition during the use of the machine. If the paper does not meet the requirements, the depth of the indentation is too deep, etc., all may cause paper jamming. After the paper jam, the machine will prompt the following screen: Figure 9 Paper jam The machine software system has provided the necessary method of handling jams.
Need help?
Do you have a question about the CP340H and is the answer not in the manual?
Questions and answers