Table of Contents
Advertisement
Quick Links
Advertisement
Table of Contents

Related Manuals for SYSFORM CP330B


Summary of Contents for SYSFORM CP330B
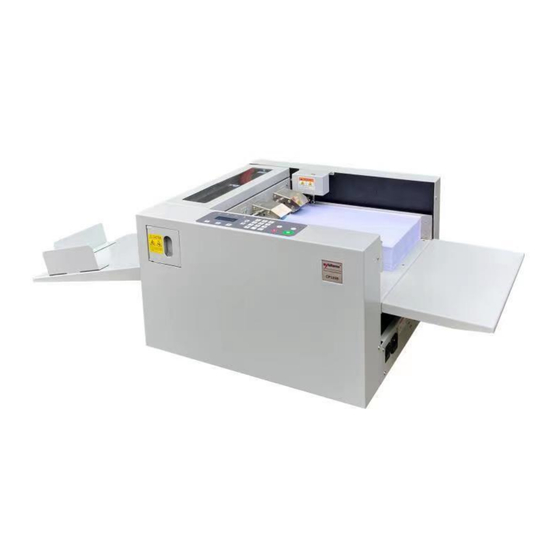
- Page 1 CP330B Auto Creaser Operation Manual Revision :18/10/21...
-
Page 3: Table Of Contents
Index 1. Safety Rules …………………………………………………………………………………………………...……………… 2. Specifications …………………………………………………………………….……………..…………………………… 3. Installation.. ……………………………………………………………………………….…………………………………... 4. Key Components ……………………………………………………………………….…………………………………. 5. Start-up ….............…………………………………..………..………..…………….… 6. Settings …....………………………………………………………….………………………………………..……… 6.1 Size Input …..……………………………………...………………………………..……..……………………..… 6.2 Cover Hinge ….…………………...………………………………..……..………………………………….……… 6.3 Progressive …………………………..………..………………………….………..…….…..……..……..…….. 6.4 Recall Data ………………………………..……….…………………………………………..………….…..6.5 Deposit Data ………………………………………...…………………………..……..……..………….………… 6.6 Speed ………………………………………...………………………………………..……..……..………….…………... -
Page 4: Safety Rules
1.Safety Rules The machine has many safety features which make it a safe to operate. Regardless of your experience, safety instructions must be read carefully, completely understood, and applied to your daily work habits. If you do not understand or are confused by certain safety instructions presented in this manual, discuss them with your supervisor. - Page 5 equipment, power must be shut off to adjustments while it is running. all circuits before any work is attempted. Individual switches must be opened and the equipment circuits tested to make sure there is no power. 7. Be sure all operators are aware of all 7.
-
Page 6: Specifications
2.Specifications Specification Description Feeder system Roller Feeder capacity 2.36" Minimum size 2.76"X3.94" Maximum size 13"X39.37" Paper stocks 70-350gsm Minimum crease distance Minimum crease from lead margin Speed (one crease on Letter size) 2400sheets Accuracy ±0.2mm Quantity of crease in one pass Counter Skew adjustment ±0.2mm... -
Page 7: Installation
3.Installation 3.1 Remove this red bracket before installation. 3.2 Use 3 screws to fix the extension table to the table. 3.3 Output Tray Output Tray Hook End Stop Side Lay Output Tray... - Page 8 The side lays and the end stop should be adjusted according to the ejecting situation. 3.4 Guides & weight Weight Cylinder Side Guide The side guides should be on proper position to hold the paper stack. The weights are used to add the gravity force of the feeding rollers on the top to get a smooth feeding.
-
Page 9: Key Components
5. Key Components Feeding Roller Safety Upper Limit Cover Switch Feeding Roller Stop Extension Table Console Cylinder Side Lay Blade Panel Side Guide Gate Power Output Switch Tray... - Page 10 Name Description Stop Stop running or change to standby Start Start processing or change standby to running Test Feeding one pass to check the machine settings Clear Delete input or reset errors Numeric Key Input 0-9 numbers Scroll Key Scroll pages on the screen No Paper This LED will be on when no paper is loading Crease Error...
-
Page 11: Start-Up
5. Start-up 5.1 While Machine is Off 5.1.1 Press the main power to on ”I”. 5.1.2 Main screen is showing last settings. 5.1.3 When the machine is standby, enter the quantity of the desired processing sheets from the keypad. Press the "Enter" key to acknowledge the input. Press the "C"... -
Page 12: Cover Hinge
6.1.1 Enter the crease position from the keypad then press to acknowledge the input. The measurement is from the feeding edge to the creasing position. 32 position data can be processed in one pass once. Press to delete input. Press and hold it for 3 seconds to clear all data in this group. - Page 13 Enter the settings referring to the above illustration and enter the quantity desired processing sheets. After finishing all settings, press twice to get into standby mode then press to start processing sheets. 6.2.1 Cover Hinge 2: Enter the settings referring to the above illustration. Press twice to get into standby mode then...
-
Page 14: Progressive
press to start processing sheets. 6.3. Progressive: In the standby status, press to access the setting menu. Press to choose "progressive" then press Press to choose "ON" then press Notice: To turn off the "Progressive" function, must set it off. Press to choose one progressive mode then press 6.3.1 Increment:... - Page 15 Enter the settings referring to the above illustration and enter the quantity desired processing sheets. After finishing all settings, press to get into standby mode then press to start processing sheets. 6.3.2 Decrement: Enter the settings referring to the above illustration and enter the quantity desired...
- Page 16 processing sheets. After finishing all settings, press to get into standby mode then press to start processing sheets. 6.3.3 Increment & Decrement: Enter the settings referring to the above illustration and enter the quantity desired processing sheets. After finishing all settings, press to get into standby mode then press to start processing sheets.
- Page 17 Enter the settings referring to the above illustration and enter the quantity desired processing sheets. After finishing all settings, press to get into standby mode then press to start processing sheets. 6.3.5 Isometric: Enter the settings referring to the above illustration and enter the quantity desired processing sheets.
-
Page 18: Recall Data
6.4. Recall Data: In the standby status, press to access the setting menu. Press to choose "Recall Data" then press Enter the memory No. from the keypad then press 6.5. Deposit Data: In the standby status, press to access the setting menu. Press to choose "Deposit Data"... -
Page 19: Speed
6.6. Speed: In the standby status, press to access the setting menu. Press to choose "Speed" then press Press to choose "LOW" or "HIGH" then press 6.7. Calibration: In the standby status, press to access the setting menu. Press to choose "Calibration" then press Press to adjust the measurement of the first creasing position. -
Page 20: About Machine
6.8. About Machine: In the standby status, press to access the setting menu. Press to choose "About machine" then press to show the information of this machine. 6.9. : Unit Select: In the standby status, press to access the setting menu. Press to choose "Unit Select"... -
Page 21: Adjustment
Press to choose "mm" or "inch" then press 7. Adjustment 7.1 Creasing skew 7.1.1 Adjust the side lay on the table to get a proper feeding angle. Loosen the two screws then adjust the angle of the side lay then tighten the two screws as shown in the illustration. - Page 22 7.2 Creasing Depth 7.2.1 Creasing depth is important to crease quality. It depends on the gap between upper die and lower die. Creasing depth should be adjusted according to paper thickness. Normal Too light Not balance Crack edge Too heavy 11.5.2 To adjust the creasing depth, open the top cover and adjust 3 allen screws on the bar.
-
Page 23: Rotary Knives(Option)
8. Rotary Knives(Optional) There are 3 types of rotary knife. Slitter Scorer Perforator 8.1 Loosen the grub screws in the lower roller using Allen key 2.0, stagger it away from the upper rubber roller. 8.2 Install one of the lower die to the lower roller with 2 M3*10 screws using Allen key 2.5, mind the 4 threaded holes position. - Page 24 touch each other. Warning! Be careful when opening the safety cover.
-
Page 25: Trouble Shooting
9. TROUBLE SHOOTING 9.1 Crease motor error/Jamming the blade 9.1.1 Feed too many papers in one pass. 9.1.2 Set the blade too low. 9.1.3 Run the thicker paper than the blade are set for Solution: 1. Carefully use the scroll buttons to move the rollers and pull the paper out, find the every reason and solve it accordingly. - Page 26 9.6.Wear on the rollers Solution: 1.Replacement. 9.7 Feed skew Solution: 1.Check if the paper is out of specification or not guided properly. Set the side guides and paper press properly. 2.Adjust the feed angle referring to the item 7.1. 9.8 Coating on the rollers 9.8.1 The rollers will accumulate the coat from the passing paper and this will reduce the friction significantly and cause sliding.
Need help?
Do you have a question about the CP330B and is the answer not in the manual?
Questions and answers