Table of Contents
Advertisement
Advertisement
Table of Contents

Related Manuals for Ski-Doo MXZ X 600 RS 2021


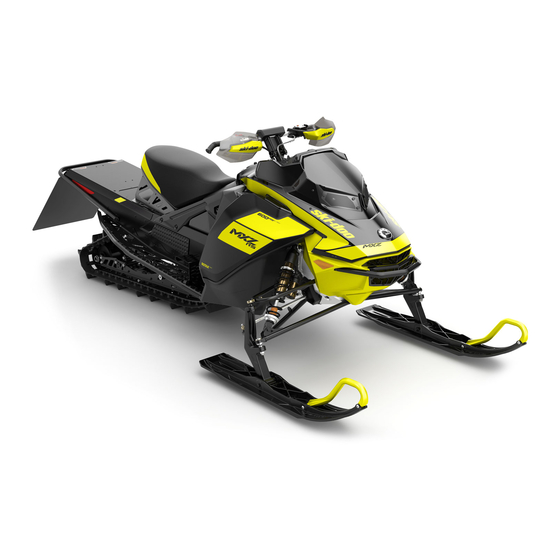
Summary of Contents for Ski-Doo MXZ X 600 RS 2021
- Page 1 M X Z 6 0 0 R S OP E R AT OR ’S GUIDE WARNING Read this guide thoroughly. It contains important safety information. Minimum recommended age: Operator: 16 years old. Keep this Operator’s Guide in the vehicle. 5 2 0 0 0 2 3 4 8 Original Instructions...
- Page 2 WARNING Disregarding any of the safety precautions and instructions SAFETY VIDEO contained in this Operator's Guide, on-product safety labels could cause injury including the pos- sibility of death! WARNING This vehicle may exceed the performance of other vehicles you may have ridden. Take time to familiarize yourself with your new vehicle.
-
Page 3: Foreword
Inc. or its subsidiaries. MX Z™ X™ E-TEC™ ROTAX ® rMotion RAVE™ ® HPG™ Ski-Doo XPS™ The KYB Pro series is a registered mark of KYB America LLC. MODEL PACKAGE ENGINE X-600RS 600R E-TEC Dieses Handbuch ist möglicherweise in Ihrer Landessprache Deutsch verfügbar. -
Page 4: Know Before You Go
Whatever model you have chosen, it is backed by the Bombardier Recreational Products Inc. (BRP) warranty and a network of autho- rized Ski-Doo snowmobile dealers ready to provide the parts, service or accessories you may require. Your dealer is committed to your satisfaction. He has taken training... -
Page 5: Safety Messages
FOREWORD Safety Messages The types of safety messages, what they look like and how they are used in this guide are explained as follows: The safety alert symbol indicates a potential injury hazard. WARNING Indicates a potential hazard, if not avoided, could result in se- rious injury or death. - Page 6 FOREWORD This Operator's Guide should be given to the customer when the ve- hicle is delivered. __________________...
-
Page 7: Table Of Contents
TABLE OF CONTENTS FOREWORD ............1 Know Before you Go . - Page 8 TABLE OF CONTENTS CONTROLS, INSTRUMENTS AND EQUIPMENT (cont’d) 6) Engine Cut-off Switch ........62 7) Multifunction Digital Gauge .
- Page 9 TABLE OF CONTENTS MAINTENANCE PROCEDURES (cont’d) Brake Fluid........... . Chaincase Oil .
- Page 10 ® BRP LIMITED WARRANTY USA AND CANADA: 2021 SKI-DOO SNOWMOBILES ..........
-
Page 11: Safety Information
SAFETY INFORMATION ____ SAFETY INFORMATION... -
Page 12: General Precautions
GENERAL PRECAUTIONS Avoid Carbon Monoxide Poisoning All engine exhaust contains carbon monoxide, a deadly gas. Breath- ing carbon monoxide can cause headaches, dizziness, drowsiness, nausea, confusion and eventually death. Carbon monoxide is a colorless, odorless, tasteless gas that may be present even if you do not see or smell any engine exhaust. -
Page 13: Avoid Burns From Hot Parts
BRP, they may increase the risk of crashes or in- juries, and they can make the vehicle illegal. Tunnel accessories must be loaded onto vehicle as per instructions provided for each accessories. See your authorized Ski-Doo dealer for available accessories for your vehicle. ____ SAFETY INFORMATION... -
Page 14: Special Safety Messages
SAFETY the snowmobile, the Operator's Guide and watch the VIDEO at www.ski-doo.com/safety before operating the snow- mobile. Only allow a new operator to operate the snowmobile in a restricted flat area, at least until he is completely familiar with its operation. If snowmobile operator's training course is offered in your area, have him enroll. - Page 15 SPECIAL SAFETY MESSAGES – Injury or death may result to the snowmobile operator or by- stander if the snowmobile is used in risky conditions which are beyond the operator's or snowmobile's capabilities or intended use. – BRP recommends the operator has at least 16 years old of age. Verify also your local laws for age and training requirements.
- Page 16 SPECIAL SAFETY MESSAGES – Avoid road traveling. If you must do so, and it is permitted, re- duce speed. The snowmobile is not designed to operate or turn on paving. When crossing a road, make a full stop, then look carefully in both directions before crossing at a 90°...
- Page 17 – Do not stud the track unless it has been approved for studs. At speed, a studded track that has not been approved for studs could tear and separate from vehicle. See an authorized Ski-Doo dealer for current specific studding availability and applications.
- Page 18 SPECIAL SAFETY MESSAGES – You may stud the track on this vehicle model. However, you MUST only use the BRP approved type stud for use on Ski-Doo snowmobiles. DO NOT EVER use conventional studs because the track thickness is thinner then our standard tracks. The stud could tear off of track and separate from vehicle.
-
Page 19: Riding The Vehicle
Ski-Doo dealer performs the preseason preparation of your snowmobile. Each visit to your autho- rized Ski-Doo dealer is a great opportunity for your dealer to verify if your snowmobile is included in any safety campaign. We also urge you to visit your authorized Ski-Doo dealer in a timely manner if you become aware of any safety related campaigns. - Page 20 RIDING THE VEHICLE 4. Check fuel level and look for leaks. Replenish if necessary and in case of any leaks; you should seek service from an authorized Ski- Doo dealer, repair shop, or person of your own choosing for main- tenance and repair 5.
- Page 21 RIDING THE VEHICLE Pre-Ride Check List ✔ ITEM OPERATION BODY INCLUDING SEAT, FOOTRESTS, Check condition and remove snow or LIGHTS, AIR FILTER, ice. CONTROLS AND INSTRUMENTS SKIS AND STEERING Check for free movement and proper ACTION operation. FUEL Check for proper level and no leaks. COOLANT Check for proper level and no leaks.
-
Page 22: How To Ride
RIDING THE VEHICLE How to Ride Riding Gear Proper snowmobile clothing should be worn. It should be comfort- able and not too tight. Always check the weather forecast before go- ing on a ride. Dress for the coldest weather expected. Thermal un- derwear next to the skin also provides a good insulation. - Page 23 RIDING THE VEHICLE ing by placing feet outside of the vehicle. Experience will teach you how much lean to put into turns at different speeds and how much you will have to lean into a slope to maintain proper balance. Generally, the riding position for best balance and control is sitting.
- Page 24 RIDING THE VEHICLE mmo2008-003-002 Kneeling This position is achieved by placing one foot firmly on the running board and the opposite knee on the seat. Avoid abrupt stops. mmo2008-003-003 ____ ____ SAFETY INFORMATION...
-
Page 25: Terrain/Riding Variations
RIDING THE VEHICLE Standing Place both feet on the running boards. Knees should be flexed to absorb the shock from surface bumps. This is an effective position to see better and to shift weight as conditions dictate. Avoid abrupt stop. mmo2008-003-004 Terrain/Riding Variations Groomed Trail... - Page 26 RIDING THE VEHICLE comfort, while at the same time keeps the body loose and capable of vehicle control. Beware of hidden rocks or tree stumps partially hidden by a recent snowfall. Deep Snow In deep “powder” snow, your vehicle could begin to “bog” down. If this occurs, turn in as wide an arc as possible and look for a firmer base.
- Page 27 RIDING THE VEHICLE Uphill There are two types of hills you can encounter — the open hill on which there are few trees, cliffs or other obstacles, and a hill that can only be climbed directly. On an open hill, the approach is to climb it by side hilling or slaloming.
- Page 28 RIDING THE VEHICLE Avalanche Hazard When riding on mountainous terrain, you should be aware of the risk of avalanches. Avalanches vary in size and shapes and generally oc- cur in steep terrain and on unstable snow. New snow, animals, people, wind and snowmobiles can all trig- ger an avalanche.
- Page 29 RIDING THE VEHICLE Unfamiliar Territory Whenever you enter an area that is new to you, drive with extreme caution. Go slow enough to recognize potential hazards such as fences or fence posts, brooks crossing your path, rocks, sudden dips, guy wires and countless other obstacles which could result in a termination of your snowmobile ride.
- Page 30 RIDING THE VEHICLE from you, crouch (stand) towards the rear of the vehicle and keep the skis up and straight ahead. Apply partial throttle and brace yourself for the impact. Knees must be flexed to act as shock absorbers. Turning Depending on terrain conditions, there are two preferred ways to turn or corner a snowmobile.
- Page 31 RIDING THE VEHICLE speed needed to crest the bank. Stop completely at the top of the bank and wait for all traffic to clear. Judge the drop to the roadway. Cross the road at a 90° angle. If you encounter another snowbank on the opposite side, position your feet near the rear of the vehicle.
-
Page 32: Environment
RIDING THE VEHICLE Signals If you intend to stop, raise either hand straight above your head. A left turn is indicated by extending your left hand straight out in the proper direction. For right turns, extend the left arm and raise the hand to a vertical position so it forms a right angle at the elbow. - Page 33 RIDING THE VEHICLE In essence, the greatest threat to our sport, is all around us. Which leaves us with one logical choice. When we snowmobile, we must always ride responsibly. The vast majority respect the law and the environment. Each of us must set an example for those who are new to the sport, young and old alike.
- Page 34 Finally, Light Treading is the sign of a smart snowmobiler. You don't have to leave big tracks or careen through a virgin forest to show you can ride. So whether you're driving a high performance Ski-Doo, a sporty MX Z™ snowmobile or any other make or model, show you know what you're doing.
-
Page 35: Traction Enhancing Products
You may stud the track on this vehicle model. However, you MUST only use the BRP approved type stud for use on these Ski-Doo snowmobiles. The stud could tear off of track and separate from vehicle. See an authorized Ski-Doo dealer for current specific studding availability and applications. - Page 36 TRACTION ENHANCING PRODUCTS WARNING If the front and rear of the snowmobile are out of balance due to an incorrect combination of traction enhancing products, the snowmobile may tend to oversteer or understeer, which could lead to a loss of control. Oversteering In certain conditions, using more aggressive ski carbide runners with- out studs on the rear track could make the snowmobile prone to over-...
- Page 37 TRACTION ENHANCING PRODUCTS A33A33A UNDERSTEERING Controlled Driving A balanced combination of carbide ski runners and studs on the track ensures adequate control and better handling, see illustration. A33A34A CONTROLLED DRIVING ____ SAFETY INFORMATION...
-
Page 38: Acceleration
TRACTION ENHANCING PRODUCTS Acceleration Using studs on the track will allow your sled to accelerate better on packed snow and ice but will have no noticeable effect on soft snow. This can cause sudden variations in traction under certain conditions. WARNING To prevent surprises that could lead to a loss of control of the snowmobile:... -
Page 39: Effects Of Having A Studded Track On The Life Of The Snowmobile
TRACTION ENHANCING PRODUCTS Effects of Having a Studded Track on the Life of the Snowmobile The use of traction enhancing products can increase the load and the stress on certain snowmobile components, as well as the vibra- tion level. This can cause premature wear on parts such as belts, brake linings, bearings, chain, chaincase sprocket, and on approved studded tracks, shorten track life. - Page 40 TRACTION ENHANCING PRODUCTS A00A8KA TRACK SYMBOLS 1. Approved 2. NOT Approved To ensure safe and proper installation, BRP recommends to have the studs installed by your dealer. – Use only the BRP approved special studs. – Never use studs that exceed the height of your snowmobile’s track profile by more than 9.5 mm (3/8 in).
- Page 41 TRACTION ENHANCING PRODUCTS WARNING – See an authorized Ski-Doo dealer for current specific stud- ding availability and applications. – DO NOT EVER use conventional stud because, the track thickness is thinner then our standard tracks and the stud could tear off of track and separate from vehicle.
-
Page 42: Maintenance/Replacement
TRACTION ENHANCING PRODUCTS Maintenance/Replacement PROCEED WITH A VISUAL INSPECTION OF YOUR TRACK BEFORE EACH USE. Look for any defects, such as: – Perforations in the track – Tears in the track (particularly around traction holes on studded tracks) – Lugs that are broken or torn off, exposing portions of rods –... -
Page 43: Safety Information On The Vehicle
SAFETY INFORMATION ON THE VEHICLE Hang Tag(s) . Operating, servicing and WARNING maintaining an off-road vehicle can expose you to chemicals including engine exhaust, carbon monoxide, phthalates, and lead, which are known to the State of California to cause cancer and birth defects or other reproductive harm. -
Page 44: Vehicle Safety Labels
The following labels are on your vehicle and they should be consid- ered permanent parts of the vehicle. If missing or damaged, the decals can be replaced free of charge. See an authorized Ski-Doo dealer. NOTE: In the event of any discrepancy between this guide and the vehicle, the safety labels on the vehicle have precedence over the la- bels in this guide. - Page 45 SAFETY INFORMATION ON THE VEHICLE NEVER SIT IN CARGO AREA ability and cause permanent damage. MAXIMUM cargo load (including tongue weight): 15,8 kg (35 lb) 155 N MAXIMUM towing capacity: 260 kg (573 lb) 2550 N 10575 EN-516010575-DEC LABEL 2 NEVER stand behind or near a rotating track.
- Page 46 SAFETY INFORMATION ON THE VEHICLE EN-516008593-DEC_44piH LABEL 5 ____ ____ SAFETY INFORMATION...
- Page 47 SAFETY INFORMATION ON THE VEHICLE EN-516007667A-DEC LABEL 6 ____ SAFETY INFORMATION...
- Page 48 SAFETY INFORMATION ON THE VEHICLE Always electrically disconnect both fuel injectors prior to testing for ignition spark. Otherwise, fuel vapors may ignite in presence of a spark creating a fire hazard. 516007661 EN-516007661-DEC LABEL 7 ____ ____ SAFETY INFORMATION...
- Page 49 SAFETY INFORMATION ON THE VEHICLE Read and understand all safety labels, locate and read operator's guide and watch the safety video (using the QR code link or visit Ski-Doo web site) before operation. • Get familiar with your vehicle. Inexperienced riders may overlook risks and be surprised by vehicle’s specific...
- Page 50 SAFETY INFORMATION ON THE VEHICLE EN-516010558-DEC LABEL 9 ____ ____ SAFETY INFORMATION...
- Page 51 SAFETY INFORMATION ON THE VEHICLE EN-516007652-DEC LABEL 10 • This shock absorber is pressurized. • An explosion may occur if heated or punctured. • Do not disassemble. mmo2010-003-101_en LABEL 11 - ON SHOCK GAS CHARGED ABSORBERS ____ SAFETY INFORMATION...
- Page 52 SAFETY INFORMATION ON THE VEHICLE 516005904A LABEL 12 ____ ____ SAFETY INFORMATION...
-
Page 53: Technical Information Labels
SAFETY INFORMATION ON THE VEHICLE Technical Information Labels 516009984 EN-516009984-DEC LOCATED ON BELT GUARD 520001797-005 ON FUEL CAP - IN COUNTRIES USING PUMP POSTED AKI (RON+MON)/2 OCTANE RATINGS ____ SAFETY INFORMATION... - Page 54 SAFETY INFORMATION ON THE VEHICLE 520001898-709 ON FUEL CAP - IN COUNTRIES USING RON OCTANE RATINGS ____ ____ SAFETY INFORMATION...
- Page 55 SAFETY INFORMATION ON THE VEHICLE This page is intentionally blank ____ SAFETY INFORMATION...
- Page 56 SAFETY INFORMATION ON THE VEHICLE ____ ____ SAFETY INFORMATION...
-
Page 57: Vehicle Information
VEHICLE INFORMATION __________________... -
Page 58: Controls, Instruments And Equipment
CONTROLS, INSTRUMENTS AND EQUIPMENT NOTE: Vehicle safety labels are not shown on illustrations. For infor- SAFETY INFORMATION ON mation on vehicle safety labels, refer to THE VEHICLE 520002097-010 520002097-009 __________________... -
Page 59: Handlebar
CONTROLS, INSTRUMENTS AND EQUIPMENT Handlebar The handlebar controls the steering of the snowmobile. As the han- dlebar is rotated to right or left, the skis are turned right or left to steer the snowmobile. __________________... -
Page 60: Throttle Lever
CONTROLS, INSTRUMENTS AND EQUIPMENT Throttle Lever Throttle lever is located on the RH side of handlebar. Designed to be thumb activated. When squeezed, it increases the engine speed. When released, engine speed returns automatically to idle. mmo2008-008-011_b TYPICAL 1. Throttle lever 2. -
Page 61: Brake Lever
CONTROLS, INSTRUMENTS AND EQUIPMENT Brake Lever Brake lever is located on the LH side of handlebar. When squeezed, brake is applied. When released, it automatically returns to the rest. Braking effect is proportional to the pressure applied on the lever and to the type of terrain and its snow coverage. 520002097-001 TYPICAL 1. -
Page 62: Parking Brake Lever
CONTROLS, INSTRUMENTS AND EQUIPMENT Parking Brake Lever Parking brake lever is located on the LH side of handlebar. Parking brake should be used whenever snowmobile is parked. 520002097-002 TYPICAL 1. Parking brake lever WARNING Make sure parking brake is fully disengaged before operating the snowmobile. -
Page 63: Emergency Engine Stop Switch
CONTROLS, INSTRUMENTS AND EQUIPMENT mmo2009-005-006_a TYPICAL — ENGAGE MECHANISM Step 1: Apply and hold brake Step 2: Lock brake lever using parking brake lever To Release Parking Brake Squeeze brake lever. Parking brake lever will automatically return to its original position. Always release parking brake before riding. Emergency Engine Stop Switch The emergency engine stop switch is located on the RH side of han- dlebar. -
Page 64: Engine Cut-Off Switch
If the switch has been used in an emergency caused by a suspected malfunction, the source of the malfunction should be determined and corrected before restarting engine. See an authorized Ski-Doo dealer for servicing. Engine Cut-off Switch The engine cut-off switch (tether cord) is located on the console. -
Page 65: Multifunction Digital Gauge
The D.E.S.S. key contains an electronic chip which features a unique permanently memorized digital code. Your authorized Ski-Doo dealer has programed the D.E.S.S. of your snowmobile to recognize the D.E.S.S. key in the tether cord cap to al- low vehicle operation. - Page 66 CONTROLS, INSTRUMENTS AND EQUIPMENT Gauge Features 520001496-010_a MULTIFUNCTION DIGITAL GAUGE 1. Mode button 2. Digital displays 3. Icons 4. Bar gauges The gauge also has a built-in beeper. Digital Display WARNING Never adjust or set functions on the multifunction gauge while riding the vehicle.
- Page 67 CONTROLS, INSTRUMENTS AND EQUIPMENT 520001496-010_b 1. Upper Display Lower Display The lower display is used to display – Various information (in combination with the upper display) ICONS AND MESSAGES MONITORING – Messages, see SYSTEM for details. MONITORING SYSTEM – Fault codes, see for details.
- Page 68 CONTROLS, INSTRUMENTS AND EQUIPMENT LH side Bar Gauge 520001496-010_c 1. LH bar gauge LH BAR GAUGE INFORMATION Engine coolant temperature Heated grips level Lap (in lap record mode) The LH side bar gauge displays the engine coolant temperature ex- cept while adjusting the heating elements. NOTICE If engine overheats, stop vehicle in a safe place.
- Page 69 CONTROLS, INSTRUMENTS AND EQUIPMENT RH side Bar Gauge 520001496-010_d 1. RH bar gauge RH BAR GAUGE INFORMATION Heated throttle lever level Record or playback telltale (in lap record mode) HEATED GRIPS For details on heated throttle lever operation, see AND THROTTLE LEVER SWITCH in this section.
- Page 70 CONTROLS, INSTRUMENTS AND EQUIPMENT 520001496-010_f 1. Gauge mode button __________________...
- Page 71 CONTROLS, INSTRUMENTS AND EQUIPMENT See the following table for available combinations. AVAILABLE DISPLAY COMBINATIONS ICON/ ICON/ UPPER LOWER SPECIFIC SPECIFIC DISPLAY DISPLAY INFORMATION INFORMATION Vehicle speed Km/h or MPH Engine speed Odometer Km or MI Trip odometer A(1) Km or MI Trip Vehicle odometer...
- Page 72 CONTROLS, INSTRUMENTS AND EQUIPMENT Top RPM Vehicle Average speed Km/h or MPH fuel consumption Engine L/100Km or speed Engine coolant and C or F temperature Tuned pipe T and C or F temperature (1) Press and hold the mode button to reset (2) Resetting the trip odometer B also resets the average fuel consumption NOTE: Make sure to display the vehicle speed whenever this infor-...
- Page 73 10 minutes when driving). Warm-up period may occur after a restart in very cold weather. NOTE: Additional function may be available for your vehicle, see the appropriate Ski-Doo accessory catalog. Lap Record Mode Entering Lap Record Mode To enter the lap record mode: DISPLAY COMBINATION SELEC- –...
- Page 74 CONTROLS, INSTRUMENTS AND EQUIPMENT 520001496-010_f 1. Gauge mode button To navigate through the functions (RECORD, PLAY or SELECT), repeatedly push DOWN on the heating elements (heated grips and throttle lever) switch. NOTE: It is not possible to adjust the heating elements level while in Lap Record Mode.
- Page 75 CONTROLS, INSTRUMENTS AND EQUIPMENT Exiting Lap Record Mode To exit the lap record mode, press the mode button. Selecting Information on Lower Display (SELECT) The information recorded by default are: – Engine speed (RPM) on the upper display – Vehicle speed on the lower display. The upper display always records the engine speed (RPM) but the lower display can record one of the following: –...
- Page 76 CONTROLS, INSTRUMENTS AND EQUIPMENT While recording, one bar of the RH bar gauge constantly moves up- wards to indicate the gauge is currently recording. The LH bar gauge acts as a lap counter. One bar means first lap, two bars means second lap, and so on. A maximum of 8 laps can be recorded.
-
Page 77: Exhaust Tuned Pipe Preheat Button
CONTROLS, INSTRUMENTS AND EQUIPMENT Exhaust Tuned Pipe Preheat Button 520002097-003 1. Preheat button To preheat the exhaust tuned pipe: 1. Apply the parking brake. 2. Start the engine. 3. Completely release the throttle 4. Push and hold the preheat button and slowly start to press on the throttle lever. -
Page 78: Headlights Dimmer Switch
CONTROLS, INSTRUMENTS AND EQUIPMENT Headlights Dimmer Switch Push the switch forward to select high beam. Push the switch backwards to select low beam. 520001496-004_a 1. High beam 2. Low beam __________________... -
Page 79: 10) Heated Grips And Throttle Lever Switch
NOTE: If the balance between the temperature of the throttle lever and the grips does not suit you, it is possible to adjust it. Contact an authorized Ski-Doo dealer. 11) Rewind Starter Handle Auto-rewind type located on right hand side of snowmobile. To en- gage mechanism, pull handle slowly until a resistance is felt then pull vigorously. -
Page 80: 12) Drive Belt Guard
CONTROLS, INSTRUMENTS AND EQUIPMENT 12) Drive Belt Guard Drive Belt Guard Removal WARNING NEVER operate engine: – Without shields and belt guard securely installed. – With hood and/or side panels opened or removed. NEVER attempt to make adjustments to moving parts while engine is running. - Page 81 CONTROLS, INSTRUMENTS AND EQUIPMENT Drive Belt Guard Installation Insert the tab into the slot and push it into place mmr2013-034-002_a 1. Belt guard tab 2. Front support slot __________________...
- Page 82 CONTROLS, INSTRUMENTS AND EQUIPMENT Push drive belt guard toward engine then toward front of vehicle. mmr2013-034-006_a __________________...
-
Page 83: 13) Front And Rear Bumpers
CONTROLS, INSTRUMENTS AND EQUIPMENT Position the rear portion of the belt guard over the retainer and secure it using the retaining pin. 520001898-002_a 13) Front and Rear Bumpers To be used whenever snowmobile requires manual lifting. CAUTION Beware of injuries by using proper lifting tech- niques, notably by using the force of your legs. - Page 84 CONTROLS, INSTRUMENTS AND EQUIPMENT 520001663-004_a TYPICAL 1. Front bumper NOTICE Do not use skis to pull or lift snowmobile. 520002097-004 REAR BUMPER __________________...
-
Page 85: 14) Side Panels
CONTROLS, INSTRUMENTS AND EQUIPMENT 14) Side Panels WARNING Never operate engine with side panels opened or removed from vehicle. Side Panels Opening and Closing Unlock all three latches, then open panel. 520001663-018_a When closing panel, make sure latches are locked securely. Side Panels Removal Open side panel. - Page 86 CONTROLS, INSTRUMENTS AND EQUIPMENT mmr2017-051-003_a TYPICAL __________________...
-
Page 87: Fuel And Oil
FUEL AND OIL Fuel Requirements NOTICE Always use fresh gasoline/oil mix. Gasoline will ox- idize; the result is loss of octane, volatile compounds, and the production of gum and varnish deposits which can damage the fuel system. Mix the appropriate oil with the gasoline in the recommended ratio. -
Page 88: Pre-Mix Oil
FUEL AND OIL NOTICE Never experiment with other fuels. Engine or fuel sys- tem damages may occur with the use of an inadequate fuel. NOTICE Do NOT use fuel from fuel pumps labeled E85. Pre-Mix Oil This vehicle has no injection oil pump. The oil must be thoroughly mixed with gasoline in an approved fuel container first, then be poured in the vehicle fuel tank. - Page 89 FUEL AND OIL WARNING Always stop engine before refueling. 2. Have operator get off vehicle. WARNING Do not allow anyone seated on the vehicle while fueling. 3. Unscrew slowly the fuel reservoir cap counterclockwise to re- move it. mmo2013-004-025_a TYPICAL 1.
- Page 90 FUEL AND OIL WARNING Never top up the fuel tank before placing the vehicle in a warm area. As temperature increases, fuel expands and may over- flow. 7. Fully tighten fuel reservoir cap clockwise. WARNING Always wipe off any fuel spillage from the vehicle. __________________...
-
Page 91: Break-In Period
BREAK-IN PERIOD Operation During Break-In Engine During the break-in period: – Avoid prolonged full throttle operation. – Avoid sustained accelerations. – Avoid prolonged cruising speeds. – Avoid engine overheating. However, brief accelerations and speed variations contribute to a good break-in. During a predetermined period, the engine management system controls some engine parameters. - Page 92 BREAK-IN PERIOD Drive Belt A new drive belt requires a break in period of 50 km (30 mi). During the break-in period: – Avoid strong acceleration and deceleration. – Avoid pulling a load. – Avoid high speed cruising. If the vehicle creeps, lower the drive belt height from the preliminary DRIVE BELT MAINTENANCE PROCEDURE setting.
-
Page 93: Basic Procedures
BASIC PROCEDURES Engine Starting Procedure Procedure 1. Apply parking brake. 2. Recheck throttle control lever operation. 3. Put your helmet on. 4. Ensure that the tether cord cap is installed on the engine cut-off switch and that the cord is attached to your clothing eyelet. 5. -
Page 94: Shutting Off The Engine
BASIC PROCEDURES NOTICE If vehicle does not move when throttle is applied, stop engine, remove tether cord cap from the engine cut-off switch, then do the following. – Check if skis are stuck on the ground. Lift one ski at a time by the handle, then put it down. -
Page 95: Riding Conditions And Your Snowmobile
RIDING CONDITIONS AND YOUR SNOWMOBILE Temperature The engine management of these engines provides the optimum air/fuel ratio for all temperatures. Hard Packed Snow This snowmobile's track has a lug profile of 44.5 mm (1.75 in) and BRP does not recommend to ride it at high speed on a trail, hard packed snow or ice. -
Page 96: Special Operation
SPECIAL OPERATION Towing Another Snowmobile If a snowmobile is disabled and must be towed use a rigid tow bar. DRIVE Remove the drive belt from disabled snowmobile, refer to BELT MAINTENANCE PROCEDURES and tow at moderate speed. NOTICE Always remove the drive belt of the snowmobile that is to be towed to prevent damage to its belt and drive system. -
Page 97: Tune Your Ride
TUNE YOUR RIDE Snowmobile handling and comfort depend upon multiple adjust- ments. WARNING Suspension adjustment could affect vehicle handling. Always take time to familiarize yourself with the vehicle's behavior af- ter any suspension adjustment have been made. Always ad- just LH and RH suspension components to the same setting. Choice of suspension adjustments vary with carrying load, operator's weight, personal preference, riding speed and field condition. -
Page 98: Rear Suspension Adjustments
TUNE YOUR RIDE Rear Suspension Adjustments 520001797-001_a ADJUSTABLE COMPONENTS 1. Rear spring preload 2. Center shock absorber damping 3. Center spring preload 4. Stopper straps 5. Rear shock absorber damping NOTICE Whenever adjusting rear suspension, check track ten- sion and adjust if necessary. Rear Spring Rear spring preload has an effect on comfort, ride height and load compensation. - Page 99 TUNE YOUR RIDE ACTION RESULT Firmer rear suspension Higher rear end Increasing preload More bump absorption capability Heavier steering Softer rear suspension Lower rear end Decreasing Less bump absorption capability preload Lighter steering Better performance and handling in deep snow Refer to the following to determine if preload is correct.
- Page 100 50 mm (2 in) preload NOTE: If the specification is unattainable with the original springs, see an authorized Ski-Doo dealer for other available springs. NOTICE To increase spring preload, always turn the left side adjustment cam in a clockwise direction, and the right side cam in a counterclockwise direction.
- Page 101 TUNE YOUR RIDE mmo2011-005-503_a TYPICAL - RH SIDE 1. Adjust spring preload Center Spring Center spring preload has an effect on steering effort, handling and bump absorption. Also, since center spring preload adjustment puts more or less pres- sure on the front of the track, it has an effect on the performance in deep snow.
- Page 102 TUNE YOUR RIDE 520002097-005 TYPICAL 1. Spring preload adjustment ring 2. Increase preload 3. Decrease preload NOTE: Use the suspension adjustment tool provided in the tool kit. Stopper Straps Stopper Straps Length Stopper straps length has an effect on the amount of weight the cen- ter spring has to carry especially during acceleration, therefore on the front end uplift.
- Page 103 TUNE YOUR RIDE ACTION RESULT Lighter ski pressure under acceleration Increasing stopper More center spring travel straps length More bump absorption capability Heavier ski pressure under acceleration Decreasing stopper Less center spring travel straps length Less bump absorption capability Stopper straps can be set to position 1, 2, 3, 4 and 5. Below are illus- trations for position 1 and 3.
- Page 104 TUNE YOUR RIDE mmo2015-007-102_b STOPPER STRAP POSITION 1 (1ST HOLE, LONGEST) 1. 1st hole from end 2. Towards rear 3. Tip of strap touching strap axis 4. Two holes left open between screw head and nut 5. Towards front _________________...
- Page 105 TUNE YOUR RIDE mmo2015-007-103_b STOPPER STRAP POSITION 3 (3RD HOLE) 1. Free holes 2. 3rd hole from end 3. Towards rear 4. Tip of strap touching strap axis 5. Two holes left open between screw head and nut 6. Towards front NOTE: Smaller numbers correspond to a longer strap setting.
- Page 106 TUNE YOUR RIDE Generally, a longer stopper strap setting gives better performance in deep snow on a flat landscape. Shock Absorber Damping 520002348-001_a ADJUSTMENT SCREWS 1. High speed rebound - Red screw 2. High speed compression - Blue screw 3. Low speed compression - Grey screw 4.
- Page 107 TUNE YOUR RIDE 520002097-006 TYPICAL FRONT SHOCK ABSORBER 1. Front shock absorber 2. Adjustment screws 520002097-007 TYPICAL REAR SHOCK ABSORBER 1. Rear shock absorber 2. Adjustment screws _________________...
- Page 108 TUNE YOUR RIDE Low Speed Compression Damping (Grey screw) Low speed compression damping controls how the shock absorber reacts to a low suspension velocity (slow compression strokes, in most cases when riding at lower speeds). ACTION RESULT ON BIG BUMPS Increasing low speed Firmer compression damping compression damping force...
-
Page 109: Front Suspension Adjustments
TUNE YOUR RIDE ACTION RESULT Reduce the speed in extension of the suspension. Increasing high speed rebound The suspension will react damping force slower thus comply with less of the bumps on the ground. Let the suspension move Decreasing high speed quicker in extension helping it rebound damping force to follow most of the ground... - Page 110 TUNE YOUR RIDE 2. Remove the ski bolt. 3. Place the spacer according to the desired stance see illustration. WARNING Proceed to the same setting for both skis. mbl2015-002-013_a LH SIDE SHOWN 1. Ski stopper 2. M10 x 130 screw 3.
- Page 111 TUNE YOUR RIDE ACTION RESULT Firmer front suspension Higher front end Increasing preload More precise steering More bump absorption capability Softer front suspension Lower front end Decreasing preload Lighter steering Less bump absorption capability mmo2010-003-019_a TYPICAL 1. Spring preload adjustment ring 2.
- Page 112 TUNE YOUR RIDE Shock Absorber Damping 520002348-001_a ADJUSTMENT SCREWS 1. High speed rebound - Red screw 2. High speed compression - Blue screw 3. Low speed compression - Grey screw 4. Bypass screw Low Speed Compression Damping (Grey Screw) Low speed compression damping controls how the shock absorber reacts to a low suspension velocity (slow compression strokes, in most cases when riding at lower speeds).
- Page 113 TUNE YOUR RIDE ACTION RESULT Increasing high speed Firmer compression damping compression damping force (fast compression) Decreasing high speed Softer compression damping compression damping force (fast compression) To adjust, turn clockwise to increase damping force and counter- clockwise to decrease damping force. High Speed Rebound Damping (Red screw) High speed rebound damping controls how the shock absorber reacts when moving in extension.
-
Page 114: Adjustment Tips According To Vehicle Behavior
TUNE YOUR RIDE ACTION RESULT Reduce the damping force both Increasing bypass in compression and rebound, giving a smoother ride. Raise the damping force in both compression and Decreasing bypass rebound. The suspension can absorb bigger impacts. To adjust, turn clockwise to decrease bypass and counterclockwise to increase bypass. - Page 115 TUNE YOUR RIDE PROBLEM CORRECTIVE MEASURES Rear of snowmobile – Increase rear spring preload. seems too soft – Increase compression damping adjustment if equipped. – Increase rear spring preload. Rear suspension is – Increase center spring preload. frequently bottoming – Lengthen limiter strap. –...
-
Page 116: Vehicle Transportation
VEHICLE TRANSPORTATION Make sure that oil reservoir and fuel tank caps are properly installed. Tilt bed trailers can easily be equipped with a winch mechanism to afford maximum safety in loading. Simple as it may seem, never drive your snowmobile onto a tilt bed trailer or any other kind of trailer or vehicle. -
Page 117: Maintenance
MAINTENANCE _________________... -
Page 118: Maintenance Schedule
MAINTENANCE SCHEDULE Maintenance is very important for keeping your vehicle in safe oper- ating condition. WARNING Failure to properly maintain the vehicle according to the main- tenance schedule and procedures can make it unsafe to oper- ate. EVERY YEAR AT PRESEASON OR 3 000 KM (2,000 MI) (WHICHEVER COMES FIRST) Perform pre-ride inspection Check fault codes... - Page 119 MAINTENANCE SCHEDULE EVERY YEAR AT PRESEASON OR 3 000 KM (2,000 MI) (WHICHEVER COMES FIRST) Adjust headlight beam aiming Inspect engine rubber mounts Lubricate front suspension shocks upper spherical bearings EVERY 2 YEARS OR 6 000 KM (4,000 MI) (WHICHEVER COMES FIRST) Replace brake fluid Inspect throttle cable...
-
Page 120: Maintenance Procedures
MAINTENANCE PROCEDURES This section includes instructions for basic maintenance procedures. WARNING Turn off the engine, remove tether cord cap and follow these maintenance procedures when performing maintenance. If you do not follow proper maintenance procedures you can be injured by hot parts, moving parts, electricity, chemicals or other hazards. -
Page 121: Exhaust System
MAINTENANCE PROCEDURES Exhaust System Exhaust System Verification The muffler tail pipe should be centered with the exit hole in the bot- tom pan. Exhaust system must be free of rust or leaks. Make sure that all parts are securely in place. Check retaining springs condition and replace if necessary. - Page 122 MAINTENANCE PROCEDURES 4. Clean the spark plug and cylinder head with pressurized air. WARNING Whenever using compressed air, always wear protective eye wear. 5. Remove lock securing spark plug wire to spark plug. mmr2017-031-002 6. Remove spark plug cables as shown. _________________...
- Page 123 MAINTENANCE PROCEDURES 219100897-007-001_a Step 1: Gently rotate Step 2: Pull off 7. Unscrew the spark plug sufficiently to break the applied torque using the appropriate tools. mmr2017-031-001 8. Remove spark plugs by hand. _________________...
- Page 124 MAINTENANCE PROCEDURES Installing the Spark Plugs (OEM) 1. Prior to installation, ensure the contact surfaces of the cylinder head and spark plug are free of grime. 2. Using a wire gauge, confirm electrode gap is as specified. Refer TECHNICAL SPECIFICATIONS NOTE: If spark plug gap is incorrect, use another spark plug.
-
Page 125: Brake Fluid
MAINTENANCE PROCEDURES mdd2009-001-551_a SPARK PLUG INDEXING 1. Acceptable installation 2. Unacceptable installation If the plug indexing angle is not within specification, repeat proce- dure with another spark plug until correct indexing is achieved. Brake Fluid Recommended Fluid Use only DOT 4 brake fluid from a sealed container. An opened con- tainer may be contaminated or may have absorbed moisture from the air. - Page 126 MAINTENANCE PROCEDURES WARNING Use only DOT 4 brake fluid from a sealed container. To avoid serious damage to the braking system, do not use fluids other than the recommended one, nor mix different fluids for top- ping up. NOTICE Brake fluid can damage painted and plastic parts. Handle with care.
-
Page 127: Chaincase Oil
MAINTENANCE PROCEDURES CAUTION Avoid getting brake fluid on skin or eyes - it may cause severe burns. In case of contact skin, wash thoroughly. In case of contact with the eyes, immediately rinse with plenty of water for at least 10 minutes and then consult a doctor imme- diately. - Page 128 MAINTENANCE PROCEDURES 520001663-011_a CHECK PLUG Oil level must reach the threaded hole. If level is correct, reinstall check plug and tighten to the specified torque. TIGHTENING TORQUE 6 N•m ± 1 N•m Check plug (53 lbf•in ± 9 lbf•in) CHAINCASE FILLING PROCEDURE If level is insufficient, See Chaincase Filling Procedure Remove the check plug.
- Page 129 MAINTENANCE PROCEDURES 520001663-011_a CHECK PLUG Remove the filler cap. 520001663-010_a TYPICAL - TOP OF CHAINCASE 1. Filler cap Pour recommended oil in the filler hole until oil comes out by the check plug hole. Reinstall check plug and tighten to the specified torque. _________________...
-
Page 130: Drive Chain
MAINTENANCE PROCEDURES TIGHTENING TORQUE 6 N•m ± 1 N•m Check plug (53 lbf•in ± 9 lbf•in) Reinstall the filler cap. Drive Chain Access to Chaincase CONTROLS, INSTRUMENTS AND Open RH side panel, refer to EQUIPMENT Drive Chain Adjustment Using the Torx end of the driven pulley expander, GENTLY turn ten- sioner clockwise to eliminate the play. -
Page 131: Drive Belt
RPM with frozen track, fast starts without warm-up period, burred or rusty sheave, oil on belt or distorted spare belt. Contact an authorized Ski-Doo dealer. Drive Belt Replacement Drive Belt Removal 1. Remove tether cord cap from engine cut-off switch. - Page 132 MAINTENANCE PROCEDURES Drive Belt Installation DRIVE BELT RE- 1. If necessary, open the driven pulley, refer to MOVAL above. 2. Slip the belt over the drive pulley, then over the driven pulley. NOTICE Do not force or use tools to pry the belt into place, as this could cut or break the cords in the belt.
- Page 133 MAINTENANCE PROCEDURES CONTROLS, INSTRUMENTS AND 2. Open LH side panel, refer to EQUIPMENT DRIVE BELT GUARD REMOVAL 3. Remove belt guard, refer to 4. Keep the set screw from turning using a 1/8 inch Allen wrench and loosen the lock nut using a 7/16 in open wrench. 5.
- Page 134 MAINTENANCE PROCEDURES Belt Deflection Measurement 1. Set deflection between 27 mm (1.06 in) and 37 mm (1.46 in) using bottom O-ring. mmr2009-133-003_b DEFLECTION SETTING 1. Bottom O-ring set to specification 2. Place upper O-ring to 0 kgf (0 lbf). 3. Position a straight edge ruler on the drive belt. 4.
-
Page 135: Drive Pulley
Improper assembly or modifications could cause the pulley to explode violently under the stress generated by the high rotational speed. See your Ski-Doo dealer to maintain or service the drive pulley. Improper servicing or maintenance may affect performance and reduce belt life. Always respect maintenance schedules. - Page 136 MAINTENANCE PROCEDURES Procedure CONTROLS, INSTRUMENTS AND EQUIPMENT 1. Refer to and re- move: – LH side panel – Drive pulley guard 2. Locate the cam and the pivot screw on the drive pulley. 520001496-020_a TYPICAL 1. Cam 2. Pivot screw The cam position is identified as follows: –...
- Page 137 MAINTENANCE PROCEDURES mmc2016-001-118_b 1. Numbered position 2. Position 3 - Notch 3. Pointers To adjust, proceed as follows for all 3 cams: 3. Using the driven pulley expander, loosen the pivot screw. _________________...
- Page 138 MAINTENANCE PROCEDURES mmc2016-001-116_a 1. Pivot screw 4. Move the right lever aside to be able to turn the cam. 5. Turn cam to the desired position. _________________...
- Page 139 MAINTENANCE PROCEDURES mmc2016-001-117_a 1. Desired cam position (here #2) 6. Tighten the pivot screw. TIGHTENING TORQUE 5 N•m ± 1 N•m Pivot (44 lbf•in ± 18 lbf•in) NOTICE Always adjust all 3 cams to the same setting. _________________...
-
Page 140: Track
If worn or cut, or if track fibers are exposed, or if missing or defective inserts or guides are noted; contact an authorized Ski-Doo dealer. S S nowmobiles Equipped with Traction Enhancing Products... - Page 141 MAINTENANCE PROCEDURES – Tears in the track (particularly around traction holes on studded tracks) – Lugs that are broken or torn off, exposing portions of rods – Delamination of the rubber – Broken rods – Broken studs (studded tracks) – Bent studs (studded tracks) –...
- Page 142 MAINTENANCE PROCEDURES WARNING To prevent serious injury to individuals near the snowmobile: – NEVER stand behind or near a moving track. – Always use a wide-base snowmobile stand with a rear de- flector panel if it is necessary to rotate track. –...
- Page 143 MAINTENANCE PROCEDURES mmr2009-133-003_b DEFLECTION SETTING 1. Bottom O-ring set to specification 6. Place upper O-ring to 0 kgf (0 lbf). 7. Position the tensiometer on track, halfway between front and rear idler wheels. 8. Push the tensiometer downwards until bottom O-ring (deflection set earlier) be aligned with the bottom of slider shoe.
- Page 144 MAINTENANCE PROCEDURES mmr2009-133-002_a 1. Deflection O-ring aligned with slider shoe 9. Read load recorded by the upper O-ring on the tensiometer. mmr2009-133-003_a LOAD READING 1. Upper O-ring 10. Load reading must be as per the following table. TRACK ADJUSTMENT SPECIFICATION Track deflection setting 3.2 cm (1.26 in) Track load reading...
- Page 145 4. Through the track holes, tighten or loosen both adjustment screws to increase or decrease track tension. NOTE: You may need to position the track to access the adjustment screws. 5. If correct tension is unattainable, contact an authorized Ski-Doo dealer. _________________...
- Page 146 MAINTENANCE PROCEDURES 6. Retighten the retaining nut to specifications while holding axle. TIGHTENING TORQUE 48 N•m ± 6 N•m Rear axle nut (35 lbf•ft ± 4 lbf•ft) 7. Check track alignment as described below. Track Alignment WARNING Before checking track alignment, ensure that the track is free of all particles which could be thrown out while track is ro- tating.
- Page 147 MAINTENANCE PROCEDURES A01F05A 1. Guides 2. Slider shoes 3. Equal distance 4. To correct track alignment: Stop engine. Remove tether cord cap from engine cut-off switch. WARNING Remove tether cord cap from engine cut-off switch be- fore performing any maintenance or adjustment, unless otherwise specified.
-
Page 148: Suspension
MAINTENANCE PROCEDURES A01F0BA 1. Guides 2. Slider shoes 3. Tighten on this side 5. Tighten the rear axle nut. WARNING Properly tighten wheel retaining bolt, otherwise wheel may come off and cause track to “lock”. 6. Restart engine and rotate track slowly to recheck alignment. 7. - Page 149 MAINTENANCE PROCEDURES Suspension Stopper Strap Condition Inspect stopper straps for wear and cracks, bolt and nut for tightness. If loose inspect holes for deformation. Replace as required. Tighten nut to specification. TIGHTENING TORQUE 10 N•m ± 1 N•m (89 lbf•in ± 9 lbf•in) Stopper strap nut Suspension Lubrication Lubricate the following suspension pivots at grease fittings.
-
Page 150: Skis
Steering and Front Suspension Condition Visually inspect steering and front suspension for tightness of com- ponents (steering arms, control arms and links, tie rods, ball joints, ski bolts, ski legs, etc.). If necessary, contact an authorized Ski-Doo dealer. Skis Wear and Condition of Skis and Runners Check the condition of the skis and ski runner carbides. - Page 151 MAINTENANCE PROCEDURES Unlock fuse block from its cover. FUSE IDENTIFICATION AMPERAGE RATING F1: Start, RER, Clock F2: Loads 25 A F3: Battery 30 A F4: Accessories 7.5 A Fuse Inspection Check fuse condition and replace it if necessary. WARNING Never use a higher rated fuse than specified. To remove fuse from holder, pull fuse out.
-
Page 152: Headlights
MAINTENANCE PROCEDURES WARNING If fuse burns out repeatedly, source of malfunction should be determined and corrected before restarting. See an autho- rized Ski-Doo dealer for servicing. Headlights Headlights Bulb Replacement The headlights bulbs are not replaceable. Replace assembly. Remove screws holding light assembly. - Page 153 MAINTENANCE PROCEDURES 520001898-701 _________________...
-
Page 154: Vehicle Care
VEHICLE CARE Post-Operation Care Remove snow and ice from rear suspension, track, front suspension, steering mechanism and skis. WARNING Make sure D.E.S.S. key is removed from D.E.S.S. post before standing in front the vehicle, getting close to the track or rear suspension components. -
Page 155: Storage
STORAGE During summer, or when a snowmobile is not in use for more than three months, proper storage is necessary. STORAGE Clean the vehicle Add fuel stabilizer to fuel following the product manufacturer recommendations. Run the engine after adding the product to the fuel. Run the engine until there is no fuel left. - Page 156 STORAGE This page is intentionally blank _________________...
-
Page 157: Technical Information
TECHNICAL INFORMATION _________________... -
Page 158: Vehicle Identification
VEHICLE IDENTIFICATION Vehicle Description Decal Vehicle description decal is located on right hand side of tunnel. mmo2013-004-037_a TYPICAL 1. Vehicle description decal Date XX/XX/XX BOMBARDIER RECREATIONAL PRODUCTS Inc. XXXXXXXXXXXXXXXXX XXXXXXXXXXXXXXXXX VIN. / NIV. Description Type: SNO/MNG xxxxxxxxxxx xxxxxx xxxx xxxx xxxx MOD. -
Page 159: Identification Numbers
These numbers are required by the authorized Ski-Doo dealer to complete warranty claims properly. We strongly recommend that you take note of all the identification numbers on your snowmobile and supply them to your insurance company. - Page 160 VEHICLE IDENTIFICATION 520001797-002_a 1. Engine identification number _________________...
-
Page 161: Vehicle Compliance Labels
VEHICLE COMPLIANCE LABELS EMISSION CONTROL INFORMATION THIS SNOWMOBILE IS DESIGNED EXCLUSIVELY FOR COMPETITION AND IS EXEMPT FROM EMISSION STANDARDS AND RELATED REQUIREMENTS UNDER 40 CFR 1051.620 AND SOR/2011-10 5.(4). RENSEIGNEMENTS SUR LE DISPOSITIF ANTIPOLLUTION CETTE MOTONEIGE EST CONÇUE EXCLUSIVEMENT POUR LA COMPÉTITION ET EST EXCLUE DES NORMES D`ÉMISSIONS ET DE LEURS REQUIS SELON 40 CFR 1051.620 ET DORS/2011-10 5.(4). - Page 162 VEHICLE COMPLIANCE LABELS CERTIFIED CE MODÈLE A ÉTÉ ÉVALUÉ THIS MODEL HAS BEEN PAR UN LABORATOIRE EVALUATED BY AN INDE- D'ESSAIS INDÉPENDANT PENDENT TESTING LABOR- ET SATISFAIT TOUTES LES ATORY AND IT MEETS ALL NORMES DE SÉCURITÉ DU SSCC SAFETY STANDARDS SSCC EN VIGUEUR À...
-
Page 163: Eac Declaration Of Conformity
EAC DECLARATION OF CONFORMITY Left blank for Eurasian Conformity mark where applicable _________________... -
Page 164: Radio Frequency Digitally Encoded Security System (Rf D.e.s.s. Key)
RADIO FREQUENCY DIGITALLY ENCODED SECURITY SYSTEM (RF D.E.S.S. KEY) This device complies with FCC Part 15 and Industry Canada license exempt RSS standard(s). Operation is subject to the following two conditions: (1) this device may not cause interference, and (2) this device must accept any inter- ference, including interference that may cause undesired operation of the device. -
Page 165: Specifications (Engine)
SPECIFICATIONS (ENGINE) ENGINE Rotax 600 E-TEC ® Engine type Liquid cooled with reed valves and electronic RAVE Number of cylinder 72.3 mm Bore (2.846 in) 73.0 mm Stroke (2.874 in) 599.4 cm³ Displacement (36.58 in³) Maximum power engine speed 8500 ± 100 RPM FUEL/LUBRICATION SYSTEM E-TEC direct injection with... - Page 166 SPECIFICATIONS (ENGINE) ELECTRICAL SYSTEM 30 A @ 14.5 V Lighting system output 1340 W @ 6000 NGK ILKR9Q7 (engine and spark Type plug threads are indexed) Spark plug Not adjustable 0.6 mm to 0.7 mm (.024 in to .028 in) _________________...
-
Page 167: Specifications (Vehicle)
SPECIFICATIONS (VEHICLE) COOLING SYSTEM XPS Extended Recommended life pre-mixed coolant Coolant Type Distilled water Alternative, and antifreeze or if not solution (50% available distilled water, 50% antifreeze) FUEL SYSTEM In-tank electrical Fuel pump fuel pump Premium unleaded gasoline (fuel Type which may contain up to 10% MAX... - Page 168 SPECIFICATIONS (VEHICLE) DRIVE SYSTEM XPS Synthetic Type chaincase oil Chaincase 350 ml Capacity (12 U.S. oz) 22/51 Chaincase ratio Type Racing pDrive Drive pulley Engagement RPM 5700 ± 100 RPM Driven Team Type pulley Rapid reaction Drive sprocket number of teeth Width 38 cm (15 in) Track...
- Page 169 SPECIFICATIONS (VEHICLE) BRAKE SYSTEM Brake pad material Metallic Minimum brake pad thickness 0.5 mm (.02 in) Minimum brake disc thickness 5.4 mm (.213 in) Maximum brake disc warpage 0.2 mm (.01 in) SUSPENSION FRONT Suspension type RAS 3 RS 234 mm (9.2 in) Suspension maximum travel KYB PRO 46 Shock absorber type...
- Page 170 SPECIFICATIONS (VEHICLE) WEIGHT AND DIMENSIONS 1 275 mm Overall width (50.2 in) 1 200 mm Overall height (47.2 in) 1 094 mm Ski stance (43.1 in) _________________...
-
Page 171: Trouble-Shooting
TROUBLE- SHOOTING _________________... -
Page 172: Troubleshooting Guidelines
SKI-DOO dealer for proper alignment and tension adjust- ments. 7. R.A.V.E. valves problem. – Seek service from an authorized Ski-Doo dealer, repair shop, or person of your own choosing for maintenance, repair, or re- placement. 8. Fuel pressure too low. - Page 173 ENGINE BACKFIRES (cont’d) 2. Ignition timing is incorrect or there is an ignition system fail- ure. – Seek service from an authorized Ski-Doo dealer, repair shop, or person of your own choosing for maintenance, repair, or re- placement. 3. Exhaust system leak.
-
Page 174: Monitoring System
MONITORING SYSTEM Icons, Messages and Beeper Codes The gauge icons inform you of an anomaly or a particular condition. Icons can come on or blink alone or in combination with others. 520001496-010_e 1. Lower display In addition to the icons, messages are displayed along with a beep code. - Page 175 ENGINE MAINTENANCE refer to OVERHEAT coolant level correct and overheating 4 short persists, contact beeps authorized Ski-Doo every dealer. 30 seconds the engine if condition persists. MUFFLER Reduce speed or stop engine. Let engine cool down and restart. overheating persists,...
- Page 176 — KNOCK every 8 necessary. seconds – If fault still occurs, contact an authorized Ski-Doo dealer, repair shop, or person of your own choosing. 4 short Engine RPM limited for beeps — REV LIMIT protection when certain every faults occur.
-
Page 177: Fault Codes
Ski-Doo dealer. Fault Codes If the check engine icon is ON, it is possible to read fault code(s) on the gauge. To read active fault code(s), select the vehicle speed and engine RPM... - Page 178 1. High beam 2. Low beam If two or more codes are registered, use the gauge mode button to scroll. To exit the fault codes mode, press and hold the gauge mode button. Contact an authorized Ski-Doo dealer for code signification. _________________...
-
Page 179: Warranty
WARRANTY _____... -
Page 180: Brp Limited Warranty Usa And Canada: 2021 Ski-Doo
SCOPE OF THE LIMITED WARRANTY Bombardier Recreational Products Inc. (“BRP”)* warrants its 2021 Ski-Doo snowmobiles sold by authorized BRP dealers (as defined be- low) in the United States of America (“USA”) and in Canada from de- fects in material or workmanship for the period and under the con- ditions described below. - Page 181 EXCLUSIONS – ARE NOT WARRANTED The following are not warranted under any circumstances: – Normal wear and tear; – Routine maintenance items, tune ups, adjustments; – Damage caused by failure to provide proper maintenance and/or storage, as described in the Operator's Guide; –...
- Page 182 This warranty coverage is available only if each of the following con- ditions has been fulfilled: – The 2021 Ski-Doo snowmobile must be purchased as new and unused by its first owner from a BRP dealer authorized to dis- tribute Ski-Doo snowmobiles in the country in which the sale occurred (“BRP dealer”);...
- Page 183 BRP or an authorized Ski-Doo Distribu- tor/Dealer receives a proof that the former owner agreed to the transfer of ownership, in addition to the co-ordinates of the new owner.
- Page 184 CONSUMER ASSISTANCE In the event of a controversy or a dispute in connection with this lim- ited warranty, BRP suggests that you try to resolve the issue at the dealership level. We recommend discussing the issue with the au- thorized dealer's service manager or owner. If the matter still remains unresolved, contact BRP by filling out the customer contact form at www.brp.com or contact BRP by mail at CONTACT US...
-
Page 185: Brp International Limited Warranty: 2021 Ski-Doo
SNOWMOBILES SCOPE OF THE LIMITED WARRANTY Bombardier Recreational Products Inc. (“BRP”)* warrants its 2021 Ski-Doo snowmobiles sold by distributors or dealers au- thorized by BRP to distribute SKI-Doo snowmobiles ("Ski-Doo Distributor/Dealer") outside of the fifty United States, Canada, members of the European Economic Area (which is comprised of the member states of the European Union plus the United Kingdom, Norway, Iceland and Liechtenstein) (“EEA”), members states of the... - Page 186 Neither the Ski-Doo Distributor/Dealer nor any other person has been authorized to make any affirmation, representation or warranty regarding the product, other than those contained in this limited warranty, and if made, shall not be enforceable against BRP. BRP reserves the right to modify this warranty at any time, being un- derstood that such modification will not alter the warranty conditions applicable to the products sold while this warranty is in effect.
- Page 187 This warranty coverage is available only if each of the following con- ditions has been fulfilled: – The 2021 Ski-Doo snowmobile must be purchased as new and unused by its first owner from a Ski-Doo Distributor/Dealer autho- rized to distribute Ski-Doo snowmobiles in the country in which the sale occurred;...
- Page 188 – The product must have undergone proper registration by an au- thorized Ski-Doo Distributor/Dealer; – The 2021 Ski-Doo snowmobile must be purchased in the country or union of countries in which the purchaser resides. – Routine maintenance outlined in the Operator’s Guide must be timely performed in order to maintain warranty coverage.
- Page 189 BRP or an authorized Ski-Doo Distribu- tor/Dealer receives a proof that the former owner agreed to the transfer of ownership, in addition to the co-ordinates of the new owner.
-
Page 190: Ski-Doo
SNOWMOBILES SCOPE OF THE LIMITED WARRANTY Bombardier Recreational Products Inc. (“BRP”)* warrants its 2021 Ski-Doo snowmobiles sold by distributors or dealers authorized by BRP to distribute Ski-Doo snowmobiles ("Ski-Doo Distribu- tor/Dealer") in member states of the European Economic Area (which is comprised of the member states of the European Union plus the United Kingdom, Norway, Iceland and Liechtenstein) ("EEA"), in member states of the Commonwealth of the Indepen-... - Page 191 Neither the Ski-Doo Distributor/Dealer nor any other person has been authorized to make any affirmation, representation or warranty regarding the product, other than those contained in this limited warranty, and if made, shall not be enforceable against BRP. BRP reserves the right to modify this warranty at any time, being un- derstood that such modification will not alter the warranty conditions applicable to the products sold while this warranty is in effect.
- Page 192 This warranty coverage is available only if each of the following con- ditions has been fulfilled: – The 2021 Ski-Doo snowmobile must be purchased as new and unused by its first owner from a Ski-Doo Distributor/Dealer au- thorized to distribute Ski-Doo products in the country in which the sale occurred;...
- Page 193 COVERAGE The customer must cease using the snowmobile upon the appear- ance of an anomaly. The customer must notify a servicing Ski-Doo Distributor/Dealer within two (2) months of the appearance of a defect, and provide it with reasonable access to the product and reasonable opportunity to repair it.
- Page 194 BRP or an authorized Ski-Doo Distribu- tor/Dealer receives a proof that the former owner agreed to the transfer of ownership, in addition to the co-ordinates of the new owner.
- Page 195 ADDITIONAL TERMS AND CONDITIONS FOR FRANCE ONLY The following terms and conditions are applicable to products sold in France only: The seller shall deliver goods that are complying with the contract and shall be responsible for defects existing upon delivery. The seller shall also be responsible for defects resulting from packaging, assembling instructions or the installation when it is its responsibility per the contract or if accomplished...
-
Page 196: Maintenance Records
MAINTENANCE RECORDS Send photocopy of maintenance record to BRP if needed. PREDELIVERY Serial Signature/Print: number: Mileage / Hours: Date: Dealer Notes: Refer to vehicle Pre-Delivery Bulletin for detailed installation procedures FIRST INSPECTION Mileage / Signature/Print: Hours: Date: Dealer Notes: For maintenance schedule refer to Maintenance Information section of this operator's guide _________________... - Page 197 SERVICE Mileage / Signature/Print: Hours: Date: Dealer Notes: For maintenance schedule refer to Maintenance Information section of this operator's guide SERVICE Mileage / Signature/Print: Hours: Date: Dealer Notes: For maintenance schedule refer to Maintenance Information section of this operator's guide _________________...
- Page 198 SERVICE Mileage / Signature/Print: Hours: Date: Dealer Notes: For maintenance schedule refer to Maintenance Information section of this operator's guide SERVICE Mileage / Signature/Print: Hours: Date: Dealer Notes: For maintenance schedule refer to Maintenance Information section of this operator's guide _________________...
- Page 199 SERVICE Mileage / Signature/Print: Hours: Date: Dealer Notes: For maintenance schedule refer to Maintenance Information section of this operator's guide SERVICE Mileage / Signature/Print: Hours: Date: Dealer Notes: For maintenance schedule refer to Maintenance Information section of this operator's guide _________________...
- Page 200 _________________...
-
Page 201: Customer Information
CUSTOMER INFORMATION _____... -
Page 202: Privacy Information
PRIVACY INFORMATION BRP wishes to inform you that your coordinates will be used for safety and warranty related purposes. Furthermore, BRP and its affiliates may use its customer list to distribute marketing and pro- motional information about BRP and related products. To exercise your right to consult or correct your data, or to be re- moved from the addressee-list for direct marketing, please contact BRP. -
Page 203: Contact Us
CONTACT US www.brp.com Asia Room 4609, Tower 2, Grand Gateway 3 Hong Qiao Road Shanghai, China 200020 21F Shinagawa East One Tower 2-16-1 Konan, Minatoku-ku, Tokyo 108-0075 Japan Europe Skaldenstraat 125 B-9042 Gent Belgium Itterpark 11 D-40724 Hilden Germany ARTEPARC Bâtiment B Route de la côte d'Azur, Le Canet 13590 Meyreuil France... -
Page 204: North America
CONTACT US North America 565 de la Montagne Street Valcourt (Québec) J0E 2L0 Canada Sa De Cv, Av. Ferrocarril 202 Parque Ind. Querétaro, Lote2-B 76220 Santa Rosa Jáuregui, Qro., Mexico Sturtevant, Wisconsin, U.S.A. 10101 Science Drive Sturtevant, Wisconsin 53177 U.S.A. Oceania 6 Lord Street Lakes Business Park... -
Page 205: Change Of Address/Ownership
BRP. STOLEN UNITS: If your personal Snowmobile is stolen, you should notify BRP or an authorized Ski-Doo dealer. We will ask you to pro- vide your name, address, phone number, the vehicle identification number and the date it was stolen. - Page 206 CHANGE OF ADDRESS/OWNERSHIP This page is intentionally blank _________________...
- Page 207 CHANGE OF ADDRESS/OWNERSHIP CHANGEADD-SKI _________________...
- Page 208 CHANGE OF ADDRESS/OWNERSHIP This page is intentionally blank _________________...
- Page 209 CHANGE OF ADDRESS/OWNERSHIP CHANGEADD-SKI _________________...
- Page 210 CHANGE OF ADDRESS/OWNERSHIP This page is intentionally blank _________________...
- Page 211 WARNING THIS OPERATOR'S GUIDE IS WRITTEN USING A GENERIC FORM AND FOR A GENERAL USE OF THE SNOWMOBILE. THE MXZ X 600 RS RACE MODEL IS DESIGNED EXCLUSIVELY FOR COMPETITION AND IS EXEMPT FROM EMISSION STANDARDS AND RELATED REQUIREMENTS UNDER THE UNITED STATES ENVIRONMENTAL PROTECTION AGENCY 40 CFR 1051.620 AND ENVIRONMENT CANADA SOR/2011-10 5.(4).
Need help?
Do you have a question about the MXZ X 600 RS 2021 and is the answer not in the manual?
Questions and answers