Advertisement
Quick Links
IMPORTANT
Nous vous sugg é rons de lire ce d é pliant jusqu'au
bout et de suivre les instructions simples é tape
par é tape.
Vérifiez soigneusement que vous avez toutes les
pi è ces avant de commencer l'assemblage.
Gardez les pi è ces de fixation hors de la port é e
des enfants et tenir les enfants bien é loign é s de
la zone d'assemblage.
Nous recommandons d'utiliser l'emballage pour
protéger les surfaces durant l'assemblage.
AVERTISSEMENT
Manipulez les pi è ces de bois avec soin durant
l'assemblage,car elles peuvent s'égratigner
facilement.
No
lllustration
1
3
5
7
9
11
DIRECTIVES D'ASSEMBLAGE
ASSEMBLY INSTRUCTIONS
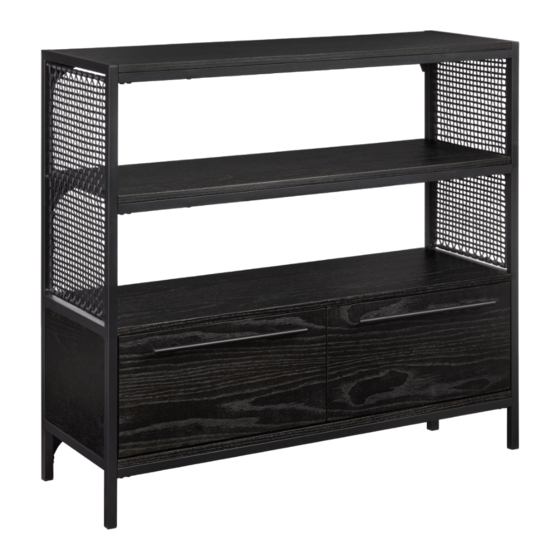
Étagère / Shelf Unit
Description
Cadre latéral
Side frame
Croisillon
Cross brace
Planche latérale
Sideboard
Planche centrale
Middle board
Planche inférieure du
meuble
Cabinet bottom board
Planche dorsale du tiroir
Drawer back board
9403943
IMPORTANT
We suggest you read through this leaflet and
follow the simple step-by-step instructions.
Carefully check that you have all parts before
beginning assembly.
Keep fittings out of children's reach and keep
children well away from the assembly area.
We recommend using the packaging to
protect surfaces during assembly.
WARNING
Handle wood components with care during
assembly as they can scratch easily.
QTE
No
lllustration
QTY
1
2
6
4
1
6
1
8
1
10
2
12
Description
Cadre latéral
Side frame
Planche arrière
Back board
Planche latérale
Sideboard
Planche du haut du
cabinet
Cabinet top board
Planche latérale du
meuble
Cabinet sideboard
Planche gauche du tiroir
Drawer left side board
QTE
QTY
1
1
1
1
2
2
Advertisement

Subscribe to Our Youtube Channel
Related Manuals for Bouclair 9403943


Summary of Contents for Bouclair 9403943
- Page 1 DIRECTIVES D’ASSEMBLAGE ASSEMBLY INSTRUCTIONS 9403943 Étagère / Shelf Unit IMPORTANT IMPORTANT Nous vous sugg é rons de lire ce d é pliant jusqu’au bout et de suivre les instructions simples é tape We suggest you read through this leaflet and follow the simple step-by-step instructions.
- Page 2 Planche inférieure du Planche droite du tiroir tiroir Right drawer side board Drawer bottom board Devant de tiroir gauche Devant de tiroir droit Front of left drawer Front of rigth drawer Tablette d'étagère supérieure Top shelf board lllustration Description lllustration Description Tige connectrice Came...
- Page 3 Fixez 24 x Tige de connexion (A) à 1 x Planche arrière (4) et 1 x Planche latérale (6)(5) et 1 x Planche du haut du cabinet (8) et Devant de tiroir gauche (15) et Devant de tiroir droit (16), serrez avec le tournevis (non inclus).
- Page 4 Fixez 2 x Glissière (CL) et 2 x Glissière (CR)à 1 x Planche latérale (5)(6) et 1 x Planche centrale (7), à l'aide de 12 x Vis (H), serrez avec le tournevis (Non inclus). Attach 2 x Slider (CL) and 2 x Slider (CR)to 1 x Sideboard (5)(6) and 1 x Middle board (7), using 12 x Screw(H), tighten with the screwdriver (Not included).
- Page 5 Fixer le cadre assemblé à l'étape l'étape 3 à 1 x Planche du haut du cabinet (8), en utilisant 10 x Came(B) et 10 x Goujon(C), serrer avec un tournevis (non inclus). Attach the frame assembled in step 3 to 1 x Cabinet top board (8), Using 10 x Cam(B) and 10 x Dowel(C), tighten with the screwdriver (Not included) Fixez le cadre assemblé...
- Page 6 Fixez 6 x Croisillon (3) à 1 x Cadre latéral (1)(2) à l'aide de 24 x Vis (D), serrez avec la Clé hexagonale (P). Attach 6 x Cross brace (3) to 1 x Side frame (1)(2), using 24 x Screw (D), tighten with the Allen key (P).
- Page 7 Fixez 4 x Vis(J) au Cadre latéral (1)(2), Serrez-les avec la Clé hexagonale (P). Attach 4 x Screw(J) to Side frame (1)(2), Tighten with the Allen key (P). Fixez 1 x Glissière (DL) à 1 x Planche gauche du tiroir (12), Fixez 1 x Glissière (DR) à...
- Page 8 Fixez 1 x Devant de tiroir de gauche (15) au cadre assemblé à l'étape 9, en utilisant 4 x Came(B), serrez avec un tournevis (non inclus), Fixez 1 x Poignée (K) au-devant de tiroir gauche (15), à l'aide de 2 x Vis(L), serrez avec un tournevis (non inclus), Répétez cette étape avec l'autre tiroir.
- Page 9 (17), using 1 x Screw(H), tighten with the screwdriver (Not included). Attach 1 x Wall screw(M) to the wall, Again the items on the wall, using 1 x Screw(N), Tighten with the screwdriver (Not included). Questions? customerservise@bouclair.com / 1-800-268-254...
Need help?
Do you have a question about the 9403943 and is the answer not in the manual?
Questions and answers