Table of Contents
Advertisement
Quick Links
MNC360 PoC Mobile Radio
User Manual
Hytera US Inc.
Hytera Canada
100 Leek Crescent, Unit 11
8 Whatney,
Irvine, CA 92618
Richmond Hill, ON L4B 3E6
(949) 326-5742
(905) 305-7545
www.hytera.ca info@hytera.ca
1363 Shotgun Road,
Sunrise, FL 33326
(954) 846-1011
www.hytera.us info@hytera.us
(C) 2022 Hytera Communications Ltd. All rights reserved.
Advertisement
Table of Contents

Related Manuals for Hytera MNC360


Summary of Contents for Hytera MNC360
- Page 1 Hytera Canada 100 Leek Crescent, Unit 11 8 Whatney, Irvine, CA 92618 Richmond Hill, ON L4B 3E6 (949) 326-5742 (905) 305-7545 www.hytera.ca info@hytera.ca 1363 Shotgun Road, Sunrise, FL 33326 (954) 846-1011 www.hytera.us info@hytera.us (C) 2022 Hytera Communications Ltd. All rights reserved.
- Page 2 Preface Welcome to the world of Hytera and thank you for purchasing this product. This manual includes a description of the functions and step-by-step procedures for use. To avoid bodily injury or property loss caused by incorrect operation, please carefully read the Safety Information Booklet before use.
- Page 3 (Conducted), UMTS 23.5 dBm (Conducted), LTE: 22.5 dBm (Conducted) Hereby, Hytera Communications Corporation Limited declares that the radio equipment type MNC360 PoC mobile radio is in compliance with Directive 2014/53/EU. The full text of the EU declaration of conformity is available at the following internet address: https://www.hytera.com/en/download-center.page.
- Page 4 This device complies with part 15 of the FCC Rules. Operation is subject to the following two conditions: (1) This device may not cause harmful interference, and (2) this device must accept any interference received, including interference that may cause undesired operation. Changes or modifications not expressly approved by the party responsible for compliance could void the user's authority to operate the equipment.
-
Page 5: Table Of Contents
User Manual Contents Contents Documentation Information ........................1 1. Packing List .............................. 2 2. Product Layout ............................3 3. Installation ..............................4 3.1 Precautions ............................4 3.2 Procedure ............................. 4 4. Basic Operations ............................6 4.1 Turning On or Off the Radio ......................... 6 4.2 Restarting the Radio .......................... - Page 6 Contents User Manual 6.7.1 Setting the Profile ........................13 6.7.2 Selecting the Speaker ......................13 6.7.3 Enabling the Emergency Broadcast ..................13 6.8 Storage ............................... 13 6.8.1 Checking the Storage Usage ....................13 6.8.2 Freeing up the Storage Space ....................14 6.9 Memory ...............................
- Page 7 User Manual Contents 11. Troubleshooting ........................... 25 12. Care and Cleaning ..........................27 12.1 Product Care ............................ 27 12.2 Product Cleaning ..........................27 13. Optional Accessories .......................... 28 14. Abbreviations ............................29...
-
Page 8: Documentation Information
User Manual Packing List Documentation Information Instruction Conventions Icon Description Indicates references that can further describe the related topics. Indicates situations that could cause data loss or equipment damage. Notation Conventions Item Description Example To save the configuration, click Apply. Denotes menus, tabs, parameter names, window names,... -
Page 9: Packing List
Packing List User Manual 1. Packing List Please unpack carefully and check that you have received the following items. If any item is missing or damaged, contact your dealer. Quantity Quantity Item Item (PCS) (PCS) Mobile Radio GPS Antenna Bracket Self-tapping Screw (5 mm x 12 mm) Palm Microphone Self-tapping Screw (4 mm x 16 mm) -
Page 10: Product Layout
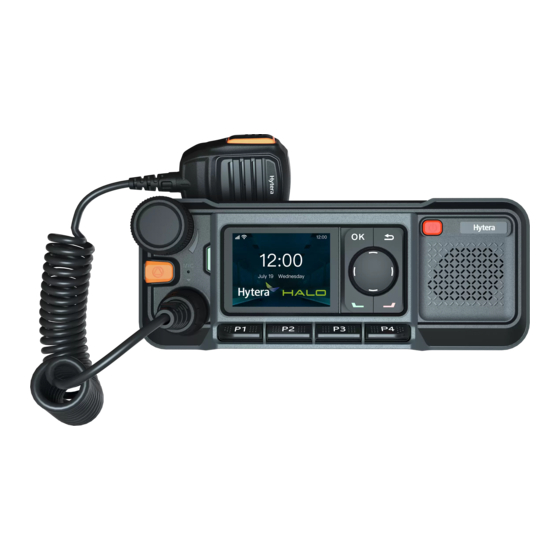
User Manual Product Layout 2. Product Layout Mobile Radio Palm Microphone... -
Page 11: Installation
Installation User Manual 3. Installation 3.1 Precautions Before installation, read the following guidelines carefully: Before installation, ensure that the vehicle power supply has a negative ground with the voltage of 13.6±15% V. If you use 24 V power supply, convert the voltage through a voltage converter. ... - Page 12 User Manual Installation Mount the radio to the fixed bracket. Install the microphone hanger in a reachable range, and then use the tapping screws (4 mm x 16 mm) to secure Plug the aviation connector on the palm microphone into aviation port on the radio with the triangle index on the palm microphone upwards, and then rotate the connector clockwise to secure it.
-
Page 13: Basic Operations
Basic Operations User Manual 4. Basic Operations 4.1 Turning On or Off the Radio Turning On the Radio After the vehicle is started, the radio automatically turns on. Long press the On-Off key for two seconds until the startup screen appears. Turning Off the Radio ... -
Page 14: Screen Operations
User Manual Basic Operations Icon Radio Status The radio operates in Airplane mode. An earpiece is connected. An accessory is connected. The radio operates in Silent mode. The BT feature is enabled. A BT device is connected. The GPS is positioning. The memory is insufficient. -
Page 15: Using The Dual Sim Cards
Basic Operations User Manual 4.6 Using the Dual SIM Cards You can use two SIM cards, but cannot access data services simultaneously. 4.6.1 Enabling or Disabling the SIM Cards Press the Navigation key to select Settings, and then press the OK key. Press the Navigation key to select SIM cards, and then press the OK key. -
Page 16: Poc Services
User Manual PoC Services 5. PoC Services You can use Push-to-Talk over Cellular (PoC) services such as one-to-one or one-to-many voice call over the public network. This service is available only when you have installed the PoC application on the radio. After the radio is connected to a WLAN or cellular network, you can initiate a call through the PoC application. -
Page 17: System Settings
System Settings User Manual 6. System Settings Press the Navigation key to select Settings, press the OK key, and then set the following radio parameters. 6.1 WLAN After the radio connects to WLAN, you can access the Internet. Press the OK key twice to enable the WLAN. Press the Navigation key to select an available WLAN in the list, and then press the OK key. -
Page 18: Cellular Network
User Manual System Settings Press the Navigation key to select Done, and then press the OK key. 6.3 Cellular Network Before connecting to the cellular network, make sure that the Nano SIM card is installed and the cellular data service is activated. When using a Nano SIM card make sure you use the Micro adapter to install your SIM. Press the Navigation key to select Cellular networks, and then press the OK key. -
Page 19: Hotspot
System Settings User Manual 6.5 Hotspot After the radio connects to the cellular or WLAN network, you can share your internet connection with other devices. Press the Navigation key to select More, and then press the OK key. Press the Navigation key to select Tethering & portable hotspot, and then press the OK key. Press the OK key to enable Portable WLAN hotspot. -
Page 20: Sound
User Manual System Settings 6.7 Sound 6.7.1 Setting the Profile You can set the profile of the radio according to different scenarios. Press the Navigation key to select Sound, and then press the OK key. Press the OK key again. Press the Navigation key to select Silent or Ringtone, and then press the OK key. -
Page 21: Freeing Up The Storage Space
6.10 Location The Location feature allows the radio to obtain its location information through WLAN, cellular network, or GPS. The location-related application such as Hytera HyTalk can access the location data of the radio. 6.10.1 Setting the Location Mode Press the Navigation key to select Location, and then press the OK key. -
Page 22: Language
User Manual System Settings Press the Navigation key to select Scanning, and then press the OK key. Turn WLAN scanning or BT scanning on or off. WLAN scanning: Allow the system applications and service to scan for WLAN network to get better ... -
Page 23: Date And Time
System Settings User Manual High speed alert: After enabling this feature, you need to set the speed limit. When the average driving speed in one minute exceeds the speed limit, the radio will initiate an alarm. 6.14 Date and Time The radio can automatically synchronize with the local date, time, and time zone over a cellular network or allows you to manually set them. - Page 24 User Manual System Settings Ensure that the memory space is sufficient before upgrade. Before upgrade, ensure that the radio is connected to the WLAN or cellular network. To save data traffic, it is recommended to download the upgrade package through WLAN. ...
-
Page 25: Applications
Applications User Manual 7. Applications 7.1 Installing an Application 7.1.1 Through the APP Center Connect the radio to the cellular or WLAN network. Press the Navigation key to select APPCenter, and then press the OK key. Press the Navigation key to select the application, and then press the OK key. Upon downloading completion, press the OK key. -
Page 26: Clearing The Data Or Cache
User Manual Applications 7.4 Clearing the Data or Cache You can clear the configuration information or temporarily cached data when there is insufficient storage or the application runs slowly. Enter the application settings interface. For details, see steps 1–3 in Uninstalling an Application. -
Page 27: Sound Recorder
Sound Recorder User Manual 8. Sound Recorder The SoundRecorder application allows you to record voice at any time during your work time or daily life. 8.1 Recording an Audio File Press the Navigation key to select SoundRecorder, and then press the OK key. Press the OK key to start recording. -
Page 28: Camera
User Manual Camera 9. Camera After the radio is connected to the external camera, the Camera application allows you to shoot photos and videos. 9.1 Taking a Photo Press the Navigation key to select Other Apps, and then press the OK key. Press the Navigation key to select Camera, and then press the OK key. -
Page 29: Gallery
Gallery User Manual 10. Gallery The Gallery application allows you to manage photos and videos. Press the Navigation key to select Other Apps, and then press the OK key twice to enter the gallery. You can perform the following operations. 10.1 Photos 10.1.1 Viewing a Photo Press the Navigation key to select the photo, and then press the OK key. -
Page 30: Videos
User Manual Gallery If you want to… Then… View the photo details, such as type, Press the Navigation key to select View details, and then press the time, resolution, file size, and storage OK key. path Press the Navigation key to select Delete, and then press the OK Delete the photo(s) key twice. - Page 31 Gallery User Manual If you want to… Then… Press the Navigation key to select the paired device, and then press the OK key. View the video details, such as type, Press the Navigation key to select View details, and then press the recording time, duration, resolution, file OK key.
-
Page 32: Troubleshooting
The keys do not The keys may fail to function Restart the radio. work normally. temporarily. Contact your dealer or Hytera technicians for The keys may be damaged. maintenance. The LCD display or LED indicator Restart the radio. The LCD display or may fail to function temporarily. - Page 33 Remove and reattach the SIM card or SD card. installed improperly. The radio fails to detect the SIM card The SIM card or SD card may suffer Contact your dealer or Hytera technicians for or SD card. from poor contact caused by dirtied or maintenance. damaged metal contacts.
-
Page 34: Care And Cleaning
User Manual Care and Cleaning 12. Care and Cleaning To guarantee optimum performance as well as a long service life of the radio, follow the tips below. 12.1 Product Care Do not pierce or scrape the radio. Keep the radio far away from substances that can corrode the circuitry. Close the accessory connector cover when no accessory is in use. -
Page 35: Optional Accessories
Optional Accessories User Manual 13. Optional Accessories Use the accessories specified by the Company only. Otherwise, we will not be liable for any loss or damage arising out of use of any unauthorized accessories. Contact your dealer for the optional accessories used with the radio. -
Page 36: Abbreviations
User Manual Abbreviations 14. Abbreviations Abbreviation Full Name Global Positioning System Liquid-Crystal Display Light-Emitting Diode Mobile Device Management Personal Computer Push-to-Talk Over Cellular Push-to-Talk Secure Digital Memory Card Subscriber Identity Module WLAN Wireless Local Area Networks... - Page 37 Hytera Canada 8 Whatney, 100 Leek Crescent, Unit 11 Irvine, CA 92618 Richmond Hill, ON L4B 3E6 (949) 326-5742 (905) 305-7545 www.hytera.ca info@hytera.ca 1363 Shotgun Road, Sunrise, FL 33326 (954) 846-1011 www.hytera.us info@hytera.us (C) 2022 Hytera Communications Ltd. All rights reserved.
Need help?
Do you have a question about the MNC360 and is the answer not in the manual?
Questions and answers